Acibadem Health Point Knee Replacement is a cutting-edge medical service offered by Acibadem Healthcare Group, a leading healthcare provider known for its state-of-the-art medical technologies and expert healthcare professionals. This article delves into what Acibadem Health Point Knee Replacement entails, its benefits, the procedure, and why it stands out in the field of orthopedic surgery.
ACIBADEM Health Point is a comprehensive health assistance service provided by the Acibadem Healthcare Group. ACIBADEM Health Point offers a range of services aimed at facilitating access to high-quality medical care for both local and international patients.
Key Services of ACIBADEM Health Point
Medical Coordination and Consultation
ACIBADEM Health Point provides seamless medical coordination and consultation services. Patients can receive expert medical opinions and personalized plans tailored to their specific health needs.
Appointment Scheduling
The service assists patients in scheduling appointments with specialist doctors and ensures timely access to medical care. This includes organizing consultations, diagnostic tests, and follow-up visits.
Medical Travel Assistance
For international patients, ACIBADEM Health Point offers comprehensive medical travel assistance. This includes help with travel arrangements, accommodation, airport transfers, and translation services, ensuring a smooth and stress-free medical journey.
Patient Guidance and Support
The service provides continuous patient guidance and support throughout the treatment process. Dedicated patient coordinators assist with navigating the healthcare system, managing medical records, and ensuring that patients receive the best possible care.
Health Check-up Programs
Post-treatment follow-up is a crucial component of ACIBADEM Health Point. The service ensures that patients receive ongoing support and monitoring after their initial treatment, facilitating a comprehensive recovery process.
Why Choose ACIBADEM Health Point?
Expertise and Excellence
ACIBADEM Healthcare Group is known for its medical excellence and advanced healthcare services. ACIBADEM Health Point leverages this expertise to provide top-tier medical assistance and coordination.
Comprehensive Care
ACIBADEM Health Point offers a holistic approach to patient care, addressing both medical and logistical needs. This ensures that patients receive not only high-quality medical treatment but also comprehensive support throughout their healthcare journey.
Accessibility
The service is designed to make high-quality medical care accessible to a wider population, including international patients. ACIBADEM Health Point removes barriers to accessing specialized medical treatments and consultations.
Patient Centered Approach
ACIBADEM Health Point is committed to a patient-centered approach, prioritizing the comfort, convenience, and overall well-being of patients. The service is tailored to meet individual patient needs, providing personalized care and attention.
What is Acibadem Health Point Knee Replacement?
Acibadem Health Point Knee Replacement refers to a specialized medical procedure aimed at replacing a damaged knee joint with an artificial implant. This procedure is designed to relieve pains, helpful in imobility, and restore function to the knee joint. The team at Acibadem utilizes advanced surgical techniques and high-quality prosthetics to ensure optimal patient outcomes.
Benefits of Acibadem Health Point Knee Replacement
Pain Relief
One of the primary benefits of Acibadem Health Point Knee Replacement is significant pain relief. Patients suffering from severe knee arthritis or injury often experience chronic pain that can be debilitating. Knee replacement surgery effectively alleviates this pain, enhancing the quality of life for patients.
Improved Mobility
Acibadem Health Point Knee Replacement helps patients regain their mobility. Post-surgery, patients can perform daily activities with greater ease and comfort, which were previously hindered by knee pain and stiffness.
Enhanced Joint Function
The procedure not only reduces pain but also improves the function of the knee joint. This improvement allows patients to return to an active lifestyle, including walking, exercising, and participating in sports.
Long lasting Results
With advancements in surgical techniques and high-quality implants, Acibadem Health Point Knee Replacement offers durable results. Patients can expect their new knee joint to function effectively for many years, providing long-term relief and mobility.
The Acibadem Health Point Knee Replacement Procedure
Pre Surgical Assessment
The process begins with a pre-surgical assessment, including a medical history review, physical examination, and imaging studies. In this comprehensive evaluation ensures that the patient is a apt candidate for knee replacement surgery.
Customized Surgical Plan
Based on the assessment, the orthopedic surgeon creates a customized surgical plan tailored to the patient’s specific needs. This plan includes selecting the appropriate type and size of the implant and determining the surgical approach.
Surgical Procedure
Acibadem Health Point Knee Replacement is performed using minimal invasive techniques to reduce damage and promote faster recovery. During the surgery, damaged knee joint is carefully removed and replaced with a prosthetic implant. The implant is securely positioned to mimic the natural movement of the knee joint.
Post Surgical Care
Post surgery, patients receive comprehensive care to ensure a smooth recovery. This includes pain management, physical therapy, and follow up visits to monitor the progress of the knee joint. The healthcare team at Acibadem provides continuous support to facilitate optimal healing and rehabilitation.
Why Choose Acibadem Health Point Knee Replacement?
Expertise and Experience
Acibadem Healthcare Group is renowned for its expertise and experience in performing knee replacement surgeries. The orthopedic surgeons at Acibadem are highly skilled and have proven track record of successful outcomes.
State of the Art Facilities
Acibadem Health Point Knee Replacement is conducted in state-of-the-art facilities equipped with the mordern medical technologies. These advanced facilities ensure the highest standards of safety and precision during the surgical procedure.
Patient Centered Care
At Acibadem, patient care is the top priority. The team is dedicates to providing personalized care and support throughout the entire treatment journey. From pre surgical assessment to post surgical rehabilitation, patients receive comprehensive care tailored to their individual needs.
Holistic Approach
Acibadem Health Point Knee Replacement adopts a holistic approach to patient care. This includes addressing not only physical aspects of knee replacement but also the emotional and psychological wellbeing of the patient. The aim is to ensure a complete and successful recovery.
Conclusion
Acibadem Health Point Knee Replacement is a leading edge solution for people suffering from severe knee pain and impaired mobility. With its focus on advanced surgical techniques, high quality implants, and patient-centered care, Acibadem stands out as a top choice for knee replacement surgery. By choosing Acibadem Health Point Knee Replacement, patients can look forward to a pain free, active, and fulfilling life.
Lemon beurre blanc, a refined and flavorful sauce, epitomizes the elegance of French cuisine. Known for its creamy texture and tangy lemon notes, this sauce complements a variety of dishes, particularly seafood. Its name, which means “white butter” in French, refers to the rich, butter-based nature of the sauce. Originating from the Loire Valley, beurre blanc is a testament to the art of French cooking, combining simplicity with sophistication. In this complete guide, we will explore the origins, ingredients, preparation, and serving suggestions for lemon beurre blanc, ensuring you can recreate this culinary classic in your kitchen.
Ingredients for Lemon Beurre Blanc
To prepare a perfect lemon beurre blanc, gather the following ingredients:
White Wine Vinegar: Provides acidity, balancing the richness of the butter.
White Wine: Adds depth and complexity. Select a dry white wine for optimal effects.
Lemon Juice: Freshly squeezed lemon juice enhances the sauce with a bright, tangy flavour.
Shallots: Finely chopped shallots contribute a subtle, aromatic sweetness.
Salt and White Pepper: Essential for seasoning the sauce to taste.
Unsalted Butter: The key ingredient for a rich and creamy texture. Ensure it is cold and cut into small cubes.
Lemon Zest (Optional): Adds an extra layer of citrus flavour.
Preparation Steps For Lemon Beurre Blanc
Prepare the Base
The base of the lemon beurre blanc is created by combining acidic and aromatic components:
Combine Ingredients: In a small saucepan, combine 1/4 cup white wine vinegar, 1/4 cup white wine, 2 tablespoons of freshly squeezed lemon juice, and 2 tablespoons of finely chopped shallots. This mixture forms the foundation of the sauce, contributing both acidity and flavour.
Simmer and Reduce: Place the saucepan over medium heat & bring the mixture to a simmer. Allow it to reduce until approximately 2 tablespoons of liquid remain. This reduction concentrates the flavours and ensures that the sauce is not overly watery.
Emulsify the Sauce
The emulsification process is crucial for creating a smooth, creamy beurre blanc:
Add Cold Butter: With the heat on low, begin adding the cold butter cubes, one at a time. Whisk constantly to incorporate the butter into the reduced liquid. The gradual addition of butter is essential for achieving a stable emulsion.
Monitor the Heat: If the mixture starts to get too hot or begins to simmer, remove the pan from the heat momentarily to prevent the sauce from separating. The sauce should be kept warm but not hot, maintaining a temperature that allows the butter to melt slowly and evenly.
Season and Finish
Final touches elevate the flavour and presentation of the sauce:
Season to Taste: Add salt and white pepper to taste. These seasonings enhance the overall flavour without overpowering the delicate balance of the sauce.
Strain (Optional): To extract the shallots, pass the sauce through a fine-mesh strainer for an extra smooth texture. Although optional, this step is helpful if you want a smooth finish.
Add Lemon Zest (Optional): For an additional burst of citrus flavour, stir in some freshly grated lemon zest. This enhances the lemony notes and adds a touch of elegance to the sauce.
Nutrition Facts for Lemon Beurre Blanc
Serving Size: 2 tablespoons (about 30 grams)
Nutrient
Amount per Serving
% Daily Value
Calories
200
10%
Total Fat
22 grams
34%
– Saturated Fat
14 grams
70%
– Trans Fat
0 grams
0%
Cholesterol
60 mg
20%
Sodium
120 mg
5%
Total Carbohydrates
1 gram
0%
– Dietary Fiber
0 grams
0%
– Sugars
0 grams
0%
Protein
0 grams
0%
Vitamin D
0 IU
0%
Calcium
0 mg
0%
Iron
0 mg
0%
Serving Suggestions For Lemon Beurre Blanc
Lemon beurre blanc is incredibly versatile and pairs well with a variety of dishes. Here are some serving ideas:
Seafood
Beurre blanc is a classic accompaniment to seafood, where its rich and tangy profile complements delicate fish flavours:
Grilled Fish: Drizzle the sauce over grilled or poached fish such as salmon, halibut, or sole. The acidity of the lemon beurre blanc cuts through the fish’s richness, creating a balanced and flavorful dish.
Shellfish: Serve with shellfish like shrimp, scallops, or lobster. The sauce enhances the seafood’s natural sweetness while adding a layer of complexity.
Vegetables
Elevate simple vegetables with a touch of lemon beurre blanc:
Steamed Vegetables: Pour the sauce over steamed vegetables like asparagus, broccoli, or cauliflower. The buttery richness enhances the natural flavours, transforming everyday veggies into a gourmet side dish.
Roasted Vegetables: Drizzle over roasted vegetables for a creamy, citrusy twist that complements the caramelized flavours.
Poultry
Use lemon beurre blanc to add sophistication to poultry dishes:
Chicken: A drizzle of lemon beurre blanc can elevate a simple chicken breast or roasted chicken, adding a layer of richness and flavour.
Turkey: Pair with turkey dishes, especially those with mild seasonings, to enhance the overall taste and presentation.
Tips for Success
To achieve the best results with your lemon beurre blanc, consider the following tips:
Use Cold Butter: Cold butter is crucial for the emulsification process. It helps to create a stable and creamy sauce that doesn’t separate easily.
Whisk Constantly: Continuous whisking is essential for incorporating the butter evenly and preventing the sauce from breaking. This helps achieve a smooth & cohesive texture.
Monitor the Heat: Maintaining the right temperature is key. Overdoing it heat can cause the butter to separate, resulting in a greasy sauce. Keep the sauce warm and avoid overheating.
Serve Immediately: Lemon beurre blanc is best served immediately while still warm. It can thicken and lose its smooth texture if allowed to cool for too long. If required, gently reheat the sauce over low heat while whisking to restore its consistency.
Final Touches
To achieve the best results with your lemon beurre blanc, consider the following tips:
Use Cold Butter: Cold butter is crucial for the emulsification process. It helps to create a stable and creamy sauce that doesn’t separate easily.
Whisk Constantly: Continuous whisking is essential for incorporating the butter evenly and preventing the sauce from breaking. This helps achieve a smooth & cohesive texture.
Monitor the Heat: Maintaining the right temperature is key. Overdoing it heat can cause the butter to separate, resulting in a greasy sauce. Keep the sauce warm and avoid overheating.
Serve Immediately: Lemon beurre blanc is best served immediately while still warm. It can thicken and lose its smooth texture if allowed to cool for too long. If required, gently reheat the sauce over low heat while whisking to restore its consistency.
Troubleshooting Common Issues
Even with careful preparation, you might need some help with some issues. Here’s how to address common problems:
Separation: If the sauce starts to separate, it’s likely due to overheating. Remove the pan from the heat & whisk vigorously to reincorporate the butter. If necessary, add a small amount of cold butter to help stabilize the sauce.
Too Thick: If the sauce becomes too thick, whisk in a small amount of warm water or additional white wine to adjust the consistency. Be cautious not to add too much liquid, as this can dilute the flavour.
Too Sour: If the sauce is too tangy, balance it by whisking in a small amount of cream or additional butter. This can help mellow the acidity and improve the overall flavour.
Conclusion
Lemon beurre blanc is a classic French sauce that combines elegance and simplicity, making it a staple in gourmet cooking. Its rich, buttery texture and bright, tangy lemon flavour enhance a variety of dishes, from seafood and vegetables to poultry. By following the steps & tips outlined in this guide, you can master the art of making lemon beurre blanc, impressing your guests and adding a touch of sophistication to your meals. Whether you’re preparing a special dinner or looking to elevate everyday dishes, this versatile sauce is sure to become a favourite in your culinary repertoire.
Gravlax, a classic Scandinavian delicacy, has captivated food enthusiasts globally with its unique blend of flavors and historical roots. This article will explore the origins, preparation, variations, and serving suggestions for gravlax, offering a detailed insight into this beloved dish.
The Origins of Gravlax
Historical Background
Gravlax, which translates to “buried salmon” in Swedish, originates in the medieval Scandinavian practice of fermenting fish. Fishermen lightly salt the salmon and bury it in the sand above the high-tide line, allowing it to ferment. This method preserved the fish and imparted a unique flavor.
Evolution Over Time
Over the centuries, the fermentation process evolved into a curing process. Instead of burying the fish, it is now cured with a combination of salt, sugar, and dill, resulting in the modern version of gravlax enjoyed today. The shift from fermentation to curing was likely driven by the desire for a more consistent and refined flavor and the development of refrigeration methods that made it possible to preserve fish without the need for fermentation safely.
Ingredients
To prepare gravlax, you will need the following ingredients:
Fresh Salmon Fillet
Amount: 2 to 3 pounds (approximately 1 to 1.5 kilograms)
Description: For superior flavor and texture, choose a high-quality, fresh salmon fillet, preferably wild-caught. Look for a fillet that is firm to the touch, with a vibrant, deep orange color and a fresh, clean smell.
Kosher Salt
Amount: 1/2 cup
Description: Kosher salt is preferred for its coarser grain and purity. It helps to draw out moisture from the salmon and preserves it.
Granulated Sugar
Amount: 1/2 cup
Description: Granulated sugar balances the saltiness and enhances the fish’s natural flavors. It also contributes to the texture of the gravlax.
Fresh Dill
Amount: 1 large bunch (about 1 cup loosely packed)
Description: Fresh dill is essential for traditional gravlax, imparting a fresh, herbaceous note that complements the fish.
Optional Ingredients
Black Pepper: 1 tablespoon, freshly ground. It adds a subtle heat and complexity to the cure.
Lemon Zest: Zest of 1 lemon. Provides a bright, citrusy flavor.
Aquavit: 2 tablespoons. A Scandinavian spirit that adds a subtle anise flavor.
Step-by-Step Preparation
Selecting the Salmon
Choosing the right salmon is crucial for making gravlax. Opt for a high-quality, fresh salmon fillet. Wild-caught salmon is often favored for its superior flavor and texture to farmed salmon. Seek a fillet with a firm texture, a vibrant, deep orange color, and a fresh, clean smell.
Preparing the Cure
The curing mixture is the heart of gravlax preparation. Combine equal parts of kosher salt and granulated sugar in a bowl. The salt draws out dampness from the salmon, while the sugar balances the saltiness and enhances the fish’s natural flavors. Add freshly ground black pepper, lemon zest, and a splash of aquavit for additional flavor.
Applying the Cure
Place the salmon fillet skin-side down on a large piece of plastic wrap.
Cover the salmon with the salt & sugar mixture, ensuring it is evenly distributed.
Lay fresh dill over the salmon, covering it completely. Dill is essential for traditional gravlax, imparting a fresh, herbaceous note that complements the fish.
Wrapping and Weighing Down
Tightly wrap the salmon in plastic wrap, ensuring it is well-sealed to prevent any air from getting in.
Place the wrapped salmon in a dish or baking pan and weigh it with a heavy object, such as a baking dish filled with cans. The weight helps press the cure into the salmon, ensuring even curing.
Curing Time
Refrigerate the salmon for 24-48 hours, depending on the thickness of the fillet and desired flavor intensity. Turn the salmon over halfway through the curing process to ensure even curing. The longer the curing time, the more intense the flavor will be, but be careful not to over-cure, as this can result in an overly salty product.
Finishing Touches
Once the curing process is complete, unwrap the salmon and rinse off the excess cure under cold water. Pat it dry with paper towels. The salmon should have a firm texture and a translucent, glossy appearance.
Serving Suggestions
Traditional Accompaniments
Gravlax is traditionally served thinly sliced, accompanied by mustard-dill sauce (hovmästarsås), rye bread, and pickled vegetables. Capers, red onions, and lemon wedges are also popular additions. The mustard-dill sauce, made with Dijon mustard, sugar, vinegar, and fresh dill, provides a tangy, slightly sweet complement to the rich, savory gravlax.
Modern Twists
Gravlax Salad:Toss sliced gravlax with mixed greens, thinly sliced radishes, and a light vinaigrette for a refreshing and light dish. The fresh, crisp vegetables and tangy dressing balance the rich, flavorful gravlax, making it a perfect appetizer or light meal.
Gravlax Canapés: Gravlax canapés are an elegant and easy-to-make appetizer. Serve gravlax on small rye crackers or blinis with a dlop of crème fraîche & a sprig of dill. The creamy, tangy crème fraîche and crunchy crackers contrast with the smooth, delicate gravlax.
Gravlax Benedict: For a Scandinavian twist on the classic eggs Benedict, top a toasted English muffin with gravlax, a poached egg, and hollandaise sauce. The rich, buttery hollandaise and soft, runny egg yolk complement the savory, flavorful gravlax, creating a luxurious and satisfying breakfast or brunch dish.
Variations of Gravlax
Beetroot Gravlax:Add grated beetroot to the curing mixture for a vibrant pink color and earthy flavor. The beetroot adds visual appeal and imparts a subtle sweetness and earthy depth to the gravlax.
Citrus Gravlax: Incorporate citrus zest and juice into the cure for a bright, tangy flavor profile. Lemon, lime, or orange zest & juice can add a refreshing, zesty note that enhances the salmon’s natural flavors.
Spicy Gravlax: Include crushed red pepper flakes and a touch of horseradish to cure a spicy kick. The heat from the pepper flakes and the sharpness of the horseradish adds a bold, exciting dimension to the gravlax, making it a perfect choice for those who enjoy spicy foods.
Storing and Handling Gravlax
Gravlax can be stored in the freezer for up to a week, securely encased in plastic wrap. For extended storage, freeze it for up to three months in an airtight container. When freezing, consider slicing the gravlax before storing it so you can quickly thaw and use portions as needed.
Always handle raw fish with clean hands and utensils to avoid cross-contamination. Ensure the salmon is fresh and sourced from a reputable supplier to minimize the risk of foodborne illnesses. When preparing gravlax, work on a clean surface and sanitize all equipment and surfaces after use.
Health Benefits of Gravlax
Nutritional Profile
Gravlax is rich in omega-3 fatty acids, protein, and essential vitamins & minerals, making it a nutritious addition to any diet. Omega-3 fatty acids are recognized for their counter-inflammatory properties & benefit heart health.
Heart Health
The omega-3 fatty acids in gravlax can help decrease inflammation & lower the risk of heart disease. Regular consumption of omega-3-rich foods has been associated with lower blood pressure, reduced triglyceride levels, and improved overall cardiovascular health.
Brain Function
Due to its high omega-3 content, gravlax can support brain health and cognitive function. Omega-3 fatty acids are crucial for brain development and function, and regular intake has been linked to improved memory, focus, and mood.
Conclusion
Gravlax is a versatile and delicious dish combining traditional and modern culinary techniques. Whether enjoyed in its classic form or with creative variations, gravlax will impress with its delicate flavors and rich history. Following this comprehensive guide, you can master making and serving gravlax, bringing a taste of Scandinavia to your table. With its impressive health benefits and endless serving possibilities, gravlax deserves a place in every food lover’s repertoire.
Penne alla Vodka with Chicken is a popular Italian-American dish that combines tender chicken pieces with a creamy, tomato-based vodka sauce. This rich, flavorful dish is relatively simple to prepare, making it a favourite for weeknight dinners and special occasions. In this comprehensive guide, we’ll explore everything you need to know to make this delicious meal at home, from choosing the best ingredients to mastering the cooking techniques.
Introduction to Penne alla Vodka with Chicken
The Origins of Penne alla Vodka
Penne alla Vodka is a beloved dish with somewhat mysterious origins. While some attribute its creation to Italian immigrants in the United States, others believe it originated in Italy. Regardless of its origins, the dish has become a staple in Italian-American cuisine, known for its creamy, marginally tangy sauce that pairs perfectly with penne pasta. Adding vodka to the tomato and cream sauce creates a unique depth of flavour that sets this dish apart from other pasta recipes. When cooked down, the vodka helps release flavours in the tomatoes that are otherwise insoluble in water, creating a more complex and nuanced sauce.
Why Add Chicken?
Adding chicken to Penne alla Vodka makes the dish heartier and more filling, providing a good source of protein. The slight flavour of the chicken complements the rich, creamy sauce without overpowering it, making it a perfect addition to the dish. The chicken also adds texture and substance, transforming the pasta into a complete meal that is satisfying and well-balanced. Chicken is also a versatile protein that cooks relatively quickly, making it ideal for incorporating into various pasta dishes.
Ingredients for Penne alla Vodka with Chicken
Choosing the Right Pasta
Penne pasta is the traditional choice for this dish due to its shape and texture, which hold onto the sauce well. The tubular shape of penne allows it to catch and hold the creamy vodka sauce, ensuring that every bite is flavorful. Select high-quality brands that use durum wheat for the best texture and flavour when selecting pasta. Durum wheat pasta has a firm bite and is less likely to become mushy when cooked. Another option could be rigatoni or ziti, which also work well with thick, creamy sauces due to their shape and ridges that capture the sauce.
Fresh and Quality Ingredients
Use premium, fresh ingredients for optimal outcomes. What you’ll need is as follows:
Chicken Breasts: Skinless, boneless chicken breasts work best for this recipe. They are easy to chop into bite-sized pieces and cook rapidly. If you want a meat that is more tasty and juicy, you can also utilize chicken thighs.
Penne Pasta: High-quality penne pasta made from durum wheat. The pasta should be prepared al dente to ensure it holds its shape and texture when mixed with the sauce.
Olive Oil: Additional virgin olive oil is used to sauté the chicken and add flavour. Olive oil helps cook the chicken and adds a layer of richness to the sauce.
Garlic: Fresh garlic cloves for a robust, aromatic base. The garlic should be finely minced to distribute evenly throughout the sauce.
Onion: A finely chopped onion adds sweetness and depth to the sauce. Yellow or white onions work well, but shallots can also be used for a more delicate flavour.
Tomato Paste: Concentrated tomato paste for a rich tomato flavour. Tomato paste adds depth & intensity to the sauce.
Crushed Tomatoes: Canned crushed tomatoes or tomato sauce for the base of the sauce. Since San Marzano tomatoes have a sweeter, less acidic flavour, they are often suggested.
Heavy Cream: To produce the dish’s distinctive creamy texture. The sauce gains smoothness and richness from the heavy cream.
Vodka: Adds a subtle depth of flavour to the sauce. The vodka helps to release flavours from the tomatoes that are otherwise not soluble in water.
Parmesan Cheese: Newly grated Parmesan cheese for serving. Parmesan adds a nutty, salty flavour that complements the creamy sauce.
Fresh Basil or Parsley: For garnish and added freshness. Fresh herbs add a bright, aromatic element to the dish.
Red Pepper Flakes: Optional for a touch of heat. Red pepper flakes include a hint of spiciness that balances the sauce’s richness.
Salt and Pepper: To taste. Seasoning is crucial to bringing out the flavours of all the ingredients.
Preparing the Ingredients
Preparing the Chicken
Start by trimming excess fat from the chicken breasts and cutting them into bite-sized pieces. Season the chicken with salt & pepper to enhance its flavour. Letting the chicken come to room temperature before cooking can help it cook more evenly. Additionally, you can marinate the chicken in olive oil, garlic, and herbs for extra flavour.
Preparing the Sauce Ingredients
Finely chop the onion & mince the garlic cloves. Have your tomato paste, crushed tomatoes, and heavy cream measured and ready to go. If you’re using fresh basil or parsley, chop these herbs finely. Prepping all your ingredients before cooking can make the process smoother and more efficient. It also helps to measure your vodka and have it ready to pour into the sauce.
Cooking Penne alla Vodka with Chicken
Cooking the Chicken
Heat the Olive Oil: Heat the olive oil over medium-high heat in a large skillet. The skillet should be large enough to accommodate the sauce and pasta later.
Sauté the Chicken: Add the chicken pieces to the skillet and sauté until they are cooked through and golden brown, about 5-7 minutes. Remove the chicken from the pan & set it aside. If necessary, cooking the chicken in batches can help prevent overcrowding the pan and ensure that the chicken browns properly. Overcrowding the pan can lead to vaporizing instead of searing, affecting the chicken’s texture and flavour.
Making the Vodka Sauce
Sauté the Onion and Garlic: Add more olive oil, if needed, in the same skillet. Add the chopped onion and sauté until it becomes translucent, about 3-4 minutes. Add the minced garlic and sauté for another minute. Garlic can become bitter if burned, so do not burn it.
Add the Tomato Paste and Vodka: Stir in the tomato paste and cook for 2-3 minutes to develop its flavour. Carefully add the vodka, stirring to combine. Let the vodka cook down for about 2-3 minutes. This step allows the alcohol to evaporate, leaving behind a subtle depth of flavour. The alcohol in the vodka enhances the flavours of the tomatoes and creates a smoother sauce.
Add the Crushed Tomatoes and Simmer. Stir together after adding the smashed tomatoes to the skillet. Lower the heat and simmer the sauce for ten to fifteen minutes to give the flavours time to combine. Simmering the sauce allows the acidity of the tomatoes to mellow and the flavours to develop fully.
Stir in the Cream: Slowly stir the heavy cream, ensuring it is fully incorporated into the sauce. Simmer for another 5 minutes until the sauce is creamy and well-blended. The cream adds richness and smoothness to the sauce, balancing the acidity of the tomatoes.
Season the Sauce: Add salt, pepper, and red pepper flakes (if using) to taste. Adjust the seasoning as needed to attain a balanced flavour. Tasting the sauce as you go ensures you achieve the perfect balance of flavours.
Combining the Chicken and Sauce
Return the Chicken to the Skillet: Reintroduce the cooked chicken and vodka sauce to the pan. Stir to combine, ensuring the chicken is well-coated with the sauce. Let it simmer briefly to warm the chicken and melt the flavours. This step allows the chicken to absorb some of the sauce and become even more flavorful.
Cooking the Pasta
Boil the Penne: While the sauce simmers, Heat a big saucepan of water with salt until it boils. Pasta is al dente when added to the penne and cooked as directed on the package. Pasta that is al dente holds up nicely to the sauce and is firm to the bite. The pasta water should be well-salted, as it flavours the pasta from within.
Drain the Pasta: Drain the cooked pasta, reserving a cup of the pasta water if you need to thin the sauce. A cohesive and silky sauce can be made with starchy pasta water. The starch that keeps the sauce sticking to the pasta can be washed away if you rinse the pasta.
Combining Pasta with Sauce
Add the Pasta to the Sauce: Add the cooked and drained penne pasta to the skillet with the chicken and vodka sauce. Toss everything together to guarantee that the pasta is uniformly coated with sauce. Add some conserved pasta water to the sauce if it’s too thick until you have the right consistency. Tossing the pasta in the sauce for a few minutes allows it to absorb some flavours.
Transfer the Penne alla Vodka with Chicken to a serving dish. Garnish with finely sliced fresh basil or parsley and freshly grated Parmesan cheese for an added taste and colour boost. The fresh herbs balance the sauce’s richness with a crisp, fragrant accent. For even more richness, you can also use extra virgin olive oil.
Pairing Suggestions
Penne alla Vodka with Chicken pairs well with a simple green salad and crusty garlic bread. Consider a crisp white wine like Pinot Grigio or a light red wine like Chianti for a wine pairing. The acidity in these wines helps balance the richness of the creamy sauce. A slice of lemon and some sparkling water can also make a cool garnish.
Tips for Perfect Penne alla Vodka with Chicken
Adjusting the Heat
If you prefer a spicier dish, increase the red pepper flakes in the sauce. For a milder version, omit the red pepper flakes altogether. Adjusting the heat can alter the dish to suit your own tastes. You can add a pinch of cayenne pepper for a different heat level.
Making it Ahead
Penne alla Vodka with Chicken can be made ahead of time and reheated. Store the sauce & pasta separately to prevent the pasta from absorbing too much sauce. When ready to serve, combine and heat them together in a skillet. This is a great option for meal prep or for serving a crowd. Reheating the dish on the stovetop with a splash of pasta water or cream can help maintain its creamy texture.
Adding Vegetables
Consider adding vegetables to the dish for added nutrition and flavour. Spinach, bell peppers, or mushrooms can be sautéed and added to the sauce. Vegetables enhance the taste, flavour colour, and texcolourto the dish. You can also add peas or zucchini for a fresh springtime variation.
Using Different Proteins
Although chicken is a common option, shrimp, sausage, or tofu can also be used as alternative proteins in this dish. Each protein adds unique flavour and texture, making the dish versatile and adaptable to different dietary preferences. Shrimp can be cooked the same way as the chicken, while sausage can be crumbled and browned before being added to the sauce. Tofu should be pressed and sautéed to achieve a crispy texture.
Conclusion
This delicious dish, Penne alla Vodka with Chicken, mixes the flavorful richness of a creamy tomato vodka sauce with freshly cooked penne pasta and tender chicken. You can change the ingredients and amount of spice in this adaptable recipe to suit your preferences. Penne alla Vodka with Chicken is a fantastic dish for a special occasion or a weeknight supper. When you use premium products and basic culinary methods, you can prepare meals in your house that rival those in restaurants. Savour each bite of this delectable Italian-American classic while you prepare it.
Chuck roast, a flavorful and budget-friendly cut of beef, is perfect for a variety of hearty meals. Known for its rich marbling & robust taste, thechuck roast is ideal for slow-cooking methods that break down its tough fibers, resulting in tender, juicy meat. Whether you are a seasoned cook or a beginner in the kitchen, this reference will provide you with a range of delicious chuck roast recipes to suit any occasion.
Introduction to Chuck Roast Recipes
What is Chuck Roast?
One meat cut from the cow’s shoulder is called chuck roast. It is known for its rich flavor and relatively low cost. Because of its firm texture, the chuck roast works well for slow cooking techniques like braising, slow roasting, or cooking in a crockpot. These techniques produce delicate, delicious meat, allowing the connective tissue to break down.
Selecting the Right Chuck Roast
When choosing a chuck roast, look for one with good marbling, which means it has streaks of fat throughout the meat. This fat will melt during cooking, adding flavor and tenderness to the roast. A chuck roast typically weighs between 3 and 5 pounds, making it perfect for feeding a family or meal prepping.
Classic Pot Roast
Ingredients
For a classic pot roast, you will need:
3 to 5 pounds of chuck roast
Two tablespoons of olive oil
Salt and pepper to taste
One large onion, chopped
Four cloves of garlic, minced
4 cups of beef broth
2 cups of red wine (optional)
Four large carrots, cut into chunks
Four large potatoes, cut into chunks
Three sprigs of fresh rosemary
Three sprigs of fresh thyme
Instructions
How to make a traditional pot roast:
Set the oven temperature to 325°F (163°C).
Give the chuck roast a liberal amount of salt and pepper.
Preheat the olive oil over medium-high heat in a large ovenproof pot or Dutch oven.
The roast should be seared on each side for four to five minutes or until browned.
After taking the roast out of the pot, set it aside.
Add the sliced onion to the same saucepan and simmer for about 5 minutes or until softened. Add the minced garlic & continue cooking for one more minute. Stir in the red wine (if using) and beef broth, scraping up any browned pieces from the bottom of the pot. Return the chuck roast recipes to the pot after adding the potatoes, carrots, rosemary, and thyme. After covering the pot, move it to
Slow Cooker Chuck Roast Recipes
Ingredients
For a slow cooker chuck roast, gather:
3 to 5 pounds of chuck roast
Two tablespoons of olive oil
Salt and pepper to taste
One large onion, chopped
Four cloves of garlic, minced
4 cups of beef broth
Two tablespoons of Worcestershire sauce
Four large carrots, cut into chunks
Four large potatoes, cut into chunks
One teaspoon of dried thyme
One teaspoon of dried rosemary
Instructions
Add salt and pepper to season the chuck roast. Heat the olive oil in a large skillet over medium-high heat. Sear the roast for four to five minutes on each side or until it begins to brown. Transfer the roast to the slow cooker. Simmer the chopped onion in the same skillet for approximately five minutes or until it becomes tender. Add the minced garlic and heat for a further minute. Add the onions and garlic to the slow cooker.
Cover the roast in the slow cooker with the beef broth and Worcestershire sauce. Stir in the potatoes, carrots, rosemary, and thyme. When the beef is soft and easily picked apart with a fork, simmer it covered for 8 to 10 hours on low or 4 to 6 hours on high. Clear the chuck roast from the slow cooker & let it rest for about 10 minutes before serving. Serve the roast with the vegetables and some of the cooking liquid.
Place the olive oil in a big skillet and heat it to medium-high.
Sear the roast for four to five minutes on each side or until it browns.
Transfer the roast to a low-heat cooker.
Simmer the chopped onion in the same skillet for approximately five minutes or until it becomes tender.
Add the minced garlic & heat for a further minute.
Add the garlic & onions to the slow cooker.
Pour the beef broth and beer (if using) over the roast in the slow cooker. Add the diced tomatoes, chili powder, cumin, smoked paprika, and oregano. When the beef is soft and easily picked apart with a fork, simmer it covered for 8 to 10 hours on low or 4 to 6 hours on high. Using two forks, shred the meat after taking the chuck roast out of the slow cooker.
Serve the shredded beef in tortillas with your favorite toppings, such as chopped onions, cilantro, lime wedges, salsa, and avocado.
Barbecue Chuck Roast Recipes
Ingredients
For a barbecue chuck roast, gather:
3 to 5 pounds of chuck roast
Two tablespoons of olive oil
Salt and pepper to taste
One large onion, chopped
Four cloves of garlic, minced
2 cups of beef broth
1 cup of barbecue sauce
1/4 cup of apple cider vinegar
Two tablespoons of brown sugar
One teaspoon of smoked paprika
One teaspoon of chili powder
One teaspoon of cumin
Buns or rolls for serving
Coleslaw, for serving
Instructions
Season the chuck roast with salt and pepper. In a large skillet, heat olive oil over medium-high heat. The roast should be seared on each side for four to five minutes or until browned. Place the roast in a cooker set on low heat. Add the sliced onion to a similar skillet and simmer for about 5 minutes or until softened. Add the minced garlic & continue cooking for one more minute. Add the garlic & onions to the slow cooker.
Cover the roast in the slow cooker with the beef broth, brown sugar, apple cider vinegar, and barbecue sauce. Stir in the cumin, chili powder, and smoked paprika. When the beef is soft and easily picked apart with a fork, simmer it covered for 8 to 10 hours on low or 4 to 6 hours on high. Using two forks, shred the meat after taking the chuck roast out of the slow cooker.
Serve the shredded beef on buns or rolls with coleslaw.
Italian-Style Chuck Roast Recipes
Ingredients
To prepare an Italian-style chuck roast, you will need:
3 to 5 pounds of chuck roast
Two tablespoons of olive oil
Salt and pepper to taste
One large onion, chopped
Four cloves of garlic, minced
4 cups of beef broth
1 cup of red wine
One can of crushed tomatoes
Two tablespoons of tomato paste
One teaspoon of dried basil
One teaspoon of dried oregano
One teaspoon of dried thyme
One teaspoon of red pepper flakes
1 cup of sliced mushrooms
1 cup of sliced bell peppers
Pasta, for serving
Grated Parmesan cheese for serving
Instructions
Season the chuck roast with salt and pepper. In a large skillet, heat olive oil over medium-high heat. Sear the roast for 4–5 minutes on each side or until browned on all sides. Place the roast inside a slow cooker. Add the chopped onion and cook in the same skillet until it’s tender, about 5 minutes. Add the minced garlic and continue cooking for an additional minute. Add the onions and garlic to the slow cooker.
Pour the beef broth, red wine, crushed tomatoes, and tomato paste over the roast in the slow cooker. Add the dried basil, oregano, thyme, and red pepper flakes. Add the sliced mushrooms and bell peppers to the slow cooker. When the beef is soft and easily picked apart with a fork, simmer it covered for 8 to 10 hours on low or 4 to 6 hours on high. Using two forks, shred the meat after takingthe chuck roast out of the slow cooker.
Sprinkle-grated Parmesan cheese on the cooked spaghetti before serving the shredded beef.
Asian-Style Chuck Roast Recipes
Ingredients
For an Asian-style chuck roast, gather:
3 to 5 pounds of chuck roast
Two tablespoons of olive oil
Salt and pepper to taste
One large onion, chopped
Four cloves of garlic, minced
4 cups of beef broth
1/4 cup of soy sauce
1/4 cup of hoisin sauce
Two tablespoons of rice vinegar
One tablespoon of sesame oil
One teaspoon of grated ginger
One teaspoon of red pepper flakes
1 cup of sliced mushrooms
1 cup of sliced bell peppers
1 cup of snap peas
Cooked rice for serving
Sliced green onions for garnish
Sesame seeds, for garnish
Instructions
Season the chuck roast with salt and pepper. In a large skillet, heat olive oil over medium-high heat. Sear the roast on all sides until browned, about 4-5 minutes per side. Transfer the roast to a slow cooker. In the same skillet, add the chopped onion and cook until softened about 5 minutes. Add the minced garlic and cook for an additional minute. Transfer the onions and garlic to the slow cooker.
Pour the beef broth, soy sauce, hoisin sauce, rice vinegar, and sesame oil over the roast in the slow cooker. Add the grated ginger and red pepper flakes. Add the sliced mushrooms, bell peppers, and snap peas to the slow cooker. Cover & cook on low for 8-10 hours or on high for 4-6 hours until the meat is tender & easily pulled apart with a fork. Remove the chuck roast from the slow cooker & shred the meat with two forks.
Serve the shredded beef over cooked rice and garnish with sliced green onions & sesame seeds.
Tips for Cooking Chuck Roast Recipes
Cooking chuck roast perfectly requires key techniques and tips to ensure your meals are flavorful, tender, and satisfying. Here are some essential tips to keep in mind when preparing chuck roast recipes:
Selecting the Best Chuck Roast
When selecting a chuck roast, it’s important to look for certain characteristics that indicate good quality. Pick a chuck roast with good marbling or fat streaks running through the flesh. Marbling adds flavour and helps keep the meat tender during cooking. Additionally, opt for a roast that weighs between 3 and 5 pounds. This size is ideal for most recipes and ensures even cooking. Look for meat with a bright, deep red colour. Avoid roasts with brown or grey spots, which indicate the meat is not fresh.
Preparing the Chuck Roast
Proper preparation of the chuck roast is essential for achieving the best results. Always sear the roast before slow cooking or braising. Searing the meat on all aspects in a hot skillet with a bit of oil helps to lock in juices and adds depth of flavour. Season the roast generously with salt & pepper before cooking. This enhances the taste of the meat and complements the other ingredients in your recipe. After cooking, let the roast rest for at least 10-15 minutes. Resting allows the juices to reorganize throughout the meat, making it more tender & flavorful when you slice it.
Cooking Methods
Choosing the right cooking method for chuck roast is crucial for tender, flavorful results. Slow cooking is ideal for chuck roast, as it breaks down the tough fibres and connective tissue, resulting in tender, juicy meat. Cook on low for 8-10 hours or high for 4-6 hours in a slow cooker. Braising involves cooking the meat in a covered pot with a small amount of liquid at a low temperature. This method adds depth of flavour and tenderizes the meat. Braise the roast in the oven at 325°F (163°C) for 3-4 hours. Roasting is great for achieving a crispy exterior and tender interior. Cook the roast uncovered in the oven at 375°F (190°C) for about 2-3 hours, depending on the size of the roast.
Flavor Enhancements
Enhancing the flavour of your chuck roast can take your dish to the next level. Use aromatics like onions, garlic, and herbs like rosemary, thyme, and bay leaves to infuse the roast with flavour. Adding beef broth, wine, or beer to the cooking liquid can provide additional flavour and help tenderize the meat. Including root vegetables like carrots, potatoes, and parsnips in your recipes adds flavour and creates a complete meal in one pot.
Serving Tips
When it comes to serving your chuck roast, there are a few techniques to remember. For recipes like tacos or pulled beef sandwiches, use two forks to tear up the meat after cooking. This method works well with the tender meat from a slow-cooked chuck roast. For pot roast or roast dinners, slice the meat against the grain to ensure tender pieces. This technique shortens the muscle fibres, making the meat easier to chew. Use the cooking liquid to make a rich sauce or gravy. Strain the liquid, skim off excess fat, and thicken it with a slurry of cornstarch and water or a roux of butter and flour.
Storage and Leftovers
Properly storing and reheating your leftover chuck roast is important to maintain its quality. Store the remaining roast in an airtight container in the refrigerator for up to 3-4 days. For longer storage, freeze leftover roast in airtight containers or heavy-duty cold storage bags for up to 3 months. Thaw in the refrigerator overnight before reheating. When reheating, do so gently in the oven or stovetop with a bit of broth or water to keep it moist. Avoid microwaves, as they can dry out the meat.
By following these tips, you can ensure that your chuck roast recipes turn out perfectly every time, whether making a classic pot roast, tacos, or an Asian-inspired dish. Enjoy experimenting with different flavours and cooking methods to find your favourite way to prepare this versatile cut of beef.
Conclusion
Chuck roast is an adaptable cut of beef that can be transformed into various delicious meals with the right recipes and cooking techniques. From classic pot roast to flavorful tacos and Asian-inspired dishes, there are endless possibilities for creating satisfying and savory dishes with chuck roast. By slow-cooking this hearty cut, you can enjoy tender, juicy meat that is sure to please family and friends. Whether you’re looking for a comforting meal or an impressive dish for entertaining, these chuck roast recipes offer something for everyone.
If you’ve been scrolling constantly on Instagram or TikTok lately, you’ve probably seen the stunning and mouthwatering Pink Drink. This vibrant beverage isn’t just a treat for your taste buds and a pleasure for your eyes. Today, we’re diving deep into the best Pink Drink recipe you can easily make at home. This article will guide you through this delightful drink’s ingredients, step-by-step instructions, variations, and benefits.
What is the Pink Drink?
Thanks to Starbucks, the pink drink became a viral sensation. Known for its beautiful pink shade and refreshing taste, the Pink Drink combines strawberries, acai, coconut milk, and a hint of passionfruit. Its popularity soared not just because of its taste but also due to its photogenic appeal, making it a favorite on social media platforms.
Why Make the Pink Drink at Home?
While grabbing a Pink Drink from Starbucks is convenient, making it at home has its perks:
Cost-effective: Save money using ingredients you already have or can easily purchase.
Customizable: Tailor the sweetness and ingredients to your liking.
Healthy: Control the sugar content and use fresh, organic ingredients.
Creative Fun: Experiment with different flavors and ingredients.
Ingredients for the Best Pink Drink Recipe
To make the best Pink Drink at home, you’ll need the following ingredients:
1 cup of brewed hibiscus tea (chilled)
1/2 cup of coconut milk
1/2 cup of white grape juice
1/2 cup of strawberries (sliced)
Ice cubes
Sweetener to taste (optional)
These ingredients are quiet to find and can be customized to suit your preferences.
Step By Step Instructions for the Pink Drink Recipe
Here’s how you can make the perfect Pink Drink at home:
Brew the Hibiscus Tea
Start by brewing a cup of hibiscus tea. To achieve a rich and vibrant flavor, let it steep for 5-10 minutes. Once brewed, allow the tea to cool to room temperature naturally, or place it in the refrigerator for faster cooling. Ensuring the tea is well-chilled will help keep your Pink Drink refreshing and enjoyable.
Prepare the Strawberries
Wash the strawberries thoroughly to remove any dirt or residues. Slice them into thin pieces for easy mixing and a pleasant texture in your drink. If you prefer a smoother drink without chunks, you can blend the strawberries into a puree. This step adds a fresh, fruity element that enhances both the flavor and visual appeal of your Pink Drink.
Mix the Ingredients
In a large pitcher, combine the chilled hibiscus tea, creamy coconut milk, and sweet white grape juice. Stir the mixture well to ensure all the ingredients are thoroughly blended. If you enjoy a sweeter beverage, add your preferred sweetener, such as honey or a sugar substitute, and stir until it dissolves completely. This mixture forms the delightful base of your Pink Drink.
Assemble the Drink
Fill a tall glass with ice cubes to keep your drink cool and refreshing. Pour the pink mixture over the ice, ensuring an even distribution. Add a generous handful of sliced strawberries to each glass, which not only infuses more flavor but also enhances the drink’s aesthetic appeal with vibrant red hues.
Serve and Enjoy
Your homemade Pink Drink is now ready to be enjoyed. Serve it immediately to savor its refreshing taste at its best. For an extra touch of elegance, garnish each glass with a sprig of fresh mint or a slice of lime. These garnishes not only add a visual flair but also introduce subtle hints of additional flavor, making your drink even more delightful.
A Vibrant and Tasty Collection of Refreshing Pink Drinks
One of the best aspects of the Pink Drink is its versatility. Here are some exciting variations to try:
Tropical Pink Drink
Add a splash of pineapple juice and a few pieces of diced mango to give your Pink Drink a tropical twist. The pineapple juice brings a sweet, tangy flavor, while the mango adds a creamy, exotic touch, transporting you to a tropical paradise with every sip.
Berry Pink Drink
Enhance the berry flavor by adding a handful of mixed berries such as blueberries, raspberries, and blackberries. These additional berries not only intensify the fruity taste but also contribute a delightful texture and a boost of antioxidants, making the drink both delicious and nutritious.
Matcha Pink Drink
For a unique flavor combination, mix a teaspoon of matcha powder with the coconut milk before combining it with the tea and juice. The earthy, slightly bitter taste of matcha contrasts beautifully with the sweetness of the other ingredients, creating a sophisticated and refreshing beverage.
Low-Calorie Pink Drink
Use unsweetened coconut milk and a sugar-free sweetener, such as stevia or monk fruit, to make a low-calorie version of the Pink Drink without sacrificing taste. This variation allows you to enjoy the deliciousness of the Pink Drink while keeping the calorie count low, making it a perfect choice for those mindful of their calorie intake.
By exploring these variations, you can enjoy a Pink Drink that suits your taste preferences and dietary needs, making it a versatile and enjoyable beverage for any occasion.
The Pink Drink isn’t just delicious; it also offers several health benefits:
Hydration
The high water content from the tea and juice helps keep you hydrated. Staying hydrated is crucial for maintaining energy levels, supporting bodily functions, and promoting overall well-being. The Pink Drink is an enjoyable way to increase your daily fluid intake, especially during hot weather.
Antioxidants
Hibiscus tea and strawberries are rich in antioxidants, which help combat oxidative stress and support overall health. Antioxidants play a pivotal role in protecting your cells from damage caused by free radicals, potentially reducing the risk of chronic diseases and supporting healthy aging.
Vitamins and Minerals
Coconut milk and strawberries provide essential vitamins and minerals, including vitamin C, potassium, and calcium. These nutrients are vital for various bodily functions, such as supporting immune function, maintaining heart health, and ensuring strong bones. The combination of these ingredients makes the Pink Drink a nutritious option.
Low in Calories
The Pink Drink can be a low-calorie, guilt-free indulgence when made with natural sweeteners and unsweetened coconut milk. This makes it a perfect choice for those looking to enjoy a delicious treat without worrying about excessive calorie intake. It’s a satisfying way to curb sweet cravings while staying mindful of your diet.
Tips for the Perfect Pink Drink
Chill the Tea
Ensure the hibiscus tea is well-chilled before mixing to keep the drink refreshing. An adequately chilled tea base ensures your Pink Drink stays cool and invigorating, enhancing its refreshing quality. This step is essential for achieving the optimal texture and flavor.
Adjust Sweetness
Taste the mixture before adding sweetener and adjust according to your preference. This allows you to customize the drink to your desired level of sweetness, ensuring it’s perfect for your taste. Whether you prefer a subtly sweet drink or a more sugary treat, adjusting the sweetness lets you create your ideal beverage.
Use Fresh Ingredients
Fresh strawberries and high-quality coconut milk make a significant difference in flavor. Opt for organic, ripe strawberries and premium coconut milk to enhance the overall taste and nutritional value. Fresh ingredients not only improve the flavor but also boost the drink’s health benefits, making each sip as nourishing as it is delicious.
By following these tips and exploring the health benefits, you can make the most out of your Pink Drink experience, enjoying a delicious, refreshing, and nutritious beverage.
Experiment with Flavors
Don’t be afraid to get creative and try different fruit combinations and additions. Adding various fruits and flavors can lead to discovering new favorite variations of the Pink Drink.
Following these tips and exploring variations, you can enjoy a Pink Drink perfectly tailored to your taste preferences and nutritional needs. Whether you prefer a tropical twist, a berry boost, a matcha infusion, or a low-calorie option, there’s a Pink Drink recipe for everyone. Cheers to creating your own delicious and vibrant Pink Drink at home.
Conclusion
The Pink Drink isn’t just a beverage; it’s an experience. With its striking appearance and delightful taste, it’s no wonder this drink has become a favorite for many. Making it at home allows you to enjoy all its benefits while tailoring it to your tastes. Follow this Pink Drink recipe to create a tasty and vibrant drink that will impress friends, family, and your taste buds. Whether you’re lounging by the pool, hosting a summer party, or simply craving a refreshing treat, the Pink Drink is the perfect choice. Cheers to your new favorite homemade beverage!
Frequently Asked Questions (FAQs)
Q: Can I use a different type of tea for the Pink Drink?
A: Yes, you can experiment with different teas, such as berry or rosehip tea, but hibiscus tea provides the traditional color and flavor.
Q: Is the Pink Drink vegan?
A: Yes, as long as you use plant-based coconut milk, the Pink Drink is vegan-friendly.
Q: Can I make a large batch of Pink Drink in advance?
A: Absolutely! Prepare the mixture in a large pitcher and store it in the refrigerator. When you’re preparing to serve, add ice and strawberries.
Q: What if I don’t have white grape juice?
A: You can substitute with apple juice or any other mild, sweet juice.
Q: How can I make the Pink Drink more visually appealing?
A: Use a clear glass to showcase the drink’s beautiful color, and add garnishes like mint leaves, lime slices, or extra strawberry pieces.
In today’s digital age, the way teens communicate has evolved rapidly, giving rise to a unique set of slang terms. Among these, the “teens slangy term for parents” stands out as a fascinating linguistic phenomenon. These terms, often humorous and sometimes baffling to older generations, provide insight into the dynamic relationship between teens and their parents.
Common Teens Slangy Terms for Parents
Teens have a knack for creativity, and this is evident in the myriad of slang terms they use to refer to their parents. Here are a few popular “teens slangy term for parents”:
Rents: A shortened version of parents, this term is widely used and easily recognizable.
Folks: A casual and affectionate term that teens often use.
P-units: A playful and slightly tech-savvy term that reflects the influence of the digital age.
Teens have a unique way of creating and using language, especially when it comes to referring to their parents. Here are some of the most common “teens slangy terms for parents,” along with explanations for each term:
Rents
‘Rents is a widely used slang term that shortens the word “parents.” It’s a casual and concise way for teens to refer to their parents without the formality of the full word. This abbreviation reflects the trend of brevity and efficiency in modern teen communication.
Folks
‘Folks is another popular term that teens use to refer to their parents. It’s an informal and affectionate way of addressing them, often used in a friendly and casual context. This term can sometimes extend to other family members or older adults, but in the context of teens, it specifically refers to their parents.
P-units’
‘P-units is a playful and somewhat tech-savvy term for parents. The “P” stands for parents, and “units” reflects a more modern and slightly detached way of referring to them. This term is influenced by the digital age and the way teens interact with technology, often using jargon that mimics tech language.
Parental Units
‘Parental Units is a more formal but still slangy term used by teens. This term often has a humorous connotation, as it sounds like something out of a science fiction movie or a tech manual. It’s a way for teens to refer to their parents in a way that feels both respectful and irreverent.
Ancestors
‘Ancestors is a term that teens use humorously to refer to their parents. It plays on the generational gap and often carries a tone of mock reverence. While it might sound like a serious term, in teen slang, it’s used to emphasize the age difference and the perceived old-fashioned nature of their parents.
Olds
‘Olds is a term that teens use to refer to their parents, highlighting the generational gap. It’s a straightforward and slightly cheeky way to acknowledge the age difference. This term can be used affectionately or playfully, depending on the context.
Why Teens Use Slangy Terms for Parents
The usage of a “teens slangy term for parents” is more than just a trend; it’s a way for teens to express their individuality and to navigate their social world. Using these terms can help teens feel more in control and less formal when talking about their parents. It also serves as a way to bond with peers who understand and use the same slang.
The Evolution of the Teens Slangy Term for Parents
Language is always evolving, and the “teens slangy term for parents” is no exception. What might be popular today can quickly change as new cultural influences emerge. Social media platforms, movies, and music all play significant roles in shaping the language teens use, including the terms they use for their parents.
How Parents Can Keep Up with Teens Slangy Terms
For parents wanting to stay connected with their teens, understanding the “teens slangy term for parents” can be beneficial. Here are some tips:
Stay Informed: Follow popular teen influencers and social media platforms to keep up with the latest slang.
Communicate: Talk to your teens about the terms they use and what they mean. This can open up a dialogue and help bridge the generational gap.
Be Open-Minded: Remember that slang is a natural part of language evolution. Embrace the creativity and have fun with it.
The Cultural Significance of Teens Slangy Terms for Parents
The “teens slangy term for parents” reflects broader cultural trends and attitudes. It shows how teens navigate their identities and relationships in a rapidly changing world. The ways in which language adapts to meet the needs of its users.
Conclusion
In conclusion, the “teens slangy term for parents” is a fascinating aspect of modern language that highlights the ever-changing nature of communication. As teens continue to innovate and create new slang, staying attuned to these changes can help parents and older generations connect with and understand the younger generation better. Embracing these terms can lead to a more harmonious and connected family dynamic.
Are you a seafood lover looking for a luxurious and unique dish to impress your guests? Look no further. This ultimate crab brulee recipe is a delightful fusion of creamy, savory custard and sweet, succulent crab meat, topped with a crispy caramelized sugar crust. It’s a gourmet twist on the classic creme brulee that is sure to become a favorite in your culinary repertoire. Let’s dive into the world of crab brulee and learn how to create this decadent dish step-by-step.
Why Crab Brulee?
Crab Brulee combines the best of both worlds: the elegance and richness of a classic French creme brulee with crab’s fresh, delicate flavor. It’s an unexpected and sophisticated appetizer or main course that will wow your family and friends. The creamy custard base perfectly complements the sweet and tender crab meat, while the caramelized sugar topping adds a delightful crunch.
The History of Crab Brulee
Crab Brulee is a modern twist on traditional creme brulee, a dessert enjoyed in France since the 17th century. Creme brulee, which means “burnt cream,” is known for its creamy custard base and crispy caramelized sugar top. Adding crab to this classic dessert might seem unconventional, but it creates a savory dish that highlights the delicate sweetness of crab meat.
Choosing the Right Ingredients
The success of your Crab Brulee Recipe depends on the standard of the ingredients you use. Here are some tips for selecting the best ingredients:
Crab Meat: Fresh crab meat is essential for this dish. Look for lump crab meat, which has a sweet and delicate flavor. If fresh crab meat is unavailable, high-quality canned or frozen crab meat can be used as a substitute.
Heavy Cream: Add heavy cream for a rich and velvety custard base. Avoid using light cream or milk, which will not provide the same creamy texture.
Egg Yolks: Egg yolks are crucial to achieving the smooth and creamy consistency of the custard. Make sure to carefully separate the yolks from the whites to avoid any egg white in the mixture.
Cheese: Gruyere cheese adds a nutty and slightly sweet flavor that compliments the crab meat. If you prefer, you can use another type of cheese like Parmesan or Gouda.
Seasonings: Dijon mustard, Worcestershire sauce, salt, and white pepper add depth and flavor to the custard. Fresh herbs like chives and dill enhance the overall taste and presentation.
Step-by-Step Crab Brulee Recipe
Now that we have covered the basics, let’s start with the recipe. This step-by-step guidance will help you create the perfect Crab Brulee.
Ingredients:
Eight oz. fresh lump crab meat, picked over for shells
1 cup heavy cream
Three large egg yolks
1/2 cup grated Gruyere cheese
1/4 cup finely chopped green onions
One tablespoon of Dijon mustard
One teaspoon of Worcestershire sauce
1/2 teaspoon salt
1/4 teaspoon white pepper
Two tablespoons finely chopped fresh chives
Two tablespoons finely chopped fresh dill
1/4 cup granulated sugar (for the brulee topping)
Instructions:
Preheat the Oven: Preheat your oven to 325°F (160°C).
Prepare the Crab Mixture: Gently mix the crab meat, green onions, chives, and dill in a bowl. Be careful not to bust-up the crab meat too much.
Prepare the Custard Base: Heat the heavy cream on to medium heat in a medium saucepan until it simmers. Remove from heat. Whisk together the egg yolks, Gruyere cheese, Dijon mustard, Worcestershire sauce, salt, and white pepper in a separate bowl. Slowly pour the hot cream on the egg mixture, whisking constantly to intercept the eggs from curdling.
Combine and Fill: Add the crab mixture to the custard base and mix well. Divide the mixture evenly among 4-6 ramekins.
Bake: Place the ramekins in a baking dish and pour hot water into the dish until it arrive at halfway up the sides of the ramekins. Bake in the preheated oven for 30-35 minutes, or until the custards are set but still slightly jiggly in the center.
Cool and Chill: Remove the ramekins from the water bath and let them cool to room temperature. Cover and refrigerate for at least 2 hours or until well chilled.
Caramelize the Sugar Topping: Just before serving, sprinkle a thin, even layer of granulated sugar over the top of each custard. Use a kitchen torch to caramelize the sugar until it forms a crispy, golden-brown crust. Alternatively, you can place the ramekins under a broiler for 1-2 minutes, watching closely to avoid burning.
Serve: Allow the caramelized sugar to cool and harden for a minute before serving.
Creating the perfect Crab Brulee requires attention to detail and a few expert tips:
Use a Water Bath: Baking the custards in a water bath confirms even cooking and prevents the custard from becoming rubbery. The water bath provides gentle and consistent heat, creating a smooth and creamy texture.
Avoid Overbaking: The custards should be set but still slightly jiggly in the center when you remove them from the oven. They will continue to cook and stabilize as they cool. Overbaking can lead to a grainy texture.
Chill Thoroughly: Chilling the custards allows the flavors to meld and the custard to set correctly. Refrigerate them for at least 2 hours before caramelizing the sugar topping.
Even Sugar Layer: For the best-caramelized topping, sprinkle an even layer of pulverized sugar over the custards. Use a kitchen torch to melt and caramelize the sugar slowly and evenly.
Experiment with Flavors: While this recipe uses Gruyere cheese, Dijon mustard, and Worcestershire sauce, feel free to experiment with different flavors and ingredients. For example, add a touch of cayenne pepper for a hint of heat, or use different herbs like tarragon or parsley.
Serving Suggestions
Crab Brulee is a versatile dish served as an appetizer, main course, or part of a seafood feast. Here are some serving recommendation to enhance your dining experience:
Appetizer: Serve Crab Brulee as an elegant appetizer for a dinner party. Pair it with a crisp white wine like Sauvignon Blanc or Chardonnay.
Main Course: For a luxurious main course, serve Crab Brulee with a fresh salad, crusty bread, and roasted vegetables. A glass of Champagne or sparkling wine complements the rich flavors.
Seafood Feast: Include Crab Brulee in a seafood feast, along with dishes like lobster tail, grilled shrimp, and seared scallops. A light and refreshing rosé wine pairs well with various seafood flavors.
Conclusion
This crab brulee recipe is a show-stopping dish that combines the creamy, indulgent texture of crème brûlée with the delicate sweetness of crab meat. It’s a sophisticated and flavorful dish that will impress any seafood lover. By following this step-by-step guidance and using high-quality ingredients, you can create the perfect crab brulee that will become a spotlight of your culinary repertoire.
So, seafood lovers, it’s time to celebrate! Dive into the world of gourmet cooking and treat yourself and your guests to the ultimate crab brulee experience. Whether you’re hosting a dinner party or simply indulging in a special meal at home, this crab brulee recipe is sure to delight and satisfy your taste buds. Enjoy!
The internet is full of slang terms that can confuse or even mislead people about their health—and one of those is “Cream Pie Pregnancy.” While popular in online discussions and adult content, this phrase has no medical relevance and can trivialize the deeply personal and important topic of conception.
In this blog, we’ll clarify the facts vs. fiction behind this term and, more importantly, provide expert guidance on how to build a healthy, informed routine during pregnancy and postpartum recovery—including nutrition, safe workouts, emotional support, breastfeeding help, and healing tips.
What Does “Cream Pie Pregnancy” Really Mean?
“Cream Pie Pregnancy” is a slang term typically referring to pregnancy resulting from internal ejaculation during unprotected sex. While the phrase is colloquial and often sexualized, it’s essential to focus on the biological truths behind conception.
The Facts:
Pregnancy can occur any time sperm enters the vagina, particularly during ovulation.
The term itself is not a medically approved or accurate description of how pregnancy works.
Conception is determined by timing, sperm viability, and ovulation, not the visual result of sex.
How Pregnancy Happens: A Quick Biology Breakdown
To understand fertility, let’s look at what truly causes pregnancy:
Steps in Conception:
Ovulation: An egg is released from the ovary.
Fertilization: Sperm meets egg in the fallopian tube.
Implantation: A fertilized egg attaches to the uterine lining.
Note: Even pre-ejaculate (pre-cum) may contain sperm. Pregnancy doesn’t require a full ejaculation to occur.
Myth Buster:
“Cream pie” does not guarantee pregnancy.
Contraception, such as condoms or birth control, is essential if pregnancy is not desired.
Building a Healthy Pregnancy Routine (For First-Time & Experienced Moms)
Once pregnancy is confirmed, it’s time to shift focus from “how” to “how to stay healthy.” Here’s a complete guide:
1. Prenatal Nutrition: Eating for Two (Wisely)
What you eat plays a direct role in fetal development and your strength.
Staying active improves mood, circulation, sleep, and even prepares your body for labor.
Safe Activities:
Prenatal yoga or Pilates
Swimming
Walking
Light strength training (with approval)
Avoid:
High-impact or contact sports
Lying flat on your back after the 1st trimester
Exercises that risk falls or injury
ACOG recommends at least 150 minutes of moderate-intensity weekly exercise unless otherwise advised.
3. Emotional and Mental Wellness: It’s Okay Not to Be Okay
Hormonal changes can cause emotional fluctuations. Anxiety, mood swings, or sadness may occur. You’re not alone.
Mental Health Tips:
Practice meditation or deep breathing
Join a pregnancy support group
Speak to a therapist
Maintain open communication with your partner/family
1 in 5 women experience mood disorders during or after pregnancy. Early support is essential.
4. Sleep & Rest: Listening to Your Body
Fatigue is common, especially in the first and third trimesters.
Tips for Better Sleep:
Sleep on your left side to improve blood flow
Use pregnancy pillows for support
Avoid caffeine late in the day
Keep a consistent sleep schedule
Source: National Sleep Foundation
Postpartum Recovery: The Fourth Trimester
The 6–12 weeks after childbirth are just as important. Prioritize healing, emotional care, and support.
5. Pelvic Floor Recovery
Common Symptoms:
Leaking urine when sneezing/laughing
Pelvic heaviness or discomfort
Pain during intercourse
What Helps:
Kegel exercises
Pelvic floor physical therapy
Avoiding heavy lifting initially
Speak to your OB/GYN about your recovery at your 6-week checkup.
6. Emotional Health Postpartum
Baby Blues:
Common and short-lived
May include crying, mood swings, anxiety
Usually resolves in 2 weeks
Postpartum Depression:
Persistent sadness or anger
Difficulty bonding with the baby
Feeling worthless or hopeless
Needs professional support
Reach out early. You deserve care, too.
7. Breastfeeding Support & Nutrition
Breastfeeding is natural, but not always easy.
Tips:
Drink plenty of water
Eat an extra 300–500 calories/day
Seek a lactation consultant for latching or pain
Try different positions: cradle, football hold, side-lying
Fed is best. If breastfeeding isn’t working, formula is a safe and healthy alternative.
Final Thoughts
While slang terms like “Cream Pie Pregnancy” might appear casually online, they oversimplify a complex biological and emotional experience. If you’re sexually active, understanding real fertility facts and safe practices is empowering.
Frequently Asked Questions (FAQs)
Can you get pregnant from a “cream pie”?
Yes—pregnancy can occur any time sperm enters the vagina, especially around ovulation. Internal ejaculation is one possible scenario, but not the only one.
How soon can you test for pregnancy?
Most tests detect pregnancy 7–10 days after ovulation. For more accuracy, wait until after a missed period.
When should prenatal care begin?
Your first OB visit should be scheduled by week 8 of pregnancy or as soon as you find out you’re pregnant.
When can I exercise postpartum?
Light walking can start within a few days after delivery, but intense workouts—especially after C-sections—should be delayed for 6+ weeks (or until OB clearance).
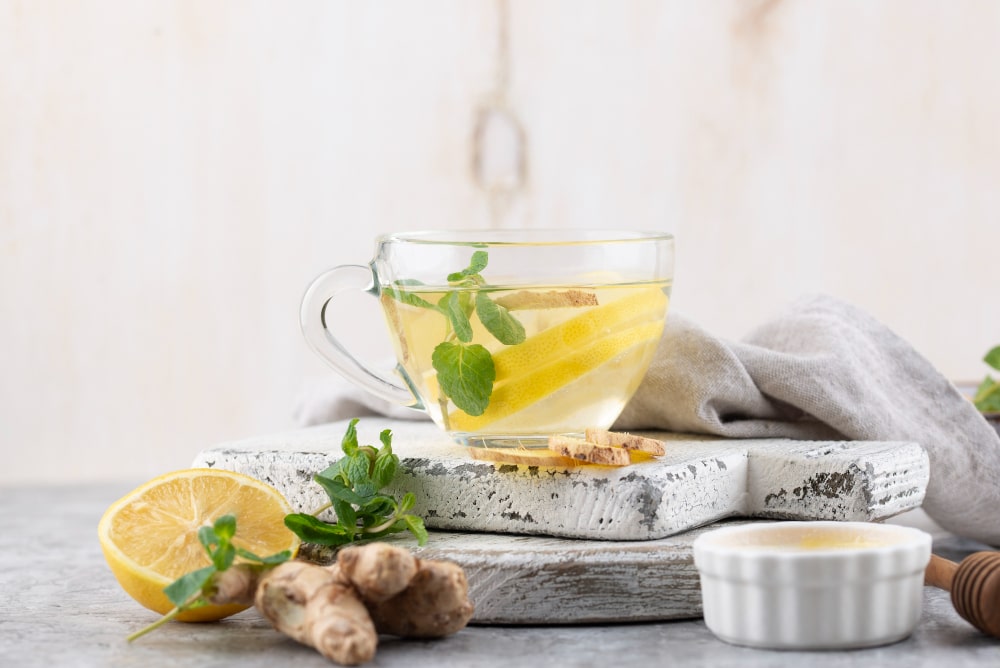
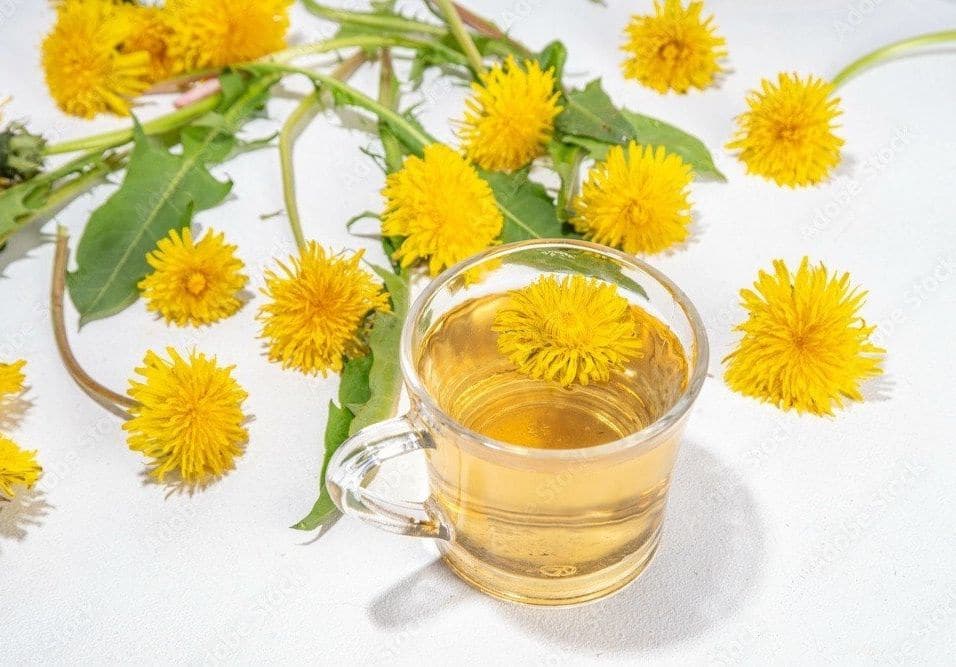
Herbal teas are a fantastic way to start or refresh your day. Unlike historic teas from the Camellia sinensis plant, herbal teas are made from various dried fruits, flowers, spices, and herbs. These infusions, known as tisanes, are caffeine-free and have health benefits. This comprehensive guide will explore several delightful herbal tea recipes you can easily make at home. Each recipe provides unique flavors and health benefits, making them perfect for any time of the day.
This refreshing blend combines fresh ginger’s spicy warmth with mint’s refreshing coolness. Ginger aids digestion, reduces inflammation, and boosts immunity, while mint helps relieve headaches and enhances mental focus. Perfect for starting your day or as a midday pick-me-up, this tea offers a flavorful and healthful boost to your routine.
Ingredients
One tablespoon of fresh ginger, sliced
One handful of fresh mint leaves
2 cups boiling water
Honey or lemon (optional)
Instructions
Preparation: Begin by washing and slicing a piece of fresh ginger. The size of the ginger slice can be adjusted according to your taste preference. Fresh mint leaves should also be washed thoroughly.
Brewing: Place the ginger slices and mint leaves in a teapot. Pour the boiling water over the herbs and let it steep for about 5-7 minutes.
Serving: Strain the tea into a cup. You can choose honey or a slice of lemon for added flavor if desired.
Benefits and Experience
Ginger is known for its capacity to aid digestion and decrease inflammation. Its spicy kick pairs wonderfully with the refreshing coolness of mint. This combination invigorates your senses and helps soothe digestive discomfort, making it an ideal morning or post-meal beverage.
This light and citrusy tea is perfect for a midday refreshment or a soothing evening beverage. Lemon balm is similar for its calming properties, helping to decrease stress and anxiety while improving mood and cognitive function. The subtle lemon flavor is uplifting and relaxing, making it an ideal choice for unwinding after a long day or a gentle pick-me-up in the afternoon.
Ingredients
One tablespoon of dried lemon balm leaves
2 cups boiling water
A few lemon slices (optional)
Instructions
Preparation: Measure out a tablespoon of dried lemon balm leaves. Fresh lemon balm can be used if available; double the quantity.
Brewing: Place the lemon balm leaves in a teapot. Pour boiling water above the leaves and steep for 5-10 minutes.
Serving: Strain the tea into a cup and garnish with a few lemon slices if you prefer a more robust citrus flavor.
Benefits and Experience
Lemon balm is known for its calming properties. It can help decrease stress and anxiety, making this tea a superb choice for unwinding after a long day or mid-afternoon break. The light, lemony flavor is both uplifting and soothing.
This refreshing blend combines green tea’s antioxidant power with peppermint’s refreshing coolness. Peppermint helps relieve headaches, improve mental focus, and aid digestion, while green tea boosts metabolism and enhances overall health. This tea is perfect for a morning boost or an afternoon pick-me-up, offering a crisp and revitalizing way to improve your energy and alertness.
Ingredients
One green tea bag
One teaspoon of dried peppermint leaves
2 cups boiling water
Honey (optional)
Instructions
Preparation: Start with a good-quality green tea bag. Add a teaspoon of dried peppermint leaves.
Brewing: Place the green tea bag and peppermint leaves in a cup. Pour boiling water over them and let it steep for 3-5 minutes.
Serving: Remove the tea bag and strain the peppermint leaves. Sweeten with honey if you like.
Benefits and Experience
Peppermint is refreshing and can help relieve headaches and improve mental focus. Combined with green tea, which is lavish in antioxidants, this brew becomes a potent drink to boost energy and concentration. The mint adds a unique touch to the slightly bitter green tea.
This vibrant tart tea combines rich, antioxidant-packed hibiscus flowers with refreshing citrus zest. Hibiscus is known for boosting the immune system, lowering blood pressure, and enhancing heart health, while citrus adds a dose of vitamin C and a sweet, tangy flavor. This tea can be celebrate hot or cold for a refreshing afternoon drink, providing a revitalizing and healthful boost to your day.
Ingredients
One tablespoon of dried hibiscus flowers
One orange, sliced
2 cups boiling water
Honey or agave syrup (optional)
Instructions
Preparation: Use dried hibiscus flowers and slice a fresh orange into thin rounds.
Brewing: Add the hibiscus flowers and orange slices to a teapot. Pour boiling water over them and let it steep for 5-7 minutes.
Serving: Strain the tea and sweeten it with honey or agave syrup if desired.
Benefits and Experience
Hibiscus tea is known for its vital red color and tart flavor. It’s high in vitamin C and antioxidants, which help charge the immune system and lower blood pressure. The addition of orange slices adds a citrusy sweetness that complements the tartness of hibiscus, making it a refreshing drink, especially when served cold.
This calming infusion blends the gentle flavors of chamomile and lavender, renowned for their soothing properties. Chamomile aids digestion, promotes relaxation, and supports sleep quality, while lavender offers stress relief and a delightful floral aroma. Ideal as an evening wind-down beverage or a bedtime ritual, this tea helps to ease tension and promote a sense of tranquility, making it the best choice for relaxation and unwinding after a busy day.
Ingredients
One tablespoon of dried chamomile flowers
One teaspoon of dried lavender buds
2 cups boiling water
Honey (optional)
Instructions
Preparation: Measure out the chamomile flowers and lavender buds.
Brewing: Place the chamomile and lavender in a teapot. Pour boiling water over the herbs and let it steep for 5-7 minutes.
Serving: Strain the tea and add honey if you like.
Benefits and Experience
Chamomile and lavender are both known for their calming effects. This tea is perfect for relaxing before bedtime. Chamomile helps to soothe the digestive system and promote sleep, while lavender’s floral notes add a sense of tranquility. The combination creates a delicate, fragrant tea to help relieve stress and promote restful sleep.
This herbal infusion features dandelion root, which is known for its detoxifying properties and support for liver health. Dandelion root tea helps cleanse the liver, aid digestion, and promote detoxification. It has a marginally earthy and nutty flavor profile, which can be complemented with a touch of lemon or honey. Enjoyed as a daily tonic or part of a cleansing regimen, dandelion root tea offers a natural way to support your body’s detox efforts and maintain optimal health.
Ingredients
One tablespoon of dried dandelion root
2 cups boiling water
Lemon juice or honey (optional)
Instructions
Preparation: Measure out a tablespoon of dried dandelion root.
Brewing: Place the dandelion root in a teapot. Pour boiling water over it and steep it for 10-15 minutes.
Serving: Strain the tea and add lemon juice or honey for extra flavor if desired.
Benefits and Experience
Dandelion root is familiar for its detoxifying properties, particularly for the liver. This earthy tea helps to cleanse the liver and promote digestion. It has a marginally bitter taste, which can be balanced with a squeeze of lemon or a bit of honey.
Elderberry tea is celebrated for its potent immune-boosting properties, thanks to its lofty levels of antioxidants and vitamins. This tea helps strengthen the immune system, making it particularly helpful during cold and flu season. The addition of a cinnamon stick not only enhances its flavor but also contributes anti-inflammatory benefits. Enjoyed hot or cold, elderberry tea provides a delicious and healthful way to support your immune health and overall well-being.
Ingredients
One tablespoon of dried elderberries
One cinnamon stick
2 cups boiling water
Honey (optional)
Instructions
Preparation: Combine dried elderberries and a cinnamon stick.
Brewing: Place the elderberries and cinnamon sticks in a teapot. Pour boiling water over them and let it steep for 10 minutes.
Serving: Strain the tea and sweeten it with honey if desired.
Benefits and Experience
Elderberries are full with antioxidants and vitamins that support the immune system. This tea is particularly beneficial during cold and flu season. The addition of cinnamon not only improves the flavor but also adds anti-inflammatory properties, making it a comforting and healthful brew.
Fennel tea is renowned for supporting digestion and alleviating digestive discomforts such as bloating and gas. The tea is made from fennel seeds, which have a sweet, licorice-like flavor and contain compounds that help relax the digestive tract muscles, easing the passage of food and reducing cramping. Fennel tea is a gentle and natural remedy for digestive issues, perfect for sipping after meals to promote digestive health and comfort.
Ingredients
One teaspoon of fennel seeds
2 cups boiling water
Honey or lemon (optional)
Instructions
Preparation: Measure out a teaspoon of fennel seeds.
Brewing: Place the fennel seeds in a teapot. Pour boiling water over them and let it steep for 5-10 minutes.
Serving: Strain the tea and add honey or lemon if you like.
Benefits and Experience
Fennel tea is excellent for digestion. It helps to relieve bloating, gas, and indigestion. The slightly sweet, licorice-like fennel flavor makes this tea a pleasant after-meal drink that soothes the digestive system.
Holy Basil, known as Tulsi, is cherished for its calming and adaptogenic properties. This herbal tea offers a warm, slightly spicy flavor with hints of clove and pepper, making it soothing and rejuvenating. Tulsi tea helps reduce stress, promote mental clarity, and support overall wellness. Whether enjoyed in the morning to start your day with tranquility or in the evening to unwind, Holy Basil tea provides a natural way to relax and restore balance to the mind and body.
Ingredients
One tablespoon of dried holy basil (tulsi) leaves
2 cups boiling water
Honey or lemon (optional)
Instructions
Preparation: Measure out a tablespoon of dried holy basil leaves.
Brewing: Place the holy basil leaves in a teapot. Pour boiling water over them and let it steep for 10 minutes.
Serving: Strain the tea and add honey or lemon if desired.
Benefits and Experience
Holy basil, or tulsi, is revered in Ayurvedic medicine for its adaptogenic decore, which help the body manage stress. This tea has a warm, spicy flavor with hints of clove and pepper. Drinking tulsi tea can help calm the mind and body, making it an excellent choice for unwinding after a hectic day.
Rooibos tea combines rooibos’s-rich, earthy flavors with warming spices like cinnamon and cloves. Rooibos is famous for its high antioxidant content and caffeine-free nature, making it a perfect choice for those seeking a beneficial alternative to traditional chai. This blend offers a comforting, aromatic experience and provides antioxidant benefits that support overall health. Whether performed hot or cold, Rooibos tea is a delightful addition to any wellness routine, offering a flavorful and revitalizing way to boost your antioxidant intake.
Ingredients
One tablespoon rooibos tea
One cinnamon stick
2-3 cloves
2 cups boiling water
Milk and honey (optional)
Instructions
Preparation: Combine rooibos tea with a cinnamon stick and cloves.
Brewing: Place the rooibos, cinnamon, and cloves in a teapot. Pour boiling water over them and let it steep for 5-7 minutes.
Serving: Strain the tea and add milk and honey for a richer flavor if desired.
Benefits and Experience
Rooibos is a South African red bush tea known for its high antioxidant content and lack of caffeine. This chai blend combines the robust flavor of rooibos with warming spices like cinnamon and cloves. It’s a perfect afternoon pick-me-up that offers a flavorful and healthful alternative to traditional chai.
Conclusion
Incorporating these easy herbal tea recipes into your daily routine can boost energy and health. Whether seeking an energizing start to your day, a calming evening drink, or a soothing remedy for common ailments, these herbal teas offer a natural and delightful way to enhance your well-being. Experiment with combinations to find your favorite flavors and enjoy these herbal infusions’ numerous benefits. Herbal tea can transform any moment into a revitalizing and healthful experience.

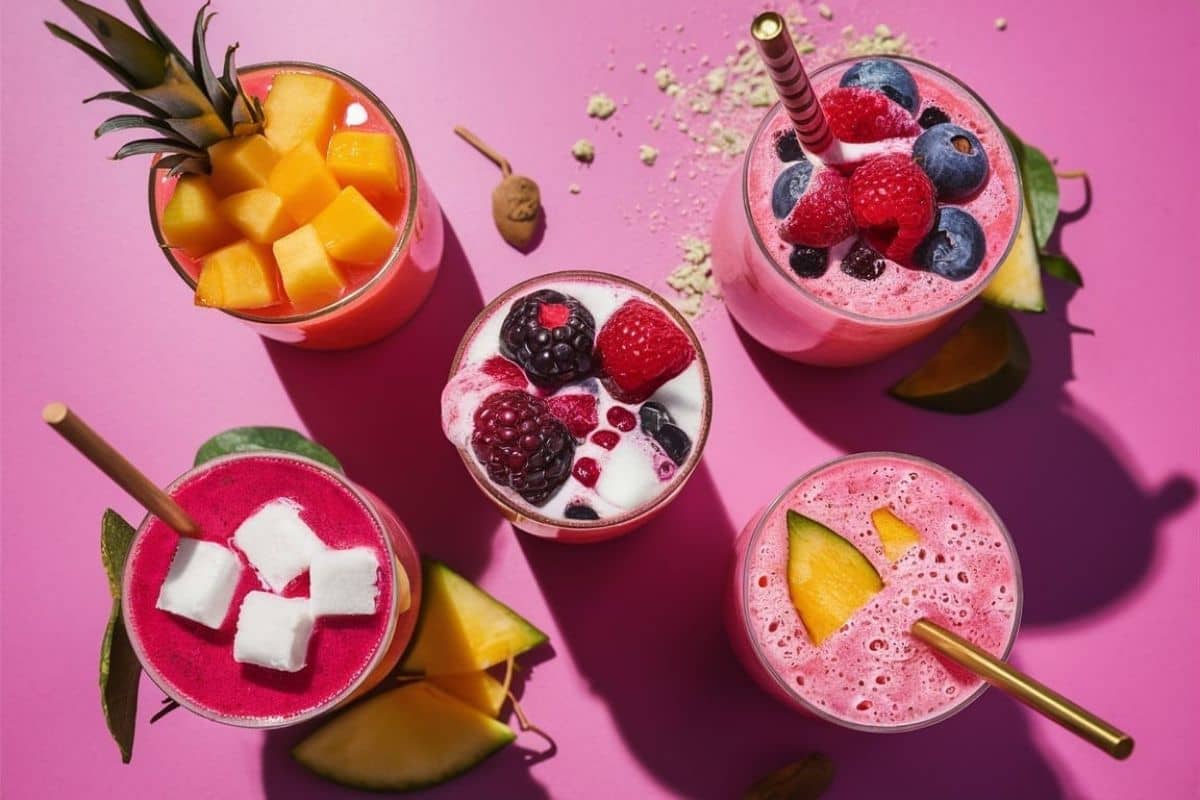

 How Pregnancy Happens: A Quick Biology Breakdown