The living room is the heart of every home, and designing it with the perfect blend of colors can make all the difference. A gray and green living room offers the ultimate sophistication and freshness. Whether you aim for a calm, cozy retreat or a bold, modern statement, this neutral gray and lively green pairing allows for endless versatility.
Why Choose Gray and Green for Your Living Room?
Gray, as a neutral tone, provides a timeless and versatile backdrop for almost any design aesthetic. On the other hand, green brings nature’s vibrancy indoors, creating a rejuvenating atmosphere. Together, these colors balance each other perfectly. Gray offers a grounding element, while green infuses energy and life into the space.
Ideas for Styling a Gray and Green Living Room
1. Earthy Elegance with Sage and Charcoal
Combine soft sage green walls with charcoal gray furniture to create a serene and earthy ambiance. Add natural wood accents like a coffee table or shelving to enhance the organic vibe. Accessorize with metallic elements such as brass or copper lighting for a modern touch.
2. Bold and Moody with Forest Green and Deep Gray
For those who prefer a moody, dramatic feel, pair forest green walls with deep gray furniture. This pairing is perfect for creating cozy, sophisticated space. Add texture with velvet cushions, a plush rug, and layered curtains. A few golden or brass accents can further elevate the look.
3. Bright and Fresh with Mint and Light Gray
A light gray sofa paired with mint green decor, such as throw pillows or curtains, creates an airy, bright atmosphere. This combination works well in smaller spaces, as the light tones make the room feel larger. Incorporate white or cream accents to keep the palette cohesive and uplifting.
4. Natural Contrast with Jade Green and Soft Gray
For a striking contrast, use jade green as the focal point—perhaps as the color of your sofa or an accent wall. Pair it with soft gray on the surrounding walls and floors. Neutral accessories in beige or black can tie the look together while allowing the green to shine.
5. Accent Pop with Emerald and Neutral Grays
If you’re hesitant to commit to green walls or large furniture pieces, try incorporating emerald green accents into your gray living room. Green cushions, artwork, or a statement chair can make a bold impression without overpowering the neutral tones.
Tips for Perfecting Your Gray and Green Living Room
Play with Textures: Use a mix of textures, such as a velvet green sofa, a gray wool rug, and woven baskets, to add depth and dimension to your room.
Incorporate Plants: Nothing complements a gray and green living room like real greenery. Indoor plants enhance the green elements, purify the air, and add vibrancy.
Layer Lighting: Mix ambient, task, and accent lighting to highlight the beauty of your design. Warm lights work well with green tones, while more astonishing lighting emphasizes gray hues.
Pattern and Prints: Don’t shy away from patterns. Green and gray can be highlighted beautifully through printed curtains, throw pillows, or rugs. Choose designs like botanical prints, geometric patterns, or abstract motifs to match your style.
Gray and Green Color Schemes for Inspiration
Green Shade
Gray Tone
Suggested Accents
Sage Green
Light Gray
Natural wood, cream, brass
Forest Green
Charcoal Gray
Velvet textures, gold, leather
Mint Green
Cool Gray
White, pastel pink, glass
Jade Green
Warm Gray
Black, beige, metallics
Emerald Green
Neutral Gray
Copper, patterned cushions
Final Thoughts
A gray and green living room is more than just a design choice—a statement of balance and harmony. Whether you prefer soft, subtle tones or bold, dramatic contrasts, this color pairing offers endless possibilities to reflect your style. With the right accessories, textures, and lighting, you can transform your living room into a timeless and contemporary space.
Apple cider vinegar is one of the pantry staples that has stood the test of time & is praised for its potential health benefits and culinary versatility. While many people are familiar with its use in health tonics or as a natural remedy, there’s so much more this humble ingredient can do. Whether you’re looking for a tangy vinaigrette, a flavorful marinade, or a way to elevate your vegetable dishes, there’s an apple cider vinegar recipe for every occasion. Let’s dive into how to incorporate Apple Cider Vinegar Recipe into your cooking.
1. Simple Apple Cider Vinegar Salad Dressing
A classic apple cider vinegar recipe is a basic salad dressing. This quick and easy recipe has just a few ingredients and is an excellent way to bring out the flavors of fresh greens & vegetables.
Ingredients:
1 part Bragg Apple Cider Vinegar (with the mother)
1 part olive oil
Salt and pepper to taste
Instructions:
Whisk together apple cider vinegar & olive oil in a small bowl.
Season with salt & pepper, adjusting to taste.
Drizzle over your favorite salad or greens.
This tangy, slightly sweet vinaigrette pairs perfectly with simple salads, but you can also use it to dress cole slaw, pasta salads, or even warm potato salad.
2. Apple Cider Vinegar Marinade for Meat
Apple cider vinegar is a fantastic marinade ingredient because it tenderizes meat while adding a unique depth of flavor. You can use it to marinate chicken, or beef.
Ingredients:
3 tbsp Bragg Apple Cider Vinegar
2 tbsp olive oil
1 tbsp honey
1 tsp cayenne pepper
Salt and pepper to taste
Instructions:
Whisk together all ingredients in a bowl.
Pour over your choice of meat, ensuring it’s well coated.
Allow it to marinate for at least 30 minutes before grilling, roasting, or pan-searing.
This apple cider vinegar marinade adds a spicy, tangy kick to meats and is especially great for grilling or barbecuing.
3. Quick Pickled Vegetables
Quick pickles are one of easiest ways to enjoy the flavor and benefits of apple cider vinegar. In minutes, you can pickle various vegetables, such as cucumbers, carrots, onions, or radishes.
Ingredients:
1 cup Bragg Apple Cider Vinegar
1 cup water
1 tbsp sugar
1 tsp salt
Sliced vegetables (cucumbers, carrots, onions)
Instructions:
Combine apple cider vinegar, water, sugar, salt in a pot & bring to a simmer.
Pour the hot brine over the sliced vegetables in a jar.
Let the mixture sit for about 10 minutes before draining the vinegar.
These quick pickles can be stored in fridge and enjoyed as a crunchy side dish, topping, or snack.
4. Apple Cider Vinegar for Roasted Vegetables
Apple cider vinegar is also an excellent addition when roasting vegetables. Adding a splash of ACV to your oil mixture enhances the flavors and helps to caramelize the veggies beautifully in the oven.
Ingredients:
1 tbsp Bragg Apple Cider Vinegar
2 tbsp olive oil
Your favorite vegetables (carrots, Brussels sprouts, potatoes)
Salt and pepper to taste
Instructions:
Preheat oven to 400°F (200°C).
In bowl, combine olive oil, apple cider vinegar, salt, and pepper.
Toss your vegetables in the mixture until well-coated.
Roast for 30 minutes, stirring halfway through, vegetables are tender & slightly crispy.
Adding apple cider vinegar adds a tangy richness to the vegetables, making them irresistible.
5. Apple Cider Vinegar for Detox Water
While apple cider vinegar is known for its health benefits, it also makes a refreshing addition to a detox water recipe. This is an excellent option if you’re looking for a simple way to incorporate ACV into your daily routine.
Ingredients:
1-2 tbsp Bragg Apple Cider Vinegar
1 cup water
1 tsp honey (optional)
Lemon slices (optional)
Instructions:
Mix the apple cider vinegar with water.
Stir in honey if desired for sweetness.
Add few slices of lemon for extra flavor.
Drinking this ACV water in the morning or throughout the day is a popular way to support digestion and metabolism, making it a perfect addition to your wellness routine.
6. Apple Cider Vinegar Detox Smoothie
If you’re looking for an apple cider vinegar recipe that blends health benefits with flavor, try adding it to a smoothie—the vinegar’s acidity pairs surprisingly well with fruits like apples and berries.
Ingredients:
1 tbsp Bragg Apple Cider Vinegar
1 cup water or almond milk
1 banana
1/2 cup mixed berries (blueberries, strawberries)
1 tsp honey (optional)
Instructions:
Add ingredients to blender & blend until smooth.
Adjust sweetness by adding honey if necessary.
This refreshing smoothie can kickstart your day and boost your digestion, making it an excellent healthy option.
Conclusion
Apple cider vinegar is more than just trendy health tonic—it’s a versatile ingredient that can enhance a variety of dishes in your kitchen. From salad dressings to marinades and even detox drinks, there are countless apple cider vinegar recipes to try. By incorporating it into your cooking routine, you’ll boost flavor and potentially reap the health benefits of this powerhouse ingredient. So why not explore how apple cider vinegar can elevate your meals and wellness today?
Tuscan Chicken Pasta, a creamy, hearty dish infused with rich flavors, has become a go-to meal for pasta lovers worldwide. Combining tender chicken, sun-dried tomatoes, fresh spinach, and a decadent cream sauce, this dish offers a warm embrace for the senses. Whether you’re looking for a satisfying dinner for family or a romantic meal for two, Tuscan Chicken Pasta checks all the boxes—flavorful, comforting, and surprisingly straightforward to prepare.
The Essence of Tuscan Chicken Pasta
Tuscan Chicken Pasta draws inspiration from the rustic flavors of the Tuscany region in Italy. The dish is known for its vibrant combination of fresh herbs, olive oil, and sun-dried tomatoes—ingredients that embody the essence of Tuscan cuisine. While there are many variations, the most common features include pan-seared chicken breasts, a creamy garlic sauce, sun-dried tomatoes, and spinach, all complemented by a generous amount of Parmesan cheese.
Why Tuscan Chicken Pasta Works So Well
Creamy Sauce with Bold Flavors: The creamy sauce made from heavy cream, Parmesan cheese, and chicken broth strikes the perfect balance of richness and depth. The addition of sun-dried tomatoes provides a tangy sweetness, while the spinach adds color and a mild earthiness that pairs perfectly with the sauce’s creaminess.
Versatility: One of the best things about Tuscan Chicken Pasta is its versatility. You can alter ingredients based on your preferences. For instance, you can swap the spinach for kale, use a different type of pasta, or even add extra protein like bacon or mushrooms. The base recipe is a fantastic canvas for experimentation.
Quick and Easy to Make: Despite its luxurious taste, this dish comes together quickly—typically in under 30 minutes. The chicken is cooked to golden perfection, and the sauce comes together effortlessly, making it ideal for busy weeknights or special occasions.
How to Make Tuscan Chicken Pasta
If you’re ready to experience the magic of Tuscan Chicken Pasta, here’s a simple recipe to get you started.
Ingredients:
1 lb boneless, skinless chicken breasts
2 tablespoons olive oil
Salt and pepper to taste
3 cloves garlic, minced
1 cup sun-dried tomatoes (julienned)
2 cups fresh spinach
1 cup heavy cream
1 cup chicken broth
1 cup grated Parmesan cheese
1 pound of your favorite pasta (penne, fettuccine, or rigatoni work well)
Fresh basil or parsley for garnish
Instructions:
Cook Chicken: Season chicken breasts with salt & pepper. Heat olive oil in skillet over medium-high heat. Sear chicken on both sides until golden & cooked, about 6-7 minutes per side. Once done, remove the chicken from skillet & set it aside.
Prepare the Sauce: Add a little more olive oil, if needed, in the same skillet. Sauté the garlic until fragrant, about 1 minute. Add sun-dried tomatoes & cook for 2 minutes. Pour in chicken broth, scraping up browned bits from bottom of the pan.
Add Cream and Spinach: Stir in the heavy cream and Parmesan cheese, allowing the sauce to thicken. Add spinach & cook when it wilted about 3 minutes.
Combine with Pasta: Cook the pasta according to the package instructions. Once the pasta is ready, drain & add it to the skillet with the sauce. Toss everything together until the pasta is well-coated.
Finish the Dish: Slice the cooked chicken into strips and add it to the skillet. Stir to combine and heat everything through. Garnish with fresh basil or parsley and extra Parmesan cheese if desired.
Serve and Enjoy: Plate your Tuscan Chicken Pasta and serve immediately. It’s best enjoyed with garlic bread or a simple green salad.
Tips for the Perfect Tuscan Chicken Pasta
Cook the Chicken Properly: The chicken should be seared to a golden brown but not overcooked. Overcooking can lead to dry chicken, so keep an eye on it and check the internal temperature—it should reach 165°F (74°C).
Use Fresh Ingredients: Fresh spinach and sun-dried tomatoes will enhance the flavor & texture of the dish. Use fresh Parmesan cheese instead of pre-grated cheese for a more vibrant color and richer flavor.
Customize the Pasta: Feel free to use any pasta you like. Short pasta shapes like penne or rigatoni will hold the creamy sauce well, while long pasta like fettuccine provides an elegant touch.
Make It Spicy: If you enjoy little heat, add pinch of red pepper flakes to sauce for an extra kick.
Why You’ll Love Tuscan Chicken Pasta
Tuscan Chicken Pasta isn’t just about the flavors—it’s about the experience. It combines warmth and comfort with sophistication, making it perfect for everything from a casual dinner to a festive celebration. Whether it’s a cozy weeknight meal or a dish to impress a date, this recipe will win hearts (and stomachs) every time.
Its creamy texture, savory ingredients, and easy preparation make it an excellent addition to your recipe repertoire. Plus, Tuscan Chicken Pasta’s flexibility means that you can make it your own, adding extra vegetables, adjusting seasoning, or playing with the pasta choice. One thing’s for sure: once you try it, this dish will quickly become favorite in your culinary collection.
Tuscan Chicken Pasta is the perfect balance of indulgence and simplicity—guaranteed to make every meal feel like an occasion. This dish will undoubtedly impress whether you cook for yourself, your family, or a loved one.
In the fitness world, trends come, but some workouts have stood the test of time. Among these, Pilates has gained significant attention in recent years, especially with social media platforms fueling the rise of what’s been coined “Pilates arms.” While getting caught up in these trends is easy, it’s essential to take a step back and focus on the broader landscape of workouts that can help you build strength, enhance flexibility, and improve overall fitness. In this blog, we’ll look deeper at Pilates while exploring other highly effective Types of Workouts, from yoga and strength training to high-intensity interval training (HIIT) and cardio exercises.
What Is Pilates and Why Has It Gained Popularity?
Pilates is a low-impact, resistance-based exercise routine that builds core strength, flexibility, and body awareness. It uses controlled movements and breathwork to engage the muscles, particularly the trunk and limbs. As seen in the case of celebrities like Miley Cyrus, Pilates can contribute to arm strength and muscle toning. However, it’s important to note that no single workout type will “target” specific body parts in the way many social media trends suggest. Much like strength training, Pilates helps build muscle and increase flexibility, but achieving visible results in any body area also requires a combination of fat loss and overall muscle growth.
Complementing Pilates with Other Types of Workouts
While Pilates is beneficial for improving flexibility and strength, it’s even more effective when combined with other forms of exercise. Whether you aim to improve cardiovascular fitness, increase muscle mass, or boost overall endurance, incorporating a variety of workouts into your fitness routine is key to reaching your goals. Let’s dive into other popular types of workouts you can try alongside Pilates:
High-Intensity Interval Training (HIIT)
HIIT is workout method that alternates short bursts of intense exercise with periods of low-intensity exercises. It’s known for improving cardiovascular health, burning fat, and boosting endurance. When combined with Pilates, HIIT can provide a balanced fitness routine that improves strength and cardiovascular fitness. You can even incorporate HIIT intervals into Pilates routines for an added challenge.
Yoga
Yoga is ancient practice focusing on strength, mindfulness. Much like Pilates, yoga enhances flexibility, balance, and mental clarity. Incorporating yoga into your routine will complement Pilates’s flexibility benefits, improving your range of motion and helping to prevent injury. In addition, yoga’s focus on breathwork can enhance Pilates performance by teaching you to control your breath while performing movements.
Strength Training
Strength training aims to build muscle mass by using resistance exercises.While Pilates involves some resistance-based movements, incorporating more targeted strength training, such as weightlifting or resistance bands, can help you build stronger muscles, including those in your arms. Combining Pilates with strength training exercises will give you a well-rounded approach to toning your body and increasing muscle strength.
Cardio Workouts
Cardio exercises like running, cycling, swimming, and brisk walking are essential for improving heart health & burning calories. Though Pilates provides an excellent foundation for muscle development and flexibility, incorporating cardiovascular exercises into your routine will ensure you build muscle and burn fat, leading to a leaner physique. Cardio is an excellent addition to your Pilates regimen to help with fat loss and overall fitness.
Dance Workouts
Dance-based exercises, such as Zumba or other forms of dance fitness, are fun and incredibly effective for improving coordination, cardiovascular endurance, and flexibility. Many Pilates enthusiasts also enjoy dance to keep workouts fresh and exciting while working out to music. Adding dance to your routine can also help improve balance and coordination, which are crucial components of Pilates exercises.
Functional Training
Functional training focus on exercises that mimic everyday movements & enhance your body’s ability to perform daily tasks. These exercises, such as squats, lunges, and kettlebell swings, can complement Pilates by improving strength and balance. Functional training helps build overall muscle stability, making your Pilates workouts even more effective.
Aqua Aerobics
For those who prefer low-impact exercises, aqua aerobics can be a fantastic complement to Pilates. The water provides resistance, making it easier on the joints while providing a full-body workout. Aqua aerobics enhances cardiovascular health, flexibility, and muscle endurance without the high risk of injury that some other workouts may have.
Comprehensive Fitness: A well-rounded routine that includes Pilates, cardio, strength training, & flexibility exercises helps improve all aspects of fitness, from strength to endurance.
Variety and Enjoyment: Switching up your workout routine with different exercises keeps things exciting & prevents boredom, making it easier to stick to your goals.
Balanced Muscle Development: While Pilates builds muscle strength and flexibility, other workouts like strength training and HIIT focus on increasing muscle mass, improving fat loss, and boosting endurance.
Conclusion
No matter your fitness goal, embracing various types of workouts, including Pilates, will help you achieve a balanced, functional, and healthy body. While the concept of “Pilates arms” may seem appealing, it’s important to remember that the ideal body is unique to each person. Pilates can help you build strength & flexibility. Still, for a holistic approach to fitness, it’s essential to complement it with other forms of exercise like HIIT, cardio, strength training, and dance. With consistency and the right approach, you’ll be well on your way to achieving your fitness goals.
Are you seeking a fun, unique, and highly effective way to spice up your fitness routine? Look no further than chandelier exercise! No, it’s not about hanging from an actual chandelier but instead performing a dynamic, full-body move that tones muscles, improves coordination, and boosts cardiovascular endurance. Let’s explore everything you need to know about the chandelier exercise, its benefits, and how to incorporate it into your workout routine.
What is the Chandelier Exercise?
The chandelier exercise is a simple yet powerful move that targets multiple muscle groups in one fluid motion. It’s commonly used in functional training programs emphasizing core strength, flexibility, and full-body engagement. By mimicking a chandelier’s graceful, swaying motion, this exercise involves coordinated arm swings and body pivots that engage your core, arms, legs, and shoulders.
Why Should You Add the Chandelier Exercise to Your Routine?
You might wonder, “Why should I bother with the chandelier exercise?” The answer is simple: it offers a full-body workout with numerous benefits. Here are a few reasons why you should consider adding this exercise to your fitness regime:
Full-Body Engagement: The chandelier exercise engages multiple muscle groups, including your arms, legs, shoulders, and core. This makes it efficient to work your entire body in one move.
Improved Coordination: The exercise involves fluid, controlled movements, so it’s perfect for improving your coordination and balance over time.
Boosted Endurance: This dynamic move gets your heart pumping, helping you build cardiovascular endurance while enhancing your stamina.
Low Impact: Unlike high-impact exercises such as jumping or running, the chandelier exercise is gentle on your joints, making it an good option for individuals looking for a low-impact full-body workout.
How to Perform the Chandelier Exercise
Ready to give the chandelier exercise a try? Follow these easy-to-follow steps to perform this dynamic move:
Step 1: Start in a Standing Position
Start by standing straight with your feet positioned shoulder-width apart. Extend your arms before you, keeping your posture straight and your core engaged.
Step 2: Swing Your Arms
Reach both arms overhead as if trying to touch a chandelier. Slowly and with control, bring your arms down, leading with your hands, lowering them to shoulder height.
Step 3: Pivot and Move Your Feet
As you lower your arms, pivot your feet and rotate your body in a smooth, circular motion. Your movement should feel fluid and graceful like a chandelier gently swaying in the wind.
Step 4: Repeat the Motion
Continue moving your arms and body in a circular, fluid pattern. Coordinate your arm and leg movements while maintaining good posture & engaging your core throughout the exercise.
Step 5: Increase Intensity (Optional)
You can add weights or increase your speed to intensify the chandelier exercise. This will help you build more strength & endurance over time.
Tips for Getting the Most Out of Your Chandelier Exercise
For the best results, here are a few tips to keep in mind as you practice the chandelier exercise:
Focus on Control: Instead of rushing through the movement, focus on controlled, deliberate motions. This will ensure you’re correctly engaging the target muscles.
Engage Your Core: Make sure your core remains active throughout the exercise. This will improve balance and help you maintain proper posture.
Start Slow: If you’re new to this exercise, start at a slow pace. Gradually increase speed & intensity as you become more comfortable with the movement.
Combine with Other Moves: To create a more challenging workout, combine the chandelier exercise with squats, lunges, or push-ups.
Benefits of the Chandelier Exercise
The chandelier exercise is more than just a fun move—it has various benefits for your fitness journey. Here’s why you should consider adding it to your routine:
Strengthens Key Muscle Groups: By engaging the upper and lower body, the chandelier exercise helps strengthen essential muscles, including your arms, legs, and core.
Improves Balance and Flexibility: The flowing, circular movements promote better balance and flexibility over time, making this exercise an excellent choice for individuals looking to improve their overall body control.
Boosts Cardiovascular Health: As a dynamic, full-body exercise, the chandelier move helps get your heart rate up, improving your cardiovascular endurance.
Low-Impact Alternative: If you’re seeking a low-impact exercise that still delivers great results, the chandelier exercise is an excellent option that puts less stress on your joints.
Conclusion
The chandelier exercise is a fun and effective full-body workout that provides many benefits, from improved coordination and balance to strengthened muscles and increased cardiovascular endurance. Whether you’re beginner or seasoned fitness enthusiast, this exercise can be modified to suit your needs.
So why not give it a try? Add the chandelier exercise to your workout routine today and start enjoying the benefits of this dynamic, low-impact move. You’ll be amazed at how it challenges your body and leaves you feeling more potent than ever!
If you’ve ever struggled to achieve the perfect curl or wave with your hair, you’re not alone. Finding the right hair styling tool that complements your unique hair type is crucial for achieving flawless results while minimizing heat damage. Whether you have fine, thick, or curly hair, a hair curler is essential for creating versatile and stunning styles. In this guide, we’ll walk you through the different hair types and help you choose the best curler for your needs.
Understanding Different Hair Types
Before diving into the specifics of hair curlers, it’s essential to understand different hair types & how they affect the styling process. Each hair type has unique characteristics that can influence the effectiveness of various styling tools.
Fine Hair: Fine hair is typically softer and thinner, which can make curls difficult to hold. To avoid excessive damage, it’s essential to use a hair curler that offers adjustable heat settings and is gentler on the hair.
Thick Hair: Thick hair minister to be stronger & more resilient, but due to its density, it can be harder to curl. You’ll need a curler that heats up quickly and offers high heat for long-lasting curls.
Curly Hair: If you have curly hair, use a curler to enhance and define your natural curls. Look for a curler with features that can create uniform curls that help you control the shape and volume.
Coarse Hair: Coarse hair is more resistant to styling and requires a curler with higher heat settings to achieve smooth, defined curls. Ceramic or tourmaline-coated curlers are often the best option to prevent frizz and breakage.
Now that we have a basic understanding of hair types let’s explore the top hair curlers on the market and how they cater to different hair types.
Top Hair Curlers for Different Hair Types
Vega I-Curl Hair Curler
Best For: Fine to medium hair types
Why It’s Great: The Vega I-Curl is perfect for those with finer hair, as it features a ceramic-coated barrel that ensures even heat distribution and minimizes heat damage. With adjustable heat settings, this curler can be customized for your hair type, allowing you to achieve everything from soft waves to tight curls without worrying about damaging your delicate strands.
Key Features:
Adjustable temperature settings up to 200°C, ideal for fine hair.
Ceramic coating is designed to protect hair from heat damage.
Quick heat-up time for convenience.
AGARO HC6001 Hair Curler
Best For: Medium to thick hair types
Why It’s Great: The AGARO HC6001 hair curler is an excellent option for those with thicker or medium-textured hair. Its 25mm ceramic-coated barrel works well to smooth and curl the hair. It reaches 200°C, making it hot enough to handle denser hair while maintaining safety and performance.
Key Features:
Heats up to 200°C, perfect for thick hair.
Ceramic coating infused with tourmaline to reduce frizz.
Cool touch tip for added safety during styling.
Tash Hair Twirl-Automatic Cordless Hair Curler
Best For: Curly or coarse hair types
Why It’s Great: If you already have curly hair and want to enhance or define your curls, the Tash Hair Twirl Automatic Cordless Hair Curler is a game-changer. This cordless curler offers six adjustable temperature settings, permitting you to tailor the heat to your hair type for consistent and flawless curls.
Key Features:
It is cordless and rechargeable, making it convenient for travel.
Automatic curling function for easy styling.
Adjustable temperature to suit different hair types.
Urban Yog MakeMeeBold Automatic Hair Curler
Best For: Coarse to very thick hair types
Why It’s Great: The Urban Yog MakeMeeBold Automatic Hair Curler is designed for coarse or thick hair. With adjustable temperature settings & a ceramic coating, this curler provides smooth, shiny curls without frizz. The dual-direction control also helps create a variety of curls, whether you want tight ringlets or loose waves.
Key Features:
Adjustable temperature from 160°C to 220°C, perfect for coarse hair.
Anti-stick function to ensure smooth curls without tangling.
360° swivel cord for added flexibility.
Choosing the Right Curler Based on Your Hair Type
When selecting a hair curler, it’s essential to match the tool with your specific hair type. Here are a few tips:
Fine Hair: Look for a curler with adjustable temperature settings and a ceramic or tourmaline barrel to minimize damage and add shine.
Thick Hair: Opt for a curler that heats up quickly and offers high heat settings to handle the density of your hair.
Curly Hair: Consider an automatic curler or a curling iron with a smaller barrel to enhance and define your natural curls.
Coarse Hair: Choose a curler with high heat capabilities and a coating that prevents frizz, such as ceramic or titanium.
Why Hair Curlers are Essential for Every Hair Type
Hair curlers are versatile tools that can cater to any hair type. Whether you want to add volume, define your natural curls, or create waves, the proper curler can transform your hair and give you the confidence to rock various looks. With features like adjustable heat, ceramic coatings, and easy-to-use designs, these curlers help you easily style your hair and minimize risk of damage.
In conclusion, selecting the proper curler for your hair type is key to achieving the best results. Whether you’re looking to enhance your waves, create bouncy curls, or tame frizz, a curler is perfect for your unique hair type. Choose one that caters to your needs, and enjoy styling your hair like a pro!
Maintaining a balanced diet can challenge many individuals in today’s fast-paced world. Busy schedules, limited access to healthy food, & the pressures of modern life make it challenging to meet all nutritional needs. Supplements like Chamagnga Multivitamins Dominican Republic offer an easy and effective solution to fill those nutritional gaps. Chamagnga has become a trusted brand in the Dominican Republic, catering to diverse health needs across its population.
What Are Chamagnga Multivitamins?
Chamagnga Multivitamins are a comprehensive blend of essential vitamins & minerals that help promote overall health & wellness. These supplements are designed to bridge the gaps in daily nutrition, supporting everything from immune function to energy levels. Champagne is a versatile and practical multivitamin that can meet the unique needs of individuals in the Dominican Republic with tailored formulas for different age groups, including adults, seniors, and children.
Chamagnga stands out in the crowded multivitamin market due to its dedication to quality and its commitment to addressing the specific health needs of people in the Dominican Republic. Here’s why this brand has garnered significant attention:
Tailored Nutritional Support for All Ages Chamagnga Multivitamins Dominican Republic offer formulations catering to different life stages. For adults, the focus is on boosting energy and enhancing immune function. The multivitamins support bone health and cognitive function for seniors, ensuring they age gracefully and stay active. Meanwhile, Chamagnga offers a range of products for children that promote healthy growth and development.
High-Quality Ingredients One of the reasons Chamagnga has become a household name in the Dominican Republic is its commitment to quality. The brand uses high-grade, bioavailable ingredients that ensure maximum absorption and effectiveness. Using the best raw materials, Chamagnga ensures that every tablet or capsule delivers the nutrients needed to support daily health.
Trusted by Dominican Consumers Over the years, Chamagnga has earned the trust of many in the Dominican Republic. Its dedication to quality and ingredient transparency has made it a go-to multivitamin for individuals looking to improve their nutritional intake. Whether you’re looking to boost your immunity, support your energy levels, or enhance cognitive function, Chamagnga provides a reliable solution.
Enhanced Immune Function Chamagnga Multivitamins are rich in Vitamin C and Zinc, two crucial nutrients that help support the immune system. By strengthening your body’s natural defenses, Chamagnga enables you to ward off common illnesses, such as colds and flu, ensuring you stay healthy & active throughout the year.
Increased Energy Levels The B-complex vitamins found in Chamagnga Multivitamins are essential for converting food into energy. By boosting your metabolism and reducing fatigue, these vitamins help keep your energy levels high throughout day, making it easy to tackle daily tasks & stay productive.
Support for Healthy Skin, Hair, and Nails Nutrients such as Biotin, Vitamin E, and Zinc contribute to maintaining healthy, glowing skin and strong hair and nails. Regular use of Chamagnga can help improve your appearance and boost your confidence.
Bone and Joint Health Chamagnga Multivitamins include essential nutrients such as Calcium, Vitamin D, and Magnesium, which are particularly beneficial for seniors. These ingredients help maintain bone density, improve joint function, and reduce the risk of osteoporosis.
Cognitive Benefits For those looking to boost mental performance, Chamagnga Multivitamins Dominican Republic include ingredients that enhance brain function. These nutrients support memory, focus, and cognitive clarity, helping you stay sharp and mentally alert.
How to Incorporate Chamagnga Multivitamins Dominican Republic into Your Daily Routine
To maximize the benefits of Chamagnga Multivitamins Dominican Republic, it’s essential to incorporate them into your routine correctly:
Follow the recommended dosage. Always adhere to dosage instructions on packaging. If you’re unsure about the right amount, consider consulting a healthcare professional to personalize the dosage based on your health needs.
Take Them Consistently Consistency is key. Take your Chamagnga Multivitamin simultaneously each day, preferably with a meal. This will help increase the absorption of nutrients and prevent any potential stomach discomfort.
Complement with a Balanced Diet While Chamagnga Multivitamins Dominican Republic are an excellent supplement, they should not replace a balanced diet. Ensure your daily meals are rich in fruits, vegetables, lean proteins, & whole grains for optimal health.
Potential Side Effects and Precautions
While Chamagnga Multivitamins are generally safe, it’s important to note that taking them on an empty stomach may cause mild gastrointestinal discomfort. If you have any underlying health conditions, are pregnant, or nursing, it’s advisable to consult with healthcare provider before starting any supplement regimen.
Conclusion
Chamagnga Multivitamins have quickly become a staple in the Dominican Republic for those looking to improve their health and well-being. With wide range of formulations tailored to different age groups and health needs, these multivitamins provide a simple yet effective solution to nutritional gaps. Whether you’re seeking to increase your immune function, increase your energy, or promote healthy skin and bones, Chamagnga Multivitamins Dominican Republic offer a comprehensive solution for anyone looking to maintain optimal health in today’s busy world.
When the winter chill sets in, there’s nothing better than a hearty, comforting dish to warm you up. If you’re in the mood for a creamy, flavorful meal that will satisfy everyone at the table, look no further than this Garlic Parmesan Chicken Pasta. This dish perfectly fuses rich Parmesan cheese, savory garlic, and tender chicken—ideal for cozying up after a long day.
What Makes Garlic Parmesan Chicken Pasta So Special?
Garlic Parmesan Chicken Pasta offers a delightful combination of creamy, savory flavors that are rich yet balanced. The garlic-infused cream sauce is the heart of the dish, providing a comforting, velvety texture that clings perfectly to the pasta. The Parmesan cheese adds a nutty, umami depth, while the chicken ensures the dish is filling and satisfying.
This dish is even better because it can be easily made in one pot, saving time on cleanup without sacrificing flavor. Whether you’re cooking for busy weeknight dinner or preparing for a special family gathering, this pasta will never disappoint.
The Key Ingredients
Chicken: Tender, juicy chicken breasts or thighs provide protein and texture to the dish. For quicker prep, you can use boneless, skinless chicken.
Garlic: Fresh garlic is sautéed to release its aromatic flavor, forming the base for the creamy sauce.
Parmesan: Freshly grated Parmesan adds a sharp, nutty flavor that enhances the sauce’s richness.
Cream: Heavy cream creates that luscious, velvety sauce that pairs perfectly with the pasta.
Pasta: A sturdy pasta like penne or rotini works best, as it can hold the sauce without getting soggy.
Step-by-Step Recipe: Creamy Garlic Parmesan Chicken Pasta
Ingredients:
2 chicken breasts, cubed
4 cloves garlic, minced
1 cup heavy cream
1 cup grated Parmesan cheese
1 lb pasta (penne, fusilli, or rotini)
2 tablespoons olive oil
Salt and pepper to taste
Fresh parsley for garnish
Instructions:
Cook the Pasta: Bring pot of salted water to boil. Cook pasta according to instructions till al dente. Drain & set aside.
Cook Chicken: Heat olive oil in large skillet over medium-high heat. Season chicken cubes with salt & pepper, cook until golden brown & cooked through about 6-8 minutes. Remove chicken from the skillet & set aside.
Prepare the Garlic Parmesan Sauce: In the same skillet, add the minced garlic and sauté for 1-2 minutes until fragrant. Be careful not to burn the garlic. Pour in heavy cream, stirring to combine. Let it simmer for 3-5 minutes, allowing it to thicken slightly.
Add Parmesan and Chicken: Stir in the grated cheese, allowing it to melt into cream. Add cooked chicken back into skillet and mix well. Taste and adjust seasoning with salt & pepper.
Combine with Pasta: Add cooked pasta to skillet, tossing everything together until pasta is well-coated with the creamy garlic Parmesan sauce. Garnish with fresh parsley for pop of color.
Serve and Enjoy: Serve your creamy garlic Parmesan chicken pasta warm with a side salad or some crusty bread for dipping.
Tips to Elevate Your Garlic Parmesan Chicken Pasta
Add Veggies: While the classic recipe is delicious, you can boost its nutritional value by add on vegetables spinach, broccoli, or peas. These will not only add color but also complement creamy sauce perfectly.
Customize the Chicken: If you prefer a different chicken cut, try using thighs for a juicier bite or even grilled chicken for a smoky flavor.
Make it Spicy: For bit of heat, add pinch of red pepper flakes to sauce. This adds a subtle kick without overpowering the dish.
Cheese Variations: While Parmesan is the star, mix in other cheeses, such as Asiago or mozzarella, for a richer flavor profile.
Use Fresh Garlic: This dish has a fragrant, savory base. Avoid using garlic powder, as it won’t provide the same depth of flavor.
Why You’ll Love This Garlic Parmesan Chicken Pasta
Quick & Easy: This recipe is ready in under 30 minutes, making it the perfect option for busy weeknights when you still want a flavorful, satisfying meal.
Creamy Comfort: The rich, creamy sauce makes this dish a comfort food classic that everyone will love, even picky eaters!
Whether you make it for a family dinner or serve it at a cozy winter gathering, Garlic Parmesan Chicken Pasta will surely be a hit. It’s easy to prepare, versatile, and comforting—a perfect dish to enjoy all season long.
As you enjoy this flavorful dish, get creative and experiment with different add-ins or seasonings. The creamy garlic Parmesan sauce is a base that allows for endless variations, so feel free to adapt it to your tastes. Happy cooking!
Few cuts of beef rival the versatility and richness of the chuck roast when it comes to hearty, flavorful meals. Commonly referred to as pot roast or chuck roll, this budget-friendly cut is a favorite among home cooks and professional chefs. Whether you’re slow-cooking it to tender perfection or experimenting with bold flavors, Chuck Roast Recipes offer endless possibilities for satisfying dishes.
What is Chuck Roast?
Chuck roast comes from the back shoulder of the steer, a long section of meat located between the ribs and backbone. This large, marbled cut typically weighs around 20 pounds and is prized for its rich flavor and tender texture when cooked properly. Its affordability and adaptability make it a staple for comforting family meals and impressive dinner party dishes.
The Difference Between Chuck Roast and Clod Roast
While the chuck roast is known for its marbling, the clod roast—its leaner counterpart—comes from the outer shoulder. Clod roast is tougher due to its muscle composition and is often used for stews or ground beef. Both cuts shine in recipes that call for slow cooking, but chuck roast is especially well-suited for dishes requiring a balance of tenderness and flavor.
Key Comparison:
Feature
Chuck Roast
Clod Roast
Location
Back shoulder
Outer shoulder
Texture
Marbled, tender
Lean, tougher
Ideal Cooking Method
Braising, slow cooking
Stewing, braising
Price Per Pound
$6.21 (average)
$4.49 (average)
How to Cook Chuck Roast
Cooking chuck roast low & slow is the key to unlocking its tender, juicy potential. Below are some tried-and-true methods:
Slow Cooker Chuck Roast Recipe
Combine chuck roast with onions, carrots, potatoes, and beef broth in a slow cooker.
Add seasoning like garlic, rosemary, thyme, and a splash of red wine.
Cook on low for 8-10 hours until meat falls apart.
Oven-Braised Chuck Roast
Sear the roast in a Dutch oven with olive oil to lock in the flavors.
Add broth, tomatoes, and herbs before covering and cooking at 325°F for 3-4 hours.
Serve with mashed potatoes for classic comfort meal.
Tender Chuck Roast Variations
Try a chuck roast recipe inspired by international flavors for a unique twist. Add soy sauce, ginger, & sesame oil to an Asian-inspired dish, or use chipotle peppers for a smoky, southwestern flair.
Why Choose Chuck Roast?
Chuck roast recipes are ideal for budget-conscious cooks who don’t want to compromise on flavor. Its marbling ensures a juicy result, while its versatility allows for countless meal ideas, from hearty pot roasts to shredded beef tacos.
Tips for Maximum Tenderness:
Always sear the roast before slow cooking to enhance its flavor.
Permit roast to rest for 15 minutes before slicing to help retain its juices.
Use meat thermometer to ensure internal temperature reaches at least 190°F for shreddable tenderness.
Best Chuck Roast Recipes for Every Occasion
If you’re searching for crowd-pleasing dishes, these chuck roast recipes are must-tries:
Classic Pot Roast: Simmered with root vegetables for a comforting meal.
Italian Beef Sandwiches: Shredded chuck roast with Italian spices and peppers.
Beef Stroganoff: Tender chuck roast chunks in a creamy mushroom sauce.
Conclusion
Whether cooking for a weeknight dinner or a special gathering, chuck roast recipes are a foolproof way to deliver big flavors on a budget. From slow-cooker classics to innovative international dishes, the possibilities are endless. Embrace the versatility of this affordable cut, and let your culinary creativity shine!
Gastroesophageal Reflux Disease (GERD) influence millions worldwide, causing discomfort & interrupting daily life with symptoms like heartburn, acid regurgitation, and indigestion. A carefully designed diet can be pivotal in managing GERD, reducing symptoms, and improving overall health. This 7 day GERD diet plan is tailored to help alleviate symptoms while promoting balanced nutrition.
Why a GERD Diet Plan Works
A GERD-friendly diet reduces triggers like high-fat, acidic, and spicy foods while incorporating low-fat, alkaline, and nutrient-rich options. Key principles include eating smaller, more frequent meals, avoiding lying down after eating, and maintaining hydration.
Post-Meal Habits: Avoid lying down for at least 2-3 hours after eating.
Cooking Methods: Opt for baking, grilling, and steaming over frying.
Portion Control: Small, frequent meals are better than large portions.
Conclusion
This 7 day GERD diet plan offers a practical guide to managing symptoms while enjoying flavorful and nutritious meals. Choosing the right foods and avoiding triggers can significantly improve your digestive health & quality of life. Start implementing this plan today and experience the benefits of a GERD-friendly lifestyle!
 Ideas for Styling a Gray and Green Living Room
 Gray and Green Color Schemes for Inspiration
 Ingredients:
 Ingredients:
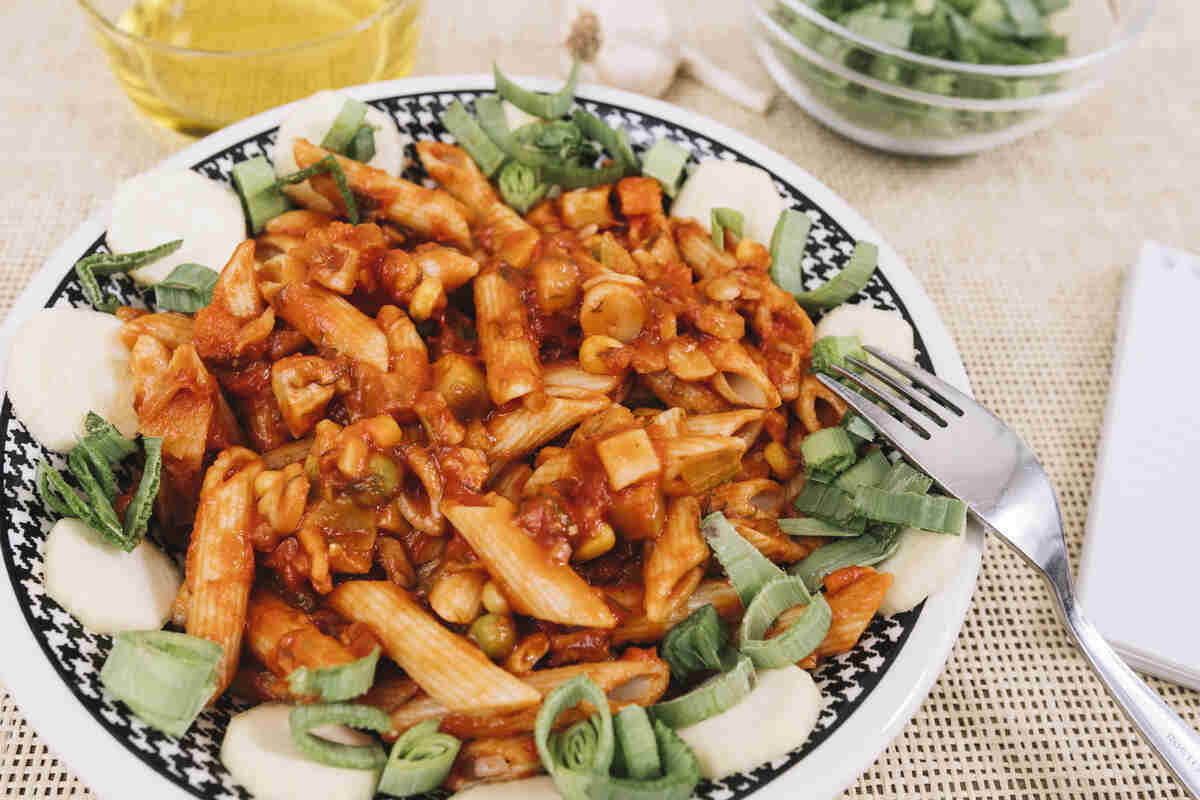 Why Tuscan Chicken Pasta Works So Well
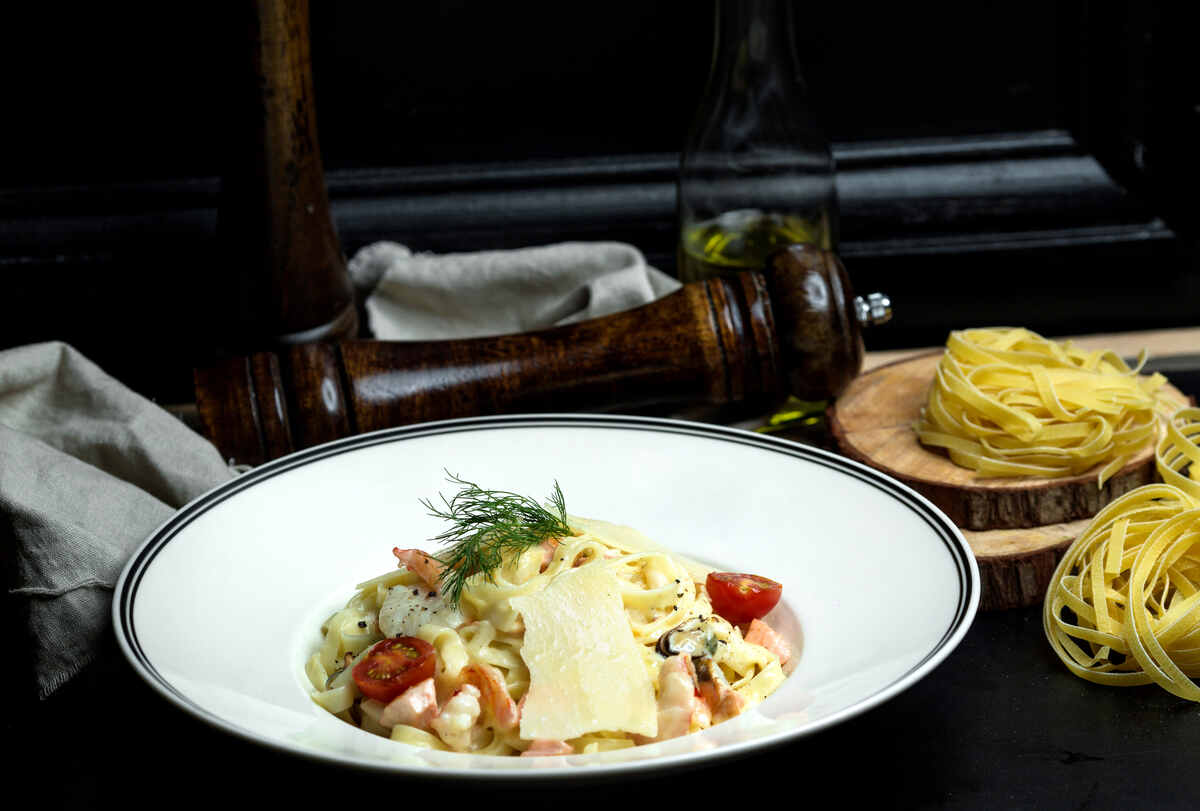 Why You’ll Love Tuscan Chicken Pasta
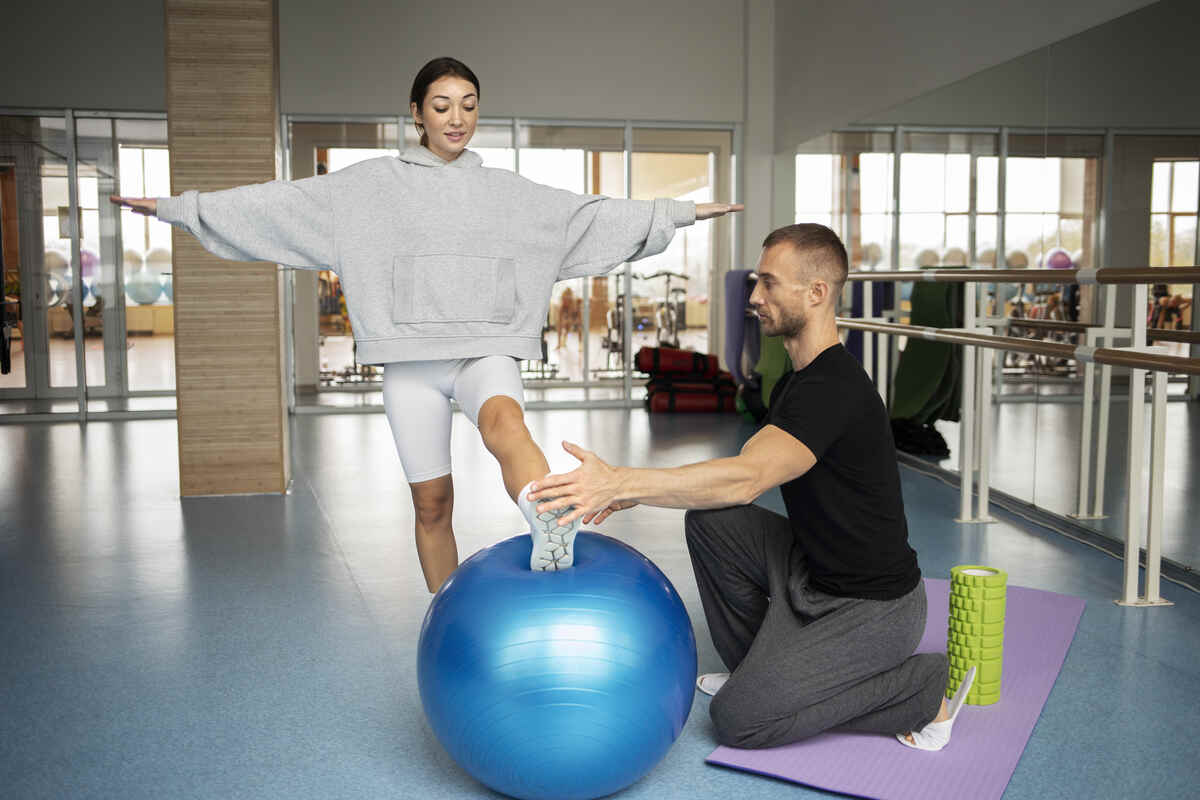 Complementing Pilates with Other Types of Workouts
 Conclusion
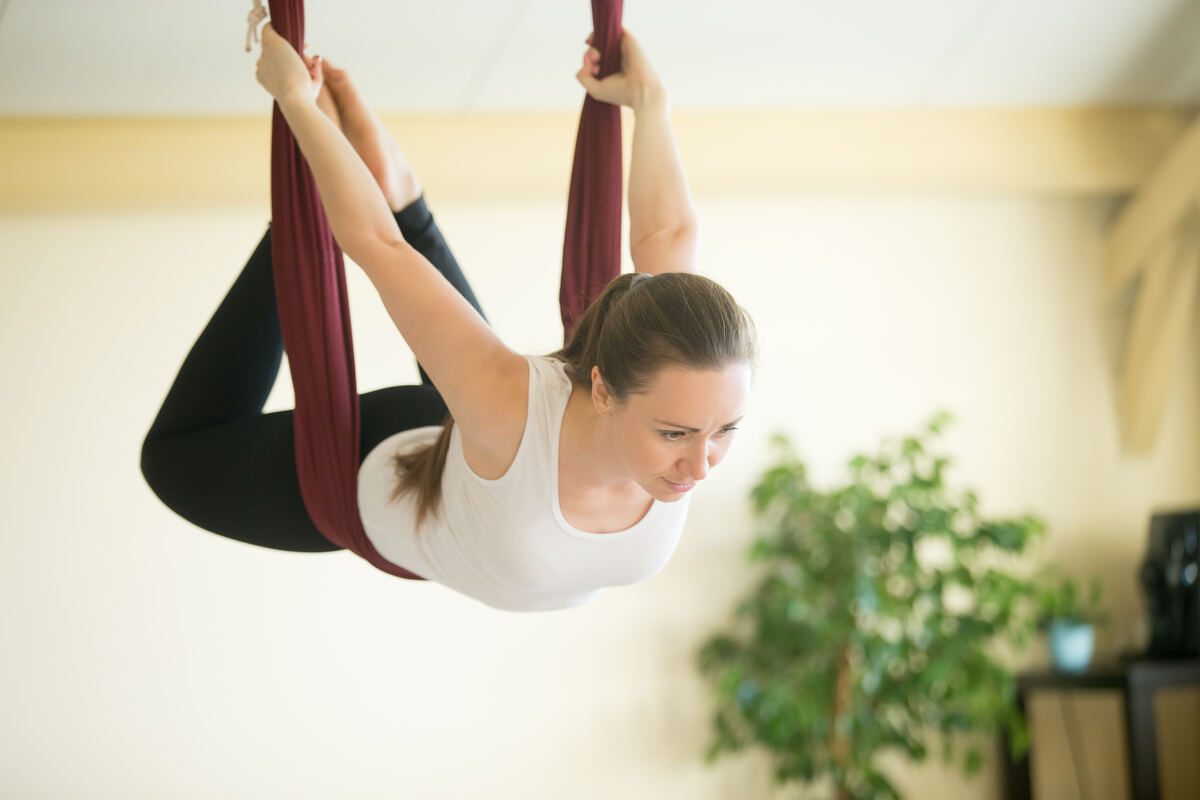 Why Should You Add the Chandelier Exercise to Your Routine?
 Conclusion
 Top Hair Curlers for Different Hair Types
 Why Hair Curlers are Essential for Every Hair Type
 Why Choose Chamagnga Multivitamins Dominican Republic?
 Follow the recommended dosage. Always adhere to dosage instructions on packaging. If you’re unsure about the right amount, consider consulting a healthcare professional to personalize the dosage based on your health needs.
 The Key Ingredients
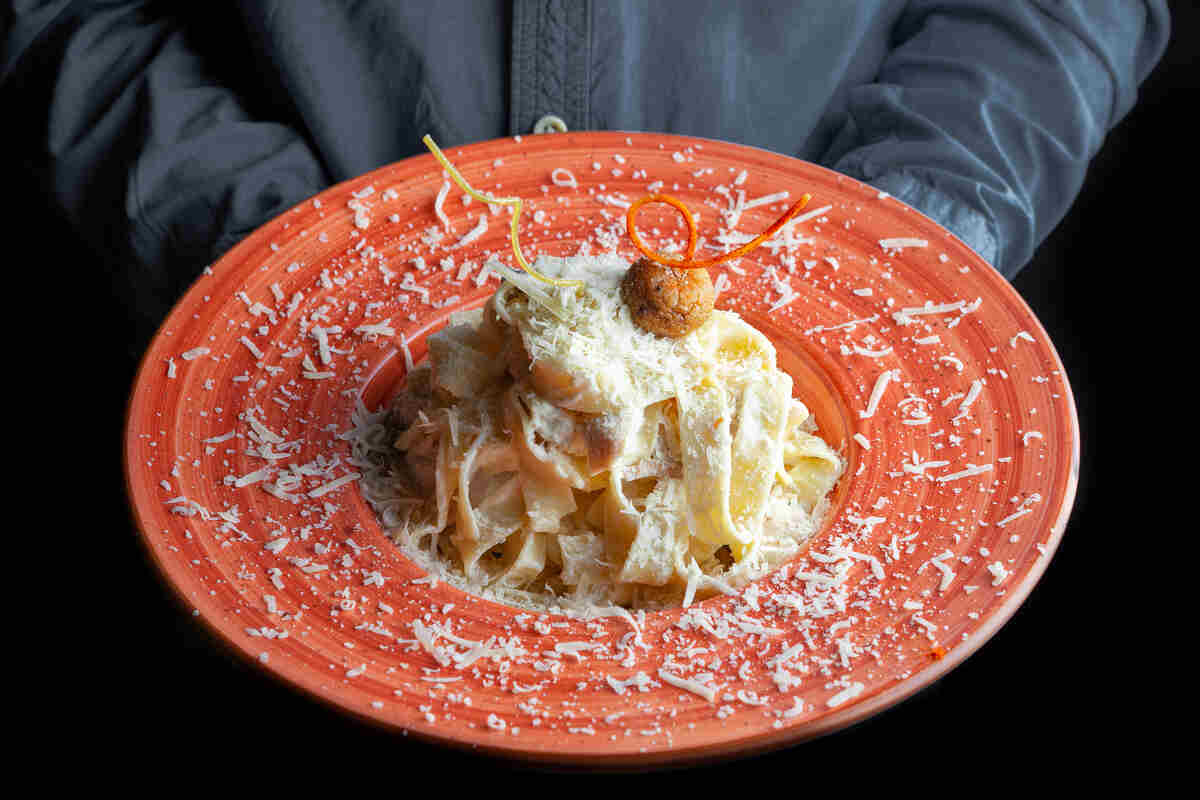 Final Thoughts
 The Difference Between Chuck Roast and Clod Roast
 Tips for Maximum Tenderness:
 Foods to Include in GERD Diet Plan
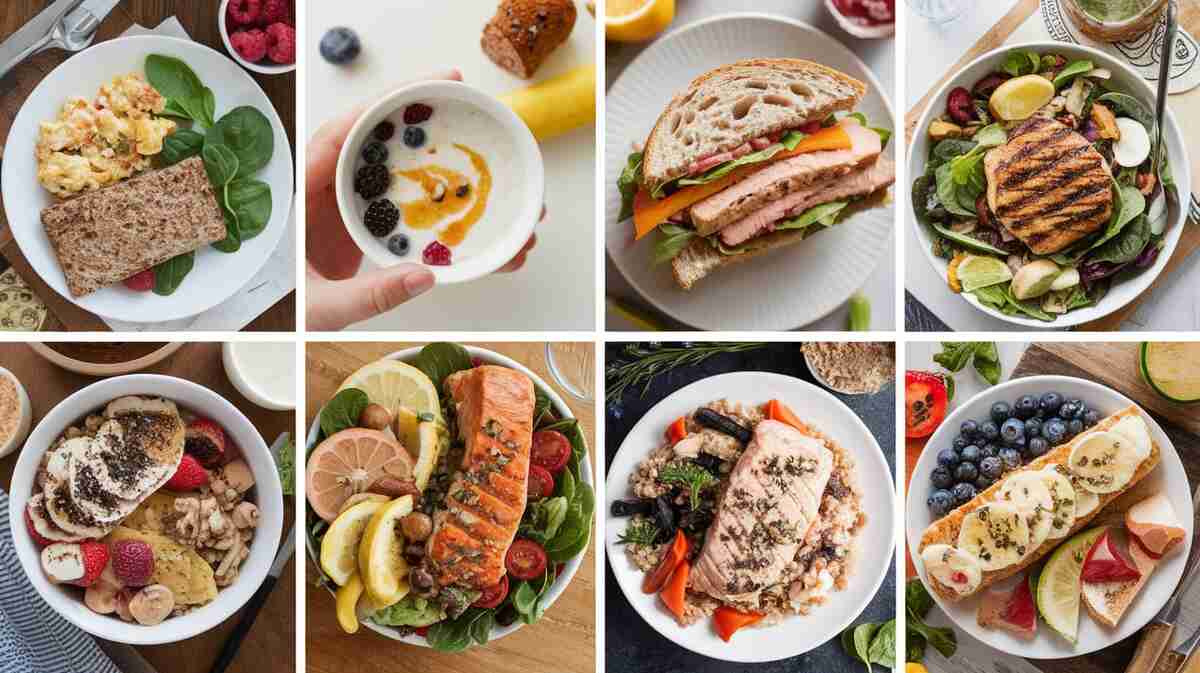 Day 1
Day 1