[vc_row][vc_column][vc_column_text]In the world of weeknight dinners, there’s nothing quite as satisfying as a hearty, creamy dish that comes together quickly and effortlessly. That’s exactly where garlic parmesan chicken pasta shines. This recipe delivers on all fronts—rich in flavor, easy to make, and packed with protein. Whether you’re cooking for family, friends, or just treating yourself, this meal will easily become a favorite on your menu.
Why You’ll Love This Dish
This meal is the ideal balance of savory, creamy, and cheesy goodness. The garlic and Parmesan provide a robust flavor that compliments the tender chicken and pasta. The best part? It’s quick to prepare, making it the perfect option for hectic weeknights when you want to prepare a handmade meal without devoting a lot of time to the kitchen.
The combination of fresh garlic and Parmesan cheese adds a rich, aromatic base to the dish, while the creamy sauce brings everything together in a velvety finish. The chicken provides a hearty, satisfying bite, and the pasta soaks up every bit of that delicious sauce. It’s a complete meal that you can serve in under 30 minutes.
Here’s a simple and delicious recipe for garlic parmesan chicken pasta:
A beautifully arranged flat lay of the essential ingredients for making Garlic Parmesan Chicken Pasta – from fresh chicken breasts to Parmesan cheese, garlic, and herbs.
Ingredients:
2 chicken breasts, skinned and boneless (cubed)
8 oz pasta (penne, fettuccine, or your choice)
4 cloves garlic (minced)
1 cup heavy cream
1 cup grated Parmesan cheese
1 tablespoon olive oil
1 tablespoon butter
1 teaspoon Italian seasoning
Salt and pepper to taste
Fresh parsley (chopped, for garnish)
Red pepper flakes (optional for a little heat)
Ingredients Breakdown
To make garlic parmesan chicken pasta, you’ll need some simple ingredients that you probably already have in your pantry and fridge:
Chicken Breasts: The protein star of this dish. Chicken is tender and absorbs the sauce wonderfully.
Garlic: Fresh garlic is key here, offering that bold and delicious flavor that pairs beautifully with Parmesan cheese.
Parmesan Cheese: The hero ingredient, it gives the sauce a rich and nutty flavor that compliments the creaminess of the sauce.
Heavy Cream: This makes the sauce luxuriously creamy and adds to the richness of the dish.
Pasta: You can use any pasta you like—penne, fettuccine, or even bowtie pasta. Each variety gives the dish its own texture.
Italian Seasoning: A mixture of dried herbs, such as oregano, thyme, and basil adds an extra layer of flavor to the chicken.
Olive Oil and Butter: These fats provide the base for browning the chicken and making the sauce extra flavorful.
Salt and Pepper: Simple but essential for bringing all the flavors together.
Fresh Parsley: To brighten the dish and give it some color and freshness.
How to Make Garlic Parmesan Chicken Pasta
Creamy Garlic Parmesan Chicken Pasta being prepared on the stove with succulent chicken breasts and rotini pasta.
There are a few easy stages in this recipe, and in no time, you’ll have a delicious meal ready to serve.
Cook the Pasta:
Begin by boiling your pasta as directed on the packet. Don’t forget to add a generous amount of salt to the water, as this enhances the flavor of the pasta. Once cooked, drain it and set it aside.
Sear the Chicken:
While the pasta is cooking, season your chicken cubes with salt, pepper, and Italian seasoning. Heat a large skillet with melted butter and olive oil over medium heat. After adding the chicken, sauté it for 6 to 8 minutes, or until it is cooked through and golden brown. When finished, take the chicken out of the skillet and place it somewhere else.
Prepare the Sauce:
Within the same frying pan, add the chopped garlic and reduce the heat. Cook, stirring occasionally, until aromatic, about 1 minute; do not let it burn. After adding the heavy cream, thoroughly blend. After letting the cream simmer for a few minutes, gradually stir in the Parmesan cheese. Continue to stir up until the sauce thickens and turns creamy, melting the cheese.
Combine and Serve:
Add the cooked chicken back into the skillet and toss to rub it in the sauce. Then, add the drained pasta and toss everything together until each bite is covered in that luscious garlic-Parmesan sauce. Serve hot, garnished with more Parmesan cheese if desired and fresh parsley.
Tips for the Perfect Garlic Parmesan Chicken Pasta
Don’t overcook the chicken: Overcooking chicken can make it dry and tough. Make sure to cook it until just done to keep it juicy and tender.
Use freshly grated Parmesan: Freshly grated Parmesan cheese melts better and has a more intense flavor compared to pre-shredded cheese.
Control the heat: When making the garlic sauce, be sure to lower the heat so the garlic doesn’t burn. Burnt garlic can turn bitter and affect the overall taste of the dish.
Pasta options: While you can use any pasta, short pasta like penne or fusilli tends to hold the sauce better and is easier to eat with the chicken pieces.
Why This Dish Is Perfect for Busy Weeknights
A perfectly plated serving of Garlic Parmesan Chicken Pasta – creamy, delicious, and topped with seared chicken slices and fresh parsley. Ideal for a cozy evening meal.
One of the best things about garlic parmesan chicken pasta is how quickly it comes together. In under 30 minutes, you have a complete meal that feels gourmet but requires minimal effort. It’s also a great option for meal prep. Just prepare a big quantity and refrigerate any leftovers for up to three days. The flavors actually intensify as the dish sits, making it a delicious option for lunch or dinner the next day.
Pairing Suggestions
For a complete meal, you can pair garlic parmesan chicken pasta with a light side salad or garlic bread. A crisp Caesar salad adds a refreshing contrast to the rich pasta, while any remaining sauce on your plate can be soaked up by the garlic bread. For drinks, a glass of chilled white wine like Chardonnay or Sauvignon Blanc complements the creamy, garlicky flavors perfectly.
Conclusion
If you’re looking for a delicious, comforting dish that’s easy to make, garlic parmesan chicken pasta is the answer. Its creamy garlic Parmesan sauce, tender chicken, and perfectly cooked pasta come together in a harmony of flavors that are sure to impress. Best of all, it’s a meal that’s ready in a flash, making it ideal for any busy night of the week. Give it a try, and it just might become a staple in your household.[/vc_column_text][/vc_column][/vc_row][vc_row][vc_column width=”1/1″][us_separator size=”small”][us_text text=”Frequently Asked Questions (FAQ)” link=”%7B%22url%22%3A%22%22%7D” tag=”h2″][vc_tta_accordion][vc_tta_section title=”Can I use a different type of pasta for this recipe?” tab_link=”%7B%22url%22%3A%22%22%7D”][vc_column_text]Yes! You can use any pasta you prefer, such as fettuccine, penne, or even whole wheat pasta. The recipe is versatile and works well with most types of pasta.[/vc_column_text][/vc_tta_section][vc_tta_section title=”Can I substitute the chicken with another protein?” tab_link=”%7B%22url%22%3A%22%22%7D”][vc_column_text]Absolutely! You can use shrimp, turkey, or even tofu as a substitute for chicken in this dish. Just adjust the cooking time accordingly for your chosen protein.[/vc_column_text][/vc_tta_section][vc_tta_section title=”Can I make this dish ahead of time?” tab_link=”%7B%22url%22%3A%22%22%7D”][vc_column_text]Yes, Garlic Parmesan Chicken Pasta can be made ahead of time. Store it in an airtight container in the refrigerator for up to 3 days. Reheat on the stovetop with a little cream or milk to restore its creamy texture.[/vc_column_text][/vc_tta_section][vc_tta_section title=”Can I make this recipe gluten-free?” tab_link=”%7B%22url%22%3A%22%22%7D”][vc_column_text]Yes! Simply substitute regular pasta with your favorite gluten-free pasta. The other ingredients are naturally gluten-free, making this dish easy to adapt for gluten-free diets.[/vc_column_text][/vc_tta_section][vc_tta_section title=”How do I prevent the sauce from becoming too thick?” tab_link=”%7B%22url%22%3A%22%22%7D”][vc_column_text]
If your sauce becomes too thick, you can thin it out by adding a little more cream, milk, or pasta water until you reach your desired consistency.
[vc_row][vc_column][vc_column_text]Chickpea pasta has emerged as a favorite among health-conscious individuals, offering a nutritious, protein-packed, and gluten-free alternative to traditional wheat pasta. Whether you’re looking for a healthy weeknight dinner or a satisfying meal for a gluten-free lifestyle, chickpea pasta provides a versatile base that fits into any diet. In this post, we’ll explore the nutritional benefits of chickpea pasta, share practical tips for cooking it, and offer culinary inspiration to enhance your enjoyment of this plant-based pasta in innovative ways.
Why Choose Chickpea Pasta?
Gluten-Free Alternative: Made from ground chickpeas, this pasta is naturally gluten-free. It’s an excellent option for people with celiac disease or gluten sensitivity while providing a satisfying pasta-like texture.
High in protein and dietary fiber: Chickpea pasta is a powerhouse of nutrients, Provides around 11-15 each serving contains 8 grams of dietary fiber and 16 grams of protein. This makes it ideal for those on plant-based diets or anyone seeking a protein boost without adding meat. Dietary fiber aids in the regulation of digestion and enhances satiety, which is key for maintaining healthy eating habits.
Low Glycemic Index: Since chickpea pasta is lower in carbs and has a low glycemic index, it acts to stabilize blood glucose levels, making it a great option for people managing diabetes or anyone wanting to avoid sugar spikes and crashes.
Vitamins and Minerals: Chickpeas are rich in essential nutrients such as iron, magnesium, potassium, and folate, all of which contribute to maintaining energy levels and overall health.
Tips for Cooking Chickpea Pasta
Cooking chickpea pasta is easy, but it does require a few adjustments to ensure the perfect texture. Follow these tips to avoid messiness and enjoy a well-cooked dish:
Use plenty of water: Chickpea pasta tends to foam more than traditional pasta, so be sure to use ample water—around 4-6 cups per 8 ounces of pasta. This helps reduce foam buildup and ensures the pasta cooks evenly without becoming sticky.
Cook to al dente: Chickpea pasta cooks faster than wheat-based varieties, so keep a close eye on it. Aim for al dente (firm to the bite) in about 7-9 minutes. Excessive cooking can result in a soft and mushy consistency, so taste test it a minute or two before the recommended time on the package.
Rinse after cooking: After draining, give your chickpea pasta a quick rinse with cold water. This step removes excess starch, which helps prevent clumping or stickiness, ensuring your pasta retains its structure and texture.
Recipe Spotlight: Garlic-Lover’s Mushroom Chickpea Pasta
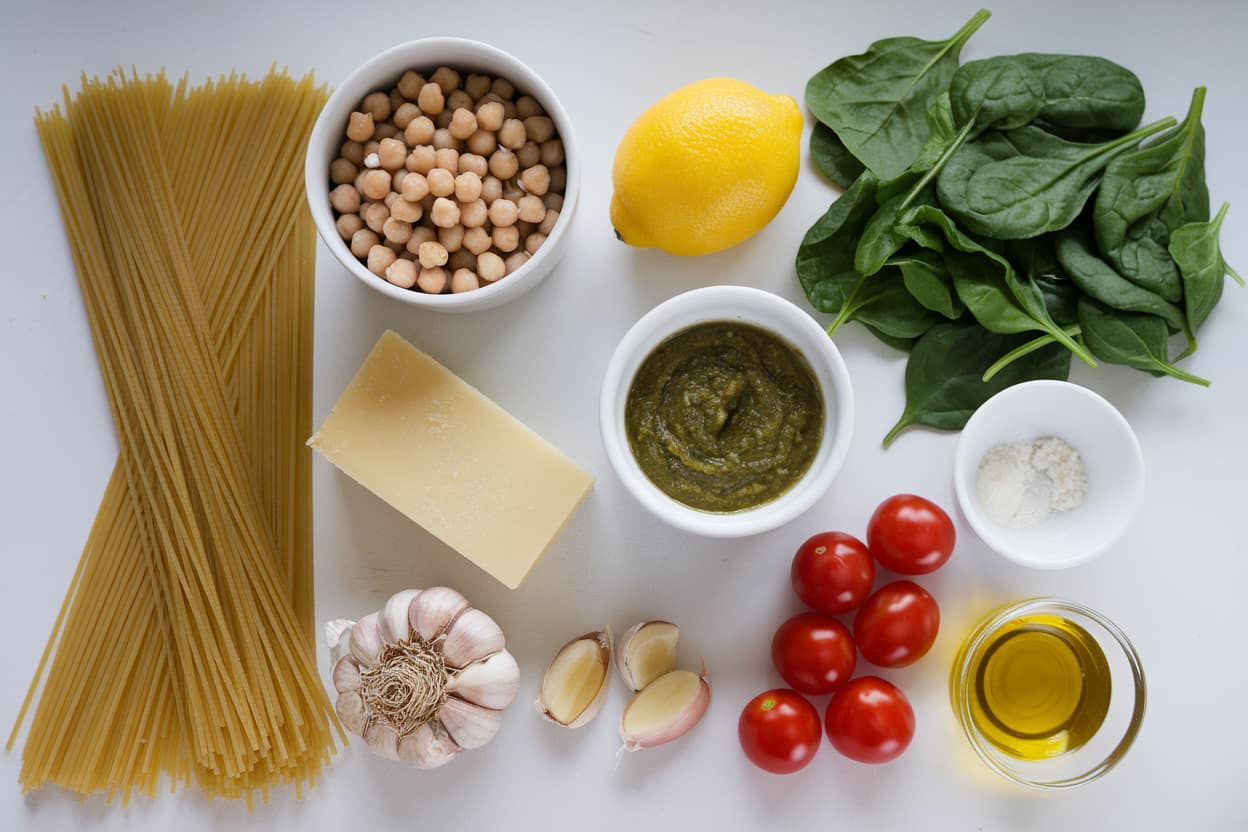
Ingredients laid out for a delicious Mediterranean pasta: spaghetti, chickpeas, spinach, cherry tomatoes, Parmesan cheese, pesto, garlic, and olive oil.
This recipe brings together garlic, mushrooms, and chickpea pasta for a quick and healthy dinner. The meal is plant-based and can be prepared in under 30 minutes, making it perfect for busy weeknights.
Ingredients:
8 oz chickpea pasta
2 tbsp olive oil
1 cup mushrooms, sliced
3-4 cloves garlic, minced
1/4 cup Parmesan cheese (optional)
Salt and pepper to taste
Fresh parsley for garnish
Instructions:
Pasta should be cooked as focused on the package and then set aside.
Garlic should be sautéed until fragrant in a skillet with heated olive oil over medium heat.
When the mushrooms are soft, add them and simmer, about 5 minutes.
Mix the cooked pasta with the mushrooms and garlic. Season with salt, pepper, and (if preferred) Parmesan cheese.
Garnish with parsley and serve hot.
This dish combines the savory flavor of mushrooms with the robust taste of garlic, while chickpea pasta adds a healthy twist. You can also add fresh spinach, grilled chicken, or roasted veggies to make the meal more substantial.
Other Recipe Ideas
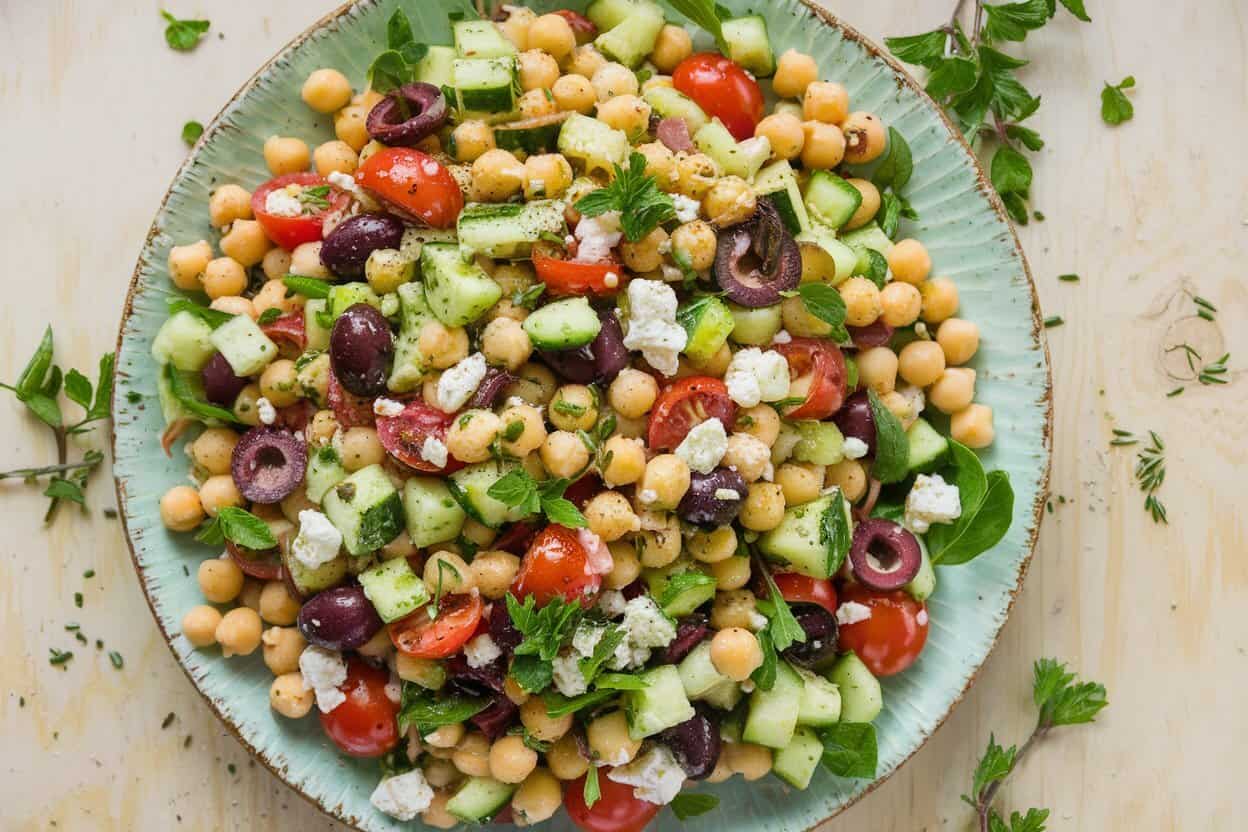
A refreshing Mediterranean chickpea salad with cucumbers, cherry tomatoes, Kalamata olives, feta cheese, and fresh herbs, perfect for a light and healthy meal.
Pesto Chickpea Rotini
This Mediterranean-inspired dish combines chickpea pasta with a vibrant pesto sauce, sautéed spinach, crunchy pistachios, and creamy feta. It delivers the perfect balance of plant-based protein, healthy fats, and antioxidants, making it both satisfying and nutritious. This recipe is a go-to for anyone craving bold flavors with a healthy twist.
Chickpea Pasta Salad
For a cool and refreshing option, toss chickpea pasta with diced cucumbers, juicy cherry tomatoes, and a light vinaigrette. Add in Kalamata olives and extra chickpeas for a protein boost, creating a perfect make-ahead meal that’s brimming with Mediterranean flavors and ready to enjoy at any time.
Spicy Chickpea Arrabbiata
Turn up the heat with this fiery chickpea pasta dish! Toss your pasta with a spicy arrabbiata sauce made from garlic, crushed tomatoes, and red pepper flakes. Add some sautéed spinach or roasted veggies for extra nutrition. This high-protein meal is perfect for spice lovers looking for a bold, energizing dinner.
Creamy Avocado Chickpea Pasta
Blend ripe avocados, garlic, lemon juice, and a little olive oil to make a silky sauce for your chickpea spaghetti for a rich and creamy touch. Toss with cherry tomatoes, fresh basil, and a sprinkle of red pepper flakes for a dish that’s bursting with healthy fats and bright flavors. This meal is a perfect mix of indulgence and nutrition.
Lemon Garlic Chickpea Spaghetti
Brighten up your dinner with a simple yet zesty lemon garlic chickpea spaghetti. Cook chickpea pasta to al dente and toss with a light sauce of olive oil, minced garlic, and freshly squeezed lemon juice. Add chopped parsley and grated Parmesan cheese for a fresh, citrusy dish that’s quick to prepare and packed with protein and flavor.
Chickpea Pasta and Sustainability
Climbing plants with green pods growing in a sunlit field.
Switching to chickpea pasta isn’t just a smart choice for your health—it’s also an environmentally friendly one. Chickpeas, the star ingredient in this pasta, are a member of the legume family, which plays a vital role in sustainable agriculture. Unlike traditional wheat, chickpeas require significantly less water to grow and are highly drought-tolerant, making them an ideal crop for areas facing water scarcity. This reduces the overall water footprint of your meal compared to wheat-based pasta.
Incorporating chickpea pasta into your diet also helps reduce the demand for resource-intensive crops like wheat and corn, contributing to a more diverse and resilient food system. Because chickpeas are a plant-based protein source, when compared to proteins derived from animals, they have a smaller carbon impact. Choosing chickpea pasta can therefore help decrease the environmental impact of your meals, making it a great option for those looking to align their food choices with eco-friendly values.
Ultimately, by opting for chickpea pasta, you’re not only nourishing your body with a nutritious, plant-based diet while simultaneously promoting more environmentally friendly farming methods and making the world a healthier place.
Conclusion
Chickpea pasta is a versatile, nutrient-rich option that fits into many dietary lifestyles, from gluten-free to plant-based and low-carb. Whether you want to cook a quick weeknight dinner like Garlic-Lover’s Mushroom Chickpea Pasta or prepare a meal-prepped salad, chickpea pasta delivers on taste, texture, and health benefits. By making the switch, you’re not only fueling your body with wholesome, plant-based nutrition but also contributing to a more sustainable future.[/vc_column_text][/vc_column][/vc_row][vc_row][vc_column width=”1/1″][us_separator size=”small”][us_text text=”Frequently Asked Questions (FAQ)” link=”%7B%22url%22%3A%22%22%7D” tag=”h2″][vc_tta_accordion][vc_tta_section title=”What is chickpea pasta made from?” tab_link=”%7B%22url%22%3A%22%22%7D”][vc_column_text]Chickpea pasta is made primarily from chickpea flour, which is made by grinding dried chickpeas into a fine powder. This makes it a gluten-free alternative to traditional wheat pasta.[/vc_column_text][/vc_tta_section][vc_tta_section title=”Is chickpea pasta a good source of protein?” tab_link=”%7B%22url%22%3A%22%22%7D”][vc_column_text]Yes, chickpea pasta is a great source of plant-based protein. It typically contains about 14-20 grams of protein per serving, compared to about 7 grams in traditional pasta.[/vc_column_text][/vc_tta_section][vc_tta_section title=”How does chickpea pasta compare to regular pasta in terms of taste and texture?” tab_link=”%7B%22url%22%3A%22%22%7D”][vc_column_text]Chickpea pasta has a slightly nutty flavor and a firmer texture than regular pasta. While it may taste a bit different, many people find it to be a satisfying and delicious alternative.[/vc_column_text][/vc_tta_section][vc_tta_section title=”How do you cook chickpea pasta?” tab_link=”%7B%22url%22%3A%22%22%7D”][vc_column_text]Chickpea pasta is cooked similarly to regular pasta. Boil it in salted water for about 7-10 minutes, or until it reaches your desired level of tenderness. It’s important to stir it occasionally to prevent sticking.[/vc_column_text][/vc_tta_section][vc_tta_section title=”Can chickpea pasta be used in all the same recipes as regular pasta?” tab_link=”%7B%22url%22%3A%22%22%7D”][vc_column_text]Yes, chickpea pasta can be used in most recipes that call for regular pasta. It works well in salads, stir-fries, and traditional pasta dishes. Just keep in mind that its unique flavor and texture might slightly alter the final dish.[/vc_column_text][/vc_tta_section][vc_tta_section title=”Section”][/vc_tta_section][/vc_tta_accordion][/vc_column][/vc_row]
Worldwide, millions of people suffer from depression, a prevalent mental health problem. An individual’s capacity to operate is severely hampered by depression, which is characterized by intense feelings of melancholy, pessimism, and disinterest in everyday tasks. Because of their advanced education and clinical experience, advanced practice nurses (APNs) play a more and more important role in addressing depression. This comprehensive overview explores how APNs contribute to the treatment of depression, their responsibilities, treatment methodologies, and the unique benefits they offer in mental health care.
What is Depression?
Depression, recognized clinically as Major Depressive Disorder (MDD), is a severe mood disorder that disrupts daily life. It’s more than just feeling down or having a bad day; it is a persistent state of emotional turmoil that affects various aspects of life, including work, relationships, and self-esteem. The impact of depression can be profound, often leading to challenges in performing daily tasks and a decreased quality of life.
Symptoms and Diagnosis of Depression
Symptoms
Depression manifests utilizing a range of symptoms, including persistent feelings of sadness, loss of interest or pleasure in daily activities, significant changes in appetite or weight, disrupted sleep patterns, and chronic fatigue. Individuals may also experience feelings of worthlessness or excessive guilt, difficulty concentrating, and, in severe cases, suicidal thoughts. Recognizing these symptoms is important for accurate diagnosis and effective treatment.
Diagnostic Process
Advanced Practice Nurses (APNs) play a vital role in the diagnostic process for depression. They conduct comprehensive assessments that include detailed interviews and standardized questionnaires, to gauge the intensity of depression symptoms, use a tool like the Patient Health Questionnaire-9 (PHQ-9). Examining the patient’s medical history in detail aids in determining any underlying issues or risk factors, leading to a well-informed diagnosis and tailored treatment plan.
The Role of Advanced Practice Nurses in Depression Treatment APN
Who Are APNs?
Advanced Practice Nurses (APNs) are registered nurses who have pursued advanced education and training, typically holding Master’s or Doctoral degrees. They are equipped to provide a wide range of healthcare services, comprising the diagnosis and treatment of mental health conditions such as depression. Their advanced training allows them to offer comprehensive care, combining pharmacological and therapeutic approaches.
Types of APNs and Their Roles in Depression Treatment
Nurse Practitioners (NPs)
Nurse Practitioners (NPs) specializing in psychiatric and mental health are instrumental in treating depression. They perform thorough assessments to diagnose depression and determine its severity. NPs have the authority to prescribe antidepressants and manage medication regimens, adjusting treatments as necessary based on patient response. They also provide various forms of psychotherapy, including Cognitive-Behavioral Therapy (CBT) and Interpersonal Therapy (IPT), to help patients manage their symptoms effectively.
Clinical Nurse Specialists (CNSs)
Clinical Nurse Specialists with a focus on psychiatric-mental health provide advanced care and consultation for managing depression. They develop individualized treatment plans and offer specialized care for complex cases. CNSs also play a critical role in educating patients and their families about depression and its management, helping them understand treatment options and coping strategies.
Psychiatric Nurse Practitioners
The focus of psychiatric nurse practitioners is mental health treatment, managing complex cases of depression with a combination of pharmacological and therapeutic interventions. They work collaboratively with psychiatrists, psychologists, and other healthcare professionals to ensure a comprehensive & integrated approach to treatment.
Responsibilities of APNs in Depression Treatment
Comprehensive Assessment
One of the primary responsibilities of APNs is to conduct comprehensive assessments of patients with depression. This process involves gathering detailed information about the patient’s emotional state, behavior, and medical history. APNs use various assessment tools and methods to evaluate the severity of symptoms, identify contributing factors, and develop personalized treatment plans.
Medication Management
APNs play a crucial role in medication management for depression. They prescribe antidepressants and monitor their effectiveness and side effects. This entails scheduling routine follow-up visits to evaluate the patient’s reaction to medicine, adjust dosages, or switch medications if necessary. Effective medication management is essential for achieving optimal treatment outcomes and minimizing adverse effects.
Therapeutic Interventions
In addition to medication management, APNs provide various forms of psychotherapy to help patients manage depression. Cognitive-behavioral Therapy (CBT) is used to help patients identify and change negative idea patterns & behaviors that contribute to their depression. Interpersonal Therapy (IPT) focuses on enhancing interpersonal relationships and communication skills. Psychodynamic Therapy explores unconscious processes and past experiences that may influence current depressive symptoms. Each of these therapeutic approaches offers valuable tools for managing and overcoming depression.
Patient Education
An APN’s responsibility includes educating patients about their disease and available treatments. APNs offer information about the causes of depression, its treatments, and symptom management techniques. They help patients understand their diagnosis, make informed decisions about their care, and adopt coping strategies to improve their overall well-being.
Collaborative Care
APNs work as part of a multidisciplinary team to provide thorough care for patients with depression. They collaborate with psychiatrists, psychologists, social workers, and additional medical specialists to handle every facet of the patients’ health. Patients will receive comprehensive care that addresses their physical, emotional, and social needs thanks to this joint technique.
Crisis Intervention
In cases of severe depression or crises, APNs provide immediate intervention and stabilization. This includes assessing the risk of self-harm or suicide, developing safety plans, and coordinating with emergency services or hospitalization if needed. Effective crisis intervention is crucial for ensuring the safety & well-being of patients in critical situations.
Treatment Approaches for Depression by APNs
Pharmacological Treatments
Antidepressants are a cornerstone of depression treatment APN. APNs prescribe various classes of antidepressants based on the patient’s specific symptoms and history.
Selective Serotonin Reuptake Inhibitors (SSRIs), like fluoxetine (Prozac) and sertraline (Zoloft), are commonly prescribed due to their favorable side effect profile. These medications work by growing serotonin levels in the brain, which helps alleviate depressive symptoms.
Serotonin-norepinephrine reuptake Inhibitors (SNRIs), including venlafaxine (Effexor) and duloxetine (Cymbalta), affect both serotonin and norepinephrine. They are used to treat a range of depressive symptoms and can be particularly effective for patients who do not respond to SSRIs.
Tricyclic Antidepressants (TCAs), like amitriptyline and nortriptyline (Pamelor), are often reserved for cases that are resistant to other treatments. While effective, TCAs can have more side effects and require careful monitoring.
Monoamine Oxidase Inhibitors (MAOIs), including phenelzine (Nardil) and tranylcypromine (Parnate), are typically used for severe cases of depression or when other medications have failed. MAOIs require dietary restrictions to avoid potentially dangerous interactions.
Psychotherapy
Cognitive-Behavioral Therapy (CBT): APNs use CBT to help patients address and change negative thought patterns and behaviors. This evidence-based Therapy is effective in treating depression by assisting individuals to develop healthier thinking and coping strategies.
Interpersonal Therapy (IPT): This Therapy focuses on improving interpersonal relationships and communication skills. APNs use IPT to help patients address relationship issues and life transitions that may contribute to their depression.
Psychodynamic Therapy: By exploring unconscious processes and past experiences, psychodynamic Therapy helps patients understand how these factors influence their current emotional state. APNs use this approach to increase self-awareness and address underlying issues contributing to depression.
Lifestyle and Complementary Therapies
Exercise: Regular physical activity is an essential adjunct to depression treatment. APNs may recommend exercise as it has been shown to improve mood and overall well-being, enhancing the effectiveness of other therapies.
Nutrition: A balanced diet supports mental health and can impact mood and energy levels. APNs may provide nutritional counseling to help patients adopt healthy eating habits that complement their depression treatment.
Mindfulness and Relaxation Techniques: Techniques such as mindfulness meditation, yoga, & deep breathing exercises can help control your stress and improve emotional regulation. APNs often incorporate these techniques into treatment plans to support overall mental health.
Support Groups: Support groups provide a sense of community and reduce feelings of isolation. APNs may refer patients to groups where they can connect with others experiencing comparable challenges and receive mutual support.
Benefits of APN-Led Depression Treatment
Personalized Care
APNs provide personalized care that is tailored to each patient’s unique needs. By conducting comprehensive assessments and developing individualized treatment plans, APNs ensure that care is specific to the patient’s symptoms, history, and preferences.
Enhanced Accessibility
APNs enhance accessibility to mental health services, particularly in underserved areas where mental health professionals may be scarce. Their ability to offer medication management and psychotherapy helps bridge gaps in care and improve patient access.
Continuity of Care
APNs build long-term relationships with their patients, providing continuity of care that is crucial for managing chronic conditions like depression. This ongoing support helps improve treatment adherence, track progress, and make essential adjustments to treatment plans.
Collaborative Approach
APNs work within multidisciplinary teams, contributing to a holistic approach to depression treatment. Their collaboration with other healthcare professionals ensures that all aspects of the patient’s health are addressed, leading to better overall outcomes.
Challenges and Considerations
Addressing Mental Health Stigma
The stigma surrounding mental illness may discourage people from getting depression treatment. APNs are essential in lowering stigma because they encourage candid conversations about mental health and offer sympathetic, non-judgmental care. APNs encourage patients to seek and continue treatment by fostering a supportive environment.
Training and Competency
To deliver effective depression treatment, APNs must stay informed about the latest research & advancements in mental health care. Ongoing education and professional development are essential to maintaining competency and ensuring the provision of high-quality care.
Insurance and Access Issues
Insurance coverage and healthcare policies can impact access to mental health services. APNs may encounter challenges related to insurance limitations and reimbursement rates, which can affect the availability of care for some patients. Advocacy for mental health parity and improved insurance coverage is necessary to address these issues and ensure equitable access to treatment.
Conclusion
Advanced Practice Nurses (APNs) play a crucial role in Depression Treatment APN, offering a comprehensive approach that includes assessment, medication management, therapy, and patient education. Their expertise and dedication contribute significantly to managing depression, ensuring that patients receive personalized, effective care. As mental health services evolve, APNs remain integral in improving patient outcomes and advancing the overall quality of depression treatment. Their commitment to providing compassionate and informed care is essential for helping individuals manage and overcome depression, ultimately enhancing their quality of life.
Frequently Asked Questions (FAQ)
Why am I depressed?
Depression can result from a combination of factors, including genetic predisposition, brain chemistry imbalances, life events, and chronic stress. Personal experiences and underlying mental health conditions also play a role.
What is Depression Treatment APN?
Depression Treatment APN involves care provided by an Advanced Practice Nurse specializing in managing depression through assessment, medication, therapy, and education.
How does Depression Treatment APN work?
Depression Treatment APN offers personalized care plans, including medication management, therapy sessions, and patient education tailored to individual needs.
What is TMS treatment for depression?
Transcranial Magnetic Stimulation (TMS) is a non-invasive treatment for depression that uses magnetic fields to stimulate nerve cells in the brain. It is used when other treatments, like medication and therapy, are ineffective.
How do you stop feeling so depressed?
To stop feeling so depressed, consider seeking professional help through therapy or medication and engage in regular exercise, a balanced diet, and healthy sleep habits. Building a support network and practicing mindfulness or relaxation techniques can also be beneficial.
How to control anxiety and depression?
Control anxiety and depression by seeking professional help, engaging in therapy or medication, and practicing stress-reduction techniques like mindfulness and exercise. Maintaining a healthy lifestyle and a supportive network also plays a key role.
[vc_row][vc_column][vc_column_text]If you’ve ever wanted to recreate that restaurant-quality salmon pasta at home, you’re in the right place. While it might seem like an indulgent dish reserved for special occasions, Make salmon pasta with a few essential materials and techniques, and it’s surprisingly easy. Whether you’re a beginner or a seasoned cook, this step-by-step guide will help you master the secrets to preparing a gourmet salmon pasta meal that’s bursting with flavor.
Let’s dive in and discover how to bring this delicious dish from sea to table!
Why Salmon Pasta Deserves a Spot in Your Recipe Arsenal
Salmon pasta is an elegant, yet approachable dish that combines the richness of tender salmon with the comforting bite of pasta. The flavors are incredibly versatile, allowing you to craft anything from a light, lemony pasta for summer evenings to a creamy, indulgent version perfect for cozy nights in.
What makes this dish truly stand out is how easy it is to customize to your taste. Whether you prefer smoked salmon or fresh filets, creamy sauces or zesty, oil-based ones, salmon pasta offers endless opportunities for experimentation. It’s also loaded with nutrients—pasta gives you a filling energy boost, while salmon is a fantastic source of protein and omega-3 fatty acids.
Here’s a detailed recipe for a classic Creamy Garlic Salmon Pasta that’s sure to impress your family or guests:
Ingredients:
2 salmon fillets (fresh or smoked)
300g pasta (fettuccine, penne, or your choice)
1 cup heavy cream
1/2 cup grated parmesan cheese
2 cloves garlic (minced)
2 tbsp butter
1 lemon (zest and juice)
Fresh parsley (chopped)
Salt and pepper to taste
1/2 cup reserved pasta water
Follow these steps to create your own delicious version of salmon pasta, tailored to your preferences and ready to impress:
To make gourmet salmon pasta, you’ll want to start with high-quality, fresh ingredients. This dish’s flavors are basic, so the quality of your salmon and pasta really shines through.
Fresh salmon fillet being lightly seared in a pan with lemon slices, ready for a delicious and healthy meal.
Salmon
You have a few options when it comes to the salmon:
Fresh Salmon Filets: These are perfect for those who prefer tender, juicy flakes of fish throughout the dish. Fresh filets give you more control over the texture.
Smoked Salmon: For a rich, salty flavor with a slightly firmer texture, smoked salmon is an excellent choice. It’s especially good in lighter sauces, like lemon and herb butter.
Canned Salmon: If you’re short on time, canned salmon can work as a quick alternative. It’s not as luxurious, but it still delivers on flavor.
Pasta
The texture of pasta might vary significantly depending on the kind you select:
Long Pasta: Fettuccine, spaghetti, or linguine are excellent for creamy sauces, where you want the sauce to cling to every strand.
Short Pasta: Penne, rigatoni, or farfalle work well in chunkier dishes where you want the pasta to catch bits of salmon and vegetables.
Fresh Herbs and Vegetables
For an added layer of flavor and brightness, fresh herbs like parsley, dill, or basil complement salmon beautifully. Vegetables like spinach, cherry tomatoes, or asparagus can add color and texture, while boosting the nutritional value of the dish.
Preparing the Salmon
How you prepare your salmon depends on the type you’re using:
Fresh Salmon Filets: Season your filets with salt, pepper, and a bit of lemon zest. Melt a tiny amount of butter or olive oil in a pan over medium heat. Sear the salmon filets skin-side down for about 4-5 minutes, The salmon should be cooked through but still moist after two to three minutes of cooking on the opposite side. Remove and set aside.
Smoked Salmon: Since it’s already cooked, smoked salmon is ready to add straight into the pasta. Simply slice it into thin strips or bite-sized pieces and toss it in at the last step.
Canned Salmon: Drain the canned salmon and break it into chunks. You can add it to the sauce once it’s heated to keep things quick and easy.
Cooking the Pasta to Perfection
Boil a large pot of salted water for your pasta. Cooking it until it’s firm to the bite but not overly done is crucial. Overcooked pasta becomes mushy, especially when mixed with sauce.
Save roughly ½ cup of the pasta water before emptying. This water with starch is a covert weapon for creating a silky sauce that clings to the pasta, adding richness without needing to overload on cream or butter.
Crafting the Perfect Sauce
Creamy garlic sauce simmering in a pan, garnished with herbs for added flavor.
The sauce can make or break your salmon pasta, and fortunately, there are several routes you can take depending on the style you’re aiming for.
Creamy Garlic Sauce
A classic creamy garlic sauce is indulgent yet easy to make. Here’s how to do it:
The pan used to cook the fish was added a tablespoon of butter and sauté minced garlic for about a minute until fragrant.
Pour in heavy cream (about 1 cup) and let it simmer for a couple of minutes.
Stir in grated parmesan cheese (½ cup) and allow the sauce to thicken.
Once the sauce has reached a smooth and creamy consistency, add a small amount of the pasta water that was set aside.
Add some salt, pepper, and freshly squeezed lemon juice for seasoning.
Lemon Butter Sauce
For a lighter option, try a lemon butter sauce:
In a pan over low heat, melt the butter.
Simmer the minced garlic for one minute after adding it, then whisk in the lemon zest and juice.
Once the sauce is thoroughly combined and somewhat thickened, whisk in a few tablespoons of olive oil and a little amount of the pasta water that was set aside.
For a hit of freshness, toss in some fresh herbs, such as parsley or dill.
Bringing It All Together
Now that your pasta, salmon, and sauce are ready, it’s time to combine everything:
To the sauce, add the cooked pasta, tossing well to coat every strand or piece.
Flake the seared salmon into chunks and gently fold it into the pasta.
If you’re using smoked salmon, stir it in at this stage to warm it through without cooking it further.
Add any finishing touches, like fresh herbs, a sprinkling of parmesan cheese, or lemon zest.
For extra flavor, try tossing in lightly sautéed spinach, roasted cherry tomatoes, or grilled asparagus.
Perfect Presentation
Serving up a delicious plate of creamy fettuccine pasta with tender salmon, accompanied by a refreshing glass of white wine and a light salad – a perfect gourmet meal.
The final step in creating your gourmet salmon pasta is presentation. Even a simple dish can look elegant with the right plating. Here’s how to make it restaurant-worthy:
Twirl the Pasta: Use tongs to twirl a portion of pasta onto each plate, creating a neat mound.
Top with Salmon: Gently place larger chunks of salmon on top of the pasta.
Finish with Garnishes: As a final touch, add some red pepper flakes, fresh parsley, and a tiny quantity of extra virgin olive oil.
Serve with a Side: For a complete meal, serve your salmon pasta with a side of garlic bread or a simple green salad.
Conclusion
Salmon pasta doesn’t have to be complicated or reserved for special occasions. With these step-by-step secrets, you can create a gourmet meal in the comfort of your own kitchen. Whether you’re opting for a creamy garlic sauce or a light lemon butter variation, the use of fresh ingredients is essential for success and mastering simple techniques like cooking your pasta al dente and perfectly preparing your salmon.
So next time you’re in the mood for a sophisticated yet comforting dish, remember these salmon pasta secrets and elevate your dinner to gourmet levels[/vc_column_text][/vc_column][/vc_row][vc_row][vc_column width=”1/1″][us_separator size=”small”][us_text text=”Frequently Asked Questions (FAQ)” link=”%7B%22url%22%3A%22%22%7D” tag=”h2″][vc_tta_accordion][vc_tta_section title=”Can I use a different type of pasta for this recipe?” tab_link=”%7B%22url%22%3A%22%22%7D”][vc_column_text]Yes, while fettuccine is often used for creamy sauces, you can substitute it with other pasta types like spaghetti, linguine, or even penne for a different texture.[/vc_column_text][/vc_tta_section][vc_tta_section title=”What’s the best way to cook the salmon for this dish?” tab_link=”%7B%22url%22%3A%22%22%7D”][vc_column_text]For optimal flavor and texture, grilling or pan-searing the salmon fillets is ideal. You can also bake or poach the salmon if you prefer a lighter cooking method.[/vc_column_text][/vc_tta_section][vc_tta_section title=”Can I use canned or smoked salmon instead of fresh fillets?” tab_link=”%7B%22url%22%3A%22%22%7D”][vc_column_text]Yes, canned or smoked salmon can be used if you’re short on time. However, fresh fillets offer the best taste and texture for this gourmet dish.[/vc_column_text][/vc_tta_section][vc_tta_section title=”How do I make the creamy sauce?” tab_link=”%7B%22url%22%3A%22%22%7D”][vc_column_text]The sauce typically consists of heavy cream, butter, garlic, and Parmesan cheese. You can also add a splash of white wine or lemon juice to enhance the flavor.[/vc_column_text][/vc_tta_section][vc_tta_section title=”What herbs and seasonings work best with salmon pasta?” tab_link=”%7B%22url%22%3A%22%22%7D”][vc_column_text]Fresh dill, parsley, lemon zest, and black pepper are commonly used to season the salmon and pasta, bringing out fresh, zesty flavors. You can also add a pinch of red pepper flakes for heat.[/vc_column_text][/vc_tta_section][vc_tta_section title=”Can I make this dish ahead of time?” tab_link=”%7B%22url%22%3A%22%22%7D”][vc_column_text]While it’s best served fresh, you can prepare the sauce and pasta ahead of time and store them separately. Reheat gently and combine them when you’re ready to serve.[/vc_column_text][/vc_tta_section][vc_tta_section title=”How can I make this dish healthier?” tab_link=”%7B%22url%22%3A%22%22%7D”][vc_column_text]To lighten the dish, use low-fat cream or substitute with Greek yogurt for the sauce. You can also grill the salmon with minimal oil and add more vegetables like spinach or asparagus.[/vc_column_text][/vc_tta_section][vc_tta_section title=”Can I use other seafood instead of salmon?” tab_link=”%7B%22url%22%3A%22%22%7D”][vc_column_text]Absolutely! You can substitute the salmon with shrimp, scallops, or even a white fish like cod or tilapia for a different twist on the dish.[/vc_column_text][/vc_tta_section][vc_tta_section title=”What side dishes pair well with salmon pasta?” tab_link=”%7B%22url%22%3A%22%22%7D”][vc_column_text]This dish pairs well with a light side salad, garlic bread, or roasted vegetables like asparagus or broccoli to complement the rich flavors of the pasta.[/vc_column_text][/vc_tta_section][vc_tta_section title=”How long will leftovers last in the fridge?” tab_link=”%7B%22url%22%3A%22%22%7D”][vc_column_text]Leftover salmon pasta can be stored in an airtight container in the fridge for up to 2-3 days. Reheat on low heat to avoid drying out the salmon.[/vc_column_text][/vc_tta_section][vc_tta_section title=”Section”][/vc_tta_section][/vc_tta_accordion][/vc_column][/vc_row]
A strong stimulant that has an impact on the body and mind is cocaine, and its presence in the system can be a critical concern for individuals undergoing drug testing or managing addiction. If you’re wondering, “How long does cocaine stay in your system” Understanding the factors that influence its detection can be essential for various reasons, from drug testing to health management.
What Is Cocaine?
Cocaine is a powerful stimulant derived from the coca plant, affecting the central nervous system by increasing neurotransmitter levels. It induces intense euphoria and energy but poses severe healthrisks, including cardiovascular problems and addiction. Cocaine is commonly used in forms such as powder and crack, each with varying effects. The drug’s short-lived high can lead to severe physical and psychological issues. Addiction treatment typically includes detoxification, therapy, and support.
How Long Does Cocaine Stay in Your System?
Cocaine generally stays in your system for 2 to 4 days when detected by urine tests, though heavy use can extend this to up to 12 days. Blood tests usually detect cocaine for about 1 to 2 days. Saliva tests can identify it for up to 2 days, while hair follicle tests can reveal use for up to 90 days. Detection times vary based on metabolism, frequency of use, and overall health.
How Cocaine Metabolizes in the Body
Cocaine is rapidly absorbed into the bloodstream once ingested, leading to almost immediate effects. The drug is metabolized above all in the liver, where it is broken down into multiple metabolites, including benzoylecgonine. This metabolite is commonly tested for in drug screenings. The speed at which cocaine leaves your system depends on various factors, including the drug’s metabolism and individual health characteristics.
Factors Influencing How Long Cocaine Stays in Your System
Several individual and external factors affect how long cocaine remains detectable in the body:
Dosage and Frequency of Use
The amount of cocaine used and the frequency of use are critical in determining how long the drug stays in your system. Excessive dosages and frequent application may result in an extended detection window. For instance, a single use of cocaine might be detectable for a shorter period compared to chronic use, which can extend the detection time significantly.
Metabolic Rate
Metabolism varies from person to person. Those with faster metabolic rates may process and eliminate cocaine more quickly than those with slower metabolisms. Factors influencing metabolic rate include age, gender, body mass, and overall health. For example, younger individuals and those with higher muscle mass typically have faster metabolisms.
Body Fat Percentage
Due to its lipophilic nature, cocaine is drawn to and stored in fat cells. Cocaine may stay in the bloodstream longer in people with higher body fat percentages than in people with lower body fat percentages. Since the medication is kept in fat cells, it can be gradually released into the bloodstream, extending the detection window.
Hydration and Diet
The rate at which cocaine is metabolized and eliminated can be influenced by diet and hydration. Staying well-hydrated helps maintain optimal kidney function, which aids in the elimination of toxins from the body. A balanced diet supports overall health and can influence metabolic processes, potentially affecting drug metabolism.
Overall Health
For the metabolism and excretion of drugs, the condition of your kidneys and liver is essential. Cocaine detection times may be prolonged in people with impaired liver or renal function. Diseases like liver illness or kidney impairment can make it more difficult for the body to effectively absorb and get rid of the medication.
Detection Times for Different Drug Tests
Drug testing methods vary in their ability to detect cocaine, each with its detection window. Here’s a breakdown of how long cocaine can be detected utilizing different types of drug tests:
Urine Tests
The most widely utilized technique for identifying cocaine usage is urine testing. Usually, two to four days following consumption is the window of opportunity for the detection of cocaine in urine. However, in cases of heavy or chronic use, cocaine and its metabolites can be detectable for up to 12 days. Urine tests are favored for their ease of use and reliability in detecting recent drug use.
Blood Tests
Blood tests are less typically used for routine drug testing but can be employed in certain situations, such as medical emergencies or legal cases. Cocaine is detectable in blood for a relatively short period, usually 1 to 2 days. Blood tests help detect recent use but may not provide information on past drug use.
Saliva Tests
Saliva tests offer a non-invasive method for drug detection and can typically detect cocaine for up to 1 to 2 days after use. These tests are less intrusive than urine or blood tests and can provide quick results, making them useful for on-site testing or screening.
Hair Tests
Hair follicle tests have the most extended detection window among drug testing methods. Depending on how long the hair sample is, it is possible to detect cocaine in hair for up to 90 days or more. Hair testing offers a history of drug use, making them practical for identifying long-term patterns of cocaine use.
Side Effects of Cocaine Use
While understanding how extended cocaine stays in your system is essential for drug testing, it’s equally crucial to recognize the broader health implications associated with cocaine use:
Cardiovascular Issues
Cocaine use can lead to significant cardiovascular problems, including increased heart rate, elevated blood pressure, and a heightened risk of heart attack. The stimulant effects of cocaine can strain the heart and blood vessels, leading to potential long-term cardiovascular damage.
Neurological Effects
Cocaine can have serious neurological effects, including seizures, strokes, and cognitive impairments. The drug’s impact on the brain’s neurotransmitter systems can disrupt normal brain function, leading to potential long-term neurological issues.
Psychological Impact
The psychological effects of cocaine use can include severe anxiety, paranoia, and hallucinations. Chronic use can lead to mental health disorders and exacerbate pre-existing conditions. Cocaine use can cause extreme exhilaration, which can also result in addiction, further complicating psychological well-being.
Conclusion
If you’re asking, “How long does cocaine stay in your system” It’s essential to consider factors like dosage, metabolism, and testing methods. Cocaine’s presence can be detected through various tests for different periods, with urine tests providing the most common detection window. Understanding these factors can help manage drug testing situations and address health concerns related to cocaine use.
For those struggling with cocaine use, seeking professional help and support is important for recovery and health improvement. Understanding the duration cocaine stays in your system is just one aspect of managing its impact on your life and well-being.
The experience of welcoming a new baby into the family is transformative, and having the appropriate gear makes the adjustment more accessible for both the parents and the infant. With the myriad of products marketed to new parents, it can be daunting to sift through options. Focusing on essential baby and toddler equipment Lumolog is a brilliant starting point. This guide will walk you through the crucial baby gear, covering everything from safety and travel gear to sleep and eating essentials, ensuring you feel confident in your choices.
Safe Sleep Environment for Your Baby
Establishing a safe sleeping environment is one of the top priorities for newborn care. The proper sleep setup ensures your baby gets restful, uninterrupted sleep, which is crucial for their development and well-being.
Cribs
When selecting a crib, prioritize safety and comfort. Choose cribs that either fulfill or above safety requirements established by agencies like the Consumer Product Safety Commission (CPSC). When your baby develops and becomes more mobile, look for features like adjustable mattress heights that let you lower the mattress. Convertible cribs that can transition into toddler beds are also a wise investment, as they provide long-term usability.
Mattresses
Choose a firm, flat mattress that fits snugly in the crib without any gaps. A mattress that is far too soft can pose a risk of suffocation, while gaps can cause entrapment. Ensure the mattress is made from non-toxic materials and is easy to clean.
Bassinets
Bassinets are ideal for babies in their first few months when they are smaller and need frequent nighttime feedings. Many bassinets have features like a rocking motion or soothing sounds to help serene your baby. Ensure the bassinet meets current safety standards with a firm mattress and no soft bedding.
Sleep Safety Tips
Back to Sleep: If you want to lower your baby’s risk of SIDS, always put them to sleep on their back.
Keep it Clear: Keep the sleep area free from pillows, blankets, and stuffed animals. Use a fitted sheet on the mattress and avoid any loose bedding.
Room Sharing: Consider placing the crib or bassinet in your room for the first six months to facilitate nighttime feedings and reduce the risk of SIDS.
Travel Necessities: Car Seats and Strollers
Traveling with your baby requires careful consideration of safety and convenience. The right car seat and stroller will ensure that your baby is safe and comfortable on the go.
Car Seats
Selecting the appropriate car seat is crucial for your baby’s safety. Infant car seats are created to be rear-facing, which is the safest position for newborns. Look for car seats with a 5-point harness system and a base, allowing easy installation and removal. Some models come with an adjustable canopy for sun protection and additional padding for comfort.
Convertible Car Seats
Convertible car seats offer long-term value by transitioning from rear-facing to forward-facing as your child grows. Many models also include a booster seat function, making them a cost-effective choice. Look for seats with multiple recline positions, easy-to-adjust harness systems, and machine-washable covers.
Strollers
Strollers come in various styles, each catering to different needs. When choosing a stroller, consider factors such as size, weight, and ease of maneuverability. Travel systems that consist of an infant car seat and stroller are convenient for parents who frequently move their baby between the car and stroller. If you need a stroller for jogging or rough terrain, a jogging stroller with suspension and larger wheels might be the best option.
Travel Accessories
Car Seat Protectors: These can help protect your car’s upholstery from spills and stains.
Stroller Organizer: A stroller organizer or caddy can keep essential items like diapers, bottles, and wipes within easy reach.
Feeding Equipment for Growing Babies
Feeding your baby is a central part of early parenting, and having the right tools can make the process more enjoyable and less stressful.
Bottles and Nipples
When choosing bottles, select BPA-free ones made from materials like glass or high-quality plastic. Different nipples are designed to mimic the natural flow of breast milk and accommodate your baby’s feeding preferences. Some bottles are created to reduce colic and gas with unique anti-colic systems.
Breast Pumps
A breast pump is a useful instrument for breastfeeding mothers. Electric pumps are often preferred for their efficiency and speed. Consider features like adjustable suction levels, ease of cleaning, and portability. Manual pumps are also a good option for occasional use or travel.
High Chairs
As soon as your child begins solid food, a high chair becomes essential. Look for a high chair with a sturdy frame, adjustable height, and an easy-to-clean tray. Features like a reclining seat and removable dishwasher-safe tray can make mealtimes more convenient. Some high chairs also convert into booster seats for later use.
Feeding Accessories
Bottle Warmers: These can heat breast milk or formula to the optimal temperature.
Baby Food Makers: If you plan to make your baby food, a baby food maker can simplify the process of pureeing fruits, vegetables, and other foods.
Diapering and Hygiene Essentials
Diapering is a frequent task in early parenthood, so having the right supplies can make it more manageable.
Diapers
Choosing between disposable & cloth diapers depends on your preferences and lifestyle. Disposable diapers are convenient and come in a range of sizes and absorbencies. Cloth diapers are eco-friendly and cost-effective but require regular washing and maintenance.
Baby Wipes and Diaper Cream
Select hypoallergenic baby wipes free of fragrances to prevent skin irritation. Diaper cream helps prevent & treat diaper rash; look for creams with natural ingredients, and consult your pediatrician if you have concerns about your baby’s skin.
Changing Tables
A changing table provides a devoted space for diaper changes and helps keep essential items organized. Choose a table with safety features like raised sides to prevent falls, and ensure it has ample storage for diapers, wipes, & other necessities.
Additional Diapering Tips
Changing Pad Covers: Have several covers on hand to make cleaning easier.
Diaper Disposal System: Consider a diaper pail with an odor-control system to manage diaper waste effectively.
Monitoring Your Baby’s Safety
A baby monitor offers tranquility of mind by allowing you to monitor your baby’s safety from another room.
Audio Monitors
Basic audio monitors allow you to hear when your baby wakes up or cries. Look for models with adjustable volume controls and a reliable range. Some audio monitors also have features like a built-in nightlight or soothing sounds.
Video Monitors
Video monitors provide a picture connection to your baby’s sleeping area. Features to look for include vision at night, two-way communication, and temperature monitoring. Smart video monitors can connect to your smartphone, offering real-time updates and additional functionalities like motion detection alerts.
Additional Monitoring Tips
Camera Placement: Ensure the camera is placed in a safe spot where your baby won’t easily reach it.
Regular Checks: Even with a monitor, periodically check on your baby to make certain their safety and comfort.
Comfort and Mobility: Baby Carriers
Baby carriers are a practical solution for keeping your baby close while managing other tasks. They offer various benefits, including comfort and convenience.
Types of Baby Carriers
Wrap Carriers: These carriers wrap a long fabric around your body and baby. They are versatile and can be adjusted to fit different carrying positions.
Structured Carriers: These carriers have padded straps and a supportive frame, making them easier to use and adjust. They often offer multiple carrying positions, including front, hip, and back carries.
Slings: Slings are adjustable and quick to use, making them ideal for shorter periods of babywearing.
Choosing a Carrier
Ensure the carrier supports proper hip development and comforts you and your baby. Follow the manufacturer’s rules for safe use and make adjustments to ensure a snug fit.
Conclusion
Preparing for your baby’s arrival requires thoughtful planning and attention to detail, particularly when it comes to choosing the right equipment. From creating a safe sleep environment with a crib or bassinet to managing daily tasks like feeding, traveling, and diapering, having the right gear ensures both safety and convenience. Focusing on essential baby and toddler equipment Lumolog helps support your baby’s growth and development while making parenting more manageable. Each item plays a crucial role in creating a nurturing and well-organized environment that benefits you and your child.
Frequently Asked Questions (FAQ)
What are the most important items for a newborn?
Key items include a crib or bassinet for safe sleeping, a car seat for travel, and diapers and wipes for hygiene. Feeding supplies like bottles and a breast pump are also essential.
How do I choose the right crib for my baby?
Look for a crib that meets safety standards with no sharp edges. Choose one with adjustable mattress heights and consider convertible designs for long-term use.
What should I look for in a baby car seat?
Ensure the car seat is rear-facing for newborns and easy to install with a base or LATCH system. Convertible options that grow with your child offer extended use.
What are the benefits of a travel system stroller?
Travel system strollers integrate a car seat and stroller, allowing for easy transitions. They are convenient and cost-effective compared to separate purchases.
When should I start using a high chair?
Start using a high chair when your baby begins eating solids, around 6 months old. Look for one with adjustable heights and easy-to-clean features.
Are cloth diapers a good option compared to disposable diapers?
Cloth diapers are eco-friendly and cost-effective over time, but they require more maintenance. Disposable diapers offer convenience and ease of use.
How do baby carriers benefit both the parent and the baby?
Baby carriers allow for close bonding while keeping your hands free. They offer comfort for the baby and convenience for the parent during daily activities.
Papas fritas, or French fries as they are known in many parts of the world, are a universally loved snack that transcends cultures and cuisines. People of all ages enjoy these golden, crispy potato strips, whether as a side dish to a hearty meal or as a snack. The simplicity of papas fritas belies their widespread appeal, making them a staple in homes and restaurants. They can be paired with various dishes, including burgers, steaks, and sandwiches, and even enjoyed with dipping sauces like ketchup, mayonnaise, or aioli.
The Origin of Papas Fritas
The history of Papas Fritas is rich and somewhat contested. The dish is often linked to Belgium, where it’s said that villagers fried potatoes in the late 17th century as a substitute for fish during winter months when rivers were frozen. However, France also claims the invention of the fry, particularly with the term “French fries” emerging in the United States, possibly due to the popularity of French cooking at the time. Whether Belgian or French, papas fritas have traveled far beyond Europe to become a beloved snack globally.
Papas Fritas Recipe
Creating the perfect papas fritas at home requires just a few simple ingredients & basic steps, but attention to detail is critical to achieving that ideal crispiness and flavor.
Ingredients:
Potatoes: Russet potatoes are the greatest option for papas fritas because of their high starch content, which aids in their beautiful crisping. Nevertheless, if another variety appeals to you, feel free to try it.
Oil for Frying: Select an oil with a high smoke point, like vegetable oil, canola oil, or peanut oil. This ensures that the fries cook evenly without burning.
Salt: Simple table salt is commonly used, but you can also try sea salt or flavored salts for a different taste.
Steps:
Preparation: Peel the potatoes (optional, if you prefer a more rustic fry with the skin on). Cut the potatoes into thin, even strips. The size of the fries can vary but aim for uniformity to ensure they cook evenly.
Soaking: Place the potato strips in a bowl of cold water and soak for at least 30 minutes. This helps remove excess starch & prevents the fries from sticking together.
Drying: Drain the water and thoroughly pat the potato strips dry with paper towels. Excess moisture can reason the oil to splatter and prevent crispiness.
Frying: Preheat the oil in a big saucepan with a heavy bottom or deep fryer to approximately 350°F (175°C). Small batches of potatoes should be fried to prevent crowding. Each batch should be fried for four to five minutes, or until crispy and golden brown. Using a slotted spoon, remove and drain onto a plate covered with paper towels.
Seasoning: Immediately after frying, sprinkle with salt while the fries are still hot. You can also experiment with other spices like garlic powder, paprika, or Parmesan cheese.
Papas Fritas Calories and Nutritional Value
Nutrient
100g Serving
Calories
300-350 kcal
Fats
15-20 g
Carbohydrates
30-35 g
Proteins
3-4 g
Fiber
Pequeña cantidad
Sodium
200-300 mg
While papas fritas are a tasty treat, their high calorie and fat content means they should be consumed in moderation. Choosing healthier cooking methods, such as baking instead of frying, and controlling portion sizes can help manage their impact on your diet.
One of the best things about papas fritas is their versatility. Here are some delicious ways to elevate your fries:
Cheese Fries: Melt cheddar, mozzarella, or a blend of cheeses over your fries. Add bacon bits, sour cream, and chives for a loaded version.
Chili Fries: Top your fries with homemade chili and shredded cheese for a hearty meal.
Garlic and Herb Fries: Toss hot fries with minced garlic, fresh herbs like parsley or rosemary, and a drizzle of olive oil.
Sweet Potato Fries: Substitute sweet potatoes for a slightly sweet flavor. Pair with cinnamon sugar for a dessert-like treat or chili powder for a spicy kick.
Spicy Fries: Add heat with cayenne pepper or red pepper flakes. Serve with a spicy slanting sauce such as Sriracha mayo.
Curly Fries: Use a spiralizer to make curly fries. Season with a mix of spices before frying for a unique flavor.
Conclusion
Papas fritas are more than just a simple snack; they are a culinary canvas that can be modified to suit any taste or occasion. Whether you enjoy them plain with a sprinkle of salt or loaded with toppings like cheese and chili, papas fritas offer endless possibilities for enjoyment. Making them at home is easy and allows you to customize the fries to your liking, ensuring they are always perfectly cooked. The next time you’re craving something crispy, golden, and utterly satisfying, try making your papas fritas and experience the joy of this classic dish.
Frequently Asked Questions (FAQ)
What are papa fritas?
Papas fritas are French fries made by deep-frying potato strips until crispy and golden. They are a popular snack or side dish enjoyed globally.
Are papas fritas chips or fries?
Papas fritas are fries, not chips. They are made by deep-frying sliced potatoes, while chips are thin, crisp slices often baked or fried.
What language is papas fritas?
“Papas fritas” is Spanish for “French fries.” The term translates directly to “fried potatoes” in English.
Why are potatoes called papas?
In Spanish, “papas” is the term for potatoes, derived from the Quechua word “papa.” This term was adopted into Spanish due to the influence of indigenous cultures in the Andes.
Coffee lovers are constantly seeking new & exciting ways to enjoy their favorite brew. Among the many variations of coffee drinks, breve coffee stands out for its rich, creamy texture and indulgent flavour. Whether you’re a seasoned coffee enthusiast or just curious about this unique beverage, this guide will take you through everything you need to know about breve coffee—its origins, how it’s made, its nutritional content, and why it continues to be a beloved choice for coffee aficionados.
What is Breve Coffee?
Breve coffee, often called “breve,” is a luxurious variation of the classic café latte. The name “breve” comes from the Italian word for “short,” which refers to the drink’s richness and concentrated flavour. The main difference between a traditional latte and a breve coffee is the milk: while a latte is made with steamed milk, breve coffee is made with half-and-half (a mixture of milk and cream). This substitution gives breve coffee a thicker, creamier texture and a richer, more indulgent flavour.
Origins of Breve Coffee
The origins of breve coffee are unclear, but it is widely believed to have originated in the United States. The drink likely became popular in American coffee shops as a more decadent alternative to the traditional latte. Half-and-half, a common ingredient in American households, played a key role in the drink’s rise to fame.
How to Make a Perfect Breve Coffee
If you want to enjoy this indulgent treat at home, you’re in for a real treat! Here’s a step-by-step guide on how to make the perfect breve coffee with a twist of vanilla and caramel for an extra touch of sweetness.
Ingredients:
1 shot of espresso (2 shots for stronger flavour)
4-6 ounces of half-and-half
1 teaspoon of vanilla extract
Use 1 tablespoon of caramel sauce, plus extra for drizzling.
Optional: Whipped cream for topping
Optional: A pinch of ground cinnamon or cocoa powder for garnish
Equipment:
Espresso machine or coffee maker with an espresso setting
Milk frother or steam wand
Frothing pitcher or heat-proof container
Step-by-Step Instructions:
Prepare the Espresso: Brew shot of espresso using your espresso machine. If you prefer a stronger flavour, brew two shots. Set the espresso aside in your coffee cup.
Mix the Flavorings: In a small bowl, combine the caramel sauce and vanilla extract. Stir well until the caramel is completely dissolved to ensure even flavour distribution.
Steam the Half-and-Half: Pour the half-and-half into a frothing pitcher. Steam the half-and-half using the steam wand on your espresso machine until it reaches a temperature between 150°F & 160°F (65°C to 70°C).This will create a smooth, velvety foam. If you don’t have a steam wand, you can heat the half-and-half on the stove or microwave, then froth it with a handheld frother.
Combine and Stir: Add the vanilla-caramel mixture to the brewed espresso and stir until well combined.
Add the Steamed Half-and-Half: Slowly pour the steamed half-and-half into the espresso mixture. Use a spoon to hold back the foam, then top the coffee with the remaining foam to create a layered effect.
Garnish and Serve: Top your breve coffee with whipped cream for extra indulgence. Drizzle with additional caramel sauce and sprinkle pinch of cinnamon or cocoa powder for beautiful finish. Serve immediately and enjoy!
Why Choose Breve Coffee?
Breve coffee offers a distinct taste experience, differentiating it from other espresso-based drinks. Here’s why it’s a favourite choice for coffee lovers:
Rich and Creamy Texture: The use of half-and-half gives breve coffee a smooth, creamy texture that is thicker and richer than a traditional latte. This makes it a perfect choice for those who love a more indulgent coffee experience.
Richer Flavor: The natural sweetness and richness of the half-and-half enhance the espresso’s flavour, creating a fuller-bodied, more satisfying drink.
Less Bitterness: The creaminess of the half-and-half balances out the bitterness of the espresso, making breve coffee an excellent option for people who find traditional espresso drinks too harsh.
Versatility: Breve coffee can be customized with various syrups and flavours, such as vanilla, caramel, hazelnut, or even chocolate, allowing coffee drinkers to create a personalized, indulgent experience.
Breve Coffee vs. Latte: What’s the Difference?
Both breve coffee & lattes are made with espresso, but there are key differences between the two drinks:
Milk: latte is made with steamed milk, while breve uses steamed half-and-half, resulting in a creamier, thicker texture.
Flavour: While lattes let the espresso flavour shine through more, breve coffee has a richer, more indulgent flavour due to the creaminess of the half-and-half.
Calories: Because half-and-half is higher in fat and calories than regular milk, breve coffee is more indulgent and decadent than a traditional latte.
Nutritional Content of Breve Coffee
Since breve coffee uses half-and-half, it’s higher in calories and fat than other coffee drinks. Here’s a typical nutritional breakdown for a 12-ounce (355 ml) serving of breve coffee:
Nutrient
Amount per 12 Oz Serving
Calories
450-550 kcal
Total Fat
35-40 g
Saturated Fat
22-28 g
Cholesterol
90-120 mg
Carbohydrates
20-25 g
Sugars
18-22 g
Protein
7-10 g
Calcium
300-350 mg
Vitamin A
15-20% of RDI
Note: Nutritional content may vary depending on type of half-and-half caramel sauce and other flavourings used.
Health Considerations
While breve coffee is a delicious treat, it’s important to enjoy it in moderation due to its high fat and calorie content. Here are some tips for savouring your breve coffee without overdoing it:
Moderation is Key: Enjoy breve coffee as an occasional treat rather than a daily indulgence.
Opt for Smaller Portions: Choose an 8-ounce cup for a more moderate serving.
Healthier Alternatives: Consider using lower-fat or plant-based milk alternatives for a lighter version of breve coffee.
Conclusion
Breve coffee is a luxurious drink with a rich, creamy texture and a deep, satisfying flavour. While it may be higher in calories and fat than other coffee drinks, it can be an occasional treat for those who crave a more decadent coffee experience. Understanding its nutritional content and savouring it in moderation allows you to indulge in breve coffee without compromising your wellness goals.
Next time you’re looking for a rich, creamy, and full of flavour, treat yourself to a breve coffee—an indulgence that will make every sip feel like a moment of pure luxury.
Knee replacement surgery, or knee arthroplasty, significantly enhances mobility & quality of life for those suffering from chronic knee pain or joint degeneration. However, while the surgery is a crucial step toward better health, the recovery process is equally vital in ensuring long-term success. Unfortunately, many patients make common mistakes during their recovery that can slow progress or lead to complications. This article explores the top 5 mistakes after knee replacement surgery and offers essential tips for avoiding them for a smoother, more successful recovery.
Doing Too Much Too Soon
The Risks of Overexertion
After knee replacement surgery, feeling eager to return to normal activities is natural. Whether it’s resuming work, exercising, or engaging in daily hobbies, the desire to regain independence is common. However, overdoing it too soon can have serious consequences. Pushing your body too hard can lead to increased pain, swelling, & even damage to the newly placed knee joint.
Understanding the Recovery Timeline
The recovery process after knee replacement surgery is gradual.Your body needs time to heal, and it’s essential not to rush the process. According to most healthcare providers, you should follow specific activity guidelines to avoid overexertion. Doing too much too soon can increase your risk of complications, such as blood clots, joint instability, or prolonged recovery periods.
How to Avoid This Mistake
Listen to your body: How your knee feels after physical activities. If pain or swelling persists, reduce activity levels and give your body time to rest.
Follow your surgeon’s advice: Stick to the recommended recovery timeline, which includes gradual increases in activity. Avoid high-impact activities until you receive clearance from your doctor.
Be patient: Recovery is a long journey that requires patience and persistence; it’s not something that happens quickly. It’s crucial to pace yourself and avoid pushing beyond your limits too early.
Skipping Physical Therapy
The Importance of Physical Therapy
Physical therapy plays vital role in achieving a successful recovery following knee replacement surgery. It helps restore the strength, flexibility, and range of motion of your new knee joint. Skipping physical therapy or neglecting to follow your therapist’s prescribed exercises can lead to stiffness, reduced mobility, and a more extended recovery period.
Why Patients Skip Therapy
There are several reasons patients may skip physical therapy. Some may experience discomfort or pain during sessions, while others might feel that their knee is improving and that treatment is no longer necessary. However, physical therapy is critical for regaining full function and preventing complications, so it should never be skipped.
How to Avoid This Mistake
Commit to attending all sessions: Dedicate time to attend every scheduled therapy session and perform the prescribed exercises at home.
Communicate with your therapist: If you feel any pain or discomfort during therapy, please inform your therapist. They can modify your exercises to reduce discomfort while providing the necessary rehabilitation.
Stay consistent: Regular participation in physical therapy sessions, combined with diligent home exercises, is essential for improving mobility and reducing the risk of long-term complications.
Avoiding Prescribed Medication
The Role of Pain Management
Effective pain management is vital part of recovery after knee replacement surgery. Pain can interfere with your capacity to participate in physical therapy and complete necessary daily activities. While some patients may avoid prescribed medications out of fear of dependency or side effects, failing to manage pain can slow down recovery and hinder rehabilitation.
The Consequences of Avoiding Medication
Not taking pain medication as prescribed can lead to unnecessary discomfort, which may make it harder to perform key recovery activities like physical therapy. Inadequate pain management can also increase stress levels, anxiety, and discomfort, further delaying recovery.
How to Avoid This Mistake
Follow your healthcare provider’s instructions: Take your pain medication as prescribed. If you have concerns about side effects or dependency, discuss them with your doctor.
Don’t “tough it out”: Proper pain management will allow you to remain active, engage in therapy, and recover more comfortably, leading to a better long-term outcome.
Adjust as necessary: If you experience side effects or pain decreases over time, consult your doctor to adjust your medication plan accordingly.
Ignoring Pain & Discomfort
The Dangers of Neglecting Pain Signals
Pain & discomfort are common after knee replacement surgery; however, it is essential not to ignore these signals, particularly if the pain is severe or persists. While mild pain can be expected as part of the healing process, unchecked pain could indicate a more serious issue, such as an infection, blood clot, or problem with the implant.
Common Reasons for Ignoring Pain
Some patients may have a high pain tolerance and assume that the pain is simply part of recovery. Others might avoid reporting pain due to fear of additional medical interventions or tests. However, neglecting severe or persistent pain can lead to complications that may require further treatment or even revision surgery.
How to Avoid This Mistake
Monitor your pain: Pay attention to changes in pain intensity, swelling, redness, or warmth around the knee.
Seek medical advice promptly: If you have severe pain, fever, or other concerning symptoms, please contact your healthcare provider immediately for further evaluation.
Early detection is key: Addressing pain and complications early can prevent more serious issues & help maintain the success of your knee replacement.
Driving Too Soon After Surgery
The Risks of Driving Too Early
While driving is essential to regaining independence, getting behind the wheel too soon after knee replacement surgery can be risky. Your reaction time may be slower than usual, and your knee may not yet be strong enough to control the pedals safely. This can increase the risk of accidents and further injury to the knee joint.
Understanding When It’s Safe to Drive
The timeline for resuming driving varies for each patient. Typically, patients are advised to wait 4-6 weeks before driving, though this depends on factors like the type of surgery and individual recovery progress. Always consult your surgeon to confirm when it’s safe for you to return to driving.
How to Avoid This Mistake
Get clearance from your surgeon: Ensure your knee is strong enough and your reaction time has returned to normal before driving again.
Practice in a safe environment: If given the green light to drive, practice in a controlled environment, similar as an empty parking lot, before venturing onto busy roads.
Consider alternatives: Arrange for transportation assistance if you’re not yet ready to drive, as attempting to drive too soon can put you and others at risk.
Conclusion
Knee replacement surgery is transformative procedure that can significantly improve your quality of life. However, success of the surgery largely depends on how well you manage recovery process. By avoiding the common mistakes of overexertion, skipping physical therapy, avoiding prescribed medication, ignoring pain, and driving too soon, you can set yourself up for a smoother recovery and ensure the long-term success of your knee replacement.
Remember, every patient’s recovery journey is unique. It’s essential to follow guidance of your healthcare team and be patient with yourself throughout the recovery process. By taking a proactive approach & listening to your body, you can look forward to a future of improved mobility and pain-free life.
Tooth pain is a prevalent issue that affects many people, ranging from mild unease to severe pain that interferes with daily activities. The allure of a quick fix—such as permanently killing tooth pain nerves in just three seconds—can be tempting, but it’s essential to understand the realities of tooth pain management. This comprehensive guide will delve into the feasibility of such immediate solutions, explore professional treatments, and offer practical approaches for effectively managing and alleviating tooth pain.
Is It Possible to Kill Tooth Pain Nerve in 3 Seconds?
The concept of permanently killing tooth pain nerves in 3 seconds is more fantasy than reality. Tooth pain is typically a symptom of deeper issues such as cavities, infections, or nerve damage. While the promise of instant relief is appealing, no method can achieve permanent nerve elimination in such a brief timeframe. The reality is that addressing tooth pain requires thorough treatment rather than a rapid fix. Misleading claims about quick relief often ignore the complexity of dental health and can delay necessary professional care.
Understanding Tooth Pain Nerves
Tooth pain can manifest in various ways, each indicating different underlying problems. Common sensations include:
Throbbing Pain: This type of pain often comes and goes in waves, sometimes making it almost unbearable. It is frequently triggered by biting down, consuming hot or cold foods, or temperature changes. This throbbing pain can significantly disrupt daily activities and sleep.
Pounding Sensation: Sometimes, tooth pain feels like a constant pounding in time with your heartbeat. This type of pain can be specifically distressing & persistent, making it challenging to focus on anything else.
Dull Ache: A constant, dull ache can linger, making it difficult to find a comfortable position and concentrate on tasks. Although this type of pain may not be as intense as sharp pain, it can be equally debilitating due to its persistence.
Sharp Pain: Sudden, sharp pain can strike without warning, often taking your breath away. This type of pain is usually severe and may be associated with conditions like exposed nerves or dental trauma.
Temperature Sensitivity: Sensitivity to hot and cold temperatures can result in a jolt of pain when consuming hot or cold foods and beverages. This sensitivity often indicates that the tooth’s protective enamel has been compromised.
Understanding these sensations is crucial for diagnosing the source of the pain and determining the most appropriate course of action for relief.
Common Causes of Tooth Pain
Several factors can contribute to tooth pain, including:
Cavities: Tooth decay erodes the enamel and can expose nerves, leading to pain. Cavities are one of the most common causes of toothache and require prompt treatment to prevent further damage.
Gum Disease: Gum inflammation or infection may cause pain and discomfort. If not addressed, gum disease can worsen and might even compromise the underlying structure of the bones.
Tooth Sensitivity: Thinning enamel or exposed dentin can cause increased sensitivity to temperature or certain foods. Desensitizing treatments or dental products can manage this sensitivity.
Dental Trauma: A tooth injury can damage the nerve, leading to pain. Trauma can result from accidents, sports injuries, or even aggressive brushing.
Abscessed Tooth: An infection at the tooth’s root can cause severe pain and swelling. An abscessed tooth requires immediate professional treatment to address the infection and alleviate pain.
Immediate Relief Techniques
Home Remedies for Quick Relief
Although no method can permanently eliminate tooth pain nerves in seconds, several home remedies can provide temporary relief:
Cold Compress: Applying a cold compress to the outside of the cheek can help numb the area and reduce swelling. Wrap a bag of ice or icy peas in a cloth and apply it for 15-20 minutes. This can help manage pain until you can get professional care.
Saltwater Rinse: A saltwater rinse can help cleanse the affected area and reduce inflammation. Mix 1 teaspoon of salt into a mug of warm water and use it as a mouthwash several times daily. This remedy can help alleviate discomfort and keep the area clean.
Clove Oil: Clove oil includes eugenol, which has natural anesthetic properties. Apply a few decreases of clove oil to a cotton ball & gently place it on the affected tooth. Be cautious with the quantity, as clove oil can be potent & may cause irritation if used excessively.
Garlic Paste: Garlic has antiseptic properties that can provide pain relief. Crush a garlic clove into a paste & apply it to the affected area. Garlic can help battle infection and reduce pain, though it should be used cautiously to avoid irritation.
Over-the-Counter Pain Relievers
For immediate, though temporary, relief, over-the-counter pain medications can be effective:
Ibuprofen: An NSAID (non-steroidal anti-inflammatory drug), ibuprofen helps alleviate pain and inflammation. Due to its dual action, it is a preferred choice for managing toothache. Follow the dosage instructions cautiously to avoid potential side effects.
Acetaminophen: Acetaminophen blocks pain signals to the brain and is an excellent alternative for those who cannot take NSAIDs. Using it according to the recommended dosage and avoiding exceeding the daily limit is essential.
Topical Anesthetics: Products containing benzocaine can temporarily numb the area. Apply them according to the package guidelines. These anesthetics can provide short-term relief but do not address the underneath cause of the pain.
Professional Dental Treatments
Restorative Procedures for Long-Term Relief
Professional dental treatments are necessary for a lasting solution to tooth pain. These treatments address the root reason of the pain and provide practical, long-term relief:
Fillings: Fillings repair cavities by removing decayed material and sealing the tooth. This helps prevent further damage and alleviates pain associated with cavities. A filling can restore the tooth’s function and prevent additional discomfort.
Crowns: Crowns are used to cover & protect severely worn or damaged teeth. They help preserve the tooth’s structure and shield the nerve from pain triggers. Crowns can also improve the tooth’s appearance and functionality.
Root Canal: A root canal process removes the affected nerve tissue inside the tooth. The tooth is then sealed and, often, crowned to prevent future pain and complications. This procedure is typically considered the definitive solution for severe nerve pain and can provide long-term relief.
Extractions: For teeth that are beyond repair, extraction may be necessary. Removing a severely damaged or decayed tooth helps prevent further oral health issues and alleviates pain. Extraction is often a last resort but can be crucial for preserving oral health.
Dental Nerve Desensitization
Desensitization methods can help manage nerve pain by reducing sensitivity to pain triggers:
Topical Fluoride Gels: High-fluoride gels or varnishes applied to the teeth can help reduce nerve sensitivity. These treatments strengthen the tooth enamel and provide a protective barrier against pain triggers.
Laser Therapy: Laser therapy uses focused light to target specific areas and modify pain receptors. This technique can offer long-lasting relief by addressing the root cause of nerve pain and is increasingly used in modern dental practice.
Realistic Expectations for Pain Relief
Managing Pain Effectively
When feeling tooth pain, it is essential to set realistic expectations. Instant and permanent relief is not achievable with current methods, but several strategies can help manage pain effectively:
Cold Compress: Applying a cold compress reduces swelling and provides temporary numbness. It can help manage pain until you can seek professional dental care.
Elevation: Keeping your head elevated above your heart can minimize throbbing sensations. This helps reduce blood flow to the affected area and alleviate discomfort.
Saltwater Rinse: Saltwater rinse cleanses the area and offers short-term relief. It is a simple and effective way to manage pain and keep the affected area free of debris.
Clove Oil: Clove oil can temporarily numb the pain. However, it should be used cautiously and in moderation to avoid potential irritation.
These techniques are meant for temporary relief and should be used while awaiting professional dental treatment. Consulting a dentist is crucial for a safe and permanent solution to tooth nerve pain.
Advanced Pain Relief Techniques
Laser Therapy
Laser therapy represents an advanced approach to managing tooth nerve pain. This technique utilizes precise laser energy to target specific areas and desensitize pain sources. By modifying pain receptors and addressing the underlying cause, laser therapy can offer both immediate and long-term relief. It is a valuable tool for treating nerve pain and is often used with other treatments for optimal results.
Electrical Nerve Stimulation
Electrical nerve stimulation involves using electrical impulses to disrupt pain signals. This technique can significantly relieve nerve-related pain by blocking the transmission of pain signals to the brain. While less common in dental practice, it represents an innovative approach to managing severe pain and can be effective in some instances.
Natural Relief Methods
Saltwater Rinse
A saltwater rinse is a straightforward and effective remedy for managing tooth pain. Saltwater acts as a natural disinfectant, aiding in removing debris and food particles that might be lodged in your teeth. Additionally, it lessens inflammation, which may help with pain management. For optimal effects, use a solution of 1/2 teaspoon salt and warm water many times a day as a mouthwash.
Clove Oil
Clove oil, obtained from the clove plant, contains eugenol, a compound with natural anesthetic and anti-inflammatory properties. This makes it an effective remedy for temporary pain relief. A cotton ball should be soaked in a few drops of clove oil & utilized to the affected tooth. Be cautious with the quantity to avoid irritation, and consult a dentist for further treatment.
Cold Compress
Applying a cold compress to the external of your cheek can help alleviate pain and reduce swelling. The freezing temperature numbs the affected area and decreases inflammation. Wrap ice or frozen peas in a cloth to prevent straightforward contact with your skin, and apply it for 15 minutes at a time. This method can provide temporary relief and complement other treatments.
Peppermint Tea Bags
Peppermint has mild numbing properties that can help soothe tooth pain. For temporary relief, hold a cooled peppermint tea bag against the affected tooth. Peppermint tea also has antiseptic properties that can help with minor infections and discomfort.
Hydrogen Peroxide Rinse
One common household item that can help lessen oral irritation and plaque is hydrogen peroxide. Use equal parts water and 3% hydrogen peroxide as a mouthwash. Do not drink the fluid, and then correctly rinse your mouth with water. This remedy can help with pain and maintain oral hygiene.
Garlic Paste
Garlic has long been known for its antibacterial and anti-inflammatory properties. Crushing a garlic clove into a paste and applying it to the affected area can help relieve pain and fight infection. Be sure to use garlic paste cautiously to avoid irritation, and consult a dental professional for a comprehensive treatment plan.
Most Effective Painkillers for Toothache
Ibuprofen
Ibuprofen is an NSAID (non-steroidal anti-inflammatory drug) that is highly effective for managing tooth pain. It reduces pain and inflammation, making it a preferred choice for toothache individuals. Follow the dosage guidelines on the label to avoid potential side effects, and consult a healthcare provider if you have any concerns.
Acetaminophen
Acetaminophen is another typically used pain reliever that blocks pain signals to the brain. It is beneficial for those who cannot consider NSAIDs due to allergies or other health conditions. Acetaminophen can be used alone or in combination with ibuprofen for enhanced relief. Always adhere to the suggested dosage to avoid potential liver damage.
Combination Therapy
Combining ibuprofen and acetaminophen can improve pain management for toothaches. This approach leverages each medication’s different mechanisms of action, offering more comprehensive relief. Consult your healthcare provider to ascertain the appropriate dosages and ensure safe usage.
Conclusion
The idea of permanently killing tooth pain nerves in three seconds is more myth than reality. Effective tooth pain management requires a multifaceted approach, including temporary relief methods, professional dental treatments, and realistic expectations. Over-the-counter drugs or home cures cannot replace professional dental treatment, even though they may provide momentary relief.
Addressing the underlying cause of tooth pain through professional treatments is essential for lasting relief. If you experience tenacious or severe tooth pain, consult a dental professional to receive appropriate care and ensure optimal oral health. By combining effective pain management strategies with professional treatment, you can achieve relief and improve your overall quality of life.
Frequently Asked Questions (FAQ)
What stops tooth nerve pain immediately?
Applying a cold compress and taking over-the-counter pain relievers like ibuprofen can stop tooth nerve pain immediately, providing temporary relief until you see a dentist.
Will salt kill a tooth nerve?
Salt won’t kill a tooth nerve, but rinsing with saltwater can help reduce inflammation and pain temporarily, providing some relief from tooth discomfort.
How do I stop nerve pain asap?
To stop nerve pain ASAP, apply a cold compress to numb the area and take an over-the-counter painkiller like ibuprofen for quick relief.
What can I do if tooth pain is unbearable?
If tooth pain is unbearable, take a strong painkiller like ibuprofen and apply a cold compress, then contact a dentist immediately for urgent treatment.