Fire hydrant exercises, also known as quadruped hip abductions, are a deceptively simple yet profoundly effective movement that enhance gluteal strength, improve hip mobility, and build lower body stability. As a no-equipment, bodyweight exercise, fire hydrants are accessible to all, from beginners to seasoned athletes. Their primary target—the gluteus maximus—is pivotal for postural support, athletic functionality, and injury prevention.
How To Do Fire Hydrant Exercises
The fire hydrant exercise is grounded in biomechanical simplicity but demands precision for optimal effect.
Step-By-Step Guide
1. Starting Position:
Position yourself on all fours (quadruped position).
Align hands directly beneath shoulders and knees beneath hips.
Maintain a neutral spine. Engage the core by slightly tucking the pelvis.
Eyes should face the floor to keep the cervical spine in alignment.
2. Lifting the Leg:
Bend one knee at 90 degrees.
Abduct (lift) the leg outward to the side to approximately a 45-degree angle.
Keep hips square; do not tilt or rotate the pelvis.
3. Returning to Start:
Lower the leg back with control.
Avoid sudden drops—this is where the muscle engagement is refined.
Recommended Reps and Sets:
3 sets of 15 repetitions per leg are ideal for neuromuscular activation and strength development.
Key Form Tips
Engage the core: Prevents lumbar hyperextension and isolates the hip movement.
Do not rotate the torso: Rotation dilutes glute activation.
Foot orientation: Keep your foot slightly pointed down for correct glute engagement.
Benefits Of Fire Hydrant Exercises
Fire hydrant exercises deliver a multitude of performance and therapeutic advantages:
1. Glute Activation and Strength
The fire hydrant isolates the gluteus maximus, enhancing functional strength and muscular hypertrophy. Regular practice supports posture, athleticism, and aesthetic toning.
2. Improved Hip Mobility
The movement targets the hip abductors, including the gluteus medius and minimus, and amplifies lateral hip mobility. This is crucial for squatting, sprinting, and stair climbing.
3. Injury Prevention
Weak glutes are a common source of kinetic chain dysfunction. Strengthening this region:
Reduces knee valgus risk
Stabilizes pelvic alignment
Minimizes lumbar strain
4. Core Stability Enhancement
The static core engagement necessary during each rep enhances spinal integrity and builds deep abdominal strength, preventing back pain and promoting better balance.
Fire Hydrant Variations For Increased Challenge
To avoid muscular adaptation and plateaus, consider advancing your routine with these progressive fire hydrant modifications:
1. Fire Hydrant With Resistance Band
Loop a resistance band just above your knees.
Maintain constant tension during each rep.
This increases the mechanical load on the abductors and glutes.
Activates gluteus medius and reinforces pelvic stability.
3. Side Leg Raise
Stand tall, then lift one leg laterally.
Keep the motion slow and controlled.
Enhances abductor strength and balance training.
Final Thoughts
The fire hydrant exercise remains one of the most potent, equipment-free strategies for building a stable, strong lower body. It transcends traditional gym routines by enhancing glute activation, hip mobility, and core stabilization in a single movement. Its adaptability—from resistance bands to advanced pulses—ensures continued progression and muscular development.
Staying active is important for preserving good health, improving cardiovascular endurance, building muscle strength, and enhancing flexibility. Whether you prefer bodyweight exercises, weightlifting, or outdoor activities, incorporating a variety of movements into your routine ensures balanced fitness.
Below, we explore 20 Different Types of Exercises categorized into cardiovascular endurance, strength training, and flexibility workouts. Each exercise targets specific muscle groups & contributes to overall fitness.
20 Different Types of Exercises
Cardiovascular Endurance Workouts
Cardio exercises improve heart health, stamina, and lung capacity while burning calories. These workouts are great for weight loss and boosting endurance.
1. Jumping Rope
A classic and effective aerobic exercise, jumping rope strengthens the heart, improves coordination, and enhances agility. This high-intensity workout also aids in weight loss and increases bone density.
2. Cycling
One of the best low-impact cardiovascular exercises, cycling strengthens the legs, improves joint mobility, and enhances endurance. Whether outdoors or on a stationary bike, it’s an excellent calorie-burning workout.
3. Brisk Walking
Unlike casual strolling, brisk walking (around 3-4.5 mph) raises the heart rate, burns fat, and strengthens the lower body. It’s a tremendous beginner-friendly alternative to running.
4. Stair Climbing
Taking the stairs makes it easy to engage multiple muscle groups while improving cardiovascular health. It enhances leg strength, glute activation, and endurance while reducing the risk of heart disease.
5. Aerobics
High-energy aerobics workouts—like Zumba or step aerobics—improve cardiovascular fitness, flexibility, and balance while making exercise fun and engaging.
6. Dancing
Whether salsa, hip-hop, or ballet, dancing improves coordination, burns calories, and enhances flexibility. It’s also a stress-relieving and enjoyable way to stay active.
7. Swimming
Swimming is a full-body, low-impact cardio exercise that increases lung capacity, builds endurance, and strengthens muscles. It’s ideal for individuals with joint pain or arthritis.
8. Mountain Climbers
This high-intensity bodyweight exercise mimics the movement of climbing and is excellent for cardio conditioning, core strength, and fat burning.
9. Burpees
A staple in circuit training, burpees combine strength and endurance by incorporating squats, push-ups, and jumps into one explosive movement.
10. Rowing
Using a rowing machine or engaging in water rowing provides a full-body workout, building endurance while strengthening the core, arms, and legs.
Strength Training Exercises
Building muscle is essential for boosting metabolism, enhancing bone density, and preventing injuries. Strength exercises can be done using bodyweight movements or lifting weights.
11. Chair Squat
Chair squats are a beginner-friendly squat variation that targets the glutes, hamstrings, and quadriceps while improving balance and mobility.
12. Push-ups
Push-ups are among the best upper-body exercises, working the chest, shoulders, triceps, and core. Beginners can modify with knee push-ups.
13. Bridge Exercise
The bridge exercise strengthens your glutes, hamstrings, and lower back. It also improves posture and core stability.
14. Jumping Lunges
Adding a jump to traditional lunges increases intensity, improving lower-body power, balance, and agility.
15. Squat Jumps
This explosive plyometric exercise builds lower-body strength, enhances speed, and boosts cardiovascular endurance.
16. Lifting Weights
Weightlifting helps build muscle mass, increases metabolism, and strengthens bones. Beginners can start with dumbbells or resistance bands.
17. Bird Dog Exercise
This core and stability exercise enhances coordination, strengthens the lower back, and improves posture.
18. Dead Bug Exercise
A popular core-strengthening movement, the dead bug exercise improves stability and strengthens the abdominal muscles and lower back.
Improving flexibility prevents injuries and enhances overall movement. Balance exercises also help with coordination and stability.
20. Yoga
Yoga combines breath control, strength, and stretching to enhance flexibility and reduce stress. Poses like the plank to downward dog improve core strength and mobility.
How to Incorporate These Exercises into Your Routine
For best results, combine different types of exercises throughout the week:
Cardio workouts (e.g., cycling, swimming, jumping rope) 3-5 times per week
Strength training (e.g., push-ups, squats, lifting weights) 2-3 times per week
Flexibility & balance exercises (e.g., yoga, Pilates) at least 2 times per week
Final Thoughts
Regular exercise improves physical and mental well-being, reduces the risk of chronic diseases, & enhances overall fitness. Whether you prefer circuit training, weightlifting, or outdoor activities, the key is staying consistent and choosing exercises that you enjoy.
Cottage cheese has experienced a revival in recent years, particularly in 2023, as it has become a favourite in kitchens everywhere, thanks to its high protein content, rich calcium levels, and versatility. Often seen as a staple for diet plates in the past, Cottage Cheese Recipes has shed its old image and emerged as a trendy and functional ingredient in both sweet and savoury recipes. Whether used as a base for a high-protein snack or as an ingredient in an indulgent dish, cottage cheese is here to stay.
In this blog, we’ll explore creative and delicious ways to incorporate cottage cheese into daily meals, from breakfast to dinner. We’ll also introduce exciting new recipes to elevate your cooking and make the most of this surprisingly versatile dairy product.
The Benefits of Cottage Cheese
Before diving into the recipes, let’s quickly touch on why cottage cheese is so great. Cottage cheese is packed with:
High Protein: It’s an excellent source of protein, making it a great option for those looking to build muscle, lose weight, or maintain balanced diet.
Calcium: Cottage cheese is essential, and it is rich source of calcium for bone health.
Micronutrients: It provides essential vitamins like riboflavin (vitamin B2) and selenium, both of which support metabolism and immune health.
Low Fat: Many cottage cheese varieties are available in low-fat or fat-free options, allowing you to enjoy a creamy texture without the extra calories.
Now, let’s explore some delicious and inventive ways to use cottage cheese in your meals.
1. High-Protein Cottage Cheese Pancakes
Why settle for regular pancakes when you can make them high-protein? Adding cottage cheese to your pancake batter can boost protein to about 20 grams per serving. These pancakes also include ripe bananas and chocolate chips for sweetness—no syrup needed. Plus, they freeze well, making them perfect for a quick and easy breakfast on the go.
How to make: Blend ingredients, cook on a griddle, and enjoy the fluffy, protein-packed pancakes.
2. Curry Potato Fritters
Inspired by the Indian aloo tikki, these curry potato fritters are crispy on the outside & soft on inside, thanks to the cottage cheese that helps bind the potatoes. Serve with chutney for a snack or as a side dish to a curry-based meal.
How to make: Mix ingredients, form fritters, and fry until golden brown. Serve with tangy chutney for the perfect bite.
3. Baked Penne with Cottage Cheese, Eggplant, and Salami
This hearty baked pasta combines Mediterranean antipasti flavours with cottage cheese’s richness. The cottage cheese binds everything together, creating a creamy, satisfying dish perfect for weeknight dinners. With ingredients like eggplant, salami, and olives, this dish is a delicious way to enjoy cottage cheese in a savoury meal.
How to make: Layer ingredients in a baking dish, bake until golden, and enjoy this easy-to-make comfort food.
4. Cottage Cheese Chocolate Chip Cookies
Who knew that cottage cheese could improve cookies? Using cottage cheese, you can reduce the amount of butter while keeping your cookies chewy and fluffy. These cottage cheese chocolate chip cookies are healthier version of the classic, providing extra protein without compromising taste.
How to make: Mix the ingredients, bake at 350°F until golden brown, and enjoy the delightful texture and taste.
5. Cottage Cheese Tzatziki Mezze Plate
Why not replace full-fat yoghurt with cottage cheese in tzatziki? The result is a creamy, garlicky dip that pairs wonderfully with fresh vegetables and pita bread. This cottage cheese tzatziki is a lighter alternative to the traditional version, making it perfect for hot summer days when you want something refreshing but satisfying.
How to make: Combine the ingredients, chill, and serve with pita or veggies.
6. Breakfast Grilled Cheese with Cottage Cheese
Use cottage cheese instead of the usual cheese in a grilled cheese sandwich for a fun and unique breakfast treat. Pair it with a drizzle of jelly between waffles for a sweet and savoury twist. It’s a breakfast that’s quick to make and sure to impress.
How to make: Spread jelly between waffles, add cottage cheese, and grill until crispy.
7. Cheesy Buffalo Chicken Dip
Buffalo chicken dip is a popular party snack but often heavy on cream cheese. By substituting cottage cheese, you create a lighter, healthier version of this dip without sacrificing the creamy texture. The cottage cheese adds richness while keeping the dip protein-packed.
Recipe:
Ingredients: Cottage cheese, chicken, hot sauce, cream cheese, shredded cheese
How to make: Combine ingredients, bake until bubbly, and serve with chips or veggies.
8. Pineapple-Orange Crostini with Cottage Cheese
For a quick appetizer, top toasted baguette slices with a creamy layer of cottage cheese and finish with a fresh pineapple-orange topping. The sweetness of fruit balances perfectly with savoury cottage cheese, making these crostinis a refreshing bite.
Recipe:
Ingredients: Cottage cheese, baguette, pineapple, orange, mint
How to make: Toast the baguette, spread with cottage cheese, and top with fruit and mint for a satisfying appetizer.
Conclusion
Cottage Cheese Recipes can be a key ingredient in many recipes, from savoury dishes like fritters and pasta bakes to sweet treats like pancakes and cookies. Whether you want to increase your protein intake or add a creamy texture to your meals, Cottage Cheese Recipes is affordable, nutritious, and versatile.
Incorporating cottage cheese into your meals is a fun and flavorful way to embrace healthier eating habits. With its ability to adapt to both savoury and sweet dishes, it’s clear why cottage cheese has become a trend that’s here to stay. So, get creative, experiment with these recipes, and discover how Cottage Cheese Recipes can elevate your cooking.
If you’re a Wicked fan, you’re in for a magical treat! As the highly anticipated movie adaptation of Wicked hits theaters this Thanksgiving, Starbucks has unveiled two drinks inspired by the beloved characters from Oz: Elphaba and Glinda. Among the two, Glinda’s Pink Potion is an enchanting concoction that embodies the sweet, whimsical nature of the Good Witch herself.
In this blog, we’ll explore the Pink Drink recipe behind Glinda’s Pink Potion, discuss how it compares to other popular Starbucks drinks, and offer tips on how you can make it even more magical at home.
What’s in Glinda’s Pink Potion?
The Pink Potion is Starbucks’ latest offering inspired by Glinda, the bubbly, sparkling character from Wicked. This drink is an over-the-top, sweet creation that’s perfect for fans of fruity beverages. Here’s what you’ll find in Glinda’s magical Pink Potion:
Mango Dragonfruit Refresher Base: The drink starts with the popular Mango Dragonfruit Refresher, a fruity beverage made from the tropical flavors of mango and dragonfruit.
Creamy Coconut Milk: To add a smooth, velvety texture, coconut milk is blended into the base, making the drink creamy and indulgent.
Freeze-Dried Dragonfruit Pieces: Small, freeze-dried pieces of dragonfruit are layered in the drink for added texture and vibrant color.
Nondairy Strawberry Cold Foam: The crowning touch of Glinda’s Pink Potion is a fluffy, nondairy strawberry cold foam that gives the drink its signature pink hue.
Colorful Candy Sprinkles: To give the drink a touch of whimsy (and a nod to Glinda’s sparkling personality), the cold foam is topped with a dusting of colorful candy sprinkles.
Together, these ingredients create sweet, fruity, and visually stunning drink that feels plucked straight from the land of Oz.
How to Make Your Own Glinda’s Pink Potion at Home
If you’re craving the magic of Glinda’s Pink Potion but can’t make it to Starbucks, you can recreate this Pink Drink recipe at home with just a few ingredients. Here’s how:
Ingredients:
1 cup Mango Dragonfruit Refresher (or make your own by blending mango, dragonfruit, and water)
1 cup coconut milk
2 tablespoons freeze-dried dragonfruit pieces
1/4 cup strawberry-flavored nondairy cold foam (you can use oat or almond milk for the cold foam)
Colorful candy sprinkles for garnish (optional)
Instructions:
Prepare the Mango Dragonfruit Refresher: Blend mango, dragonfruit, and water to create a refreshing base. If you’re short on time, you can use pre-made Mango Dragonfruit Refresher packets at many grocery stores.
Add the Coconut Milk: Pour in the coconut milk, giving the drink a smooth and creamy consistency.
Add the Freeze-Dried Dragonfruit Pieces: Gently stir in the pieces, letting them infuse the drink with extra texture and color.
Top with Strawberry Cold Foam: Froth your nondairy milk (like oat milk) with strawberry syrup until it forms a thick, creamy foam. Pour it on top of your drink.
Finish with Candy Sprinkles: For that Glinda touch, sprinkle a handful of colorful candy sprinkles on top.
How Does Glinda’s Pink Potion Compare to Other Starbucks Drinks?
Glinda’s Pink Potion is a unique twist on the classic Starbucks Pink Drink with even more flair. While the standard Pink Drink is made with coconut milk, strawberry acai, and freeze-dried strawberries, Glinda’s creation swaps in Mango Dragonfruit Refresher for a tropical kick and adds the playful touch of strawberry cold foam. If you’re a fan of fruity drinks but find the Pink Drink a bit too light, Glinda’s Pink Potion offers more complexity with its rich coconut milk and vibrant dragonfruit pieces.
It’s also a perfect drink for anyone looking to try something new, especially if you like drinks with a sweet, fruity base and a creamy texture. The addition of freeze-dried fruit and candy sprinkles makes it feel festive and fun, perfect for fans of Wicked and those looking to add a little magic to their day.
Tips for Customizing Your Pink Potion
While Glinda’s Pink Potion is already pretty fabulous, there’s always room to make it your own. Here are some ideas to tweak the recipe to fit your taste:
Make it Sparkly: Add a slight shimmer with edible glitter to give your Pink Potion an extra magical touch. It’s perfect for those Instagram-worthy moments!
Adjust the Sweetness: If you’re not into super-sweet drinks, reduce the amount of strawberry cold foam or use a less sugary base.
Switch the Base: If you prefer a lighter base, use the classic Strawberry Acai Refresher instead of Mango Dragonfruit.
Add Extra Fruit: Boost the fruitiness by adding a few extra slices of fresh dragonfruit, mango, or strawberries for a more robust flavor.
Why You’ll Love Glinda’s Pink Potion
Glinda’s Pink Potion is more than just a drink; it’s an experience. Whether you’re a die-hard Wicked fan, a Starbucks enthusiast, or someone looking to try a new, fun drink, this Pink Drink recipe delivers on all fronts. It’s sweet, refreshing, and full of playful whimsy—just like Glinda herself.
This limited-time drink is a must-try for fans of tropical flavors and creamy, fruity concoctions. It offers a fun and festive twist on the traditional Pink Drink and will surely be a hit with those who love to indulge in vibrant, Instagram-worthy beverages.
Conclusion
Starbucks’ Glinda’s Pink Potion is the perfect beverage to celebrate the magic of Wicked while sipping on something delicious and refreshing. Whether you enjoy it in the theater lobby before catching the new Wicked movie or creating your version at home, it’s a drink that brings a little of Oz into your day. So grab your favorite beverage, sit back, and get ready to experience the magic that is Glinda’s Pink Potion.
With its distinctive shell-like shape, Lumache pasta is perfect for capturing rich sauces and bold flavors. Whether you prefer a creamy, spicy, or tomato-based dish, these ten Lumache pasta recipes will elevate your dining experience.
Classic Lumache alla Vodka
This timeless recipe features a luscious vodka-infused tomato sauce that balances acidity and creaminess. The pasta’s ridges grip the rich sauce, ensuring every bite is flavorful.
Ingredients:
12 oz Lumache pasta
1 cup heavy cream
1 can (14 oz) crushed tomatoes
¼ cup vodka
2 cloves garlic, minced
½ tsp red pepper flakes
2 tbsp olive oil
½ cup grated Parmesan
Salt & pepper to taste
Instructions:
Cook Lumache pasta until al dente. Reserve ½ cup pasta water.
Sauté garlic in olive oil over medium heat, then add red pepper flakes.
Make roux by melting butter, whisking in flour, and gradually adding milk.
Stir in cheeses and ground mustard until smooth.
Mix with pasta, transfer to baking dish, and top with breadcrumbs.
Preheat oven to 375°F & bake for 20 minutes, or until the dish is golden and bubbly.
Garlic Butter Shrimp Lumache
It is a simple yet flavorful seafood pasta that comes together in minutes.
Ingredients:
12 oz Lumache pasta
½ lb shrimp, peeled and deveined
3 tbsp unsalted butter
3 cloves garlic, minced
1 tbsp lemon juice
½ tsp red pepper flakes
½ cup grated Parmesan
Chopped parsley for garnish
Instructions:
Sauté shrimp in butter and garlic until pink.
Add red pepper flakes, lemon juice, and cooked Lumache pasta.
Toss in Parmesan and garnish with parsley.
Pesto and Sun-Dried Tomato Lumache
A bright and herby dish packed with fresh basil pesto and tangy sun-dried tomatoes.
Ingredients:
12 oz Lumache pasta
½ cup basil pesto
¼ cup sun-dried tomatoes, chopped
¼ cup pine nuts
½ cup grated Parmesan
Instructions:
Toss cooked Lumache with pesto and sun-dried tomatoes.
Top with pine nuts and Parmesan before serving.
Roasted Red Pepper and Goat Cheese Lumache
A creamy and slightly smoky pasta dish with tangy goat cheese.
Ingredients:
12 oz Lumache pasta
1 jar (12 oz) roasted red peppers
4 oz goat cheese
1 tbsp olive oil
1 clove garlic, minced
½ cup heavy cream
Instructions:
Blend roasted red peppers, garlic, and heavy cream into a smooth sauce.
Heat with olive oil, then mix in goat cheese until creamy.
Toss with cooked Lumache pasta and serve.
Spicy Calabrian Chili Lumache
It’s a fiery dish for those who love a spicy kick.
Ingredients:
12 oz Lumache pasta
1 tbsp Calabrian chili paste
1 can (14 oz) crushed tomatoes
2 cloves garlic, minced
½ cup grated Pecorino Romano
Instructions:
Sauté garlic in olive oil, then add chili paste.
Stir in tomatoes & simmer for 10 minutes.
Toss with Lumache pasta and Pecorino Romano.
White Wine and Clam Lumache
A light, seafood-forward pasta with a briny, elegant flavor.
Ingredients:
12 oz Lumache pasta
1 lb fresh clams
½ cup dry white wine
3 cloves garlic, minced
2 tbsp unsalted butter
¼ cup chopped parsley
Instructions:
Sauté garlic in butter, then add clams and white wine.
Cover and steam until clams open. Remove from heat.
Toss in cooked Lumache pasta and parsley before serving.
Final Thoughts
Lumache pasta’s unique shape makes it a standout ingredient for various sauces and flavors. Whether you’re in the mood for a creamy indulgence, a spicy kick, or a light seafood dish, these recipes always ensure a delicious experience.
If you’re looking to elevate your culinary repertoire with a sophisticated and unique dish, look no further than Crab Brulee Recipe. This savoury take on the traditional crème brûlée combines the rich, creamy texture of the classic dessert with the delicate, sweet flavour of crab meat, offering an unexpected and luxurious dining experience.
What is Crab Brulee?
Crab Brulee is a savoury version of the beloved French dessert, crème brûlée. Traditionally made with a custard base of heavy cream, eggs, and sugar, crème brûlée gets its signature crispy caramelized top using a small propane torch. In this variation, the rich custard is infused with fresh crab meat, resulting in a savory & dish that can served as either an appetizer or a main course.
This unique recipe retains the creamy, velvety texture of crème brûlée but replaces the sweetness with the delicate flavor of fresh crab. The result? A luxurious, mouth-watering creation that’s perfect for occasions or simply when you want to impress your guests.
Crab Brulee Ingredients
To make this creamy delicacy, you’ll need a few simple ingredients that combine harmoniously to create an unforgettable dish. Here’s a breakdown of the essentials:
1. Fresh Crab Meat
Crab meat is star of dish. While you can use canned or frozen crab meat if fresh isn’t available, fresh crab meat will elevate the flavor. Lump crab meat works best, offering a tender & delicate texture that pairs perfectly with rich custard.
2. Heavy Cream
Heavy cream is key ingredient in creating the smooth, velvety texture of the custard. It brings richness and indulgence to the dish. It is the base that makes this dish creamy and decadent.
3. Eggs
Eggs act as binding agent in this recipe, helping to form the custard and contribute to the perfect texture. The right balance of eggs ensures the dish is set without being too firm or runny.
4. Lemon Zest (Optional)
A touch of lemon zest can brighten dish and offer a hint of acidity that cuts through the richness of the cream and crab. This ingredient is optional, allowing you to adjust the flavour profile to your liking.
5. Sugar (for the Brûlée Top)
Like the classic crème brûlée, the final touch is the caramelized sugar topping. The sugar creates a crunchy, sweet contrast to the savory custard underneath, completing the dish in true brûlée fashion.
How to Make Crab Brulee Recipe
Making Crab Brulee is easier than you might think. Follow these simple steps to create dish that’s sure to wow your guests:
1. Prepare the Crab Mixture
Start by cooking your fresh crab meat (if it’s not already pre-cooked). Once it’s ready, mix it into the creamy custard base. Combine heavy cream, eggs, a pinch of salt, and lemon zest (if using). Stir gently to ensure the crab is well distributed throughout the mixture.
2. Bake the Custard
Pour the crab mixture into individual ramekins. Place the ramekins in a water bath (a baking pan filled with hot water) & bake in the oven at a low temperature (around 300°F) until the custard is set but still jiggly in the centre. This step ensures that the custard is cooked evenly without becoming overdone.
3. Chill the Crab Brulee
Once the custard is baked, let it cool to room temperature before refrigerating for at least a few hours. Cooling is essential to achieving the perfect texture. If you skip this step, you may have a soupy custard when you try to brûlée the top.
4. Brûlée the Sugar Top
Once your Crab Brulee has set in the fridge, it’s time to add the signature brûlée topping. Sprinkle thin layer of sugar on top of the custard. Use a kitchen torch or place the ramekins under the broiler in your oven to melt the sugar, forming a crispy, golden-brown crust.
5. Serve and Enjoy
Let the brûlée cool slightly before serving. When tapped, the crispy sugar layer should crack, revealing the creamy, savory crab custard underneath. For an extra flavour boost, garnish with fresh herbs like chives and dill or even a sprinkle of Old Bay seasoning.
Variations to Try
While the basic Crab Brulee recipe is delicious, there are several ways to tweak it to suit your taste. Here are some creative variations to try:
Spicy Kick: Add pinch of cayenne pepper or dash of hot sauce to crab mixture for an extra zing.
Herb Infusion: Fresh herbs like tarragon, dill, or chives can be mixed into the custard base for a more aromatic flavour.
Cheesy Delight: Sprinkle some grated parmesan cheese before broiling for a cheesy twist that pairs perfectly with the crab.
Pro Tips for the Perfect Crab Brulee
Fresh Crab: Always opt for fresh crab meat for the best flavor. If the fresh crab is unavailable, the frozen crab can work but may not have the same delicate flavor.
Avoid Overcooking: Be careful not to overcook custard. Follow the recommended baking time & temperature to achieve a smooth, velvety texture.
Chill Before Serving: Allow the Crab Brulee to chill in the refrigerator for several hours, ideally overnight, to ensure the custard is set correctly before caramelizing the sugar topping.
Sugar Crust: If using a kitchen torch, be patient when brûléeing the sugar to avoid burning the custard. If using the oven’s broiler, keep a close eye on the sugar to ensure it doesn’t burn.
Why You’ll Love Crab Brulee Recipe
Crab Brulee Recipe offers a unique twist on the traditional crème brûlée, turning a beloved dessert into a savoury dish perfect for any special occasion. Whether you’re hosting dinner party, celebrating a holiday, or just craving something different, crab brulee will impress your guests with its rich flavour, creamy texture, and crispy sugar top.
If you love crab and enjoy exploring new takes on classic recipes, this dish is a must-try. So why not give it a go? Your taste buds will thank you!
Conclusion
Crab Brulee Recipe is a versatile, sophisticated dish that brings a delightful new spin to the traditional crème brûlée. It’s a unique, savoury alternative that’s rich and creamy and sure to impress. With just a few simple ingredients and a few basic steps, you can create a luxurious, restaurant-quality dish in comfort of your kitchen. Don’t forget to try some of the variations and pro tips to make the dish your own. Happy cooking!
Few dishes capture a Philly cheesesteak’s indulgent, savory satisfaction, but finding an authentic one outside Philadelphia can be a challenge. Enter Philly cheesesteak pasta—a creamy, cheesy, and flavor-packed alternative that delivers the same bold taste in an easy one-pan meal. This dish combines tender steak, sautéed vegetables, and gooey provolone with perfectly cooked pasta for a quick yet hearty dinner.
Why You’ll Love This Recipe
✅ One-pan meal – Fewer dishes, maximum flavor.
✅ Bold flavors – Classic cheesesteak ingredients in pasta form.
✅ Quick & easy – Ready in under 30 minutes, this dish is perfect for busy nights.
Ingredients You’ll Need
To create this ultimate Philly cheesesteak pasta recipe, gather the following:
Main Ingredients
1 lb. skirt steak or ribeye – Thinly sliced across the grain for tenderness.
8 oz. cavatappi pasta – Holds onto the creamy sauce beautifully.
8 oz. mushrooms – Cremini or white, sliced.
1 medium yellow onion – Thinly sliced for authentic flavor.
1 green bell pepper – Adds sweetness and color.
4 cloves garlic – Chopped for a fragrant punch.
3 ½ cups low-sodium beef broth – Enhances the meaty depth.
1 cup half-and-half – Adds creamy richness.
6 oz. shredded provolone – The signature cheese of a classic cheesesteak.
Seasonings & Oils
2 Tbsp. Neutral oil – For cooking the steak and veggies.
1 tsp. Italian seasoning – Adds a subtle herbal touch.
Kosher salt & black pepper – To taste.
Step-by-Step Instructions
Step 1: Sear the Steak
Heat 1 tablespoon oil in a large stainless-steel skillet over medium-high heat.
Toss the thinly sliced steak with Italian seasoning, salt, and pepper.
Pair with garlic bread or a side salad for a complete meal.
Add dash of hot sauce for an extra kick.
Swap provolone for white American cheese if you prefer a milder melt.
Final Thoughts
This one-pan Philly cheesesteak pasta is the ultimate comfort food—savory, cheesy, and flavorful. It’s the perfect way to enjoy the taste of a classic cheesesteak in an easy, fuss-free meal.
Bone marrow has been a staple in traditional diets for centuries, prized for its rich texture and nutritional value. In recent years, it has gained renewed popularity due to the rise of high-fat diets like keto, paleo, and carnivore. As people seek nutrient-dense, whole foods, one question often arises: Is bone marrow a paste? This simple question opens the door to a deeper understanding of bone marrow’s unique texture, culinary applications, and health benefits.
What Exactly Is Bone Marrow?
Bone marrow is soft, fatty tissue found within the hollow cavities of bones, particularly in large bones such as the femur, tibia, and shank. It’s an essential part of the body’s hematopoietic system, producing stem cells that form red blood cells and other vital components. Beyond its biological function, bone marrow is rich in fats, collagen, gelatin, and essential nutrients like iron and zinc, making it a powerful addition to any diet.
But is bone marrow a paste? Let’s explore this question further and see how its texture changes depending on how it’s prepared.
Is Bone Marrow a Paste?
When raw, bone marrow does indeed have a paste-like consistency. It is creamy, spreadable, and fat-rich, which makes it resemble a luxurious, animal-based paste. The smooth, soft texture allows it to be easily scooped out of bones, spread onto toast, or incorporated into dishes.
However, whether the bone marrow is a paste becomes even more intriguing when cooked. As bone marrow heats up, it transforms into a silky, melt-in-your-mouth delicacy with a buttery texture. This makes it even more versatile for culinary applications, as it can be used as a spread, incorporated into sauces, or enjoyed in its own right as part of a hearty meal.
While the raw form of bone marrow is undoubtedly paste-like, the cooked version retains a rich, velvety texture that some may describe as savoury fat more than a traditional paste. Whether roasted, simmered, or blended into broths, the answer is bone marrow. A paste can depend on how it’s prepared.
Nutritional Benefits of Bone Marrow
Beyond its unique texture, bone marrow has nutritional benefits that make it valuable addition to any diet. Here are some of the key health benefits of consuming bone marrow:
Healthy Fats: Bone marrow is rich in monounsaturated fats, which supports heart health and helps reduce inflammation. It provides an excellent alternative to processed oils or spreads, aligning well with high-fat diets like keto and paleo.
Collagen and Gelatin are crucial for supporting joint health, skin elasticity, and gut health. Bone marrow is considered a natural source of collagen, making it an excellent food for maintaining healthy connective tissues.
Iron and Zinc: These two vital minerals are essential in immune function, red blood cell production, and overall health. Bone marrow is an excellent source of iron and zinc, making it an excellent food for boosting energy levels & supporting the immune system.
Amino Acids: Bone marrow contains essential amino acids like glycine and proline, aiding digestion, tissue repair, and overall bodily functions. These amino acids are particularly beneficial for those recovering from injury or illness.
How Does Bone Marrow Fit Into Modern Diets?
Bone marrow’s rich nutrient profile makes it a valuable addition to several modern dietary trends. So, is bone marrow a paste that can be included in high-fat diets? Absolutely. It fits seamlessly into:
Keto Diets: Bone marrow is an excellent source of high-quality fats with minimal carbohydrates. It helps provide satiety and sustained energy, making it an ideal food for those following a keto lifestyle.
Paleo and AIP Diets: Many adherents to the paleo and autoimmune protocols (AIP) view bone marrow as a superfood that supports gut healing and nourishes the body with essential nutrients from ancestral sources.
Carnivore Diet: For those following a carnivore diet, bone marrow is a valuable fat source that enhances meals and boosts nutrient intake from animal-based foods alone.
Is Bone Marrow a Paste? Exploring Culinary Uses
If you’ve ever wondered if the bone marrow is a paste in culinary applications, the answer is yes! It can be used in various delicious ways to add richness and flavour to your meals. Here are some of the best ways to enjoy bone marrow:
1. Roasted Bone Marrow
Roasting bone marrow is one of the most popular ways to prepare it. When roasted, the marrow becomes incredibly soft and melt-in-your-mouth tender. Cut the bones in half, season with salt & pepper, & roast in the oven until the marrow is golden and bubbly. You can scoop it out and spread it on toast for a gourmet snack or serve it alongside a hearty dish.
2. Bone Broth
Another great way to enjoy bone marrow is by making bone broth. By simmering bones for several hours, the marrow releases its nutrients into the liquid, creating a nutrient-rich broth that can be used as base for soups, stews, or a standalone beverage.
3. Marrow as a Spread
If you’re looking for a way to replace butter or margarine, roasted bone marrow makes an excellent alternative. Its creamy, spreadable consistency makes it the perfect addition to your favourite baked goods. Spread it on toast or drizzle it over roasted vegetables for a savoury twist.
4. Blended Into Sauces and Soups
Bone marrow can also be blended into sauces and soups to enhance the richness and depth of flavour. Its creamy texture adds a luxurious mouthfeel to dishes, making it favourite in gourmet cooking.
Conclusion
So, is bone marrow a paste? In short, yes, it is—especially when raw. Bone marrow has a soft, spreadable consistency that resembles a paste. When cooked, it transforms into a rich, buttery substance that can still be described as a luxurious, paste-like fat. Whether you use it as a spread on toast, blend it into broths and soups, or enjoy it in roasted form, bone marrow offers a creamy, nutrient-dense option that enhances both the flavour and health benefits of your meals.
Frequently Asked Questions (FAQs)
Is bone marrow a paste?
Yes, bone marrow has a paste-like consistency when raw. It is creamy, smooth, and spreadable, resembling a rich, animal-based paste. It softens even more when cooked, taking on a buttery, melt-in-your-mouth texture often used as a spread or in various dishes.
How do you prepare bone marrow?
Bone marrow can be prepared in a variety of ways:
Roasting the bones to create a tender, spreadable paste.
Making bone broth by simmering the bones allows the marrow to infuse the broth with nutrients.
Use it as a toast spread or blend it into soups and sauces for extra richness.
Can bone marrow be consumed raw?
Yes, bone marrow can be consumed raw, and when it’s in its natural state, it has a smooth, paste-like consistency. However, it is typically recommended to cook bone marrow to enhance its flavour and make it safer for consumption by reducing any potential bacteria.
Cajun Shrimp Pasta is an all-time favorite when it comes to comfort food with kick. This dish combines succulent shrimp, a velvety cream sauce, and a bold blend of Cajun spices to create a meal that’s as indulgent as it is flavorful. Whether looking for a quick weeknight dinner or a dish to impress guests, this pasta recipe delivers a restaurant-quality experience in just 30 minutes.
Why You’ll Love This Recipe
✅ Rich, Creamy Sauce – A luscious Alfredo-style sauce coats every bite.
✅ Bold Cajun Flavors – Smoked paprika, cayenne, and garlic create a spicy, savory punch.
✅ Quick & Easy – Ready in 30 minutes with minimal prep.
✅ Highly Adaptable – Use different pasta, adjust spice levels, or add extra ingredients like sausage.
Ingredients You’ll Need
This one-pot Cajun shrimp pasta requires simple pantry staples:
For the Pasta & Shrimp
12 oz penne pasta (or any pasta of choice)
1 lb large shrimp (peeled and deveined)
1 tbsp olive oil
1 tbsp Cajun seasoning (adjust to taste)
For the Creamy Cajun Sauce
2 tbsp butter
3 cloves garlic, minced
1 cup heavy cream
1 cup Parmesan cheese, grated
½ cup chicken broth (or reserved pasta water)
1 tsp smoked paprika
½ tsp cayenne pepper (optional, for extra heat)
Salt & black pepper to taste
Optional Add-ins
½ cup diced tomatoes
½ cup sliced andouille sausage
½ cup bell peppers (red or green)
How to Make Cajun Shrimp Pasta
Step 1: Cook the Pasta
Bring pot of salted water to a boil.
Cook penne pasta according to package order until al dente.
Reserve ½ cup of pasta water before draining.
Step 2: Cook the Shrimp
In large skillet over medium-high heat, add olive oil.
Toss the shrimp with Cajun seasoning and sauté for 2-3 minutes per side until pink and opaque.
Remove shrimp from pan and set aside.
Step 3: Make the Creamy Cajun Sauce
In the same skillet, melt butter and sauté garlic until fragrant (about 30 seconds).
Pour in heavy cream and chicken broth.
Add Parmesan cheese, smoked paprika, and cayenne pepper. Stir until smooth.
Step 4: Combine & Serve
Add the cooked pasta & shrimp back into the skillet.
Stir to coat everything in creamy sauce. If needed, use the reserved pasta water to adjust the consistency.
Taste & adjust seasoning with salt & black pepper.
Serve hot, garnished with fresh parsley & extra Parmesan.
Tips for the Best Cajun Shrimp Pasta
✅ Use Freshly Grated Parmesan – It melts better than pre-shredded cheese.
✅ Don’t Overcook the Shrimp – They cook quickly and become rubbery if overdone.
✅ Adjust the Spice Level – Add more or less Cajun seasoning to your preference.
✅ Make It a One-Pot Meal – Cook everything in one skillet for easy cleanup.
Variations & Substitutions
🔹 Cajun Shrimp Pasta with Sausage – Add andouille sausage for smoky flavor.
🔹 Cajun Shrimp Pasta Without Cream: For a lighter option, Substitute heavy cream with Greek yogurt or coconut milk.
🔹 Gluten-Free Version – Use gluten-free pasta and ensure your Cajun seasoning is GF-certified.
🔹 Extra Veggies – Add spinach, mushrooms, or zucchini for more nutrients.
Final Thoughts
This creamy Cajun shrimp pasta is a must-try for anyone who loves bold flavors and rich, satisfying meals. Its quick preparation and easy adaptability make it perfect for weeknights, date nights, or special occasions.
Looking for a simple, satisfying dish that’s perfect for busy nights? Ditalini pasta with peas and Parmesan is the ultimate comfort meal. With only seven ingredients and less than 20 minutes of cooking time, this recipe combines convenience and flavor for a delightful dinner.
Why Choose Ditalini Pasta?
Ditalini pasta, meaning “little thimbles” in Italian, is a small, tubular pasta that absorbs sauces and flavors. Its bite-sized shape makes it ideal for soups, salads, and quick skillet dishes like this one. Not only is it versatile, but it also cooks quickly, making it a favorite for easy meals.
Ingredients for Ditalini Pasta with Peas and Parmesan
Here’s everything you’ll need to whip up this dish:
1 cup ditalini pasta
1 cup frozen peas
½ cup freshly grated Parmesan cheese
1 medium onion, diced
2 tablespoons butter
1 tablespoon olive oil
Salt and pepper to taste
These pantry-friendly ingredients combine to create a creamy and flavorful dish that will impress.
How to Cook Ditalini Pasta with Peas and Parmesan
1. Caramelize the Onions
In large skillet, heat butter & olive oil over medium heat. Once the butter melts, add diced onion & a pinch of salt and pepper. Cook until onions are soft, golden, and caramelized—this will take about 8–10 minutes.
2. Cook the Ditalini Pasta
While onions cook, bring large pot of salted water to a rolling boil. Add the ditalini pasta & cook until al dente, typically around 10 minutes.
3. Blanch the Peas
Toss the frozen peas directly into the boiling water two minutes before the pasta is done. Let them cook until bright green and tender. This step saves time and reduces the number of pots to clean!
4. Combine Ingredients
Drain the pasta and peas, then transfer them to the skillet with the caramelized onions. Toss everything over low heat until well combined.
5. Finish with Parmesan
Sprinkle freshly grated Parmesan cheese into the skillet. Stir gently until the cheese melts, forming a creamy coating over the pasta and peas.
6. Serve and Enjoy
Plate the pasta immediately, garnishing with extra Parmesan and twist of freshly cracked black pepper. Serve warm, and savor the flavors!
What to Add to Ditalini Pasta
This dish is highly versatile, and you can customize it with ingredients to suit your taste. Here are some ideas:
Pesto or marinara sauce for added depth.
Sundried tomatoes and garlic for a Mediterranean flair.
Feta or Asiago cheese as a substitute for Parmesan.
Artichokes and olives elevate the dish.
Tips for the Perfect Ditalini Pasta
Cook ditalini pasta al dente to maintain its shape and texture.
For healthier version, substitute olive oil for butter or whole-grain ditalini.
Leftovers? Store in an airtight container in the fridge for up to three days and reheat with a splash of water or broth.
Why This Recipe Works
Ditalini pasta pairs beautifully with the sweetness of peas and the nutty richness of Parmesan. The caramelized onions add depth, while the butter and olive oil create a luscious base for the dish. It’s simple yet elegant meal that’s perfect for any occasion.
Conclusion
Whether you’re a busy professional or a home chef looking for inspiration, ditalini pasta with peas and Parmesan is a must-try. It’s quick, delicious, and endlessly customizable, making it a staple in any kitchen. Give it a try tonight, & enjoy the flavors of this comforting dish!
 Step-By-Step Guide
 1. Bent Knee Hip Extensions
 2. Cycling
 3. Brisk Walking
 4. Stair Climbing
 5. Aerobics
 6. Dancing
 7. Swimming
 8. Mountain Climbers
 9. Burpees
 10. Rowing
 Strength Training Exercises
 12. Push-ups
 13. Bridge Exercise
 14. Jumping Lunges
 15. Squat Jumps
 16. Lifting Weights
 17. Bird Dog Exercise
 18. Dead Bug Exercise
 19. The Contralateral Limb Raises
 Flexibility and Balance Workouts
 How to Incorporate These Exercises into Your Routine
 1. High-Protein Cottage Cheese Pancakes
 Conclusion
 How to Make Your Own Glinda’s Pink Potion at Home
 Why You’ll Love Glinda’s Pink Potion
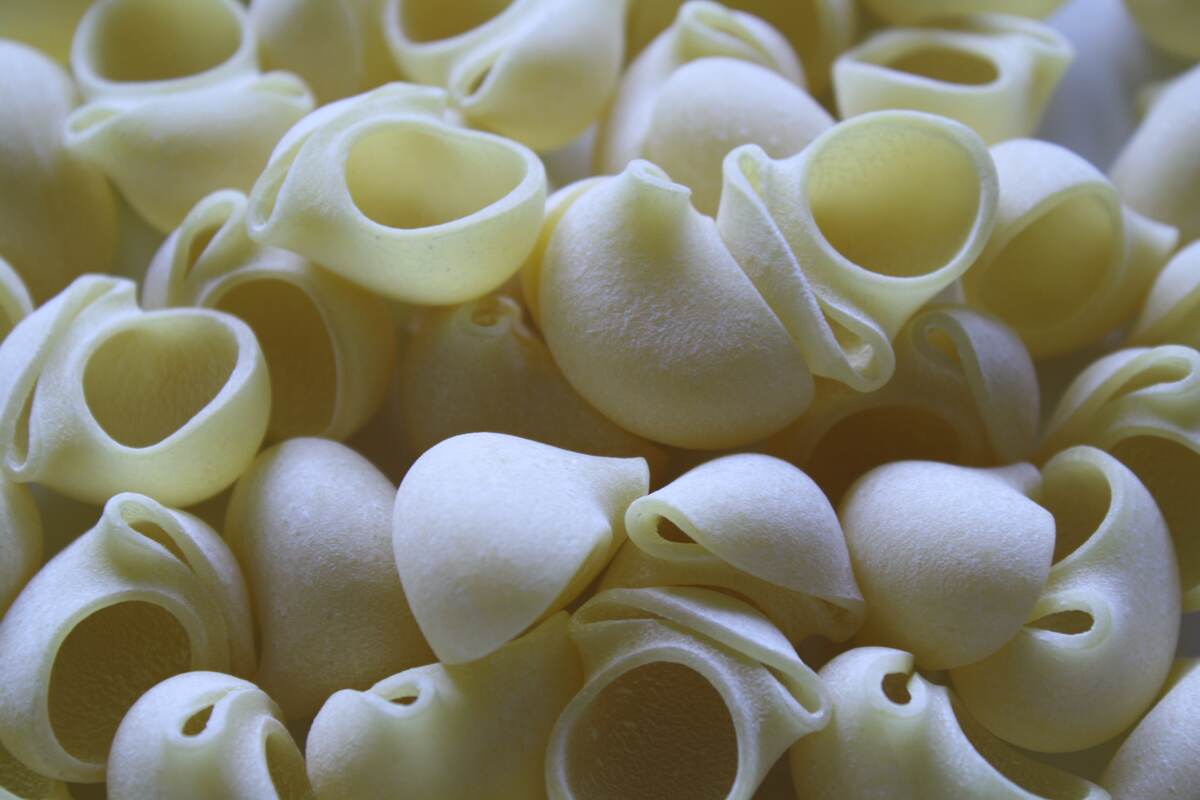 Ingredients:
 Ingredients:
 Crab Brulee Ingredients
 Conclusion
 Step 2: Sauté the Veggies
 Final Thoughts
 Is Bone Marrow a Paste? Exploring Culinary Uses
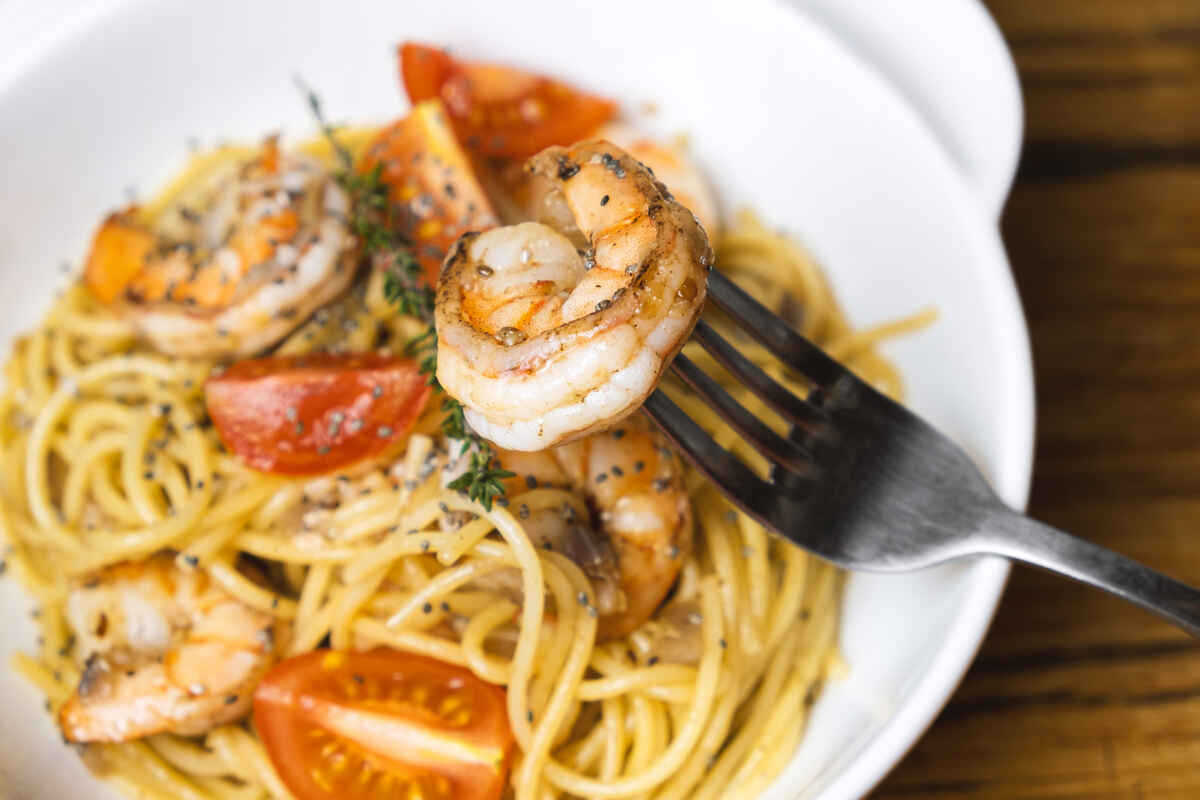 Ingredients You’ll Need
 Variations & Substitutions
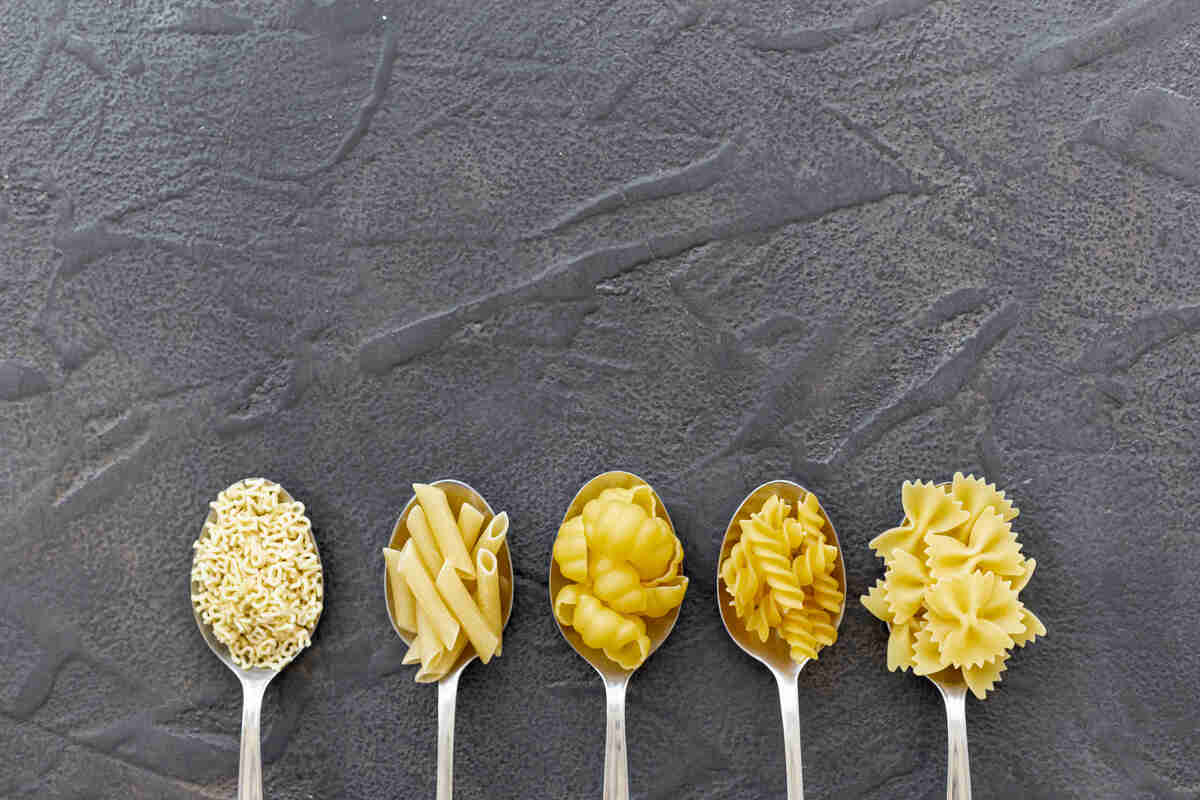 Ingredients for Ditalini Pasta with Peas and Parmesan
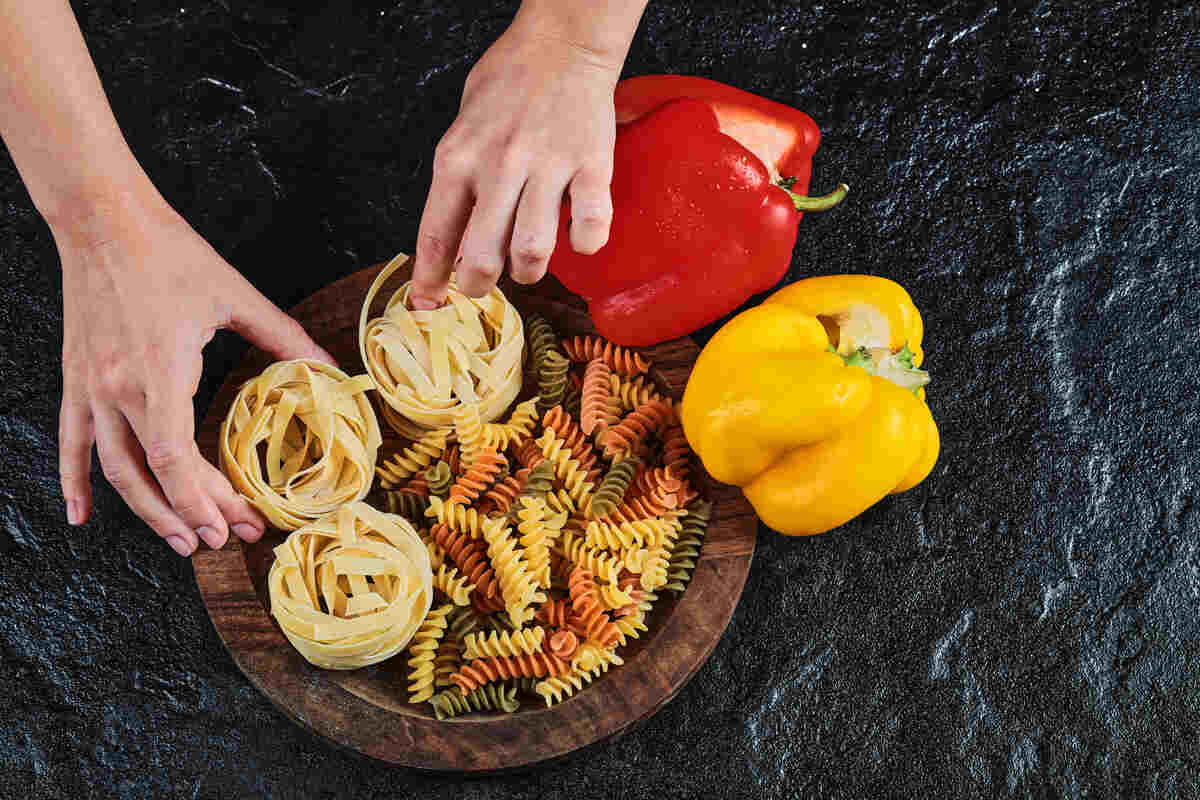 Why This Recipe Works