Murgh Musallam, a celebrated gem of Mughlai cuisine, is a royal dish known for its complex flavours, opulent presentation, and deep cultural roots. This culinary masterpiece, meaning “whole chicken,” has graced the banquet tables of emperors and nobles. Today, it continues to captivate with its aromatic spices, nut-laced richness, and luscious gravy. This detailed Murgh Musallam recipe carefully walks you through each step, unveiling traditional techniques and time-honoured ingredients.
A Glimpse into the Origins of Murgh Musallam Recipe
Steeped in history, Murgh Musallam Recipe origins are in the royal kitchens of the Mughal Empire. The dish is believed to have been a favourite of Emperor Muhammad bin Tughlaq and was later refined during the height of Mughal rule. What sets it apart is its preparation of a whole chicken, marinated with layers of spices and slow-cooked to perfection, often stuffed and richly garnished.
Ingredients You Will Need
Ensure all components are ready before embarking on the preparation. The soul of this dish lies in the freshly ground spices and patient marination.
For the Marinade:
1 whole chicken (skinless, about 1.2–1.5 kg), cleaned and pat dried
¼ cup fresh cream (optional but enriches the gravy)
2 tbsp chopped fresh coriander leaves
A few strands of saffron soaked in 2 tbsp warm milk (optional, for finishing)
Step-by-Step Preparation
Step 1: Preparing the Marinade
Start by mixing the curd with turmeric, salt, half of the red chilli powder, garam masala, and the fresh ground paste of onion, ginger, and garlic. Coat the chicken thoroughly, ensuring the marinade seeps into the cuts on the bird’s surface. Allow it to rest for at least 30 minutes. For deeper infusion, marinate overnight under refrigeration.
Step 2: Toasting the Whole Spices
In dry pan over medium heat, gently roast cloves, peppercorns, cinnamon, cardamoms, almonds, cumin, coriander, and poppy seeds. Stir continuously for even toasting. Once fragrant, remove from heat & allow to cool slightly. Grind them into a fine paste using minimal water. This forms the core masala of the dish—robust, earthy, and intensely aromatic.
Step 3: Searing the Chicken
Heat 2 tablespoons of mustard oil or ghee in a large, deep pan. Lightly sear the marinated whole chicken on all sides until it develops a golden hue. Remove and set aside. This initial browning locks in moisture and adds depth to the flavour.
Step 4: Building the Gravy Base
In the same pan, add remaining oil. Sauté the finely sliced onions until caramelized—a process that can take up to 15 minutes on low flame. This slow caramelization is critical for the signature richness of Murgh Musallam Recipe. Stir in the prepared spice paste and cook for 7–8 minutes until oil separates and the rawness dissipates.
Now, add the tomato purée and the remaining red chilli powder. Cook until the mixture thickens & takes on a deep, luscious colour. Fold in the cream for added silkiness (optional).
Step 5: Simmering to Perfection
Place the seared whole chicken into the pan, spooning the masala. Add about ½ to ¾ cup water to adjust consistency. Cover and simmer over a low flame for 35–40 minutes, occasionally basting the chicken with the sauce. The meat should be tender, easily pierced with a fork, but not falling apart.
In the final five minutes, add saffron-infused milk and fresh coriander. Simmer uncovered for a richer colour and aroma.
Step 6: Resting and Garnishing
Once cooked, allow the Murgh Musallam Recipe to rest for 10 minutes before serving. This resting period allows flavours to settle and the gravy to thicken further. Garnish with silver leaf (varq), additional saffron strands, and a drizzle of ghee for that regal touch.
Serving Suggestions
Murgh Musallam Recipe is traditionally served with fragrant basmati rice or sheer mal (sweet saffron flatbread). However, it pairs equally well with naan or tandoori roti. To balance the richness, accompany it with a simple cucumber raita and onion salad.
Final Thoughts
This Murgh Musallam Recipe is more than a method—it’s a journey into a regal era where food was not merely sustenance but art. The layering of spices, the ceremonial preparation of a whole bird, and the final flourish of saffron and cream all signal a dish crafted with reverence. Murgh Musallam Recipe celebrates tradition, patience, and flavour for a festive table or a culinary challenge.
Frequently Asked Questions (FAQs)
What does “Murgh Musallam” mean?
“Murgh Musallam” is a Persian-origin term meaning “whole chicken.” In the culinary context, it refers to a regal dish in which an entire chicken is marinated, often stuffed, and cooked in a rich, aromatic gravy. It is traditionally served during festive or royal occasions.
Can I use boneless chicken for Murgh Musallam?
While it’s technically possible, using boneless chicken deviates from the essence of this dish. Murgh Musallam is traditionally prepared with a whole bird, which helps retain moisture and delivers the intended presentation and texture. For a flavor profile similar to boneless pieces, consider “Chicken Musallam” instead.
How long should the chicken be marinated?
A minimum of 30 minutes is essential for the spices to infuse, but marinating overnight (6–8 hours) in the refrigerator is highly recommended for optimal flavour. This allows the curd and spices acid to thoroughly tenderize and flavour the meat.
Is Murgh Musallam very spicy?
Murgh Musallam has a rich, bold flavour but is not necessarily overly spicy. The heat level can be adjusted by reducing the quantity of red chilli powder or using mild chilli varieties. Curd, cream, and nuts also naturally mellow the heat.
Can Murgh Musallam be made in an oven?
Yes. After marinating and optionally searing the chicken, place it in a covered oven-safe dish or Dutch oven & bake at 180°C (350°F) for about 45–55 minutes. Baste occasionally and uncover in the last 10 minutes for a slightly roasted finish.
Every June, Men’s Mental Health Month shines a necessary spotlight on an often-overlooked subject: men’s emotional and psychological well-being. In a society that traditionally celebrates stoicism and self-reliance among men, addressing mental health challenges remains a sensitive yet urgent conversation. Recognizing Men’s Mental Health Month is not merely a ceremonial act but a vital initiative to dismantle long-standing stigmas, promote emotional resilience, and save lives.
Why Men’s Mental Health Month Matters
Men are frequently conditioned from a young age to suppress their emotions, to “man up” in the face of distress. This ingrained cultural expectation has grave consequences. Research indicates that men are significantly less likely than women to seek help for mental health issues, yet they face a suicide risk that is four times higher. Men’s Mental Health Month aims to upend this dangerous dynamic by encouraging open dialogues, promoting help-seeking behaviour, and offering tangible resources.
Beyond the statistics, there lies a deeper, more insidious problem: the internalized shame many men feel when confronting emotional vulnerability. This month-long observance serves as a societal permission slip for men to prioritize their mental health, free from judgment or ridicule.
Breaking Down Stigma Surrounding Men’s Mental Health
One of primary goals of Men’s Mental Health Month is to erode the outdated notion that vulnerability equates to weakness. Terms like “toxic masculinity” highlight the harmful effects traditional gender norms have on men’s emotional lives. By redefining strength as the courage to seek support, society can create a safer environment where mental health discussions are normalized, not marginalized.
Interestingly, anthropological studies suggest that in many indigenous cultures, emotional expression among men was considered a vital component of communal strength rather than a personal failing. Men’s Mental Health Month helps resurrect this ancient wisdom in a modern context, reminding us that true resilience involves both body and mind.
Practical Steps Men Can Take for Mental Well-Being
While awareness is crucial, action transforms lives. Men are encouraged to approach their mental health with the same seriousness and commitment they often dedicate to physical health. Regular physical activity releases endorphins, significantly elevating mood and reducing anxiety. Additionally, mindfulness meditation and journaling provide scientifically-backed benefits for emotional regulation.
Nourishing the body is equally vital. Diets rich in omega-3 fatty acids, complex carbohydrates, and antioxidants positively affect brain health, potentially warding off depressive symptoms. Adequate sleep—often dismissed as a luxury—is, in reality, a cornerstone of psychological resilience. Men’s Mental Health Month emphasizes the interconnectedness of these lifestyle factors, encouraging a holistic approach to well-being.
Where to Seek Support During Men’s Mental Health Month
Navigating mental health resources can feel daunting, but several organizations offer invaluable support. Mental Health America provides educational tools and screening services to guide individuals toward appropriate interventions. The National Suicide Prevention Lifeline stands ready with confidential support for those in immediate crisis. This crucial lifeline underscores the message of Men’s Mental Health Month: no one should suffer in silence.
Local communities, too, often offer mental health services that are both accessible and culturally sensitive. From peer support groups to licensed therapists specializing in men’s issues, resources abound for those willing to reach out.
Moreover, although most active in November, the Movember Foundation remains a year-round champion for men’s health, offering comprehensive materials tailored to male audiences. Men’s Mental Health Month is a powerful reminder to utilize these resources before emotional struggles escalate.
Beyond June: Sustaining the Momentum of Men’s Mental Health Month
While June offers a concentrated period for advocacy, the mission of Men’s Mental Health Month must persist year-round. Continued conversations in workplaces, schools, and homes are essential. Establishing mental health education early in life can equip young boys with the vocabulary and tools needed to navigate emotional challenges without shame.
Innovative initiatives like mental health first aid training for men, online therapy platforms tailored to male users, and storytelling campaigns featuring male mental health advocates are pushing the conversation forward. These progressive movements highlight the evolving understanding that mental fitness is not an accessory to life but its foundation.
Conclusion
Men’s Mental Health Month is more than a campaign; it is a clarion call to acknowledge and address the silent battles many men face. By fostering open dialogue, challenging harmful stereotypes, and connecting men with life-saving resources, we inch closer to future where mental health is universally prioritized and celebrated. The stakes could not be higher, nor could the opportunity for profound, life-affirming change. Let June be the beginning—not the end—of a commitment to mental well-being for all men.
Frequently Asked Questions
What is Men’s Mental Health Month?
Men’s Mental Health Month is an annual observance held every June to raise awareness about men’s mental health challenges. It encourages men to prioritize their mental well-being, promotes open conversations, and offers resources to reduce stigma and support emotional resilience.
Why is Men’s Mental Health Month important?
Men’s Mental Health Month is crucial because it highlights the often-overlooked mental health struggles men experience. Societal expectations often prevent men from seeking help, resulting in increased rates of untreated mental health issues and suicide. This month fosters education, understanding, and action to improve men’s emotional health.
What are common mental health issues men experience?
Men commonly experience depression, anxiety, substance abuse disorders, and post-traumatic stress disorder (PTSD). However, men may often express emotional distress through irritability, anger, or risky behaviours rather than through more typical signs of sadness, making these issues harder to recognize and treat.
Back pain is one of the most common health complaints across all age groups. While poor posture, muscle strain, and medical conditions often get the blame, there is a lesser-known but important factor that may contribute to back discomfort: dehydration. So, can dehydration cause back pain? The answer is yes, especially when water loss begins to affect spinal discs, kidneys, and muscles.
The Role of Water in Spinal Health
Your spine consists of 33 vertebrae cushioned by intervertebral discs. These discs are composed mainly of water—up to 80% in early adulthood. They function as shock absorbers, helping you bend, twist, and move easily. When dehydrated, the discs begin to shrink and lose flexibility. This can lead to:
Increased pressure between vertebrae
Irritation of nearby nerves
Reduced shock absorption
Heightened susceptibility to pain and stiffness
This connection makes it plausible that dehydration can cause back pain, especially in lower back, where the spinal load is the greatest.
Muscle Cramps and Spinal Discomfort
Another critical way dehydration contributes to back pain is through muscle tension. Electrolyte imbalance, which occurs when you’re not consuming enough water, can lead to spasms or cramps in muscles surrounding the spine. The muscles try to compensate for instability in the spinal column, resulting in strain and pain.
Chronic tightness and recurring backaches may follow when this process is left unchecked—particularly during physical activity or prolonged sitting.
Kidney Function and Lower Back Pain
In more severe cases, dehydration can affect kidney performance. Kidneys regulate fluid balance in the lower back, just below the rib cage. When fluid intake is insufficient, it can lead to:
Kidney stones
Urinary tract infections
Reduced detoxification
Inflammation in the renal region
These conditions often present as sharp, localized pain in the lower back. Thus, another pathway through which dehydration can cause back pain lies in kidney-related complications.
Signs You’re Dehydrated (and May Not Realize It)
Not all signs of dehydration are obvious. You may be mildly or moderately dehydrated if you experience:
Dry mouth or bad breath
Persistent headaches
Fatigue or lightheadedness
Dark-colored urine
Constipation
Joint or back discomfort
Many people don’t associate these symptoms with fluid loss. Yet, addressing dehydration early could prevent back pain from developing or worsening.
How Much Water Do You Need?
There isn’t a universal guideline, but a common suggestion is to drink half of your body weight in ounces each day. For example, weighing 160 pounds, you should aim for around 80 ounces of water daily. Factors like exercise, climate, and health conditions may increase your needs.
To avoid asking, “Can dehydration cause back pain?” again in the future, establish these hydration habits:
Start your day with water
Limit caffeine and alcohol, which are dehydrating
Eat water-rich foods like cucumbers and oranges
Carry a refillable bottle to track intake
When to See a Doctor
If you hydrate consistently and still suffer from persistent or worsening back pain, it’s crucial to consult a healthcare professional. The cause could be a structural issue or an underlying condition requiring medical treatment.
Remember, dehydration can cause back pain, but it’s also a symptom you can take control of with the proper lifestyle habits.
Final Thoughts
So, can dehydration cause back pain? Undoubtedly, yes. While not the sole cause of back discomfort, it’s a significant and often overlooked contributor. Proper hydration supports the integrity of your spinal discs, muscles, and kidneys—three vital components of a pain-free back.
Back pain, whether acute or chronic, can be debilitating and significantly affect daily life. When conservative treatments such as physical therapy, oral medications, or lifestyle modifications fail to provide sufficient relief, doctors may recommend targeted injections to manage the pain effectively. This article explores most commonly used types of injections for back pain, their purposes, benefits, risks, and what patients can expect.
Understanding the Role of Injections in Back Pain Management
Injections for back pain are not a one-size-fits-all solution. They are typically used for both diagnostic and therapeutic purposes. Different types of injections may be recommended depending on the root cause of pain—such as nerve compression, inflammation, or joint dysfunction.
Common Types of Injections for Back Pain
Below is a comprehensive overview of the most frequently administered injections to relieve various forms of spinal pain.
Injection Type
Primary Use
Duration of Relief
Epidural Steroid Injections
Nerve root inflammation, herniated discs
Weeks to several months
Facet Joint Injections
Arthritic or mechanical back pain
Temporary, diagnostic too
Nerve Blocks
Localized pain, diagnostic clarity
Short-term relief
Sacroiliac Joint Injections
Pain from sacroiliac joint dysfunction
Few days to weeks
Trigger Point Injections
Muscle-related back pain, myofascial pain
Varies by individual
Radiofrequency Ablation (RFA)
Long-term relief by disabling pain signals
6 months to 2 years
1. Epidural Steroid Injections (ESIs)
Among the most common types of injections for back pain, epidural steroid injections involve delivering corticosteroids into the epidural space around the spinal cord. These reduce inflammation of nerve roots caused by conditions like:
Herniated discs
Spinal stenosis
Sciatica
Pros:
Minimally invasive
Quick procedure
Reduces swelling and irritation
Cons:
Temporary relief
Potential side effects with repeated use
2. Facet Joint Injections
Facet joints are small stabilizing joints in spine. Injections here usually include a local anaesthetic and steroid to diagnose and relieve pain stemming from spinal arthritis or joint degeneration.
Key benefit: They help confirm whether a specific joint is the source of pain.
3. Nerve Blocks
This injection temporarily interrupts pain signals being sent to the brain. It’s commonly used as both a diagnostic tool and for short-term pain relief in patients with:
Radiculopathy
Complex regional pain syndrome (CRPS)
Persistent lower back pain
4. Sacroiliac (SI) Joint Injections
When pain originates at the base of the spine, SI joint injections can help relieve inflammation in the sacroiliac joint. These are especially useful in cases where walking, sitting, or standing causes discomfort.
5. Trigger Point Injections
These target muscle knots that cause localized pain or refer pain to other areas. Trigger point injections often involve saline, local anaesthetic, or corticosteroids and are highly effective for muscular causes of back pain.
6. Radiofrequency Ablation (RFA)
While technically not an injection, RFA involves inserting a probe through a needle to heat and turn off pain-causing nerves. It’s often recommended for patients who have had successful diagnostic nerve blocks.
Essential Considerations Before Receiving Injections
Although injections can be effective, they should not be viewed as a cure. They are usually one component of a broader treatment plan, which may include:
Physical therapy
Anti-inflammatory medications
Weight management
Core-strengthening exercises
Risks may include infection, allergic reaction, nerve damage, or temporary pain flare-ups. Therefore, it is critical to consult with a board-certified pain specialist or spine doctor before proceeding.
When Are Injections Recommended?
Doctors typically suggest injections when:
Pain is moderate to severe and persistent
Conservative treatments have failed
Imaging confirms a specific source of pain
Diagnostic clarity is needed before surgery
Conclusion
Choosing among the various types of injections for back pain depends mainly on the underlying condition, pain severity, and individual response to treatment. From epidural steroids to nerve blocks, these interventions offer targeted relief and can significantly enhance quality of life when used judiciously. Always seek medical advice before pursuing any injection therapy, and ensure the procedure is performed under image guidance for accuracy and safety.
Keeping your health in check isn’t always easy in today’s fast-paced world. Between long work hours, skipped meals, and over-processed foods, most people fall short of the nutrients they need daily. That’s where Chamagnga Multivitaminsare designed to bridge the gap between your lifestyle and your nutritional needs.
Multivitamins are no longer just for older adults or people with medical conditions. Whether you’re a busy professional, an active gym-goer, or simply trying to stay energised and healthy, Chamagnga Multivitaminscan help support your overall well-being, one capsule at a time.
Why Do You Need Multivitamins Today?
Even if you eat well most of the time, the modern diet often lacks essential nutrients. Soil depletion, stress, irregular sleep, and poor hydration can lead to key vitamins and minerals deficiencies.
Here are some common signs you may not be getting enough nutrients:
Constant fatigue
Brain fog
Weak immune system
Dull skin or hair loss
Poor digestion
Taking Chamagnga Multivitaminsdaily can help replenish these vital nutrients and restore your body’s natural balance.
What Makes Chamagnga Multivitamins Different?
Unlike generic formulas, Chamagnga Multivitaminsare crafted to meet the needs of modern individuals who face stress, nutrient gaps, and inconsistent eating patterns. This supplement combines a wide range of vitamins, minerals, and antioxidantsto support core body functions like:
The goal is not just to prevent deficiency—but to optimise your daily energy and performance.
Key Ingredients in Chamagnga Multivitamins
Here’s a breakdown of the powerhouse nutrients you’ll find in every dose of Chamagnga Multivitamins:
Nutrient
Function
Vitamin B Complex
Supports energy, nerve health, and stress management
Vitamin C
Powerful antioxidant, strengthens immunity
Vitamin D3
Crucial for bone health and mood regulation
Zinc
Promotes immune defense and wound healing
Iron
Essential for oxygen transport and stamina
Magnesium
Supports sleep quality and muscle relaxation
Biotin
Encourages healthy skin, nails, and hair
Folic Acid
Important for cell renewal and red blood cell production
This thoughtful blend ensures you’re meeting your daily nutritional needs and supporting long-term wellness.
Benefits of Taking Chamagnga Multivitamins Regularly
Taking Chamagnga Multivitaminsconsistently can offer a wide range of benefits, especially when paired with a healthy lifestyle:
1. Boosted Energy Levels
Many people experience reduced fatigue and improved stamina within weeks of consistent use. B-complex vitamins and iron are especially helpful for chronically tired people.
2. Improved Immune System
With nutrients like vitamin C, D3, and zinc, Chamagnga Multivitaminshelp your body stay resilient against colds, infections, and seasonal illnesses.
3. Healthier Hair, Skin, and Nails
The formula’s biotin and antioxidants support cell regeneration and collagen production, improving your skin glow and hair texture over time.
4. Mental Clarity and Mood Support
Magnesium and vitamin B6 contribute to a healthier nervous system and improved brain function, potentially easing stress and brain fog.
5. Convenient Nutrition
Let’s face it—eating perfectly every day isn’t realistic. Chamagnga Multivitaminsmake it easy to stay consistent with your wellness routine, even on your busiest days.
Who Can Benefit from Chamagnga Multivitamins?
Chamagnga Multivitaminsare suitable for:
Adults with busy lifestyles
College students under high stress
Athletes and fitness enthusiasts
Vegetarians or people with restricted diets
Individuals recovering from illness
Anyone wanting to fill dietary gaps naturally
However, it’s always best to consult a healthcare professional if you have pre-existing medical conditions or take prescription medications.
How to Take Chamagnga Multivitamins
Take one capsule daily with a meal and a full glass of water for best results. Avoid taking it on an empty stomach to minimise the chance of nausea, especially if the supplement contains iron or zinc.
Final Thoughts
Balanced nutrition is the foundation of a healthy life, but we all know how hard it can be to eat right every single day. That’s why Chamagnga Multivitaminsare a smart choice for anyone looking to maintain energy, strengthen their immune system, and support overall health without overwhelm.
By adding this supplement to your daily routine, you’re investing in long-term wellness—one day, one capsule at a time.
Frequently Asked Questions (FAQs)
1. What are Chamagnga Multivitamins used for?
Chamagnga Multivitamins support daily health by providing essential vitamins and minerals that may be lacking in a regular diet. They help boost energy, improve immunity, enhance skin and hair health, and fill nutritional gaps caused by modern lifestyle habits.
2. Who should take Chamagnga Multivitamins?
Chamagnga Multivitamins can benefit adults with busy schedules, low energy, weak immunity, or poor eating habits. They are invaluable for those with restricted diets, chronic fatigue, or individuals recovering from illness.
3. Can I take Chamagnga Multivitamins every day?
Yes, Chamagnga Multivitamins are formulated for daily use. One capsule a day with food and water is typically recommended. Always follow the product label and consult a healthcare professional if you have underlying medical conditions or take medications.
4. What ingredients are in Chamagnga Multivitamins?
Chamagnga Multivitamins usually contain a mix of Vitamin B complex, Vitamin C, Vitamin D3, Zinc, Iron, Magnesium, Folic Acid, and Biotin—nutrients essential for energy, immune defence, brain function, and skin health.
5. Are Chamagnga Multivitamins a replacement for healthy eating?
No, multivitamins should not replace a healthy diet. Chamagnga Multivitamins are meant to supplementyour nutrition, not substitute real, whole foods. A balanced diet with fruits, vegetables, lean protein, and fibre is essential for optimal health.
In recent years, many individuals have turned toward natural Mounjaro recipes as an alternative approach to managing weight and supporting healthy glucose levels. Inspired by the mechanism of GLP-1 receptor agonists like Mounjaro, these homemade formulations aim to mimic their effects using organic, plant-based ingredients.
While pharmaceutical options have their place in medical treatment, there’s a growing demand for nature-based recipes that promote similar metabolic benefits without synthetic compounds or side effects.
What Is a Natural Mounjaro Recipe?
A natural Mounjaro recipe typically includes ingredients that stimulate the body’s natural production of GLP-1, a hormone responsible for regulating appetite, slowing digestion, and maintaining insulin balance. Using specific herbs, spices, and nutrient-rich foods can create a blend that helps manage cravings, supports fat metabolism, and improves energy levels.
Ingredients Commonly Found in Natural Mounjaro Recipes
These carefully selected ingredients offer powerful, synergistic benefits:
Fenugreek Seeds are known to slow down carbohydrate absorption and improve insulin sensitivity.
Cinnamon – Balances blood sugar and enhances metabolic function.
Apple Cider Vinegar – Aids in satiety and supports digestive health.
Lemon Juice – Detoxifying and rich in vitamin C, which aids metabolic processes.
Chia Seeds are high in fibre & protein & help with appetite control.
Ginger – Promotes thermogenesis and healthy digestion.
Turmeric – Contains curcumin, which has anti-inflammatory & insulin-sensitizing properties.
How to Make a Natural Mounjaro Recipe at Home
Here’s a potent, easy-to-make natural Mounjaro recipe that can be consumed daily:
Homemade GLP-1 Activating Drink
Ingredients:
1 tablespoon apple cider vinegar
½ teaspoon cinnamon powder
1 teaspoon chia seeds (pre-soaked for 10 minutes)
1 teaspoon grated ginger
Juice of half a lemon
A pinch of turmeric
1 cup of warm water
Instructions:
Combine all ingredients in a glass.
Stir well and let it sit for 5 minutes.
Consume on an empty stomach in the morning.
This Mounjaro weight loss drink may naturally encourage your body’s GLP-1 response, helping you feel fuller and longer and reducing excessive hunger cravings throughout the day.
Benefits of a Natural Mounjaro Recipe
Incorporating a natural Mounjaro recipe into your daily regimen can offer multiple health advantages:
Promotes weight loss by reducing appetite & cravings
Encourages stable blood sugar levels
Supports hormonal balance
Boosts energy and digestion
Provides a safe, non-synthetic alternative to commercial medications
Additional GLP-1 Supporting Foods to Add to Your Diet
For enhanced results, consider incorporating the following GLP-1 weight-loss foods into your meals:
Leafy greens like kale and spinach
Avocados and nuts for healthy fats
Legumes such as lentils and chickpeas
Blueberries and apples (low glycemic fruits)
Fermented foods like kimchi and yoghurt
These Mounjaro natural ingredients work harmoniously to support your metabolism and overall well-being.
Final Thoughts
A natural Mounjaro recipe offers a promising route for those seeking holistic weight management and metabolic health solutions. While not a replacement for medical treatment in severe cases, it is a thoughtful, effective tool for individuals committed to healthier living through natural means.
The Mai Tai is one of the most beloved tropical cocktails, offering a delightful combination of rum, fruit juices, and exotic flavours. Originating in the early 20th century, this cocktail has become a staple in tiki bars and summer parties. Its name, “Mai Tai,” translates to “good” or “out of this world” in Tahitian, and the drink lives up to its name with a burst of rich flavours that transport you to an island paradise. Here’s how to craft the perfect Mai Tai recipe at home.
Ingredients for the Perfect Mai Tai
You need a few simple ingredients that harmonise to make the perfect Mai Tai. Here’s what you’ll need:
2 oz (60 ml) of light rum
1 oz (30 ml) of dark rum (preferably aged for a deeper flavour)
1/2 oz (15 ml) of orange curaçao
1/2 oz (15 ml) of fresh lime juice
1/4 oz (7.5 ml) of orgeat syrup (almond-based syrup for a hint of sweetness)
1/4 oz (7.5 ml) of simple syrup (optional, depending on your sweetness preference)
Crushed ice
Garnishes: A mint sprig and a lime wedge
Step-by-Step Instructions
Prepare Your Glass: Fill a highball or rock glass with crushed ice to chill it.
Combine the Ingredients: In a cocktail shaker, combine light rum, dark rum, orange curaçao, fresh lime juice, orgeat syrup, and simple syrup (if you’re using it). Add ice to shaker & shake vigorously for 10-15 seconds to mix ingredients thoroughly and chill the mixture.
Strain and Serve: Strain mixture into the glass over the crushed ice, ensuring it stays cold and refreshing.
Garnish: For that perfect touch, garnish your Mai Tai with sprig of fresh mint and a lime wedge. Add a cherry or a slice of pineapple for extra flair if desired.
Enjoy: Take a sip and enjoy the sweet, tangy, and refreshing flavours of the Mai Tai. It’s the perfect cocktail to transport you to a tropical getaway without leaving home.
Variations of the Mai Tai
While the classic Mai Tai recipe is beloved by many, there are a few variations to cater to different preferences:
Frozen Mai Tai: Blend ingredients with ice for a refreshing, slushy version of the classic cocktail.
Fruity Mai Tai: For those who prefer a fruitier cocktail, add a splash of pineapple juice or grenadine for sweetness and colour.
Mai Tai with a Twist: Experiment with flavoured rum, such as coconut or mango rum, for a unique twist on the traditional recipe.
The History Behind the Mai Tai
The Mai Tai’s origins are often debated, with Trader Vic’s and Don the Beachcomber claiming to have invented it. While the details are fuzzy, what remains clear is that this cocktail has become a symbol of tiki culture. Trader Vic’s version, which uses a mix of light and dark rum, has remained the most popular, offering a balanced taste of sweet and slightly tart.
Tips for the Best Mai Tai
Fresh Ingredients: Always use freshly squeezed lime juice for best flavour. Pre-bottled lime juice tends to have a more artificial taste that can affect the quality of the cocktail.
Use High-Quality Rum: Since rum is the show’s star, choose a good-quality rum for the best taste. A blend of both light and dark rum creates a balanced profile.
Don’t Overdo the Syrups: The orgeat syrup is key to achieving that signature nutty flavour. Be cautious with the amount of simple syrup you add, as it can easily overpower the other flavours.
Mai Tai in Popular Culture
The Mai Tai has appeared in pop culture, often representing carefree beach vacations, tropical islands, and fun-filled parties. Whether watching a summer blockbuster or sitting on the porch with friends, the Mai Tai is the perfect cocktail to enjoy while unwinding.
Conclusion
The Mai Tai recipe is as versatile as it is delicious, offering a refreshing balance of rum, fruit, and sweetness. By following this simple recipe, you can recreate this iconic cocktail at home and enjoy the vibrant flavors of a tropical paradise. Whether you’re making it for a party or to enjoy a relaxing evening, the Mai Tai is always a great choice.
In the modern kitchen, convenience meets creativity—and nothing exemplifies this better than the rice cooker. Originally a staple for simply cooking fluffy white rice, today’s rice cookers have evolved into versatile kitchen allies capable of preparing various dishes. Whether you’re a college student, a busy parent, or someone new to cooking, exploring Rice Cooker Recipes can open up a world of flavor with minimal effort.
Why Rice Cooker Recipes Are Trending
The rising popularity of rice cooker recipes can be attributed to three key factors:
Time-saving efficiency – Set it and forget it. Most rice cookers operate on a one-button system and automatically shut off or switch to “keep warm” once cooking is done.
Minimal cleanup – One pot means fewer dishes and less mess.
Multifunctionality – Newer rice cooker models include soup, porridge, cake, steam, and even sautéing settings.
This combination of convenience and versatility makes rice cookers an ideal companion for households seeking nutritious and comforting meals without the hassle.
1. Rice Cooker Mac and Cheese
Ingredients:
2 cups elbow macaroni
2 ½ cups water
1 cup whole milk
2 cups shredded sharp cheddar cheese
1 tsp mustard powder
Salt and pepper to taste
Instructions:
Add macaroni and water to the rice cooker.
Cook on the “White Rice” setting until pasta is al dente (about 10–12 minutes).
Add milk, cheese, mustard powder, and seasoning.
Stir well & cook for an additional 5 minutes until creamy.
Why it works: Rice cookers distribute heat evenly, creating the perfect environment for silky cheese sauces to coat your pasta without sticking or burning.
2. Chicken and Rice One-Pot Meal
Ingredients:
1 cup jasmine or basmati rice
1 ½ cups chicken broth
2 boneless chicken thighs, diced
1 cup frozen peas and carrots
1 tsp garlic powder
1 tsp paprika
Salt and pepper
Instructions:
Add all ingredients to the rice cooker.
Stir to combine.
Set to “Cook” and wait until the switch flips (about 25–30 minutes).
Let sit for 5 minutes before serving.
Pro Tip: Use pre-cooked rotisserie chicken to cut cooking time and infuse deeper flavor.
3. Rice Cooker Banana Bread
Ingredients:
2 ripe bananas, mashed
2 eggs
1 cup sugar
1 ½ cups all-purpose flour
1 tsp baking soda
½ cup vegetable oil
Pinch of salt
Instructions:
Mix all wet & dry ingredients in a bowl.
Grease rice cooker pot with butter or oil spray.
Pour the batter into the pot and close the lid.
Cook on the “Cake” or “Cook” setting for 40–50 minutes.
Use a toothpick to check doneness.
Why it’s genius: Your rice cooker acts like a mini-oven, keeping moisture and ensuring even cooking.
Tips for Mastering Rice Cooker Recipes
Use the proper rice-to-liquid ratio: For dishes like pilaf or jambalaya, stick to 1:2 or 1:1.5.
Avoid overfilling: Most rice cookers have a “Max” line for a reason—overflow can ruin your meal.
Layer flavors: Sauté garlic and onions in a bit of oil in the cooker first (if your model allows) for richer depth.
Final Thoughts
Incorporating rice cooker recipes into your daily routine can revolutionize how you cook. From savory one-pot meals to unexpected desserts, this humble appliance proves it’s far more than a rice steamer. As the trend spreads across kitchens, more people are discovering how accessible, versatile, and delicious cooking can be.
The carnivore diet has gained popularity as a high-protein, zero-carb eating plan emphasizing animal-based foods while eliminating all plant-based ingredients. Many people use this diet for weight loss, muscle gain, improved digestion, and reduced inflammation. However, sticking to it can be challenging without various satisfying meals.
If you’re searching for carnivore diet recipes that are easy to prepare, nutrient-dense, and flavorful, this guide has you covered. From juicy steaks to nourishing bone broth, you’ll find everything you need to succeed in this meat-based lifestyle.
Why Choose the Carnivore Diet?
Before diving into the best carnivore diet recipes, let’s explore the key benefits:
Weight Loss – Without carbohydrates, your body burns fat for fuel.
Muscle Growth – The diet provides ample protein for muscle repair and strength.
Reduced Inflammation – Many people report relief from joint pain, autoimmune disorders, and bloating.
Blood Sugar Stability – Insulin spikes and crashes are avoided since carbs are eliminated.
Gut Health Improvement – A meat-based diet may reduce digestive issues caused by fiber and plant toxins.
Now that we understand the benefits, let’s get to the recipes!
Best Carnivore Diet Recipes
Each carnivore diet recipe is packed with essential nutrients, easy to prepare, and incredibly delicious.
1. Ribeye Steak with Bone Marrow Butter
A perfectly seared ribeye steak, enhanced with rich and creamy bone marrow butter, is a carnivore staple.
Ingredients:
1 ribeye steak (grass-fed, if possible)
2 tbsp bone marrow (melted)
Sea salt to taste
Instructions:
Preheat a cast-iron skillet over high heat.
Season the steak with salt.
Sear for 3-4 minutes per side for a crispy crust.
Rest for 5 minutes, then top with melted bone marrow butter.
Why It Works:
High in protein and healthy fats
Provides essential amino acids for muscle recovery
Rich in collagen for joint & skin health
2. Beef Liver Pâté
The liver is one of the most nutrient-dense foods, packed with iron, vitamins A and B vitamins. This creamy pâté is a perfect way to enjoy it.
Ingredients:
½ lb beef liver
3 tbsp butter
Sea salt to taste
Instructions:
Sauté the liver in butter until browned.
Blend until smooth and creamy.
Refrigerate and serve chilled.
Why It Works:
Provides high levels of vitamins and minerals
Supports liver function and energy production
Rich in bioavailable iron, crucial for red blood cells
3. Carnivore Egg & Cheese Omelet
Eggs and cheese provide a satisfying and nutrient-rich meal that is easy to digest.
Ingredients:
3 eggs
½ cup shredded cheese (cheddar or Parmesan)
2 tbsp butter
Instructions:
Whisk eggs and cook in butter over low heat.
Add cheese and fold the omelet.
Serve hot and enjoy.
Why It Works:
High in healthy fats for sustained energy
Rich in choline, essential for brain function
Provides calcium and protein for strong bones
4. Crispy Pork Belly
A perfect combination of crispy skin & juicy meat, this pork belly recipe is a must-try.
Ingredients:
1 lb pork belly
Sea salt to taste
Instructions:
Score pork belly skin with sharp knife.
Bake at 375°F for 45 minutes, or until it is crispy.
Let rest before slicing.
Why It Works:
High in satiating fats
Provides collagen for skin and joint health
A great alternative to beef-based meals
5. Bone Broth for Gut Health
Bone broth is essential to the carnivore diet, providing collagen, amino acids, and minerals that promote gut healing.
Choose fatty cuts of meat to ensure adequate energy intake.
Stay hydrated with bone broth and mineral-rich water.
Incorporate organ meats for maximum nutrient density.
Avoid processed meats that contain additives, sugars, or preservatives.
Experiment with different cooking methods like grilling, slow cooking, and searing to keep meals exciting.
Final Thoughts
The carnivore diet may seem restrictive at first, but with the right recipes, it can become a sustainable and enjoyable way of eating. Whether you prefer steak, eggs, or nourishing bone broth, these recipes will help you stay on track while enjoying every bite.
Homemade biscuits are a staple of American comfort food, and the best part is You don’t need a long list of ingredients to make them. This 3 ingredient biscuit recipe is simple and produces flaky, tender biscuits that pair perfectly with butter, jam, or gravy. Whether making breakfast, serving a hearty dinner, or craving a warm treat, these biscuits are the ultimate go-to.
Why This 3 Ingredient Biscuit Recipe Works
A great biscuit should be soft on the inside, slightly crisp on the outside, and full of rich, buttery flavor. This recipe achieves that with just three basic ingredients:
Self-rising flour – Provides structure and the perfect amount of leavening.
Cold butter or heavy cream – Adds flakiness and a rich texture.
Milk or buttermilk – Binds the dough together and keeps the biscuits tender.
This 3 ingredient biscuit recipe is foolproof, meaning even beginners can create bakery-style biscuits at home.
Ingredients for 3 Ingredient Biscuit recipe
2 cups self-rising flour
1/2 cup (1 stick) cold butter or 3/4 cup heavy cream
3/4 cup whole milk or buttermilk
Optional Add-ins: While this is a 3 ingredient biscuit recipe, you can enhance the flavor with a pinch of salt, shredded cheese, or honey.
How to Make 3 Ingredient Biscuits
Step 1: Preheat & Prepare
Preheat your oven to 450°F (232°C). Line a baking sheet with parchment paper or lightly grease it.
Step 2: Mix the Dough
If using butter: Grate or cube cold butter and mix it into the self-rising flour using a fork or pastry cutter until mixture resembles coarse crumbs.
If using heavy cream: Mix the self-rising flour and heavy cream until a dough forms.
Slowly add milk or buttermilk, stirring until just combined. Do not overmix.
Step 3: Shape the Biscuits
Turn the dough onto lightly floured surface. Gently pat it to about ¾-inch thickness.
Use a biscuit cutter or a glass to cut out rounds. If you don’t have a cutter, shape the dough by hand.
Step 4: Bake to Perfection
Place biscuits on the prepared baking sheet, ensuring they touch slightly for soft edges. Bake for 10-12 minutes or until golden brown.
Keep ingredients cold – This helps create a flakier texture.
Avoid overmixing – Overworking the dough can lead to tough biscuits.
Use buttermilk for tangy flavor – It also helps with tenderness.
Space them correctly – Letting biscuits touch helps them rise taller.
Serving Ideas for Homemade Biscuits
Breakfast: Serve with scrambled eggs and bacon.
Dinner: Pair with fried chicken or beef stew.
Snacks: Spread with butter, jam, or honey.
Final Thoughts
This 3 ingredient biscuit recipe is an easy, no-fail way to make soft and delicious biscuits from scratch. With just a few simple ingredients & steps, anyone can enjoy fresh, homemade biscuits in under 20 minutes. Whether you’re a seasoned baker or beginner, this recipe is sure to become a household favorite.
 Ingredients You Will Need
 Final Thoughts
 Breaking Down Stigma Surrounding Men’s Mental Health
 Where to Seek Support During Men’s Mental Health Month
 What Makes Chamagnga Multivitamins Different?
 How to Take Chamagnga Multivitamins
 Ingredients Commonly Found in Natural Mounjaro Recipes
 2. Chicken and Rice One-Pot Meal
 3. Rice Cooker Banana Bread
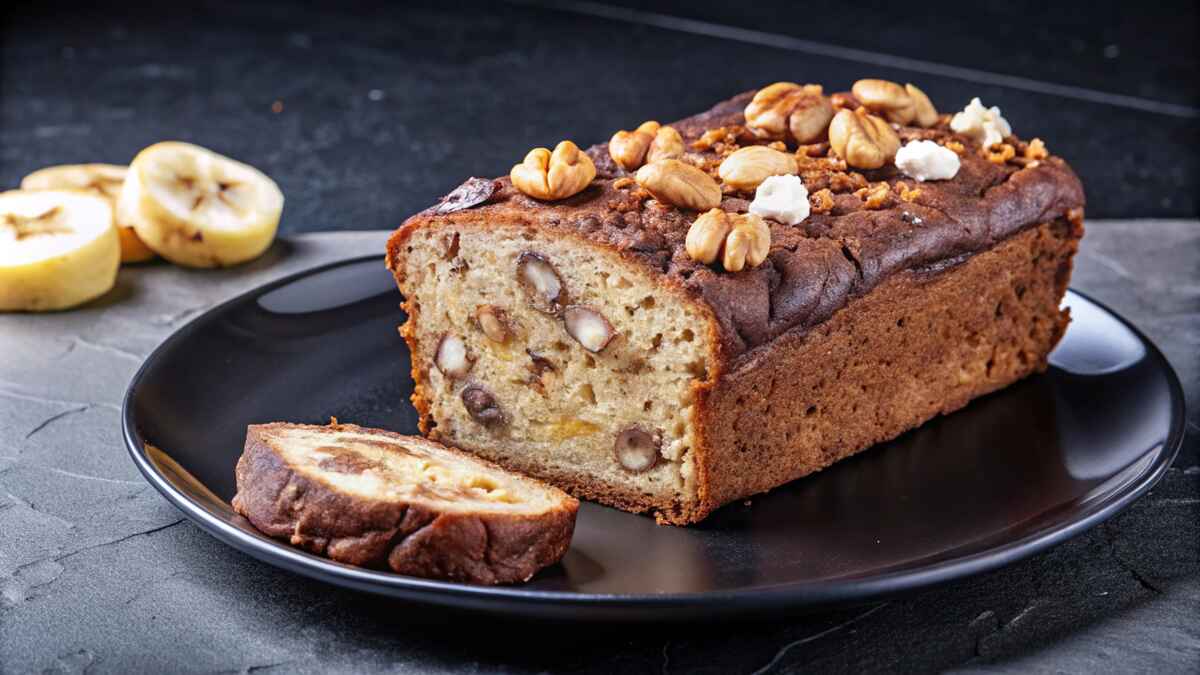 Tips for Mastering Rice Cooker Recipes
 How to Make 3 Ingredient Biscuits