In today’s fast-paced world, connecting with loved ones or colleagues can be challenging due to time constraints. Group yoga offers a unique way to strengthen physical health while fostering deeper emotional bonds. Practicing yoga in a group of four enhances physical fitness and builds trust and unity, making it an ideal practice for friends, family, or coworkers. In this blog, we’ll explore the top 10 Yoga Poses for 4 People designed to boost flexibility, promote teamwork, and encourage emotional well-being.
The Benefits of Group Yoga
Physical Benefits
Group yoga isn’t just about doing poses together but enhancing each participant’s physical health. When practicing in a group of four, individuals can benefit from increased flexibility, improved strength, and better balance. Working together to achieve challenging poses helps increase muscle tone, improves cardiovascular health, and encourages pushing physical limits in a supportive environment.
Emotional Benefits
Yoga has long been known to help reduce stress and promote relaxation. When practiced in a group, these benefits are magnified. The shared experience builds emotional resilience and fosters a sense of trust, empathy, and support among participants. Whether you’re practicing with friends, family, or coworkers, group yoga helps create a deeper connection and emotional bonding.
Social Benefits
One of most significant benefits of practicing yoga in a group is the sense of community it cultivates. In group yoga, participants work together to achieve common goals. Whether performing synchronized poses or supporting each other’s balance, teamwork is key. This strengthens physical health and social connections, leading to more profound relationships and stronger bonds.
Preparation and Safety
Preparing the space and ensuring all participants ‘ safety is essential before diving into group yoga. Here’s how:
Space and Environment
Select a spacious, quiet environment where all participants can move freely. The room should have enough space to stretch and perform poses without obstruction. A serene, peaceful setting enhances relaxation and focus during practice, making the experience more fulfilling.
Warm-Up Exercises
Warm-up exercises are essential for preventing injuries & preparing the body for the session. Light stretches or simple yoga flows, such as Sun Salutations, help loosen muscles, increase circulation, and prepare the body for more intense movements.
Communication and Trust
Clear communication is key in any group setting, especially in yoga. Encourage participants to express any discomfort or limitations before starting. Building trust through mutual respect and consistent practice will create a more positive, supportive environment for everyone involved.
Top 10 Yoga Poses for 4 People
Here are ten group yoga poses that promote physical strength, trust, and connection:
Double Downward Dog
How to Perform: Two pairs of partners perform Downward Dog while supporting each other’s lower backs. One person from each pair starts in Downward Dog and places their feet on their partner’s lower back to complete the pose.
Benefits: This pose enhances arm, leg, and core strength, stretches the spine, and improves coordination and balance. It also fosters communication and trust between participants.
Quadruple Boat Pose
How to Perform: All four participants sit in a circle, holding hands. Each person lifts their legs and leans back slightly to form a shared Boat Pose.
Benefits: This pose strengthens the core, improves balance, and fosters participant cooperation and unity.
Circle Warrior
How to Perform: Participants form a circle, performing Warrior II while holding hands. Each person extends their arms and legs, creating a strong, balanced stance.
Benefits: Circle Warrior builds leg strength, opens the hips, and improves focus. Holding hands strengthens the emotional bond between participants, enhancing teamwork.
Four-Way Plank
How to Perform: All four participants lie on their stomachs, creating a cross by resting their feet on one another’s shoulders. This creates a stable plank position.
Benefits: The Four-Way Plank strengthens core and shoulder muscles, improves balance, and enhances teamwork and communication.
Partner Tree Pose
How to Perform: Two pairs of participants perform Tree Pose while supporting each other’s shoulders for balance. Each person stands on one leg, placing the sole of the other foot against the inner thigh of the standing leg.
Benefits: This pose improves balance, strengthens the legs, and fosters trust between participants.
Quad Bridge Pose
How to Perform: All four participants lie on their backs in a circle with their feet resting on one another’s hips. They then lift their hips to create a shared bridge.
Benefits: Quad Bridge Pose strengthens the back, glutes, and legs while promoting coordination and teamwork.
Circle Cat-Cow
How to Perform: Participants form a circle on all fours and move through the Cat and Cow poses together, synchronizing their movements.
Benefits: This pose increases spine flexibility, enhances breath synchronization, and promotes participant unity and connection.
Group Child’s Pose
How to Perform: Participants kneel in a circle and perform a Child’s Pose with their hands touching the center, creating a shared position.
Benefits: Group Child’s Pose stretches the back, promotes relaxation, and creates a sense of comfort and connection.
Standing Quad Stretch
How to Perform: Participants stand in a circle, holding each other’s shoulders while performing a quad stretch. Each person bends one knee, bringing the heel toward the buttocks, and holds the ankle with one hand.
Benefits: This stretch increases flexibility in the thighs, improves balance, and promotes mutual trust and support among participants.
Human Mandala
How to Perform: All four participants lie on their backs with their feet touching the group’s center, forming a mandala shape. They extend their arms outward, creating a star-like pattern.
Benefits: The Human Mandala promotes relaxation, stretches the back and legs, and enhances the sense of interconnectedness and unity.
Tips for a Successful Group Yoga Session
Clear Communication
Encourage open dialogue & ensure everyone feels heard. Communicate any discomfort, needs, or modifications needed during the session.
Patience and Peace
Yoga is about progressing at your own pace. Moving at a speed accommodating everyone ensures no one feels rushed or pressured. Patience fosters a positive environment where everyone can enjoy the practice entirely.
Mindfulness and Respect
Respect each participant’s abilities and boundaries. Being mindful of others promotes a safe & inclusive environment where everyone can feel comfortable & supported.
Conclusion
Practicing yoga in a group of four offers a unique opportunity to strengthen physical and emotional bonds. The top 10 poses outlined above are designed to help participants develop trust, communication, and a sense of unity. Whether you’re practicing with friends, family, or coworkers, group yoga can create lasting memories and foster stronger relationships. Try these poses in your next group session and experience the many benefits that shared practice brings.
After exploring waxing techniques and solutions, it’s time to focus on selecting the best products that ensure effective and convenient hair removal. Whether you’re a first-time user or an experienced waxing enthusiast, the right product can transform your grooming routine.
This guide highlights the best waxing products, offering insights to help you make informed options based on your preferences, skin type, and lifestyle.
Top Waxing Products for Every Need
Veet Ready-to-Use Wax Strips
Perfect for those who prefer a mess-free, no-heating option. Veet’s wax strips are designed for convenience and cater to various skin types.
Why Choose Veet Wax Strips?
Easy application with pre-coated strips.
Formulated with shea butter and berry extracts for nourishment.
Removes even short hair effectively.
Best For: Busy individuals seeking quick hair removal with minimal preparation.
Try Veet Wax Strips for effortless at-home waxing and lasting smoothness.
GiGi Brazilian Body Hard Wax Kit
Known for its salon-quality results, this kit is ideal for coarse hair and sensitive areas.
Why Choose GiGi Hard Wax?
Strip-free formula minimizes discomfort.
It comes with pre-epilation oil to ensure smooth application.
Suitable for bikini lines, underarms, and other delicate areas.
Best For Individuals looking for professional-level waxing at home.
Sensitive Skin: Opt for hypoallergenic and natural products like Nad’s Sugar Wax.
Normal Skin: Choose versatile options such as Veet’s wax strips or GiGi’s hard wax.
Dry Skin: Products enriched with moisturizing agents, like Veet’s strips with shea butter, work best.
Evaluate Your Hair Removal Goals
Fine Hair: Soft wax products are effective for removing finer strands.
Coarse Hair: Hard wax options like GiGi’s kit excel in removing thicker hair.
Tips for Using Waxing Products
Before Waxing
Test the wax on a small patch of skin to avoid allergic reactions.
Ensure hair is the correct length (about 1/4 inch) for optimal grip.
During Waxing
Pull the skin taut to minimize discomfort.
Remove the wax strip in opposite direction of hair growth for the best results.
After Waxing
Apply aloe vera gel to calm irritation.
Avoid exfoliating for 48 hours to allow the skin to heal.
Additional Products to Enhance Your Waxing Routine
Pre-Wax Cleansers
Prepare skin by removing excess oil & dirt. Popular options include GiGi Pre Hon cleanser.
Post-Wax Soothers
Calm and hydrate the skin with soothing products like Bliss Ingrown Eliminating Pads.
Wax Warmers
For a professional waxing experience at home, invest in a wax warmer like the GiGi Mini Pro Kit.
Making Your Decision
Waxing is not just a grooming practice—it’s a confidence booster. Selecting the right products can achieve smooth, radiant skin with minimal hassle.
Choose Your Best Wax!
Ready to transform your hair removal routine? Explore these top waxing products and elevate your self-care journey. Select the product that suits your needs for flawless results today!
As you delve deeper into waxing, it’s time to focus on solutions tailored to meet individual needs. Whether exploring waxing for the first time or seeking to refine your routine, understanding available products & techniques is crucial for achieving best results.
This guide highlights popular waxing products, explains their unique benefits, and provides tips for a seamless hair removal experience.
How to Choose the Right Waxing Solution
Not all waxing solutions are created equal. Choosing right product depends on your skin type, pain tolerance, and hair removal goals.
Hard Wax vs. Soft Wax
Hard Wax: Ideal for sensitive areas like face, underarms, & bikini line. Hard wax adheres only to hair, making it less painful to remove.
Soft Wax: Commonly used for larger areas like legs and arms. Soft wax removes fine hair efficiently but may cause more discomfort.
At-Home vs. Professional Waxing
At-Home Waxing Kits: Convenient and cost-effective, these kits are perfect for maintaining smooth skin between salon visits.
Professional Waxing Services: Offer precision and expertise, ensuring minimal discomfort and optimal results.
Top Waxing Products for Smooth Skin
Several trusted brands offer effective waxing solutions. Here’s a closer look at popular products in the market:
Veet Ready-to-Use Wax Strips
Veet’s pre-coated wax strips are perfect for quick and easy hair removal. These strips are designed rips and have come in options for sensitive, regular, and dry skin.
Key Features:
No heating is required.
The product leaves your skin smooth for up to four weeks.
Enriched with almond oil & vitamin E for added skin care.
Nad’s Natural Sugar Wax
Nad’s offers a natural, eco-friendly waxing option with its sugar wax. Suitable for sensitive skin, this product is water-soluble and easy to clean.
Key Features:
Made from natural ingredients like honey & lemon.
Suitable for all areas of the body.
Gentle on sensitive skin.
GiGi Brazilian Body Hard Wax Kit
GiGi’s hard wax kit is a favourite among professionals and home users. It’s specifically designed for coarse hair and sensitive areas.
Key Features:
Strip-free formula for less painful removal.
It melts at a low temperature to prevent burns.
Includes a pre-epilation oil for smoother application.
Parissa Organic Wax
Parissa’s organic wax is a cruelty-free, all-natural solution for effective hair removal. Its formula is suitable for delicate skin.
Key Features:
Certified organic.
Ideal for bikini lines and facial hair.
Comes with reusable fabric strips.
Benefits of Professional Waxing Services
While at-home kits are convenient, professional waxing offers several advantages:
Expertise: Trained technicians ensure minimal discomfort and precise application.
Customization: Services are tailored to your skin type and hair growth pattern.
Advanced Products: Salons often use high-quality waxes that are unavailable in stores.
Tips for a Successful Waxing Session
Pre-Wax Care
Exfoliate the skin 24 hours before waxing to remove dead skin cells.
Avoid applying lotions or oils on day of waxing.
Post-Wax Care
Apply aloe vera or cooling gel to relieve irritation and soothe the skin.
Wear loose-fitting clothing to avoid friction on freshly waxed skin.
Avoid sun exposure for 48 hours to prevent skin damage.
Managing Pain
Take mild pain reliever 30 minutes before waxing to help reduce any discomfort.
Use numbing creams designed for waxing-sensitive areas.
Debunking Common Waxing Misconceptions
Waxing Causes Dark Skin Patches
Dark patches are often caused by improper care, not waxing itself. Using sunscreen and avoiding friction can prevent discoloration.
DIY Waxing is Always Cheaper
While cost-effective, DIY waxing may lead to missed areas or irritation if done incorrectly.
Hair Needs to Be Very Long for Waxing
Hair must only be about 1/4 inch long for effective waxing, contrary to the myth that it must be extremely long.
The Role of Skin Type in Waxing Solutions
Understanding your skin type helps you select most effective and gentle waxing product.
Sensitive Skin
Opt for hypoallergenic waxes, such as Veet’s sensitive skin strips or Parissa Organic Wax.
Normal Skin
Choose products like GiGi’s hard wax for versatility & effective hair removal.
Oily Skin
Use pre-wax cleansers to remove excess oil and enhance wax adhesion.
Why Regular Waxing is Key to Long-Term Results
Consistency is crucial for achieving smoother skin and lighter hair regrowth. Regular waxing weakens hair follicles over time, making hair removal less painful and more efficient.
Explore Tailored Waxing Solutions
Finding the right waxing product or service requires understanding your skin type, preferences, and goals. With options ranging from Veet’s convenient wax strips to Nad’s eco-friendly sugar wax, there’s a solution for everyone.
Please continue to the Bottom of the Funnel article to discover the top-rated waxing products and learn how to incorporate them into your routine for optimal results.
Waxing has become a famous method for hair removal, providing individuals with smooth skin without the need for daily shaving. But does waxing reduce hair growth over time? This guide explores the basics of waxing, its effects on hair growth, and the science behind its popularity.
Whether you’re new to waxing or curious about its long-term impact, understanding its mechanisms and benefits will help you make informed choices.
The Basics of Waxing: How It Works
Waxing involves applying a resin-based product to the skin, which adheres to hair. Once removed, the wax pulls hair out from the root. This process targets hair in the early stages of growth, leaving skin smooth for weeks.
The Hair Growth Cycle
Hair grows in three distinct phases:
Anagen (Active Growth): Hair is actively growing from the follicle.
Catagen (Transition): Growth slows, and the follicle shrinks.
Telogen (Resting): Hair naturally falls out, allowing new growth.
Waxing is most effective during anagen phase, as removing hair from the root weakens the follicle over time. However, waxing does not stop hair growth permanently.
Benefits of Waxing for Hair Removal
Waxing provides several advantages over other hair removal methods:
Longer-Lasting Smoothness
Because hair is removed from the root, skin remains smooth for up to 4–6 weeks.
Softer Hair Regrowth
Over time, waxed hair often grows back finer and softer, reducing stubble.
Skin Exfoliation
Waxing removes dead skin cells alongside hair, promoting smoother skin.
Minimal Maintenance
Compared to daily shaving, waxing requires less frequent upkeep.
Does Waxing Reduce Hair Growth Over Time?
Waxing’s impact on hair growth has sparked widespread debate. While it cannot stop hair growth, regular waxing weakens hair follicles, producing finer and lighter regrowth.
Myths About Waxing and Hair Growth
Waxing Permanently Stops Hair Growth:
Waxing weakens follicles but does not permanently eliminate them.
Hair Grows Back Thicker After Waxing:
On the contrary, waxing produces finer regrowth over time.
Waxing Causes More Ingrown Hairs:
Proper technique and post-wax care prevent ingrown hairs.
Popular Brands in the Waxing Industry
Understanding the brands that dominate the hair removal market can help beginners identify trusted products and services.
Veet
Veet is a globally recognized brand offering a wide range of waxing products. Known for its innovative formulas and ease of use, Veet caters to various skin types and hair removal needs.
Nad’s
An Australian brand, Nad’s specializes in natural, skin-friendly waxing solutions. It emphasizes gentle hair removal for sensitive skin.
Parissa
Parissa focuses on sustainable, eco-friendly hair removal products. It promotes cruelty-free practices and is popular among environmentally conscious consumers.
How to Prepare for Waxing: Tips for Beginners
Proper preparation ensures a more comfortable and practical waxing experience:
Grow Your Hair to the Right Length
For optimal wax adhesion, hair should be at least 1/4 inch long.
Exfoliate Gently
Exfoliating the skin a day before waxing removes dead cells and prevents ingrown hairs.
Avoid Moisturizers
Wax adheres better to clean, dry skin.
Perform a Patch Test
Test a small area for sensitivity to ensure the wax suits your skin.
Choose a Professional for the First Time
For beginners, visiting a professional waxing salon can help reduce discomfort and ensure proper technique.
Potential Side Effects of Waxing
Waxing is generally safe but may cause mild side effects, especially for first-timers.
Skin Redness
Temporary redness is normal and fades within a few hours.
Ingrown Hairs
Exfoliation and moisturization prevent hair from growing back beneath the skin.
Irritation
Aloe vera gel or cooling creams can soothe post-wax irritation.
Bruising
Improper technique can lead to bruises, underscoring the importance of professional waxing for beginners.
Waxing as a Hair Removal Method
Waxing is effective hair removal method that offers smooth and long-lasting results. While it does not permanently reduce hair growth, regular waxing weakens hair follicles, producing finer regrowth.
Waxing continues to be a preferred option for those seeking a convenient and dependable method for achieving smooth skin. Are you curious about how to select the best waxing solutions for your needs? Continue to the Middle of Funnel article to learn more about tailored waxing techniques and tools.
When it comes to fitness, one of the most sought-after goals is achieving an ideal Body Composition Exercises. This refers to the balance between muscle mass and body fat, and optimizing it can lead to better health, increased strength, and improved physical appearance. To help you reach this goal, we’ve curated a collection of essential exercises and tips to help you transform your body and build a solid fitness foundation.
What is Body Composition?
Body composition refers to proportion of body fat, bone, water, and muscle. Unlike weight alone, which only measures total body mass, body composition gives you a clearer picture of your overall health. The goal is to enhance lean muscle mass while reducing body fat. A favourable body composition improves your metabolism, enhances performance, and reduces the risk of various health issues such as cardiovascular disease and diabetes.
Key Exercises for Improving Body Composition
Your workout routine must be multifaceted to build muscle, burn fat, and improve overall body composition. Combining strength training, cardiovascular exercise, and core work is essential for optimal results. Below are the key exercises to include in your workouts:
Strength Training (Muscle Building)
Strength training exercises, especially compound movements, are crucial for increasing muscle mass. The more muscle you build, the more calories your body burns at rest. Here are some top strength training exercises:
Squats: A compound lower-body exercise that targets quads, hamstrings, and glutes.
Deadlifts: A full-body movement focusing on your lower back, glutes, and hamstrings.
Bench Press: An excellent upper-body workout for the chest, shoulders, and triceps.
Pull-Ups: Effective for building upper back and arm strength.
Cardio (Fat Burning)
Incorporating cardiovascular exercises helps burn calories and reduces body fat, which is essential for a leaner physique. Here are some cardio exercises that will keep your heart rate up:
Burpees: A full-body workout that combines squat, push-up, and jump.
Mountain Climbers: A high-intensity cardio move that engages your core while boosting endurance.
HIIT (High-Intensity Interval Training): Short bursts of intense exercise followed by brief rest periods.
Core Work (Strength and Stability)
Strong core muscles are key to overall stability and strength. Adding core exercises to your routine will improve posture and prevent injuries:
Planks: Hold the position for as long as possible to engage your core muscles.
Russian Twists: This rotational movement strengthens your obliques and improves core stability.
Leg Raises: An excellent exercise for targeting the lower abdominal muscles.
Designing Your Workout Routine
You need to structure your workouts effectively to see real results in body composition. Strength training, cardio, and core exercises should be performed regularly. Here’s how you can structure your week:
Sample Weekly Workout Plan
Day
Focus Area
Exercises
Monday
Strength (Upper Body)
Bench Press, Pull-Ups, Rows, Push-Ups
Tuesday
Cardio & Core
Burpees, Mountain Climbers, Plank Variations
Wednesday
Strength (Lower Body)
Squats, Deadlifts, Lunges, Glute Bridges
Thursday
Active Recovery/Flexibility
Yoga, Stretching, Light Cardio
Friday
Strength (Full Body)
Kettlebell Swings, Dips, Russian Twists
Saturday
Cardio & Core
Bicycle Crunches, Leg Raises, HIIT
Sunday
Rest
Focus on recovery and mobility exercises
Tips for Success
Achieving an ideal body composition requires commitment, consistency, and attention to key principles. Follow these tips to make the most of your workouts:
Progressive Overload: Gradually increase intensity of your workouts. This may include increasing the weight in your lifts or lengthening your cardio sessions.
Track Your Progress: Keep track of changes in your body composition by monitoring measurements, body fat percentage, and strength levels.
Nutrition: A healthy diet is pivotal in achieving body composition goals. Focus on balance of protein, healthy fats, & complex carbs to support muscle growth and fat loss.
Rest & Recovery: Allowing your muscles time to recover is crucial for growth. Make sure to include rest days in your routine and focus on getting quality sleep.
Final Thoughts
A leaner, more muscular body starts with a well-rounded workout routine incorporating strength training, cardio, and core exercises. Consistency and progressive overload, combined with a balanced diet and rest, will help you optimize your body composition over time. Stay committed, and you’ll soon notice the positive changes in your appearance and overall health.
Menopause is a changing phase in a woman’s life that can come with a variety of physical and emotional changes. One of the most challenging aspects of menopause is weight gain, which can affect your self-esteem and overall health. Fortunately, a targeted approach to diet and lifestyle can help manage weight and improve your quality of life. In this detailed guide, we will explore the menopause diet 5 day plan to lose weight, offering you a comprehensive strategy for effective weight management during this significant life stage.
Understanding Menopause and Its Impact on Weight
What Is Menopause?
Menopause represents the end of a woman’s menstrual cycles and fertility, typically between 45 and 55. It is a natural biological process characterized by a decline in reproducing hormones, primarily estrogen and progesterone. Menopause is divided into three distinct stages:
Perimenopause
This transitional period can begin several years before menopause. Hormone levels fluctuate, and you might experience irregular periods, hot flashes, and mood swings. Perimenopause is a time for women to start paying attention to their health and make lifestyle adjustments.
Menopause
Officially defined as the point when you have not had a period for 12 consecutive months, menopause marks the end of your reproductive years. Symptoms can consist of hot flashes, night sweats, and changes in mood and libido.
Postmenopause
This is the stage after menopause, where symptoms may persist but generally begin to stabilize. Women in postmenopause may continue to experience symptoms but can benefit from lifestyle changes made during earlier stages.
Understanding these stages helps you tailor your diet and lifestyle to address specific symptoms and health goals.
How Menopause Affects Weight
Menopause can significantly impact your weight due to a combination of hormonal, metabolic, and lifestyle changes:
Hormonal Fluctuations
During menopause, estrogen falls decrease, leading to changes in fat distribution. Estrogen helps regulate fat storage and metabolism. Instead of accumulating around the hips and thighs, lower amounts of this hormone can induce fat to gather around the belly. This change in fat distribution raises the risk of diabetes and cardiovascular illnesses in addition to being a cosmetic concern.
Additional Insight: Estrogen also affects how your body processes glucose and fat. With reduced estrogen levels, insulin sensitivity can decrease. This can make losing weight and lead to weight gain more challenging.
Metabolic Slowdown
A decrease in metabolism is a natural part of ageing, but menopause exacerbates this process. Your basal metabolic rate (BMR), which determines how many calories you burn at rest, decreases as you age. During menopause, this reduction can be more pronounced due to hormonal changes.
Additional Insight: Exercise and nutrition can control metabolic slowing. Strength training increases muscle mass, and since muscle burns more calories than fat, it can assist in boosting metabolism.
Changes in Muscle Mass
Estrogen is crucial for maintaining muscle mass. As estrogen levels drop throughout menopause, you can gradually lose muscle, which might impede your metabolism and lead to weight gain.
Additional Insight: Regular resistance exercises, such as weight lifting or body-weight workouts, can help maintain and build muscle mass, thereby supporting a healthy metabolism.
Lifestyle Factors
Changes in lifestyle, including reduced physical activity, increased stress, and poor dietary choices, can also contribute to weight gain during menopause.
Additional Insight: Adopting a balanced diet and a consistent exercise routine can counteract these lifestyle changes. Also, managing stress through mindfulness practices can improve emotional wellbeing and weight management.
Why a Specialized Diet Plan for Menopause?
A diet plan tailored for menopause addresses specific nutritional needs and aims to alleviate menopause symptoms while supporting weight loss. The menopause diet 5 day plan to lose weight offers a focused approach to help you achieve your health goals by incorporating:
Hormone Balance: meals high in nutrients that help with hormone regulation and reduce symptoms like mood swings and hot flashes.
Metabolism Support: Foods that boost metabolic rate and promote fat loss.
Satiety and Satisfaction: Meals are designed to keep you full and satisfied, reducing the likelihood of overeating.
Overall Health: A diet that supports cardiovascular health, bone strength, and general wellbeing.
Additional Insight: A specialized diet plan for menopause addresses weight loss and promotes a holistic approach to health. It focuses on reducing inflammation, supporting heart health, and preventing osteoporosis, common concerns during menopause.
The menopause diet 5 day plan to lose weight: Detailed Breakdown
Day 1: Kickstart Your Weight Loss Journey
Breakfast: Greek Yogurt with Berries and Almonds
Greek yoghurt is rich in probiotics and protein, which support digestion and muscle maintenance. Berries are high in antioxidants, which help combat oxidative stress and inflammation. Almonds offer protein and good fats, which help with satiety and energy levels.
Lunch: Mixed greens, avocado, and grilled chicken salad
This meal combines lean protein from chicken, healthy fats from avocado, and a variety of vitamins and minerals from mixed greens. The healthy fats and high protein content help regulate hormones and manage hunger.
Dinner: Steamed broccoli and Quinoa with Baked Salmon
Omega-3 fatty acids, suitable for the heart and reducing inflammation, are abundant in salmon. Quinoa is a complete protein and a good source of fibre, while broccoli provides essential vitamins and antioxidants.
Snacks:
A small handful of walnuts for healthy fats and protein supports brain health.
A piece of fruit, like an apple or pear, for natural sweetness and fibre.
Tip: Begin your day with a protein-rich breakfast to kickstart your metabolism. A protein-rich meal helps stabilize blood sugar levels and keeps you feeling full longer.
Day 2: Focus on Fiber and Protein
Breakfast: Scrambled Eggs with Spinach and Tomatoes
Eggs offer high-quality protein and essential nutrients, while spinach and tomatoes provide fibre and vitamins. This breakfast supports muscle maintenance and digestive health.
Lunch: A Side of Mixed Greens Salad with Lentil Soup
Plant-based fibre and protein like lentils help keep your digestive system healthy and satisfy your hunger. A side salad increases nutrient content and promotes better hydration.
Dinner: Turkey Meatballs with Pasta Squash and Marinara Sauce
Turkey meatballs are lean protein sources, and spaghetti squash is a low-carb alternative to pasta. Marinara sauce adds flavour without excessive calories or sugars.
Snacks:
Carrot sticks with hummus are used to combine fibre and protein.
A small serving of cottage cheese for additional protein and calcium.
Tip: Incorporate fibre-rich foods like lentils and vegetables to support digestion and manage hunger. Fibre also helps keep up stable blood sugar levels.
Day 3: Emphasize Healthy Fats and Hydration
Breakfast: Smoothie with Spinach, Banana, and Chia Seeds
Spinach and banana offer a nutrient-dense start to your day, while chia seeds provide omega-3 fatty acids, which support heart health and hormone balance.
Lunch: Quinoa Salad with Chickpeas, Cucumbers, and Feta Cheese
This salad combines protein and fibre from quinoa and chickpeas with the refreshing crunch of cucumbers and the flavour of feta cheese. It supports muscle maintenance and digestive health.
Dinner: Grilled Shrimp Tacos with Cabbage Slaw
Shrimp is a low-calorie, high-protein food, and cabbage slaw adds crunch and nutrients without calories. To increase fibre content, use whole-grain tortillas.
Snacks:
A handful of mixed nuts for healthy fats, protein, and essential nutrients.
A few slices of cucumber with a squeeze of lemon for a refreshing, hydrating snack.
Tip: Healthy fats from sources like avocados and nuts support hormonal balance and provide lasting energy. Additionally, maintaining weight and general health depends heavily on hydration.
Day 4: Incorporate Antioxidants and Lean Proteins
Breakfast: Chia seeds, almond milk, and fresh berries for overnight oats
Overnight oats are easy to prepare and provide a nutritious start to the day. Almond milk is low in calories, chia seeds offer omega-3 fatty acids, and berries are rich in antioxidants.
Lunch: Grilled Vegetable Wrap with Whole Grain Tortilla
Grilled vegetables offer a variety of vitamins and minerals, and a whole-grain tortilla adds fibre and nutrients. This wrap is a filling and nutritious lunch option.
Dinner: Baked Sweet Potato, Chicken Breast and Green Beans
Chicken breast provides lean protein, sweet potatoes offer complex carbohydrates and fibre, and green beans add essential vitamins and a satisfying crunch.
Snacks:
A combination of fibre, protein, and good fats can be found in an apple with a spoonful of almond butter.
A small handful of berries for a low-calorie, antioxidant-rich snack.
Tip: Incorporate antioxidant-rich foods to help combat oxidative stress and support overall health. Antioxidants play a crucial role in lowering inflammation and enhancing health.
Day 5: Balance and Recharge
Breakfast: Poached egg and avocado toast on whole-grain bread
Avocado toast combines healthy fats from avocado with protein from a poached egg and fibre from whole-grain bread. This balanced meal supports satiety and energy levels.
Lunch: Spinach and Feta-Puffed Chicken Breast with a Side of Roasted Vegetables
This meal provides lean protein and essential nutrients, with spinach and feta offering a flavorful and nutrient-dense stuffing. Roasted vegetables add vitamins, minerals, and fibre.
Dinner: Vegetable Stir-frying with Tofu and Brown Rice
Tofu is a versatile plant-based protein, and brown rice adds whole grains to your meal. The vegetable stir-fry provides a variety of nutrients and can be personalized with your favourite vegetables.
Snacks:
A small handful of pumpkin seeds for a nutrient-dense, protein-rich snack.
A cup of green tea for its metabolism-boosting properties and antioxidants.
Tip: Maintain balanced meals and snacks throughout the day to support steady blood sugar levels and prevent overeating. Consistency is critical for effective weight management.
Tips for Success on the Menopause Diet Plan
Stay Hydrated
Hydration is essential for weight management and overall health. Water aids in digestion helps control appetite and supports various bodily functions.
Hydration Tips:
Carry a Water Bottle: Carry a reusable water bottle with you at all times to constantly remind you to hydrate.
Infuse Water: To add a refreshing taste to your water without adding extra calories, add pieces of fruit, like lemon, lime, or berries.
Pre-Meal Hydration: Before meals, sip a glass of water to help manage portion sizes and avoid overindulging.
Additional Insight: Proper hydration supports healthy digestion and improves skin health and energy levels.
Exercise Regularly
Any effective weight loss program must include regular physical activity. Exercise promotes overall health, muscle growth, and calorie burning.
Exercise Recommendations:
Cardio Exercises: Participate in moderate-intense weekly exercise such as cycling, swimming, jogging, or walking for at least 150 minutes.
Strength Training: Include strength-training activities like resistance band or weightlifting at least twice weekly to build muscle and support a healthy metabolism.
Flexibility and Balance: Exercises like yoga and Pilates, balance, and stress management can increase flexibility.
Additional Insight: Combining cardio, strength training, and flexibility exercises offers a comprehensive fitness routine that addresses various aspects of health and wellbeing.
Get Enough Sleep
Getting enough sleep is essential for preserving a healthy weight and general wellbeing. Poor sleep can disrupt hormones related to hunger and metabolism.
Sleep Tips:
Consistent Schedule: Aim for seven to nine hours of sleep every night, and set your alarm for the same time every day.
Relaxing Routine: Establish a calming pre-sleep routine, such as reading a book, taking a warm bath, or practising deep-breathing exercises.
Comfortable Environment: Create a sleep-friendly environment by keeping your bedroom cool, dark, and quiet.
Additional Insight: Quality sleep supports various bodily functions, including hormone regulation, cognitive function, and emotional wellbeing.
Manage Stress
Remaining stress-free is crucial for both general health and a healthy weight. Weight gain and emotional eating are two consequences of chronic stress.
Stress Management Techniques:
Mindfulness Practices: To reduce stress, engage in mindfulness practices such as meditation, deep breathing, or progressive muscle relaxation.
Regular Exercise: Include exercise to reduce stress and release endorphins.
Hobbies and Interests: Choose activities that make you happy and calm, such as reading, gardening, or crafting.
Social Support: Contact friends, family, or support groups to share your experiences and receive emotional support.
Additional Insight: Use effective stress management practices to maintain a healthy lifestyle and enhance your mental wellbeing.
Conclusion
A major life shift, menopause can present both possibilities for growth and problems. Following the menopause diet 5 day plan to lose weight, you can take proactive steps towards managing your weight and enhancing your overall wellbeing. This plan offers a balanced approach to nutrition, focusing on hormone balance, metabolism support, and fullness to support your weight loss objectives.
In the quest for essential weight loss solutions, many have turned to various supplements and injections, with Vitamin B12 shots gaining notable attention. Promising to boost energy and metabolism, these injections are often touted as a secret weapon in the fight against excess weight. But do Vitamin B12 shots for weight loss really work? Let’s delve into the science, benefits, and potential drawbacks of this popular trend.
Understanding Vitamin B12
What is Vitamin B12?
Vitamin B12, also mention to as cobalamin, is a vital water-soluble vitamin that plays a major role in brain and nervous system function, as well as in the formation of red blood cells. It occurs naturally in animal-derived foods such as meat, fish, dairy, and eggs, and is essential for DNA synthesis and the producing of energy.
Functions of Vitamin B12
Vitamin B12’s primary functions include aiding in the production of red blood cells, maintaining neurological health, and supporting DNA synthesis. This vitamin is also implicate in the metabolism of every cell in the body, particularly influence DNA synthesis and regulation, fatty acid synthesis, and energy production.
The Association Between Vitamin B12 and Weight Loss
The premise behind Vitamin B12 shots for weight loss lies in the vitamin’s role in energy production and metabolism. Proponents suggest that by enhancing energy levels and metabolic functions, Vitamin B12 injections can help the body burn calories more comfortably, potentially leading to weight loss. Additionally, higher energy levels might encourage more physical activity, further contributing to weight loss efforts.
Scientific Evidence
While the theory sounds promising, the scientific evidence directly linking Vitamin B12 shots to significant weight loss is limited. Some studies have shown that individuals with a Vitamin B12 deficiency might experience improved energy levels and metabolic rates after receiving B12 supplementation, which could indirectly support weight loss efforts. However, for individuals with normal B12 levels, the impact of additional B12 might be minimal.
Research primarily highlights the role of B12 in preventing fatigue and supporting overall health, which can be beneficial in a comprehensive weight loss plan but is not a standalone solution for weight loss.
One of the most outstanding benefits of Vitamin B12 shots is their potential to boost energy levels. Since Vitamin B12 is crucial for converting food into energy, adequate levels of this vitamin can help reduce feelings of fatigue and lethargy. This increase in power can make it easier to engage in regular physical activity, a critical component of any successful weight loss program.
Metabolic Boost
Vitamin B12 plays a role in metabolism by assisting in the reformation of fats and proteins into energy. A well-functioning metabolism is necessary for weight management, as it determines how efficiently the body can burn calories. By supporting metabolic processes, Vitamin B12 shots might help the body use energy more effectively, which can be valuable for weight loss, particularly for those who might be deficient in this vitamin.
Limitations and Risks
Lack of Direct Evidence
Despite the potential benefits, it’s important to note the lack of direct evidence supporting Vitamin B12 shots as a significant weight loss tool. Most studies focus on the vitamin’s role in energy production and metabolism rather than its direct impact on weight loss. Therefore, while B12 shots can enhance overall health and energy levels, they should not be viewed as a magic bullet for weight loss.
Potential Risks and Side Effects
As with any medical intervention, Vitamin B12 shots come with potential risks and side effects. While generally considered safe, some individuals might experience side effects for example pain or redness at the injection site, mild diarrhea, or itching. In rare cases, allergic reactions can occur. It’s major to consult with a healthcare provider before starting B12 injections, particularly for individuals with underlying health situation or those taking other medications.
A balanced diet and regular exercise persist the cornerstones of effective weight loss. While Vitamin B12 shots can complement these efforts by boosting energy and metabolism, they should not replace foundational weight loss strategies. Incorporating a difference of nutrient-dense foods and engaging in consistent physical activity are essential for achieving and maintaining a healthy weight.
Other Nutrients and Supplements
Other vitamins and supplements, in addition to vitamin B12, can support weight loss efforts. For example, Vitamin D, iron, and magnesium are critical for energy production and overall health. Combining these nutrients with a balanced diet and exercise can create a comprehensive approach to weight loss.
Conclusion
Vitamin B12 shots offer several potential benefits, including increased energy levels and improved metabolic function, which can indirectly support weight loss efforts. However, the scientific evidence directly linking these injections to significant weight loss is limited.
So, do Vitamin B12 shots for weight loss really work? The answer is nuanced. For individuals with a Vitamin B12 deficiency, these injections can significantly improve energy levels and metabolic function, which might support weight loss efforts. However, for those with adequate B12 levels, the impact on weight loss might be minimal. Therefore, while B12 shots can be a helpful component of a broader weight loss strategy, they should not be relied upon as a sole solution.
Crab brulee offers a delightful fusion of creamy textures and savory flavors, making it a perfect choice for seafood enthusiasts looking to impress with a unique dish. This recipe combines the delicate sweetness of crab meat with a rich, creamy custard base, topped with a caramelized sugar crust for a luxurious finish.
Introduction to Crab Brulee
Inspired by the traditional French dessert creme brulee, this savory version substitutes sweet custard with a delicious mixture of crab meat, cream, and spices. The result is a sophisticated appetizer or main dish that balances creamy richness with a crispy, caramelized sugar topping, creating a memorable dining experience.
Ingredients for Crab Brulee Recipe
To prepare crab brulee, gather the following ingredients:
Fresh Crab Meat: Opt for high-quality lump crab meat for the best flavor and texture. Alternatively, canned crab meat can be used, ensuring it’s well-drained.
Heavy Cream: Provides a smooth foundation for the brulee, imparting richness and smooth texture.
Egg Yolks: Add richness and help bind the ingredients together to create a creamy consistency.
Parmesan Cheese: Enhances the depth of flavor and contributes to the creamy feel of the dish.
Salt and Pepper: Season the crab mixture.
Nutmeg: Adds a subtle warmth and complexity to the flavor profile.
Brown Sugar: Essential for caramelizing the top layer to create the signature brulee effect.
Fresh Herbs: Optional garnish for added freshness and visual appeal, such as parsley or chives.
Equipment Needed
Ramekins: Individual serving dishes for baking the crab brulee.
Baking Dish: Larger dish for creating a water bath during baking.
Culinary Torch: This is ideal for caramelizing the sugar crust on top of the brulee. Alternatively, a broiler can be used.
Instructions for Making Crab Brulee
Step 1: Prepare the Crab Mixture
Preheat Oven: Preheat your oven to 350°F (175°C) to ensure it’s ready for baking.
Mix Ingredients: In a large mixing bowl, mix the fresh crab meat (or drained canned crab meat), heavy cream, egg yolks, grated Parmesan cheese, salt, pepper, and a pinch of nutmeg. Gently fold the ingredients together until well combined. Be careful not to overmix, as you want to preserve the texture of the crab meat.
Step 2: Fill and Bake the Crab Mixture
Prepare Ramekins: Lightly grease individual ramekins or oven-safe dishes with butter or cooking spray to prevent sticking.
Fill Ramekins: Divide the crab mixture evenly among the prepared ramekins, filling them nearly to the top. Smooth the surface of each ramekin with the back of a spoon for even baking.
Create a Water Bath: Place the full ramekins in a larger baking dish. With caution, pour hot water into the baking dish, filling it about midway up the sides of the ramekins. The water bath helps ensure gentle and even cooking of the crab brulee, preventing the edges from overcooking.
Bake: Transfer the baking dish with the ramekins to the preheated oven. Bake for approximately 25-30 minutes, or until the crab brulee recipe is set but still slightly jiggly in the center. The edges should be firm, and the top should be lightly golden.
Step 3: Caramelize the Top
Add Brown Sugar: Once the crab brulee is baked and set, remove it from the oven. Sprinkle a thin, even layer of brown sugar over the top of each ramekin. When heated, the sugar will form a caramelized crust.
Use Torch or Broiler: To caramelize the sugar, use a culinary torch. Hold the torch about 2-3 inches away from the exterior and move it in circular motions until the sugar melts and caramelizes into a golden-brown crust. Alternatively, if you don’t have a torch, place the ramekins under a preheated broiler for a few minutes until the sugar caramelizes. Watch closely to prevent burning.
Step 4: Serve and Garnish
Cool Slightly: Allow the crab brulee to cool for a few minutes before serving. The sugar crust will harden slightly as it cools, creating a satisfying contrast with the creamy crab mixture beneath.
Garnish: Garnish each serving of crab brulee with chives or parsley, if desired. This enhances the dish’s look and flavor profile in addition to adding a splash of color.
Serving Suggestions
Crab brulee is best served immediately after caramelizing the sugar crust to preserve its crisp texture. It can be enjoyed as an elegant appetizer before a main course or as a luxurious main dish matched with a fresh salad or crusty bread. The combination of creamy crab custard and caramelized sugar creates a harmonious blend of savory and sweet flavors that is sure to impress guests or elevate a special meal at home.
Tips for Success
Quality Ingredients: Use fresh, high-quality crab meat for the best taste and texture.
Gentle Mixing: Be gentle when combining the crab brulee ingredients to avoid breaking up the crab meat too much.
Water Bath Technique: The water bath ensures even baking and prevents the edges from overcooking or curdling.
Caramelizing Tips: When caramelizing the sugar crust, aim for a thin, even layer to achieve a perfect balance of sweetness and savory flavors.
Conclusion
Crab brulee offers a unique twist on traditional crab brulee dishes, combining the delicate sweetness of crab meat with the creamy richness of a savory custard and the irresistible crunch of a caramelized sugar crust. With straightforward ingredients and easy-to-follow steps, you can create a gourmet dish that’s both sophisticated and delicious. Whether you’re hosting a dinner party or enjoying a special meal at home, crab brulee is sure to elevate any dining experience with its luxurious flavors and elegant presentation.
In today’s world, sugar seems omnipresent—hidden in processed snacks, drinks, and even savoury meals. Undertaking a no-sugar challenge can transform your health, offering benefits beyond the obvious. Removing added sugars from your diet is essential for weight loss, increased energy, and overall well-being. This blog explores a 14-Day No Sugar Diet Food List to guide you toward a healthier lifestyle.
Why Go Sugar-Free?
Reducing sugar isn’t just a trend; it’s a science-backed choice. Here are the key benefits of going sugar-free:
Root Vegetables: Carrots, turnips (in moderation).
Other Options: Bell peppers, cucumbers, zucchini.
Protein Sources
Protein helps you stay full and supports muscle repair:
Lean Meats: Chicken, turkey, lean beef.
Fish and Seafood: Salmon, cod, tuna.
Plant-Based Proteins: Lentils, chickpeas, tofu.
Eggs: Versatile and nutrient-dense.
Whole Grains
Ditch refined grains for these healthier options:
Quinoa: A protein-rich, gluten-free choice.
Brown Rice: Higher in fibre than white rice.
Oats: Choose unsweetened, plain varieties.
Healthy Fats
Fats provide long-lasting energy and satiety:
Avocados: Use in salads or as spreads.
Nuts and Seeds: Almonds, chia seeds, flaxseeds.
Olive Oil: Ideal for dressings and cooking.
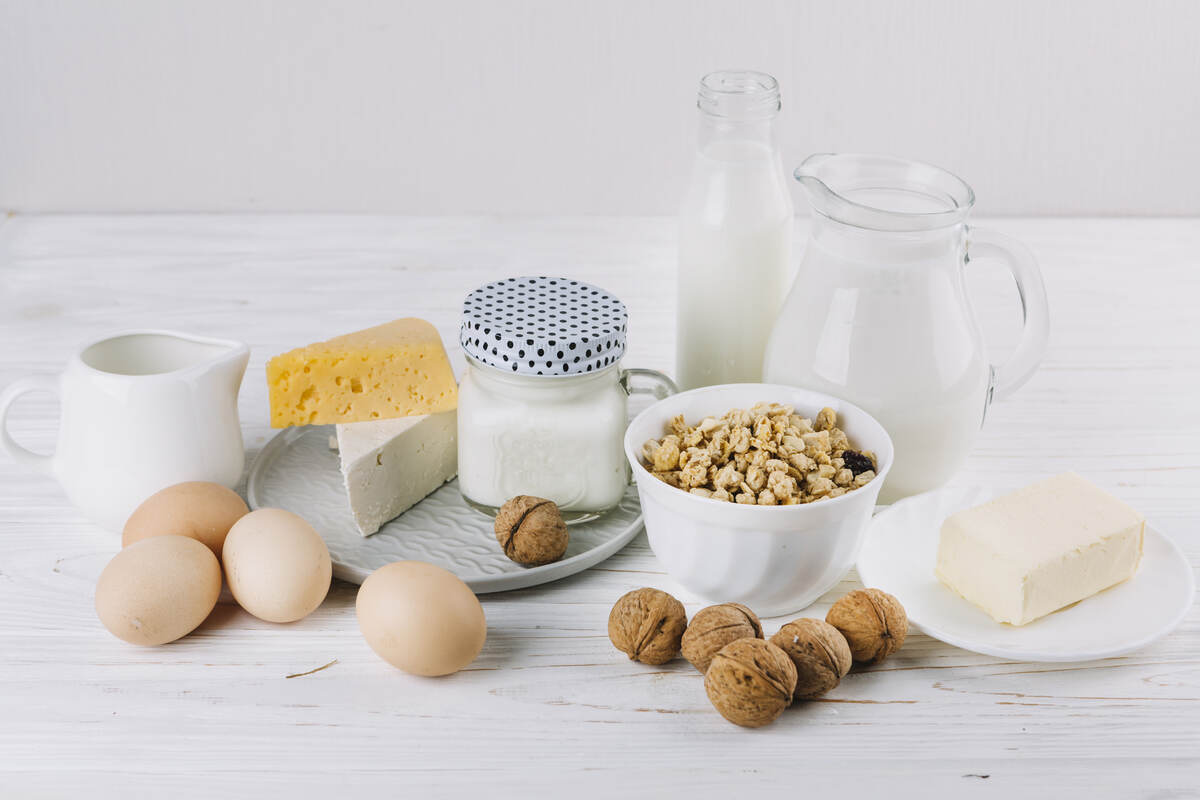
Dairy and Alternatives
Stick to unsweetened options:
Plain Greek Yogurt: Rich in protein & probiotics.
Unsweetened Almond Milk: A versatile milk substitute.
Cheese: Choose natural, unprocessed varieties.
Beverages
Stay hydrated with these no-sugar drinks:
Water: Infuse with lemon or cucumber for variety.
Herbal Teas: Naturally sugar-free and caffeine-free.
Black Coffee: Skip the sugary syrups.
Snacks
Healthy snacking helps curb cravings:
Vegetable Sticks: Pair carrots or celery with hummus.
Nuts and Seeds: Handful of almonds or sunflower seeds.
Fruit Slices: Apple or pear slices with cinnamon.
Sample 7-Day No-Sugar Diet Meal Plan
Here’s an example meal plan to kick-start your journey:
Day 1
Breakfast: Greek yoghurt with berries and chia seeds.
Lunch: Grilled chicken salad with olive oil dressing.
Dinner: Baked salmon with quinoa and broccoli.
Snack: Apple slices with almond butter.
Day 2
Breakfast: Scrambled eggs with spinach.
Lunch: Lentil soup with roasted vegetables.
Dinner: Stir-fried tofu with brown rice.
Snack: Carrot sticks and hummus.
Tips for Success on a No-Sugar Journey
Read Labels: Look for hidden sugars in packaged foods.
Plan Meals: Stick to a meal plan to avoid temptations.
Stay Hydrated: Thirst can often be confused with hunger.
Keep Snacks Handy: Healthy options reduce the risk of unhealthy cravings.
Stay Positive: Focus on the benefits like better energy and mood.
Conclusion
A no-sugar diet is a decisive step toward a healthier, more energized lifestyle. You can embrace this challenge and experience lasting benefits with the correct food list and meal plan. Commit to your goals, and let this 14-day, no-sugar diet food list guide your success.
Enjoy the journey to better health and vitality—one sugar-free meal at a time!
Yoga is often a solo practice focused on mindfulness, flexibility, and physical health. But have you ever considered transforming your yoga session into a group experience? Practicing yoga with others, particularly in groups of four, can significantly enhance individual connection while improving flexibility and strength. Whether it’s with family, friends, or even a group of colleagues, 4 person yoga poses are a fun and powerful way to deepen relationships, enhance physical well-being, and experience yoga in a completely new way.
Why 4-Person Yoga Poses Are a Great Idea
Yoga has long been known for its ability to help individuals relax, improve flexibility, and build strength. However, when practiced in a group, yoga becomes more than just physical exercise—a bonding experience.
Strengthening Relationships
Practicing yoga in a group requires trust, communication, and collaboration. This fosters a unique bond as you work together toward a common goal—executing poses successfully. When practicing 4 person yoga poses, every individual is both a participant and a supporter, which builds a sense of unity and shared accomplishment.
Enhanced Support and Motivation
Some yoga poses can be challenging, especially when done individually. However, having three other people around to lend a hand or provide moral support makes even the most challenging poses more achievable. This collective effort encourages a sense of support and camaraderie among group members, making the experience fun and motivating.
Improved Flexibility and Strength
4-person yoga poses are designed to stretch and strengthen muscles while focusing on coordination and balance. These poses challenge individuals to trust not only their own body but also the strength and stability of their group members.
Building Trust and Inclusivity
In 4-person yoga, each person’s role is crucial. Each participant contributes to the success of the pose, and this shared responsibility fosters inclusivity and mutual respect. It’s an opportunity to practice mindfulness together and develop stronger social connections through trust and teamwork.
Warm-Up Exercises for Group Yoga
Before diving into complex poses, it’s essential to warm up properly. This helps prevent injuries, enhances performance, and ensures your muscles are prepared for workout. Here are some warm up exercises that you can do with your group:
Shoulder and Neck Warm-Ups
Start by standing in a circle and rolling your shoulders backward and forward for 30 seconds each. Next, gently turn your head from side to side for 1 minute to loosen your neck muscles.
Leg and Full-Body Warm-Ups
In a line, bend forward at your waist & reach for your toes, holding for 20 seconds to warm up your hamstrings and lower back. Follow this up with a group jumping jack routine for 2 minutes to get your blood flowing.
Spine and Arm Warm-Ups
Stand back-to-back with a partner and gently twist from side to side for 15 seconds to warm up your spine. Extend your arms outward and rotate them in small circles forward for 30 seconds, then reverse the direction for another 30 seconds to activate your shoulders and arms.
4 Person Yoga Poses to Try
These poses are perfect for groups of four, fostering a supportive environment and enhancing physical fitness while promoting trust, flexibility, and connection.
Four-Legged Table Pose
How to Do It: Sit on the floor facing each other. Place your hands behind you and lift your hips, forming a “table” shape with your body. Link arms with the person across from you to form a stable base.
Benefits: Strengthens the core, arms, and back while promoting teamwork.
Group Tree Pose
How to Do It: Stand in a circle and hold hands. Lift one leg, placing the sole against the inner thigh of your supporting leg. Balance as a group, breathing together. Switch legs and repeat.
Benefits: Improves balance, coordination, and group harmony.
Quadruple Downward Dog
How to Do It: Form a square with your bodies in a downward dog position. Walk your feet toward the center, creating a stable pyramid shape.
Benefits: Enhances flexibility in the back and legs while strengthening the arms.
Circle of Trust Pose
How to Do It: Sit in a circle, extend your legs, and lean back into a V-shape. Hold hands with the person across from you to form a stable circle.
Benefits: Builds core strength, trust, and unity.
Synchronized Seated Forward Bend
How to Do It: Sit in a row, legs extended forward. Reach for the toes of the person in front of you while they reach for yours.
Benefits: Increases flexibility in the hamstrings and lower back.
Quad Chair Pose
How to Do It: Stand facing each other in a squat position, with thighs parallel to the ground. Lean back and link arms to create a stable, connected “chair.”
Benefits: Strengthens the legs & core and improves balance.
Group Cobra Pose
How to Do It: Lie down in a line, hands under your shoulders. As a group, lift your chest off the ground, creating a backbend.
Benefits: Stretches the chest and abdomen while strengthening the back.
Partner Plank Tower
How to Do It: One person is in a plank position on the floor, two people form the middle layer, and one person lies on top.
Benefits: Strengthens the core and upper body.
Common Mistakes to Avoid
When practicing 4 person yoga poses, keep these tips in mind to ensure a smooth and safe experience:
Lack of Communication: Always discuss poses with your group before starting. Clear communication is key to make suring everyone is on the same page.
Skipping Warm-Ups: Never skip the warm-up! Warming up prepares your muscles and joints, preventing injuries and improving performance.
Ignoring Abilities: Choose poses that everyone in the group can comfortably perform. Adapt as needed for flexibility and fitness levels.
Neglecting Support: Always support one another during poses to ensure stability and prevent injuries.
Rushing Between Poses: Sit between poses to maintain balance and control.
Forgetting to Breathe: Remember to breathe deeply throughout the practice to promote relaxation and focus.
Lack of Fun: Don’t forget to enjoy the experience! Yoga should be a fun and rewarding practice for everyone involved.
Conclusion
Practicing 4 person yoga poses is more than just a workout; it’s an opportunity to connect, support one another, and strengthen your relationships. Whether you want to improve flexibility, build trust, or have fun with your group, these dynamic poses can elevate your yoga experience. You can ensure a successful & enjoyable group yoga session by incorporating the proper warm-ups, being mindful of your team’s abilities, and avoiding common mistakes. So, gather your friends or family, step onto your mats, and start building strength, flexibility, and connection together!
 Physical Benefits
 Quad Bridge Pose
 Conclusion
 Cardio (Fat Burning)
 Core Work (Strength and Stability)
 Designing Your Workout Routine


 Vegetables
 Protein Sources
 Whole Grains
 Healthy Fats
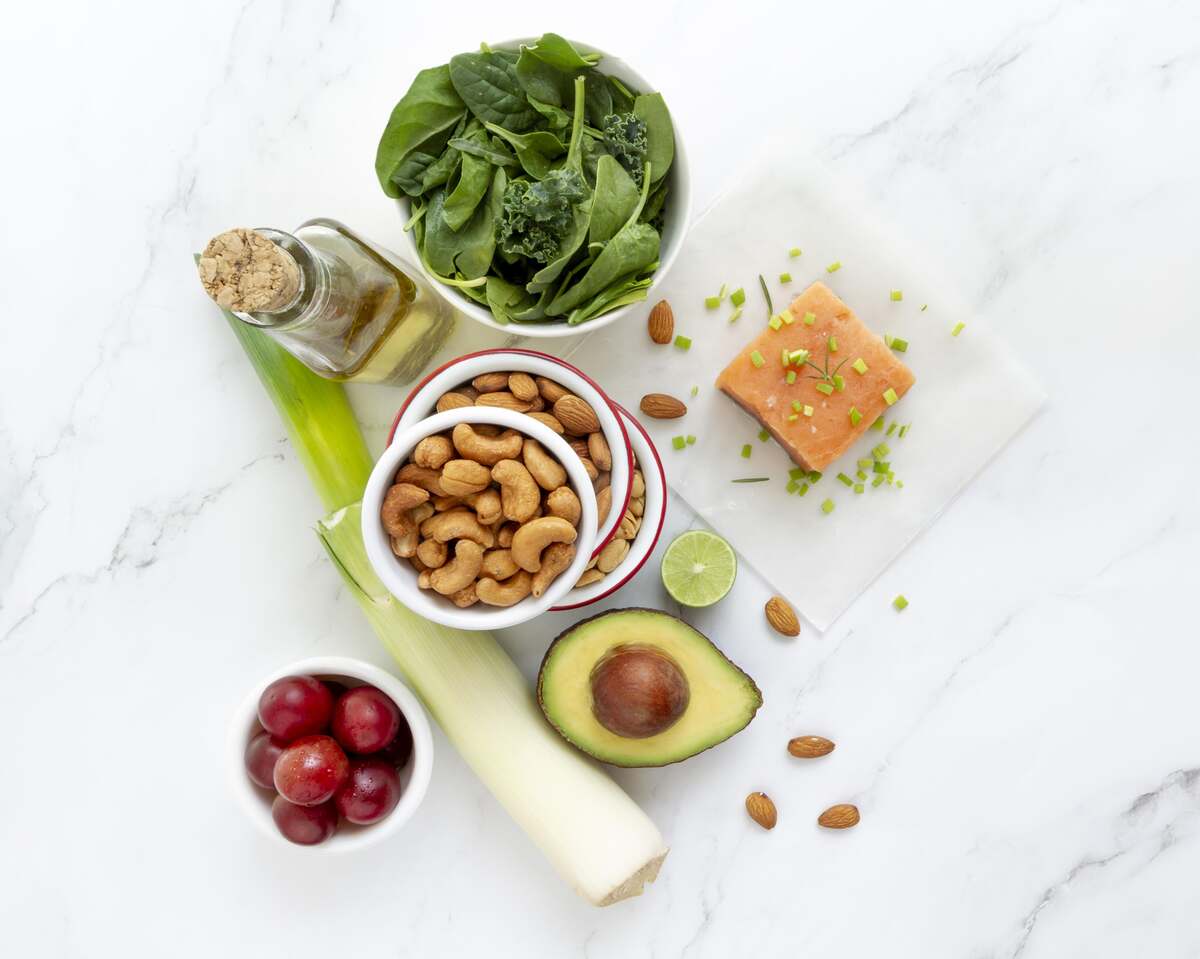
 Beverages
 Snacks
 Sample 7-Day No-Sugar Diet Meal Plan