You’re not alone if your busy schedule leaves little time for cooking. Whether juggling work, family, or fitness goals, meal prepping with easy, nourishing ingredients can make all the difference. And when it comes to simplifying your routine, high protein crock pot recipes are a game-changer.
These recipes are perfect for boosting energy, supporting gut health, and maintaining a healthy weight. In this guide, you’ll discover delicious crock pot meals, make-ahead breakfasts, and hydrating smoothies designed for busy lives.
Why High-Protein Crock Pot Recipes Are Ideal for Meal Prep
Meal prepping is about working smarter, not harder—and that’s where the crock pot shines. With just a few ingredients and a slow cooker, you can create flavorful meals that cook while you work, sleep, or run errands.
Why go with high-protein crockpot recipes?
They promote satiety and help curb cravings.
Protein supports muscle repair, metabolism, and energy levels.
Crock pots allow for hands-free, batch-style cooking.
They’re perfect for clean eating on a budget.
By preparing meals in bulk, you’ll save time, money, and decision fatigue.
Make-Ahead Breakfasts to Fuel Your Morning
1. Crock Pot Protein Oatmeal
This make-ahead oatmeal is creamy, satisfying, and packed with protein.
Combine oats, almond milk, and cinnamon in the crock pot. Cook on low for 6–8 hours. Stir in protein powder after cooking. Top with berries and yoghurt before serving.
Why It Works:
This perfect high-protein breakfast supports gut health and provides sustained energy through fibre-rich oats and probiotics from yoghurt.
High Protein Crock Pot Recipes for Lunch & Dinner
Whether you’re prepping lunches for the week or looking for an easy dinner, these high protein crock pot recipes are perfect.
2. Slow Cooker Salsa Chicken
Ingredients:
1.5 lbs boneless, skinless chicken breasts
1 cup low-sodium salsa
1 tsp cumin
Salt & pepper to taste
Instructions:
Place chicken, salsa, and seasonings in the crock pot. Cook on low for 6 hours. Shred and serve in lettuce wraps, rice bowls, or tacos.
Benefits:
Each serving delivers over 30g of protein with minimal prep and ingredients.
3. Crock Pot White Bean & Turkey Chilli
Ingredients:
1 lb lean ground turkey
1 can of white beans, rinsed
1 onion, chopped
1 can of diced tomatoes
2 tsp chilli powder
½ cup chicken broth
Instructions:
Brown the turkey and add all ingredients to the crock pot. Cook on low for 6–7 hours.
Why You’ll Love It:
Loaded with fibre and lean protein, this chilli supports digestion and keeps you feeling full.
4. Slow Cooker Beef & Broccoli
Ingredients:
1 lb flank steak, thinly sliced
2 cups broccoli florets
1/3 cup coconut aminos or low-sodium soy sauce
2 tbsp honey
2 garlic cloves, minced
Instructions:
Add everything (except broccoli) to the crock pot and cook on low for 6 hours. Add broccoli 30 minutes before serving.
Nutrition Tip:
This is one of those high protein crockpot recipes that’s both comforting and nourishing—ideal for weeknight dinners or post-workout recovery.
Time-Saving Tips for Busy Meal Preppers
Pre-chop vegetables and store them in airtight containers.
Use freezer-friendly bags to assemble crockpot meal kits ahead of time.
Store cooked meals in portion-sized glass containers for grab-and-go lunches.
Label each container with the meal name and date for easy rotation.
Hydrating Smoothies & Drinks to Pair With Your Meals
Meal prep isn’t just about food—hydration matters, too. These drinks complement your meals and support digestion.
1. Gut-Loving Green Smoothie
Ingredients:
1 cup spinach
½ frozen banana
½ avocado
1 scoop vanilla protein powder
1 tbsp chia seeds
1 cup almond milk
Tip:
Chia and avocado help digestion and satiety, while protein keeps energy levels high.
2. Cucumber Citrus Detox Water
Infuse filtered water with cucumber slices, lemon wedges, and fresh mint. This is a refreshing, zero-calorie way to stay hydrated throughout the day.
Final Thoughts
Meal prep can feel overwhelming, but it doesn’t have to be. With the help of high protein crock pot recipes, you can create delicious, balanced meals that nourish your body, save time, and support your goals. Whether you’re a busy professional, parent, or student, these recipes and hydration ideas offer everything you need for a healthier lifestyle.
Get started today—and let your slow cooker do the heavy lifting.
Frequently Asked Questions (FAQs)
Can I freeze high-protein crockpot recipes?
Yes. Most crock pot meals freeze beautifully. Cool completely before storing in freezer-safe containers.
How many meals can I prep at once?
Depending on the size of your crock pot, you can make 6–8 servings of most meals. For variety, prepare two different recipes in a week.
How much protein should each meal have?
Aim for 20–35 grams of protein per meal to support energy and satiety.
Murgh Musallam, a celebrated gem of Mughlai cuisine, is a royal dish known for its complex flavours, opulent presentation, and deep cultural roots. This culinary masterpiece, meaning “whole chicken,” has graced the banquet tables of emperors and nobles. Today, it continues to captivate with its aromatic spices, nut-laced richness, and luscious gravy. This detailed Murgh Musallam recipe carefully walks you through each step, unveiling traditional techniques and time-honoured ingredients.
A Glimpse into the Origins of Murgh Musallam Recipe
Steeped in history, Murgh Musallam Recipe origins are in the royal kitchens of the Mughal Empire. The dish is believed to have been a favourite of Emperor Muhammad bin Tughlaq and was later refined during the height of Mughal rule. What sets it apart is its preparation of a whole chicken, marinated with layers of spices and slow-cooked to perfection, often stuffed and richly garnished.
Ingredients You Will Need
Ensure all components are ready before embarking on the preparation. The soul of this dish lies in the freshly ground spices and patient marination.
For the Marinade:
1 whole chicken (skinless, about 1.2–1.5 kg), cleaned and pat dried
¼ cup fresh cream (optional but enriches the gravy)
2 tbsp chopped fresh coriander leaves
A few strands of saffron soaked in 2 tbsp warm milk (optional, for finishing)
Step-by-Step Preparation
Step 1: Preparing the Marinade
Start by mixing the curd with turmeric, salt, half of the red chilli powder, garam masala, and the fresh ground paste of onion, ginger, and garlic. Coat the chicken thoroughly, ensuring the marinade seeps into the cuts on the bird’s surface. Allow it to rest for at least 30 minutes. For deeper infusion, marinate overnight under refrigeration.
Step 2: Toasting the Whole Spices
In dry pan over medium heat, gently roast cloves, peppercorns, cinnamon, cardamoms, almonds, cumin, coriander, and poppy seeds. Stir continuously for even toasting. Once fragrant, remove from heat & allow to cool slightly. Grind them into a fine paste using minimal water. This forms the core masala of the dish—robust, earthy, and intensely aromatic.
Step 3: Searing the Chicken
Heat 2 tablespoons of mustard oil or ghee in a large, deep pan. Lightly sear the marinated whole chicken on all sides until it develops a golden hue. Remove and set aside. This initial browning locks in moisture and adds depth to the flavour.
Step 4: Building the Gravy Base
In the same pan, add remaining oil. Sauté the finely sliced onions until caramelized—a process that can take up to 15 minutes on low flame. This slow caramelization is critical for the signature richness of Murgh Musallam Recipe. Stir in the prepared spice paste and cook for 7–8 minutes until oil separates and the rawness dissipates.
Now, add the tomato purée and the remaining red chilli powder. Cook until the mixture thickens & takes on a deep, luscious colour. Fold in the cream for added silkiness (optional).
Step 5: Simmering to Perfection
Place the seared whole chicken into the pan, spooning the masala. Add about ½ to ¾ cup water to adjust consistency. Cover and simmer over a low flame for 35–40 minutes, occasionally basting the chicken with the sauce. The meat should be tender, easily pierced with a fork, but not falling apart.
In the final five minutes, add saffron-infused milk and fresh coriander. Simmer uncovered for a richer colour and aroma.
Step 6: Resting and Garnishing
Once cooked, allow the Murgh Musallam Recipe to rest for 10 minutes before serving. This resting period allows flavours to settle and the gravy to thicken further. Garnish with silver leaf (varq), additional saffron strands, and a drizzle of ghee for that regal touch.
Serving Suggestions
Murgh Musallam Recipe is traditionally served with fragrant basmati rice or sheer mal (sweet saffron flatbread). However, it pairs equally well with naan or tandoori roti. To balance the richness, accompany it with a simple cucumber raita and onion salad.
Final Thoughts
This Murgh Musallam Recipe is more than a method—it’s a journey into a regal era where food was not merely sustenance but art. The layering of spices, the ceremonial preparation of a whole bird, and the final flourish of saffron and cream all signal a dish crafted with reverence. Murgh Musallam Recipe celebrates tradition, patience, and flavour for a festive table or a culinary challenge.
Frequently Asked Questions (FAQs)
What does “Murgh Musallam” mean?
“Murgh Musallam” is a Persian-origin term meaning “whole chicken.” In the culinary context, it refers to a regal dish in which an entire chicken is marinated, often stuffed, and cooked in a rich, aromatic gravy. It is traditionally served during festive or royal occasions.
Can I use boneless chicken for Murgh Musallam?
While it’s technically possible, using boneless chicken deviates from the essence of this dish. Murgh Musallam is traditionally prepared with a whole bird, which helps retain moisture and delivers the intended presentation and texture. For a flavor profile similar to boneless pieces, consider “Chicken Musallam” instead.
How long should the chicken be marinated?
A minimum of 30 minutes is essential for the spices to infuse, but marinating overnight (6–8 hours) in the refrigerator is highly recommended for optimal flavour. This allows the curd and spices acid to thoroughly tenderize and flavour the meat.
Is Murgh Musallam very spicy?
Murgh Musallam has a rich, bold flavour but is not necessarily overly spicy. The heat level can be adjusted by reducing the quantity of red chilli powder or using mild chilli varieties. Curd, cream, and nuts also naturally mellow the heat.
Can Murgh Musallam be made in an oven?
Yes. After marinating and optionally searing the chicken, place it in a covered oven-safe dish or Dutch oven & bake at 180°C (350°F) for about 45–55 minutes. Baste occasionally and uncover in the last 10 minutes for a slightly roasted finish.
In the modern kitchen, convenience meets creativity—and nothing exemplifies this better than the rice cooker. Originally a staple for simply cooking fluffy white rice, today’s rice cookers have evolved into versatile kitchen allies capable of preparing various dishes. Whether you’re a college student, a busy parent, or someone new to cooking, exploring Rice Cooker Recipes can open up a world of flavor with minimal effort.
Why Rice Cooker Recipes Are Trending
The rising popularity of rice cooker recipes can be attributed to three key factors:
Time-saving efficiency – Set it and forget it. Most rice cookers operate on a one-button system and automatically shut off or switch to “keep warm” once cooking is done.
Minimal cleanup – One pot means fewer dishes and less mess.
Multifunctionality – Newer rice cooker models include soup, porridge, cake, steam, and even sautéing settings.
This combination of convenience and versatility makes rice cookers an ideal companion for households seeking nutritious and comforting meals without the hassle.
1. Rice Cooker Mac and Cheese
Ingredients:
2 cups elbow macaroni
2 ½ cups water
1 cup whole milk
2 cups shredded sharp cheddar cheese
1 tsp mustard powder
Salt and pepper to taste
Instructions:
Add macaroni and water to the rice cooker.
Cook on the “White Rice” setting until pasta is al dente (about 10–12 minutes).
Add milk, cheese, mustard powder, and seasoning.
Stir well & cook for an additional 5 minutes until creamy.
Why it works: Rice cookers distribute heat evenly, creating the perfect environment for silky cheese sauces to coat your pasta without sticking or burning.
2. Chicken and Rice One-Pot Meal
Ingredients:
1 cup jasmine or basmati rice
1 ½ cups chicken broth
2 boneless chicken thighs, diced
1 cup frozen peas and carrots
1 tsp garlic powder
1 tsp paprika
Salt and pepper
Instructions:
Add all ingredients to the rice cooker.
Stir to combine.
Set to “Cook” and wait until the switch flips (about 25–30 minutes).
Let sit for 5 minutes before serving.
Pro Tip: Use pre-cooked rotisserie chicken to cut cooking time and infuse deeper flavor.
3. Rice Cooker Banana Bread
Ingredients:
2 ripe bananas, mashed
2 eggs
1 cup sugar
1 ½ cups all-purpose flour
1 tsp baking soda
½ cup vegetable oil
Pinch of salt
Instructions:
Mix all wet & dry ingredients in a bowl.
Grease rice cooker pot with butter or oil spray.
Pour the batter into the pot and close the lid.
Cook on the “Cake” or “Cook” setting for 40–50 minutes.
Use a toothpick to check doneness.
Why it’s genius: Your rice cooker acts like a mini-oven, keeping moisture and ensuring even cooking.
Tips for Mastering Rice Cooker Recipes
Use the proper rice-to-liquid ratio: For dishes like pilaf or jambalaya, stick to 1:2 or 1:1.5.
Avoid overfilling: Most rice cookers have a “Max” line for a reason—overflow can ruin your meal.
Layer flavors: Sauté garlic and onions in a bit of oil in the cooker first (if your model allows) for richer depth.
Final Thoughts
Incorporating rice cooker recipes into your daily routine can revolutionize how you cook. From savory one-pot meals to unexpected desserts, this humble appliance proves it’s far more than a rice steamer. As the trend spreads across kitchens, more people are discovering how accessible, versatile, and delicious cooking can be.
Homemade biscuits are a staple of American comfort food, and the best part is You don’t need a long list of ingredients to make them. This 3 ingredient biscuit recipe is simple and produces flaky, tender biscuits that pair perfectly with butter, jam, or gravy. Whether making breakfast, serving a hearty dinner, or craving a warm treat, these biscuits are the ultimate go-to.
Why This 3 Ingredient Biscuit Recipe Works
A great biscuit should be soft on the inside, slightly crisp on the outside, and full of rich, buttery flavor. This recipe achieves that with just three basic ingredients:
Self-rising flour – Provides structure and the perfect amount of leavening.
Cold butter or heavy cream – Adds flakiness and a rich texture.
Milk or buttermilk – Binds the dough together and keeps the biscuits tender.
This 3 ingredient biscuit recipe is foolproof, meaning even beginners can create bakery-style biscuits at home.
Ingredients for 3 Ingredient Biscuit recipe
2 cups self-rising flour
1/2 cup (1 stick) cold butter or 3/4 cup heavy cream
3/4 cup whole milk or buttermilk
Optional Add-ins: While this is a 3 ingredient biscuit recipe, you can enhance the flavor with a pinch of salt, shredded cheese, or honey.
How to Make 3 Ingredient Biscuits
Step 1: Preheat & Prepare
Preheat your oven to 450°F (232°C). Line a baking sheet with parchment paper or lightly grease it.
Step 2: Mix the Dough
If using butter: Grate or cube cold butter and mix it into the self-rising flour using a fork or pastry cutter until mixture resembles coarse crumbs.
If using heavy cream: Mix the self-rising flour and heavy cream until a dough forms.
Slowly add milk or buttermilk, stirring until just combined. Do not overmix.
Step 3: Shape the Biscuits
Turn the dough onto lightly floured surface. Gently pat it to about ¾-inch thickness.
Use a biscuit cutter or a glass to cut out rounds. If you don’t have a cutter, shape the dough by hand.
Step 4: Bake to Perfection
Place biscuits on the prepared baking sheet, ensuring they touch slightly for soft edges. Bake for 10-12 minutes or until golden brown.
Keep ingredients cold – This helps create a flakier texture.
Avoid overmixing – Overworking the dough can lead to tough biscuits.
Use buttermilk for tangy flavor – It also helps with tenderness.
Space them correctly – Letting biscuits touch helps them rise taller.
Serving Ideas for Homemade Biscuits
Breakfast: Serve with scrambled eggs and bacon.
Dinner: Pair with fried chicken or beef stew.
Snacks: Spread with butter, jam, or honey.
Final Thoughts
This 3 ingredient biscuit recipe is an easy, no-fail way to make soft and delicious biscuits from scratch. With just a few simple ingredients & steps, anyone can enjoy fresh, homemade biscuits in under 20 minutes. Whether you’re a seasoned baker or beginner, this recipe is sure to become a household favorite.
A Green Tea Shot Recipe is a popular party drink known for its smooth, slightly sweet, and citrusy taste. Despite its name, this shot contains no green tea—it gets its name from the vibrant greenish-yellow color. Whether you’re hosting a gathering or just curious, here’s everything you need to know about making a green tea shot at home.
What is a Green Tea Shot?
The Green Tea Shot Recipe is a whiskey-based cocktail created initially by Jameson Irish Whiskey. It combines whiskey, peach schnapps, sour mix, and a splash of lemon-lime soda for a well-balanced drink with a fruity kick.
Ingredients You’ll Need
To make a classic green tea shot, gather the following ingredients:
½ ounce Jameson Irish Whiskey (or any smooth whiskey)
½ ounce Peach Schnapps (adds a sweet, fruity note)
½ ounce Sour Mix (for tangy balance)
A splash of Lemon-Lime Soda (similar as Sprite or 7Up)
Ice cubes
How to Make a Green Tea Shot
Follow these simple steps to prepare the perfect Green Tea Shot Recipe:
Fill a Cocktail Shaker with Ice – This helps chill the ingredients for a refreshing shot.
Add Whiskey, Peach Schnapps, and Sour Mix – Pour equal parts of each into the shaker.
Shake Well – Secure the lid & shake vigorously for about 10 seconds.
Strain into a Shot Glass – Use a strainer to pour the liquid smoothly into the glass.
Top with Lemon-Lime Soda – A tiny splash enhances the flavor and fizz.
Serve Immediately – Enjoy your green tea shot while it’s cold!
Variations & Customizations
Want to tweak your green tea shot recipe? Try these alternatives:
Green Tea Shot Without Whiskey: Replace whiskey with vodka for a milder taste.
Stronger Version: Add more whiskey if you prefer a boozier kick.
Sweeter Shot: Increase the peach schnapps or add a hint of honey.
Green Tea Cocktail: Instead of serving as a shot, pour over ice in a rocks glass for a full-sized drink.
Why is it Called a Green Tea Shot?
Many assume this drink contains honest green tea, but it doesn’t. The combination of whiskey and peach schnapps creates a golden-green hue that resembles brewed green tea, giving the drink its name.
Nutritional Information (Per Shot)
Nutrient
Amount
Calories
~90
Carbohydrates
7g
Sugar
6g
Alcohol Content
~15% ABV
Final Thoughts
A Green Tea Shot Recipeis a fun, flavorful drink that’s easy to make at home. With a balance of sweet, sour, & whiskey warmth, it’s a crowd-pleaser at parties and social gatherings. Try making one today and enjoy the refreshing taste!
Introducing solid foods to your baby is significant milestone, and preparing baby food recipes at home ensures they receive the best nutrition without additives or preservatives. Whether starting with purees or moving to textured meals, this guide will provide detailed, healthy, and easy-to-make baby food recipes for your child’s development stages.
Why Choose Homemade Baby Food?
Homemade baby food recipes allow parents to control ingredients, ensuring balanced nutrition and avoiding unnecessary sugars, salts, and artificial preservatives. Benefits include:
Better Nutritional Value – Fresh fruits, vegetables, and grains retain natural vitamins.
Customizable Textures – Adjust the consistency based on your baby’s age.
Allergy Awareness – Introduce one ingredient at a time to monitor allergic reactions.
Cost-Effective – Preparing meals at home is cheaper than store-bought options.
Best First Foods for Babies (4-6 Months)
When starting solids, opt for single-ingredient purees to check for allergies. Some excellent beginner foods include:
Banana Puree – Mash a ripe banana for a smooth, creamy texture.
Sweet Potato Puree – Steam, blend, and serve.
Apple Puree – Peel, steam, and blend apples to create a fine consistency.
Carrot Puree – Boil or steam carrots and blend them with water.
Avocado Mash – Rich in healthy fats; mash and serve fresh.
➡ Tip: Always introduce one new food at a time & wait three to five days before introducing another.
Stage 2 Baby Food (6-8 Months)
Babies are ready for thicker purees and mild food combinations at this stage. Try these nutritious baby food recipes:
1. Apple & Oatmeal Puree
✅ Ingredients:
½ cup rolled oats
1 apple, peeled and chopped
1 cup water or breast milk
🔹 Instructions:
Cook oats and apples together until soft.
Blend into a smooth puree.
Serve warm or refrigerate for later use.
2. Avocado & Banana Mash
✅ Ingredients:
½ ripe avocado
1 banana
🔹 Instructions:
Mash both ingredients together.
Serve immediately for a creamy and nutritious meal.
Stage 3 Baby Food (8-12 Months)
Babies now enjoy chunkier textures and a variety of flavors. Introduce finger foods and protein sources.
Homemade baby food recipes provide a nutritious, cost-effective, safe alternative to store-bought options. Using fresh ingredients & simple techniques, you can create meals supporting your baby’s development while catering to their growing taste preferences. Start experimenting with these baby food recipes, and enjoy making mealtime a delightful experience for your little one!
Mangoes are adored for their sweet, juicy flesh and vibrant flavour—but what about their skin? The question “Can you eat mango skin?” is one nutritionists and curious fruit lovers have explored. While many discard the peel without a second thought, mango skin is, in fact, edible and packed with potential health benefits.
However, consuming it isn’t always as straightforward as biting into the fruit. Let’s dive into the nutritional science, potential concerns, and innovative ways to enjoy mango skin safely.
Is Mango Skin Safe to Eat?
Yes, you can eat mango skin, and it’s entirely safe for most people. Like apple or pear peels, mango skin is natural source of dietary fibre, vitamins, and protective plant compounds. Despite this, it is often avoided due to its tough texture and slightly bitter or resinous taste.
Nutritional Benefits of Mango Skin
Mango skin holds many health-boosting compounds, often lost when peeled and discarded. Here’s what it contains:
Nutrient / Compound
Benefit
Dietary Fiber
Aids digestion, promotes gut health, and supports regularity
Vitamin C
Enhances immunity and supports collagen production
Beta-Carotene
Converts to Vitamin A, improves vision, and boosts skin health
Mangiferin
A powerful antioxidant with anti-inflammatory and anticancer potential
Polyphenols & Flavonoids
Reduce oxidative stress and protect cells from damage
So next time you wonder, “Can you eat mango skin?” remember it’s a treasure trove of antioxidants and immune-enhancing nutrients.
Possible Drawbacks of Eating Mango Skin
Despite its impressive nutritional profile, mango skin isn’t universally embraced. There are a few important considerations:
1. Taste and Texture
Mango skin can be leathery, fibrous, and slightly bitter, especially in certain varieties like Tommy Atkins. This texture can make it unpleasant to chew directly.
2. Allergic Reactions
Mango skin contains urushiol, a compound also found in poison ivy. People with sensitivities may experience:
Itching around the lips
Skin rash or inflammation
Tingling or burning sensation
Anyone allergic to cashews, poison oak, or ivy should be cautious before consuming mango skin.
3. Pesticide Residue
Non-organic mangoes may have pesticide traces on their surface. While washing reduces this risk, it’s still worth noting—especially if the skin will be eaten raw.
How to Eat Mango Skin Safely
If you’re interested in adding mango peel to your diet, here are safe and enjoyable ways to do so:
✔️ Wash Thoroughly
Scrub the mango under running water to remove dirt, bacteria, and pesticide residues. Soak it in baking soda solution for 10–15 minutes for extra protection.
✔️ Choose Thin-Skinned Varieties
Some mango types like Ataulfo, Honey, or Alphonso have smoother, less fibrous skin, making them easier to eat whole.
✔️ Blend Into Smoothies
Toss mango skin and flesh into a high-powered blender. Other fruits like bananas or pineapple mask the bitterness while retaining all the nutrients.
✔️ Cook or Bake With It
Cooking mango skin in chutneys, jams, or stir-fries softens its texture and reduces bitterness. It can also be dried, powdered, and added to spice mixes or teas.
✔️ Go Organic
Choosing organic mangoes minimizes your exposure to harmful chemical residues, which is especially important if you plan to eat the peel.
Who Should Avoid Mango Skin?
While most healthy adults can safely enjoy mango peel in moderation, the following groups should exercise caution:
Individuals with urushiol sensitivity
Children under 5 years, due to choking risk from tough peel
People with oral allergies to mango sap
Anyone undergoing immunosuppressive therapy, unless approved by a physician
If any adverse reactions occur after trying mango skin, discontinue use & consult a healthcare provider.
Final Thoughts
So, can you eat mango skin? Yes—mango skin is edible, nutritious, and offers powerful health benefits, thanks to its rich supply of fibre, antioxidants, and bioactive compounds. However, it’s not for everyone. Some may dislike the taste and texture or experience mild allergic reactions. To reap the benefits safely, choose organic mangoes, wash them well, and consider blending or cooking the skin into your meals.
Frequently Asked Questions (FAQs)
Can you eat mango skin raw?
Mango skin can be eaten raw, but it’s important to wash it thoroughly to remove pesticide residues and dirt. Due to its bitter taste and tough texture, many people prefer blending it into smoothies or cooking it.
Is mango skin good for you?
Absolutely. Mango skin is rich in fibre, vitamin C, beta-carotene, and powerful antioxidants like mangiferin and polyphenols. These nutrients support digestion, immunity, and skin health and help reduce inflammation.
Can eating mango skin cause allergies?
In some cases, yes. Mango skin contains urushiol, the same compound found in poison ivy, which can trigger itching, rashes, or allergic reactions in sensitive individuals. If you’re allergic to poison ivy or cashews, it’s best to avoid it.
Looking for a healthier frozen dessert option that doesn’t sacrifice flavor? This blog introduces a versatile vanilla ice cream base perfect for creating ninja creami recipes healthy enough to suit various dietary needs. Whether you’re interested in vegan alternatives, high-protein treats, or simply a creamier dessert with a twist, read on for a step-by-step guide to making your own delicious frozen desserts at home.
The Ultimate Vanilla Ice Cream Base
This base recipe serves as a foundation that can be easily adapted into countless flavor variations. By adjusting ingredients, you can make healthier versions of your favorite desserts without sacrificing taste.
Ingredients:
Cream Cheese: A unique addition that guarantees a creamy texture. Options include vegan, lactose-free, or low-fat varieties.
Heavy Cream: Often referred to as double cream. (Tip: Avoid heavy whipping cream as it might yield a thinner consistency.)
Milk: Whole milk is preferred, but almond milk, oat milk, or even non-fat milk work just fine.
Sugar: White or superfine sugar works well, though sugar substitutes like allulose or stevia can make the recipe even healthier.
Vanilla Extract: Alternatively, vanilla bean paste can be used for a richer flavor.
Step-by-Step Instructions
Follow these simple steps to transform your ingredients into a delightful frozen treat:
Prepare & Freeze:
Gently melt the cream cheese with a small amount of cream and whisk in the sugar until it dissolves.
Transfer this mixture to your Ninja Creami pint container.
Whisk in the remaining ingredients, secure the lid, and place the container in the freezer for at least 3 hours to ensure the base is thoroughly frozen.
Churn to Perfection:
Attach the frozen container to the Ninja Creami machine.
Select either “ice cream” or “lite ice cream” setting. Let the machine work its magic.
If the texture appears crumbly on top or isn’t as smooth as desired, simply re-spin it until you achieve a creamy consistency.
Serve & Enjoy:
Once churned, scoop your ice cream into bowls and enjoy immediately.
For extra flair, add your favorite mix-ins after the initial churn to ensure even distribution throughout the dessert.
Expert Tips for Consistency
Avoid Overfilling: Always fill your container at least 1/2 inch below the “max” line. Overfilling can make the machine struggle to churn evenly.
Mode Selection: Stick to the “ice cream” or “lite ice cream” modes for optimal creaminess. Other settings might result in a texture that’s more akin to a smoothie bowl or milkshake.
Timing Is Key: Freezing for a minimum of 3 hours generally provides a creamy consistency, even though some guidelines suggest 24 hours. Experiment with your freezer to see what works best.
Re-Churn as Needed: If the dessert isn’t perfectly smooth, don’t hesitate to churn a few more times until you’re satisfied with the texture.
Flavor Variations for Ninja Creami Recipes Healthy
Once you’ve mastered the base, consider experimenting with these creative and healthy flavor ideas:
Mixed Berry Sorbet: Combine 1 cup each of fresh raspberries, blueberries, and strawberries.
Cookies and Cream: Add a few sandwich or Oreo cookies for texture, along with an extra tablespoon of cream cheese.
Chocolate High-Protein Ice Cream: Use 1¾ cups of premade chocolate protein shake mixed with 2 tablespoons of chocolate pudding mix.
Banana Cream Pie: Incorporate one overripe banana and some crushed graham crackers.
Cinnamon Roll Protein: Blend 1¾ cups of premade cinnamon roll protein shake (or protein powder whisked with milk) with 2 tablespoons of vanilla pudding mix and ½ teaspoon cinnamon.
Mango or Pineapple Sorbet: Use canned or packaged fruit chunks (15 ounces) in their natural juices.
Frozen Yogurt: Swap in 16 ounces of your favorite flavored or vanilla yogurt.
Mint Chocolate Chip: Include 1 teaspoon of peppermint extract, few drops of green food coloring, and ¼ cup of chocolate chips.
Vegan Ice Cream: Replace the milk with coconut milk and use dairy-free cream for a delicious plant-based version.
These ideas ensure that you’re not only creating a delicious dessert but also keeping the options aligned with ninja creami recipes healthy goals.
Nutritional Considerations
While each variation’s nutritional profile may differ, a few general pointers include:
Dairy Alternatives: Using almond, oat, or coconut milk can lower the fat content and calories.
Sugar Substitutes: Opting for allulose or stevia reduces sugar intake without sacrificing sweetness.
Protein Boosts: Incorporating protein shakes or protein powders can enhance the nutritional value, making the dessert a more balanced treat.
For more detailed nutritional information, consider consulting nutritional databases or the official guidelines provided by your Ninja Creami machine manufacturer.
Storage and Re-Freezing Tips
If you can’t finish your pint in one sitting, don’t worry! Here are some quick storage tips:
Short-Term Storage: Enjoy your ice cream fresh for the best texture.
Re-Freezing: If needed, you can re-freeze your dessert. Treat it like a freshly frozen base and re-spin in the Ninja Creami machine to restore creaminess.
Conclusion
Creating ninja creami recipes healthy treats at home is easier than ever. With this versatile vanilla ice cream base and a host of flavor variations, you can enjoy a delicious dessert that aligns with your health goals. Experiment with different ingredients, share your favorite tweaks, and relish the joy of crafting a frozen treat that’s both nutritious and indulgent.
Cooking healthy meals can often feel time-consuming, but with an Instant Pot Chicken Recipes Healthy, it becomes effortless. Whether looking for quick weeknight dinners or meal prep solutions, these nutritious chicken recipes deliver flavour, protein, and convenience in every bite.
Benefits of Cooking Chicken in Instant Pot
Time-Saving – Meals are ready in a fraction of the time compared to traditional cooking methods.
Retains Nutrients – The pressure cooking process preserves vitamins and minerals better than boiling or frying.
Tender and Juicy Results – The sealed environment prevents moisture loss, ensuring soft, flavorful chicken.
It is a light and zesty dish packed with antioxidants and lean protein.
Ingredients:
2 boneless, skinless chicken breasts
1 cup low-sodium chicken broth
3 cloves garlic, minced
1 lemon, juiced
1 tsp olive oil
1 tsp dried oregano
Salt and pepper to taste
Instructions:
Turn on Instant Pot to sauté mode and heat the olive oil.
Add garlic and sauté for 1 minute until fragrant.
Place chicken breasts in pot and sear for 2 minutes on each side.
Pour the chicken broth and lemon juice, then add oregano, salt, and pepper.
Close the lid, set to high pressure, and cook for 8 minutes.
Permit natural pressure release for 5 minutes, then quickly release the rest.
Serve with steamed vegetables or quinoa.
2. Instant Pot Chicken and Quinoa Soup
A nourishing, protein-rich soup that supports immunity and digestion.
Ingredients:
1 lb boneless, skinless chicken thighs
1 cup quinoa, rinsed
4 cups low-sodium chicken broth
2 carrots, diced
2 celery stalks, chopped
1 onion, finely diced
2 cloves garlic, minced
1 tsp turmeric
1/2 tsp black pepper
1/2 tsp salt
1 tbsp olive oil
Instructions:
Turn on sauté mode, add olive oil, and sauté onions, carrots, and celery for 3 minutes.
Stir in garlic, turmeric, and black pepper.
Add chicken, quinoa, and chicken broth. Stir well.
Close the lid and cook on high pressure for 12 minutes.
Let the pressure release naturally for 10 minutes before opening.
Shred the chicken & mix it back into the soup. Serve warm.
3. Spicy Honey Garlic Chicken
A perfect balance of sweet & spicy, great for meal prepping.
Ingredients:
4 boneless, skinless chicken thighs
3 tbsp honey
2 tbsp soy sauce (low sodium)
1 tbsp apple cider vinegar
3 cloves garlic, minced
1 tsp red pepper flakes
1/2 cup water
Instructions:
Mix honey, soy sauce, vinegar, garlic, and red pepper flakes in a bowl.
Place chicken in Instant Pot and pour the mixture over it.
Add 1/2 cup of water.
Close the lid and cook on high pressure for 10 minutes.
Quickly release the pressure and serve over brown rice or cauliflower rice.
Tips for Instant Pot Chicken Recipes Healthy
Choose Lean Cuts: Skinless chicken breasts or thighs offer high protein with less fat.
Limit Sodium: Use low-sodium broths and seasonings instead of salt-heavy alternatives.
Enhance with Herbs: Fresh herbs like parsley, basil, and cilantro add nutrients without extra calories.
Pair with Whole Grains: Quinoa, brown rice, and farro complement chicken well and provide fibre.
These Instant Pot chicken recipes make healthy eating simple, fast, and delicious. Try them today and enjoy flavorful meals without compromising nutrition.
Many face the challenge of maintaining a healthy diet without compromising on taste, but the Trim Healthy Mama (THM) approach offers a balanced solution. By focusing on whole foods, strategic fuel separation, and natural ingredients, THM recipes cater to diverse dietary needs while supporting weight management and overall well-being. Whether you seek energizing breakfasts, satisfying lunches, or indulgent yet healthy desserts, Trim Healthy Mama Recipes will keep you nourished and satisfied.
The Core Principles of Trim Healthy Mama
THM is built around the idea of separating different macronutrients—S (Satisfying), E (Energizing), FP (Fuel Pull), and XO (Crossover)—to optimize digestion, metabolism, and energy levels. Here’s a quick breakdown:
S (Satisfying): Healthy fats with minimal carbs (e.g., butter, coconut oil, cheese, meats, and non-starchy vegetables).
E (Energizing): Lean proteins paired with healthy carbs (e.g., oats, brown rice, quinoa, and fruits).
FP (Fuel Pull): Low-fat and low-carb meals focusing on lean proteins and non-starchy veggies.
XO (Crossover): A mix of S and E fuels for maintenance and muscle building.
Trim Healthy Mama Breakfast Recipes
1. Protein-Packed Blueberry Pancakes (E)
Start the day with a nourishing, fibre-rich meal that keeps you energized.
Ingredients:
1/3 cup oat flour
1 egg white
1/4 cup unsweetened almond milk
1/2 tsp baking powder
1/4 tsp cinnamon
1/2 cup blueberries
1-2 tsp gentle sweetener (THM-approved)
Instructions:
Mix all ingredients except blueberries in bowl.
Heat a non-stick skillet and cook pancakes on medium heat.
Add blueberries while cooking.
Serve with dollop of Greek yoghurt or sugar-free syrup.
2. Avocado and Egg Breakfast Bowl (S)
A creamy, protein-rich breakfast perfect for busy mornings.
Ingredients:
1/2 avocado, mashed
2 boiled eggs, chopped
1 tbsp olive oil
1/2 tsp sea salt
1/4 tsp black pepper
1 tbsp shredded cheese (optional)
Instructions:
Mash avocado and mix with chopped eggs.
Drizzle with olive oil & season with salt & pepper.
Top with cheese if desired.
Trim Healthy Mama Lunch Recipes
3. Chicken and Quinoa Power Bowl (E)
A hearty, protein-packed meal ideal for sustained energy.
Ingredients:
1/2 cup cooked quinoa
1 grilled chicken breast, sliced
1/2 cup steamed broccoli
1 tbsp lemon juice
1/2 tsp garlic powder
Salt and pepper to taste.
Instructions:
Layer quinoa, chicken, and broccoli in a bowl.
Drizzle with lemon juice and sprinkle with garlic powder.
Toss and enjoy!
4. Zucchini Noodle Alfredo (S)
A creamy, low-carb take on a comfort food favourite.
Ingredients:
2 medium zucchinis, spiralized
1/2 cup heavy cream
1/4 cup grated Parmesan cheese
1 tbsp butter
1/2 tsp garlic powder
Salt and pepper to taste.
Instructions:
Sauté zucchini noodles in butter for 2 minutes.
Add heavy cream, Parmesan, and seasonings.
Stir until creamy and serve hot.
Trim Healthy Mama Dessert Recipes
5. Chocolate Avocado Mousse (S)
It is a rich and satisfying treat with healthy fats. Ingredients:
1 ripe avocado
2 tbsp unsweetened cocoa powder
2 tbsp gentle sweetener
1/2 tsp vanilla extract
2 tbsp unsweetened almond milk
Instructions:
Blend all ingredients until smooth.
Chill for 30 minutes before serving.
Top with whipped cream or berries.
6. Lemon Coconut Bites (FP)
It is a light, refreshing snack for any time of day.
Ingredients:
1/2 cup unsweetened shredded coconut
2 tbsp coconut flour
1 tbsp gentle sweetener
1/2 tsp lemon zest
1/4 cup unsweetened almond milk
Instructions:
Mix all ingredients in bowl until dough forms.
Roll into bite-sized balls.
Refrigerate for 1 hour before serving.
Final Thoughts
Incorporating Trim Healthy Mama recipes into your daily routine can transform your health while keeping meals delicious and satisfying. The THM approach ensures you never feel deprived, whether you prefer low-carb, high-protein, or balanced meals. By choosing wholesome ingredients and strategically combining macronutrients, you can enjoy flavorful dishes that effortlessly support your wellness goals.
 High Protein Crock Pot Recipes for Lunch & Dinner
 3. Crock Pot White Bean & Turkey Chilli
 4. Slow Cooker Beef & Broccoli
 Time-Saving Tips for Busy Meal Preppers
 2. Cucumber Citrus Detox Water
 Final Thoughts
 Ingredients You Will Need
 Final Thoughts
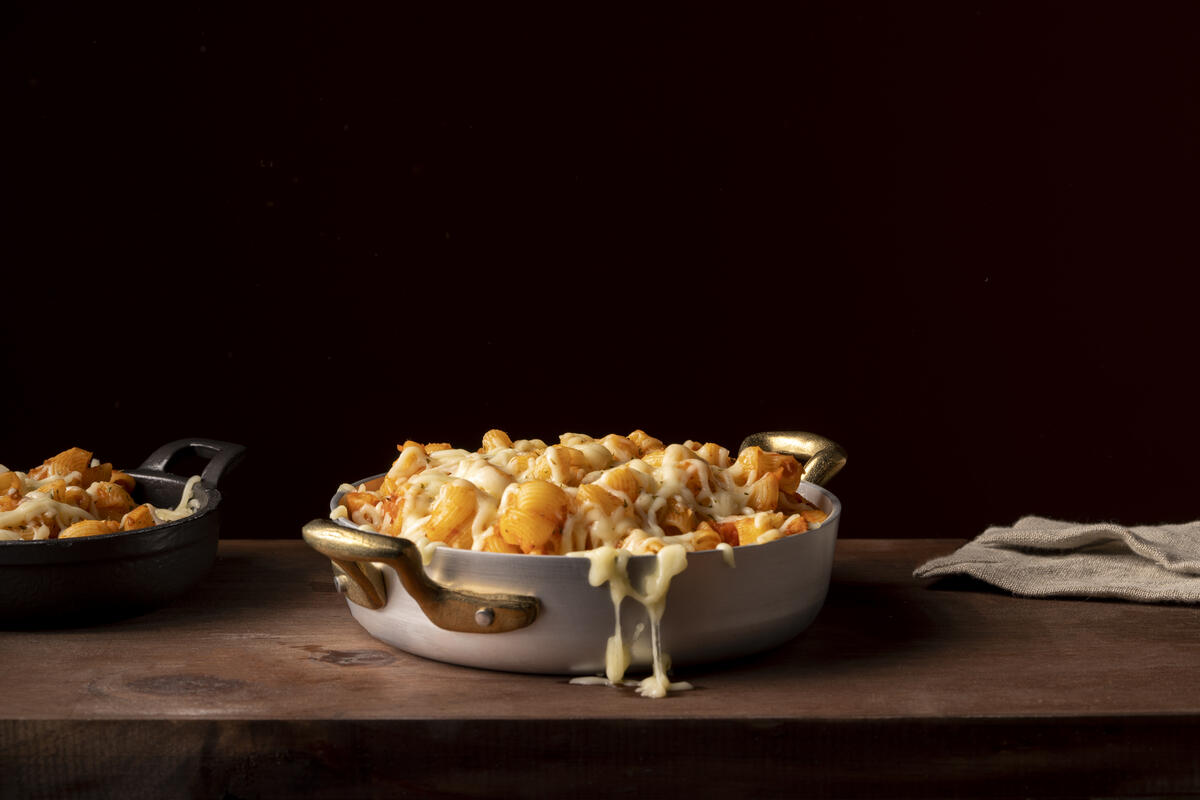 2. Chicken and Rice One-Pot Meal
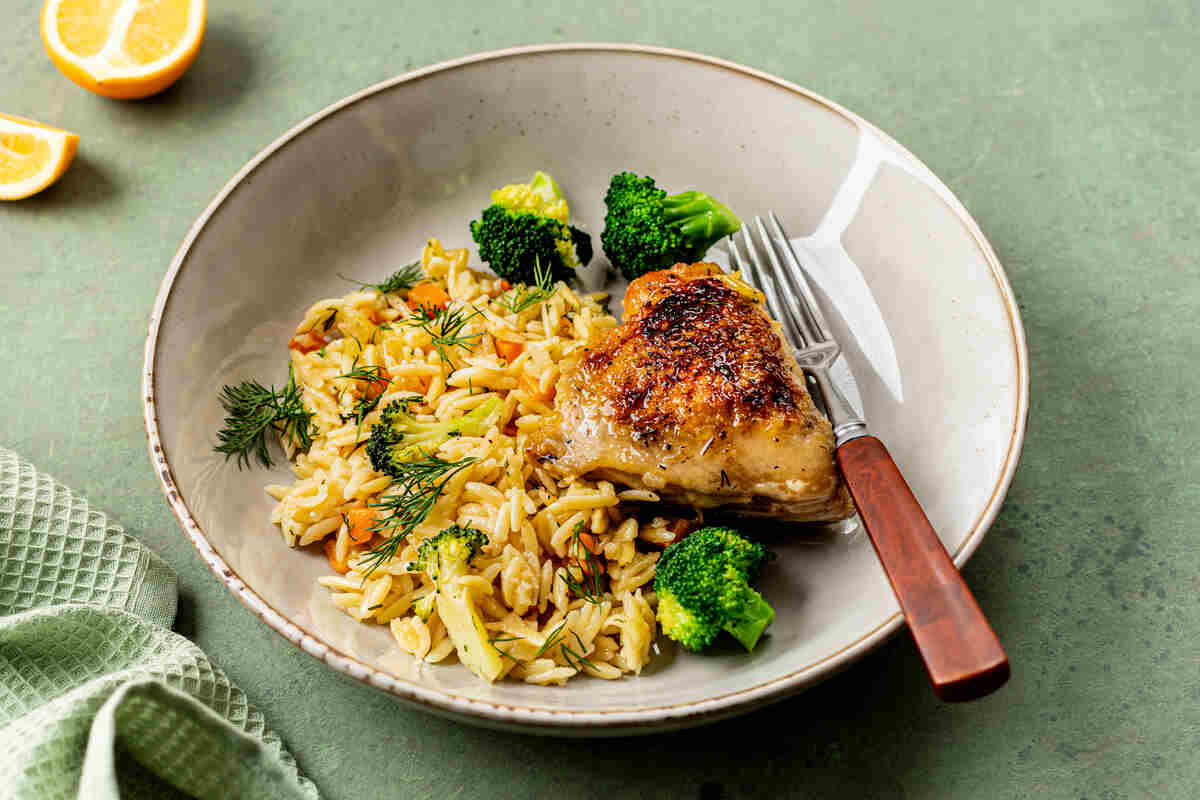 3. Rice Cooker Banana Bread
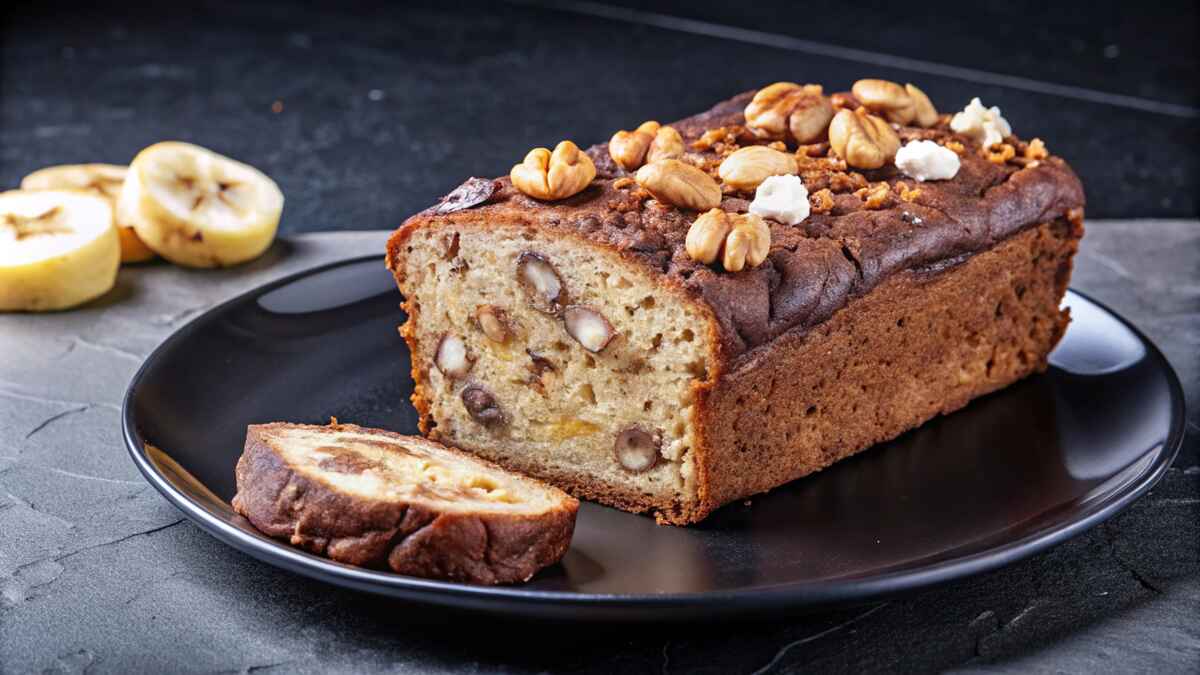 Tips for Mastering Rice Cooker Recipes
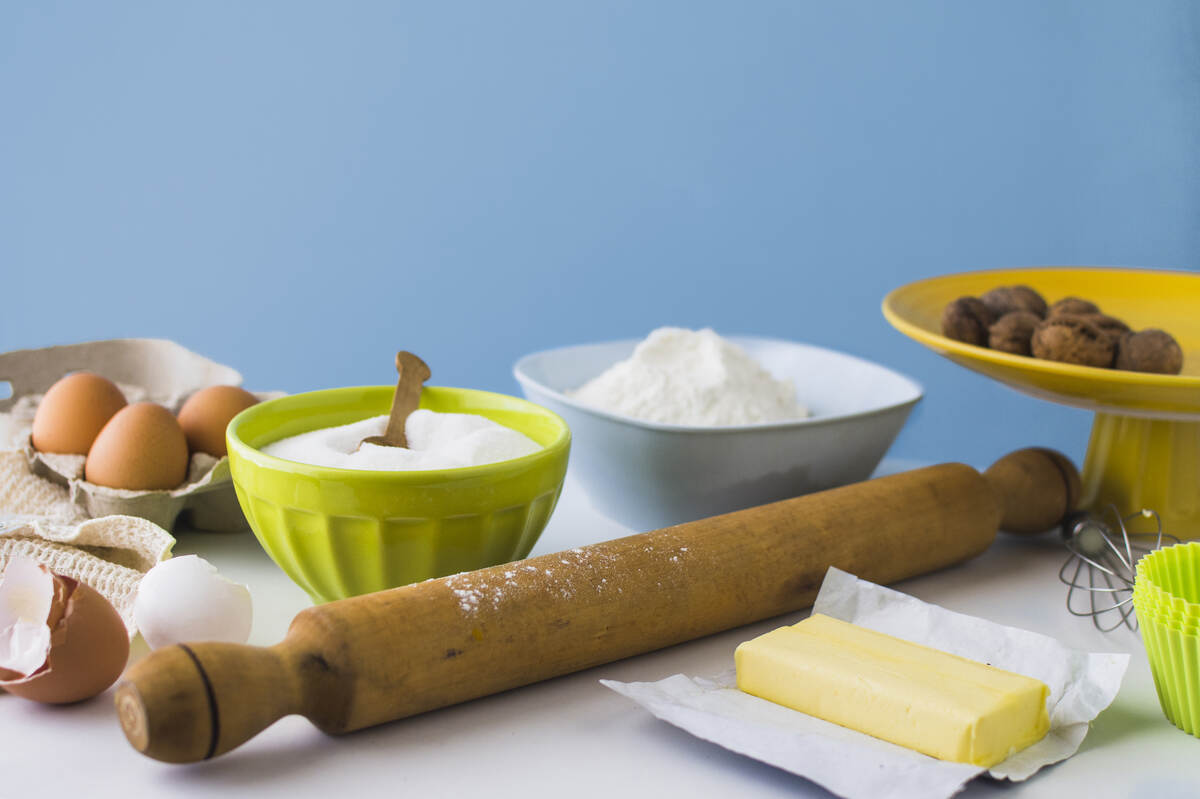 How to Make 3 Ingredient Biscuits
 Ingredients You’ll Need
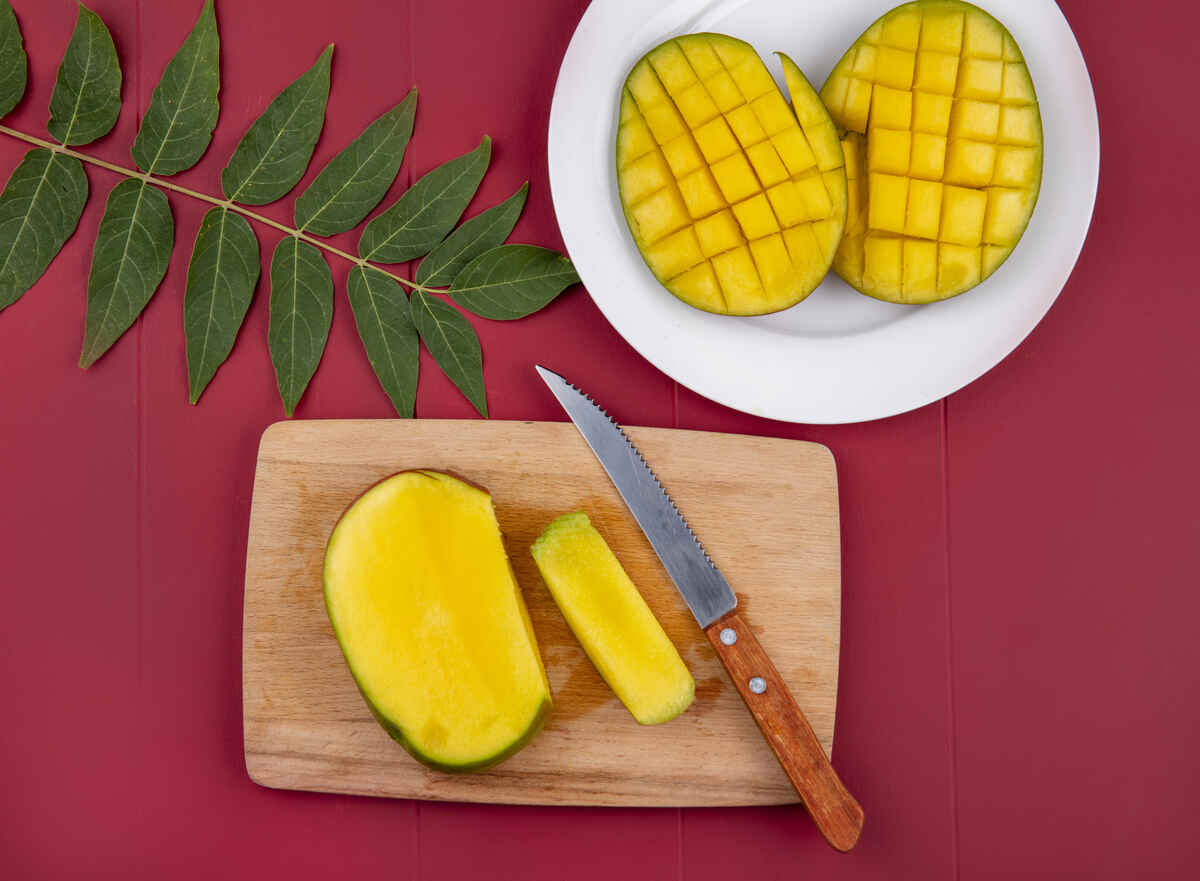 Nutritional Benefits of Mango Skin
 Final Thoughts
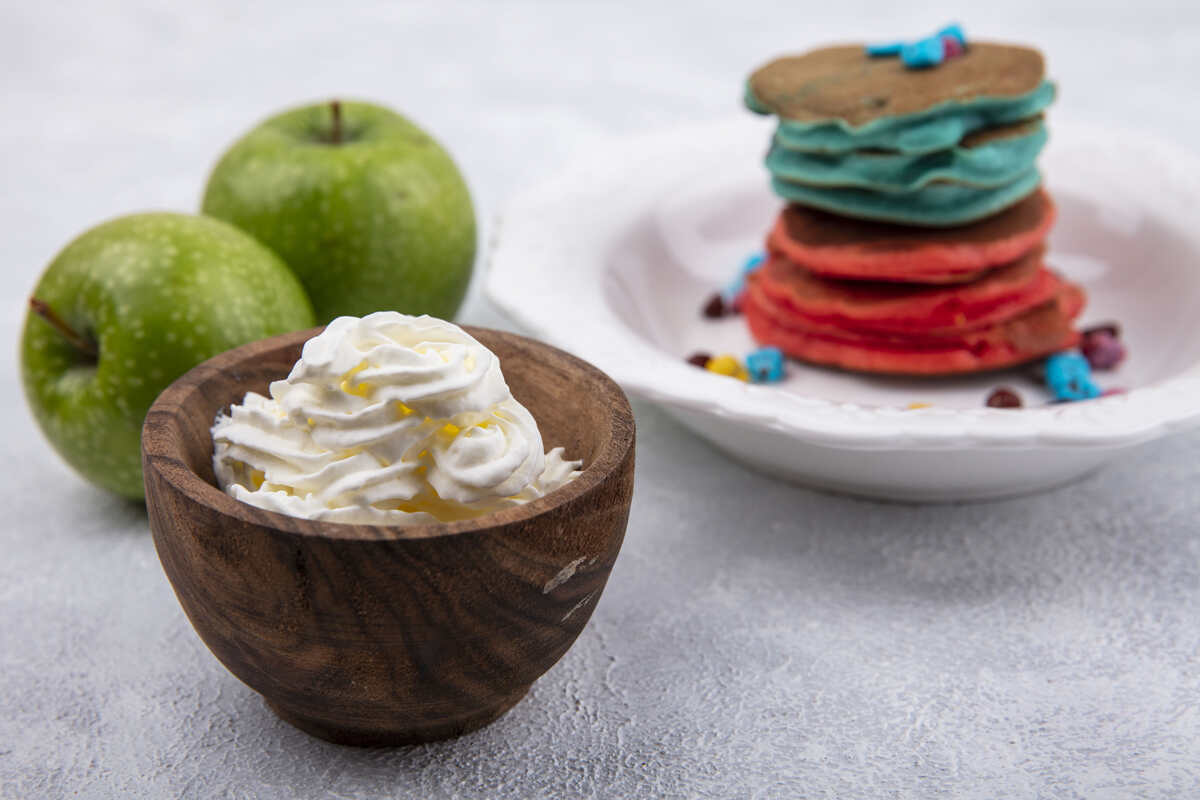 Step-by-Step Instructions
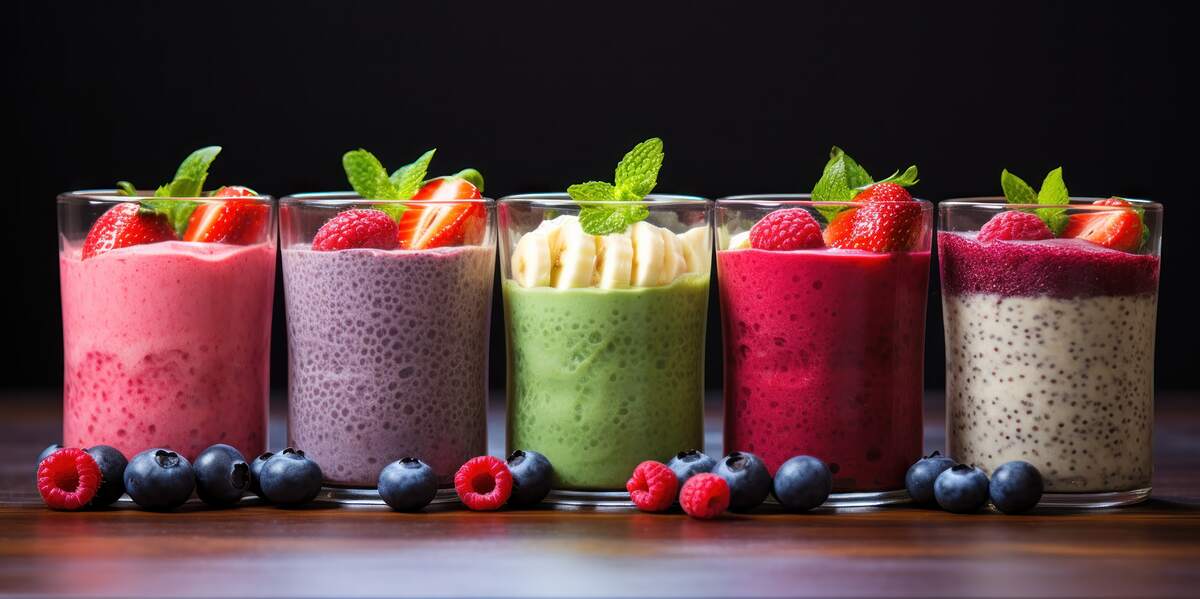 Nutritional Considerations
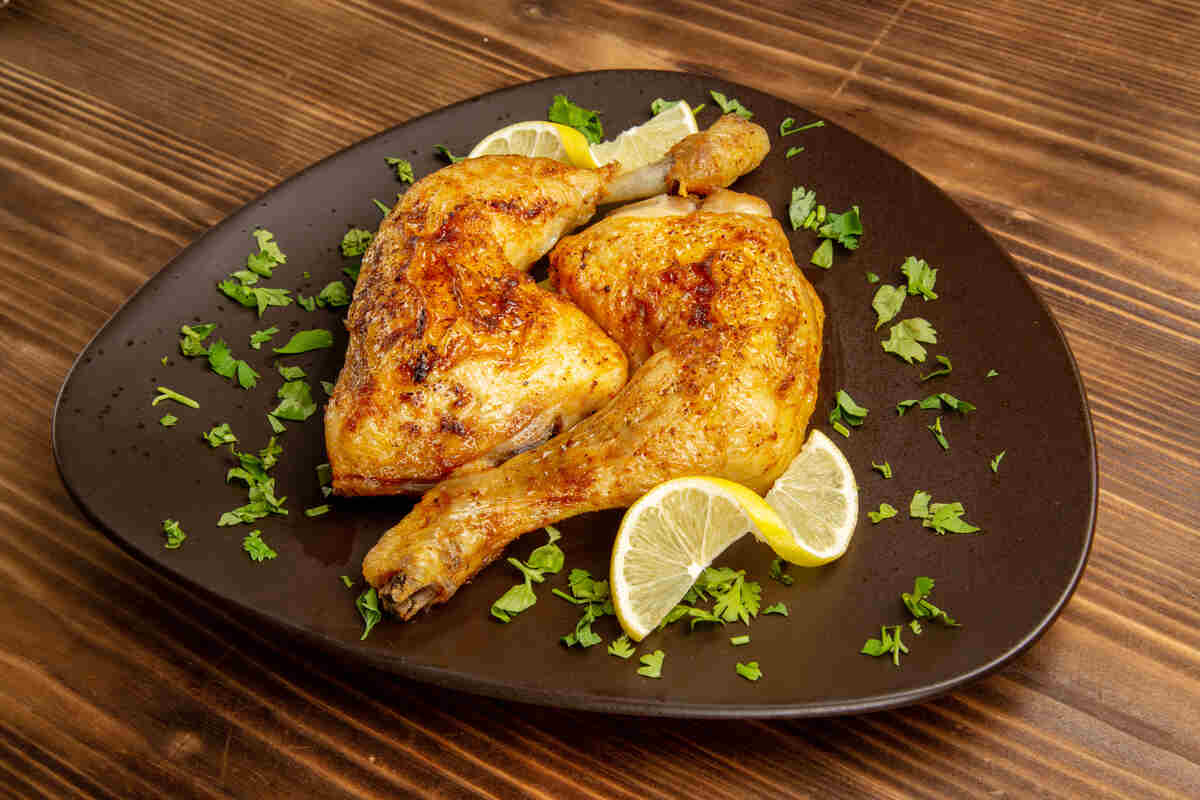 2. Instant Pot Chicken and Quinoa Soup
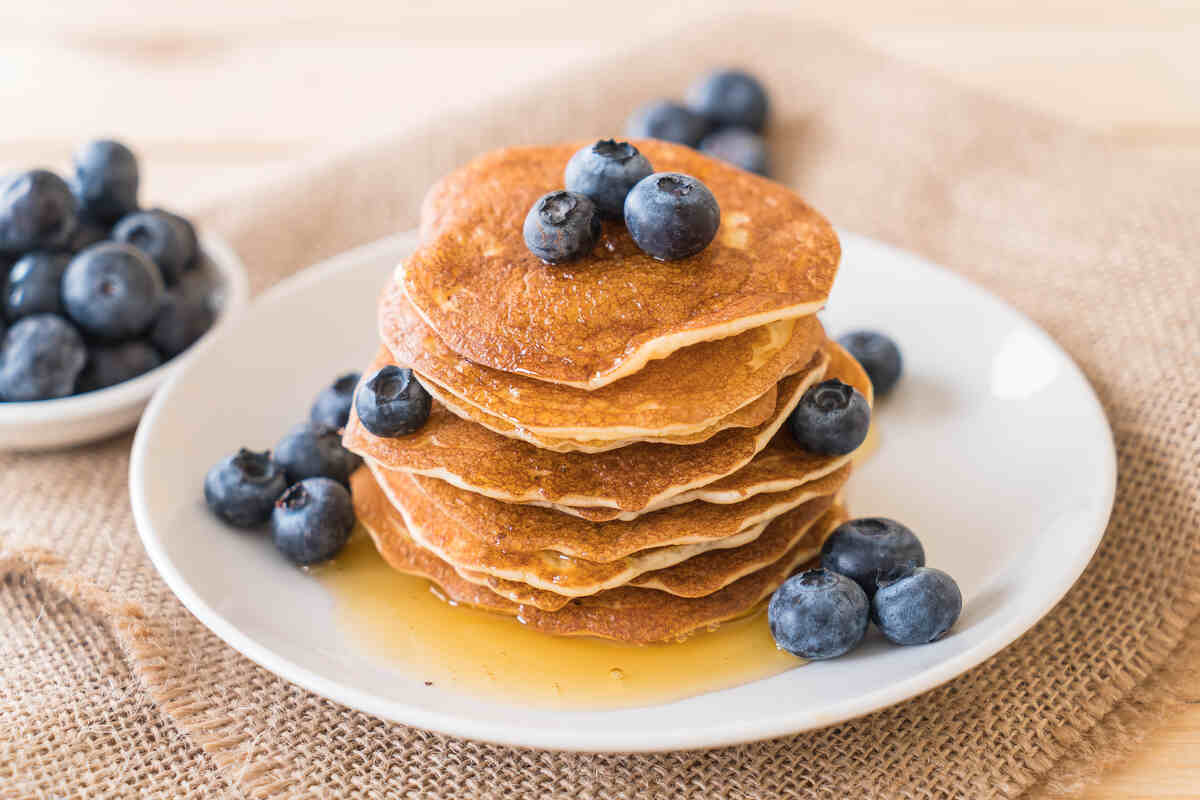 2. Avocado and Egg Breakfast Bowl (S)
 Instructions: