Sacroiliac joint pain Exercises can cause persistent discomfort radiating through the lower back, buttocks, and hips, significantly hampering everyday movement. Often misdiagnosed or misunderstood, SI joint dysfunction arises from either hypo or hypermobility, creating instability at the sacrum where it meets the ilium of the pelvis. Fortunately, specific exercises targeting muscular support and joint flexibility can alleviate symptoms and promote stability.
The Role of Sacroiliac Joint Pain Exercises in Relief
Strengthening and stretching exercises are paramount in managing Sacroiliac Joint Pain Exercises. They reinforce the musculature surrounding the pelvis and core while releasing tension in tight or overcompensating muscle groups. Done consistently and with proper form, they can substantially improve daily function and long-term comfort.
Strengthening Exercises for SI Joint Stability
1. Pelvic Tilts
A subtle yet potent manoeuvre, pelvic tilts activate the deep transverse abdominis and lumbar stabilizers.
Lie supine with knees bent and feet grounded.
Engage the abdominal muscles to press the lower back into the floor gently.
Tilt the pelvis upward without lifting the hips.
Hold for 5 seconds, relax, & repeat 10–15 times.
2. Bridging
Targeting the gluteus maximus and hamstrings, bridging builds posterior chain strength critical for SI joint integrity.
Position yourself on your back, knees bent, feet flat.
Press through the heels to raise the hips while squeezing the glutes.
Hold for 5 seconds, then slowly descend. Repeat 10–15 times.
3. Bird-Dog Exercise
This cross-limb movement enhances spinal alignment and core engagement.
Begin in a tabletop position.
Extend the right arm and left leg simultaneously, maintaining a neutral spine.
Hold for 5 seconds without twisting the torso.
Switch sides and complete 10 repetitions per side.
4. Side Plank
A side plank fortifies obliques and hip abductors, reinforcing lateral pelvic stability.
Lie on your side with your legs stacked and knees bent.
Elevate the hips, forming a straight line from head to knees.
Hold for 15 seconds; repeat on the opposite side. Perform 2–3 sets.
5. Hip Abduction with Resistance Band
Gluteus medius activation is crucial to counter lateral instability of the pelvis.
Wrap a resistance band around your thighs.
Lie on your back with your knees bent.
Gently separate the knees, resisting the band.
Hold for 3 seconds and return. Complete 12–15 reps.
Stretching Exercises for SI Joint Pain Relief
6. Knee-to-Chest Stretch
Releases tension in the lumbar and gluteal regions.
Lie flat, legs extended.
Pull one knee toward the chest while the other remains on the floor.
Hold for 30 seconds, switch legs. Repeat 2–3 times.
7. Pelvic Rotation Stretch (Lower Trunk Rotation)
Enhances spinal mobility while gently mobilizing the SI joint.
Lie on your back, knees bent, feet flat.
Slowly rotate both knees to one side, keeping shoulders grounded.
Hold for 15 seconds, switch sides.
8. Child’s Pose
A calming posture to decompress the lumbar spine and sacrum.
Kneel with knees apart, and sit back on your heels.
Extend arms forward, bringing the forehead to the mat.
Hold for 30 seconds; repeat as needed.
9. Cat-Cow Stretch
This rhythmic spinal motion lubricates the vertebral joints and releases fascial restrictions.
Start on all fours.
Inhale to arch (cow), exhale to round the back (cat).
Perform 10–15 cycles.
10. Piriformis Stretch
A tight piriformis often mimics or aggravates SI joint pain.
Sit upright, cross one leg over the other.
Rotate the torso gently toward the top knee.
Hold for 30 seconds, then switch sides.
Additional Movements for Enhanced Relief
These exercises complement your SI joint routine:
Exercise Name
Target Area
Benefit
Triangle Pose
Hips & Obliques
Enhances hip openness and core engagement
Cobra Pose
Lower Back
Improves posture, lengthens spine
Dhanurasana (Bow Pose)
Entire Spine & Legs
Strengthens back, opens chest and shoulders
Hip Adductor Stretch
Inner Thighs
Increases groin flexibility
Lying Hip Adduction
Inner Thigh Muscles
Strengthens pelvic stabilizers
Hip Adductor Squeeze
Pelvic Floor & Inner Thighs
Activates crucial pelvic support structures
Low-Impact Aerobics
Cardiovascular System
Improves circulation without SI stress
Lower Abdominal Activation
Core
Supports lumbar spine and pelvis
Guidelines for Safe Exercise Practice
Warm-Up First: Begin with 5–10 minutes of gentle dynamic movement.
Form Over Force: Precision is more effective than intensity.
Use Props When Necessary: Resistance bands, yoga blocks, or bolsters enhance accessibility.
Avoid Aggravation: Cease any movement that produces sharp or radiating pain.
Progress Gradually: Increase repetitions or duration incrementally.
Lifestyle and Therapeutic Considerations
Low-Impact Activities: Swimming and walking can aid circulation and mobility without undue stress on the SI joint.
Proper Sitting Posture: Sit with hips level, feet flat, and a lumbar support cushion to maintain a neutral spine.
Sleep Smart: Favor lying on the unaffected side with a pillow between the knees or on the back with a pillow beneath them.
Professional Guidance: Always consult a physiotherapist or osteopath for tailored treatment.
Pain Management: Under medical guidance, use ice, heat, or over-the-counter analgesics.
Final Thoughts
When performed with consistency, mindfulness, and precision, Sacroiliac Joint Pain Exercises can foster enduring relief and a return to functional movement. Individuals can reclaim control over their mobility and well-being by fortifying the core, releasing myofascial tension, and avoiding exacerbating activities.
A well-developed back is more than just a symbol of physical prowess—it’s the epicentre of functional movement, posture control, and injury prevention. Cable machines are among the most effective tools for back training. Offering continuous tension, a variety of angles, and exceptional muscle isolation, cable back exercises are indispensable for anyone aiming to build a strong, sculpted, and symmetrical back.
This detailed guide explores the most effective cable back exercises, their execution, benefits, and how to incorporate them into your training program.
Why Choose Cable Machines for Back Training?
Cable machines provide unique form of resistance that ensures your muscles remain under tension throughout the entire range of motion. This creates a distinct advantage over free weights, particularly in hypertrophy-focused workouts.
Benefits of Cable Back Exercises:
Constant Tension: Keeps muscles activated during both concentric and eccentric phases.
Joint-Friendly Motion: Reduces stress on the shoulders and spine.
Precision and Control: Ideal for slow, controlled repetitions and improved form.
Versatility: Allows for multiple grips and angles, targeting every back muscle.
Most Effective Cable Back Exercises
1. Seated Cable Row
Muscles Worked: Lats, rhomboids, traps
Execution: Sit upright, grasp the V-handle, and row the weight toward your abdomen. Squeeze your shoulder blades and avoid leaning backwards.
Execution: Use a wide grip, pull the bar down to the top of your chest, and slowly return.
Tip: Avoid pulling behind the neck to protect shoulder joints.
3. Cable Face Pull
Muscles Worked: Rear delts, traps, rotator cuff
Execution: Set a rope at face level. Pull it towards your face, keeping elbows high and wide.
Tip: Excellent for posture correction and shoulder health.
4. Straight-Arm Pulldown
Muscles Worked: Lats, triceps, core
Execution: Stand upright, keep your arms straight, and pull the bar down to your thighs.
Tip: Keep a slight bend in the knees & a tight core.
5. Single-Arm Cable Row
Muscles Worked: Lats, rhomboids, obliques
Execution: Row with one arm at a time, keeping your torso stable and your back neutral.
Tip: Great for correcting imbalances between sides.
6. Cable Reverse Fly
Muscles Worked: Rear delts, traps, rhomboids
Execution: Cross-cable handles and pull them apart in a reverse fly motion.
Tip: Use light weight and focus on the squeeze.
7. Cable Pull Through
Muscles Worked: Lower back, glutes, hamstrings
Execution: Stand away from the machine, hinge at the hips, & pull the rope through your legs.
Tip: Keep your back flat & engage your core throughout the movement.
Sample Cable Back Workout Routine
Level
Exercises
Sets
Reps
Beginner
Seated Row, Lat Pulldown, Face Pull
3
12–15
Intermediate
Wide-Grip Lat Pulldown, Reverse Fly, Straight-Arm Pulldown, Single-Arm Row
4
10–12
Advanced
Cable Deadlift, Isometric Face Pull, Chest Supported Row, Cable Pull Through
5
8–10
Tips for Maximizing Cable Back Workouts
Focus on Form: Prioritize technique over weight. Controlled reps yield better results.
Use Full Range of Motion: Don’t cut reps short—this limits engagement and growth.
Include Variety: Rotate grips and angles to target all regions of the back.
Train with Intensity: Add supersets or drop sets for increased muscle fatigue.
Recover Properly: Allow 48 hours between intense back sessions for muscle repair.
Muscles Targeted by Cable Back Exercises
Exercise
Primary Muscles Activated
Seated Cable Row
Lats, rhomboids, middle traps
Lat Pulldown (Wide & Close)
Lats, biceps, posterior deltoids
Face Pull
Rear delts, traps, rotator cuff
Reverse Fly
Rhomboids, rear delts
Pull Through
Hamstrings, glutes, spinal erectors
Straight Arm Pulldown
Lats, triceps, obliques
Final Thoughts
Incorporating cable back exercises into your workout routine offers unparalleled control, adaptability, and muscular engagement. Whether a novice aiming to build foundational strength or an advanced athlete looking to fine-tune your physique, cable machines can elevate your training outcomes.
When it comes to upper body strength, many beginners focus on the chest, shoulders, and back—but often overlook one essential muscle: the serratus anterior. This fan-shaped muscle wraps around the rib cage and plays a crucial role in maintaining shoulder stability, enhancing scapular mobility, and supporting core function.
Whether you’re a fitness newbie or looking to address poor posture and shoulder pain, incorporating serratus anterior exercises into your routine can significantly improve your physical foundation.
What Is the Serratus Anterior?
The serratus anterior originates at the first to the eighth or ninth ribs and inserts on the front of the scapula. It allows for:
Upward rotation of the scapula
Shoulder blade protraction (important in pushing motions)
Improved posture and breathing support
Without proper function of this muscle, you’re more prone to shoulder injuries, rounded shoulders, and scapular winging.
Goal Setting for Fitness Beginners
Before jumping into workouts, start with realistic and achievable goals:
Short-term goal: Strengthen serratus anterior for better shoulder health within 30 days.
Long-term goal: Develop a full-body sustainable routine for mobility, strength, and posture.
Sarah, a 35-year-old graphic designer, dealt with years of shoulder tightness and winging scapula. She started incorporating serratus anterior exercises, such as push-ups and wall slides, three times a week, combined with improved hydration and sleep. Within 6 weeks, she noticed:
Improved posture
Less shoulder popping
Stronger push-ups
Better breathing during yoga
Build Your Fitness Foundation from the Inside Out
The serratus anterior muscle may be hidden, but its impact is enormous. By focusing on this often-neglected area with the right exercises, nutrition, and recovery, you’ll not only build better posture and strength—but you’ll create a more sustainable, injury-resistant health routine.
Frequently Asked Questions (FAQs)
What are the best serratus anterior exercises for beginners?
Wall slides, push-ups, scapular push-ups, and dumbbell punches are excellent starter exercises.
Can I train serratus anterior every day?
It’s best to alternate days, doing light activation daily and resistance training 2–3 times per week.
How long does it take to strengthen the serratus anterior?
With consistency, most people see improvements in posture and strength in 4–6 weeks.
Are serratus anterior exercises safe for shoulder injuries?
Yes, many of these are rehab-approved. However, always consult a physiotherapist if injured.
Does the serratus anterior affect breathing?
Absolutely. A strong serratus helps expand the rib cage, aiding in deeper breathing.
Coca-Cola and other sugary sodas have long been a staple in many people’s diets, but their impact on skin health is often overlooked. While some myths suggest that Coke might have benefits, the reality is quite different. Here’s an in-depth look at Is Coke Good for Your Skin and what alternatives can support a more transparent, healthier complexion.
The Impact of Coke on Skin Health
1. High Sugar Content and Inflammation
Coke contains excessive sugar, which can lead to inflammation throughout the body. This inflammation contributes to:
Acne Breakouts – High sugar intake spikes insulin levels, which increases oil production and can clog pores.
Skin Aging – Glycation occurs when sugar binds to collagen and elastin, causing skin to lose elasticity and form wrinkles faster.
Dull, Uneven Skin Tone – Excess sugar can slow down skin cell renewal, leading to a lackluster complexion.
2. Dehydration from Caffeine
Coca-Cola contains caffeine, which has a diuretic effect that can contribute to dehydration if consumed in large amounts. Dehydrated skin may appear:
Dry and Flaky
More Prone to Wrinkles
Less Plump and Elastic
While moderate caffeine intake does not always lead to dehydration, replacing soda with hydrating drinks like water or herbal teas can help maintain a youthful glow.
3. Worsening of Skin Conditions
Regular soda consumption has been linked to worsening chronic skin conditions, including:
Eczema – High sugar levels can trigger inflammation, making flare-ups worse.
Cystic Acne – Sugary beverages contribute to hormonal imbalances, which can lead to deep, painful breakouts.
Excess Oil Production – The rapid rise and fall of blood sugar levels may cause excessive sebum production, leading to clogged pores.
4. The Myth of Coke as a Sunscreen Alternative
There has been a dangerous trend of using Coca-Cola as a tanning accelerator. Some believe that applying Coke to the skin can enhance tanning, but dermatologists strongly warn against this practice. Coke does not provide UV protection and can increase the risk of:
Severe Sunburn
Skin Cancer
Hyperpigmentation and Dark Spots
According to Dr. Joshua Zeichner, a board-certified dermatologist, using Coke for tanning can cause severe damage and should never be considered a replacement for broad-spectrum sunscreen.
Healthier Alternatives for Better Skin
Instead of Coke, switching to skin-friendly beverages can significantly improve overall skin health. Some great alternatives include:
✅ Water – Keeps skin hydrated and promotes a natural glow.
✅ Green Tea – Rich in antioxidants that fight inflammation and premature aging.
✅ Coconut Water – Packed with electrolytes to maintain hydration and skin elasticity.
✅ Fresh Fruit Juices (Without Added Sugar) – Provide vitamins and hydration without the harmful effects of refined sugars.
Final Thoughts
Coke may be a refreshing drink, but it offers no benefits for skin health. Its high sugar content, caffeine, and potential to worsen inflammation can lead to acne, premature aging, and dehydration. Replacing soda with healthier drinks like water and herbal teas can improve skin clarity, elasticity, and radiance.
Significant weight loss is remarkable achievement, but for many, it brings an unexpected and frustrating issue: loose or sagging skin. While surgery is an option, many individuals seek holistic ways to address this concern. Fortunately, there are practical and science-supported strategies available. Here’s a comprehensive guide on How to Tighten Skin After Weight Loss Naturally, helping your body heal and regenerate from within.
Understanding the Problem
When a person gains weight, skin stretches to accommodate the increased body mass. After weight loss—exceptionally rapid or massive—the skin may not shrink back immediately, or in some cases, at all. This is mainly due to reduced collagen & elastin fibres, which are essential for skin elasticity.
1. Rebuild Collagen Through Nutrition
A vital part of learning how to tighten skin after weight loss naturally is focusing on diet.
Key Nutrients That Support Skin Firmness:
Protein: Essential for muscle building and skin structure. Include lean meats, tofu, legumes, and eggs.
Vitamin C: Stimulates collagen production. It is found in citrus fruits, bell peppers, & strawberries.
Zinc: Helps tissue repair and inflammation control. Present in pumpkin seeds, chickpeas, and nuts.
Omega-3 Fatty Acids: Promote skin hydration & elasticity. Found in fatty fish, walnuts, and flaxseeds.
Tip: Drinking bone broth daily is a natural source of collagen peptides, which can help restore skin strength over time.
2. Strength Training and Muscle Building
Loose skin often appears more prominent when the underlying muscle is lacking. Incorporating resistance training is powerful way to support skin recovery.
Recommended Exercises:
Squats and lunges (for thighs and buttocks)
Push-ups and rows (for upper arms and chest)
Planks and core routines (for the abdominal area)
These exercises help fill the area beneath loose skin with firm muscle mass, providing a tighter appearance. This is a core method for naturally tightening skin after weight loss.
3. Hydration and Skin Elasticity
Water is vital for internal health, but it also plays a pivotal role in skin appearance and elasticity. Proper hydration allows your skin to function optimally, helping repair and tighten.
Aim for at least 8 to 10 glasses of water daily.
Eat water-rich foods like cucumbers, melons, oranges, and leafy greens.
Dehydrated skin tends to sag more, so staying hydrated is a simple yet effective natural method for improving firmness.
4. Natural Topical Treatments
Using the right ingredients topically can gradually help tighten and rejuvenate the skin.
Effective Natural Ingredients:
Aloe Vera Gel: Rich in antioxidants; apply twice daily for improved skin tone.
Coconut Oil: Moisturizes and improves elasticity; massage nightly into problem areas.
Vitamin E Oil: Supports collagen regeneration and smooth texture.
Coffee Scrubs: Stimulate blood flow and exfoliate dead skin cells.
Applying these treatments consistently is a key part of any regimen focused on naturally tightening skin after weight loss.
5. Dry Brushing and Massage Therapy
Dry brushing stimulates lymphatic flow, removes dead skin, and improves circulation—all factors in skin rejuvenation.
How to Dry Brush Properly:
Use natural bristle brush on dry skin before showering.
Brush in long upward strokes toward the heart.
Focus on thighs, abdomen, and arms.
Perform 3–4 times per week, followed by moisturizing.
Massage therapy, especially firming oils or tools like jade rollers, can stimulate collagen and improve skin tightness over time.
6. Lifestyle Enhancements That Matter
Long-term success in learning how to tighten skin after weight loss naturally depends on consistent, supportive habits.
What to Include:
Sleep 7–8 hours nightly to allow for cellular regeneration.
Avoid smoking and excess sun exposure—both degrade collagen.
Stay active with daily movements like walking, yoga, or swimming.
Additionally, stress management practices such as meditation and deep breathing can reduce cortisol levels, which helps prevent premature skin ageing.
7. Home Remedies and DIY Solutions
If you’re looking for cost-effective methods, natural DIY options can complement your efforts.
Examples:
Egg white masks (apply weekly for a natural skin-tightening effect)
These homemade remedies can be repeated weekly and are excellent additions to your natural skincare approach.
Final Thoughts
Understanding how to naturally tighten skin after weight loss is not about quick fixes. It requires patience, consistency, and a holistic approach integrating nutrition, exercise, topical care, and lifestyle changes.
Frequently Asked Questions (FAQs)
Can loose skin naturally tighten after 2 years?
Yes, especially if weight loss was gradual and you’re under 40. Collagen rebuilding continues for years with the right support.
What is the best non-surgical method?
Strength training paired with collagen-rich nutrition yields the most noticeable results.
Is dry brushing scientifically backed?
While clinical evidence is limited, anecdotal reports suggest circulation and skin texture improvements.
Looking for a healthier frozen dessert option that doesn’t sacrifice flavor? This blog introduces a versatile vanilla ice cream base perfect for creating ninja creami recipes healthy enough to suit various dietary needs. Whether you’re interested in vegan alternatives, high-protein treats, or simply a creamier dessert with a twist, read on for a step-by-step guide to making your own delicious frozen desserts at home.
The Ultimate Vanilla Ice Cream Base
This base recipe serves as a foundation that can be easily adapted into countless flavor variations. By adjusting ingredients, you can make healthier versions of your favorite desserts without sacrificing taste.
Ingredients:
Cream Cheese: A unique addition that guarantees a creamy texture. Options include vegan, lactose-free, or low-fat varieties.
Heavy Cream: Often referred to as double cream. (Tip: Avoid heavy whipping cream as it might yield a thinner consistency.)
Milk: Whole milk is preferred, but almond milk, oat milk, or even non-fat milk work just fine.
Sugar: White or superfine sugar works well, though sugar substitutes like allulose or stevia can make the recipe even healthier.
Vanilla Extract: Alternatively, vanilla bean paste can be used for a richer flavor.
Step-by-Step Instructions
Follow these simple steps to transform your ingredients into a delightful frozen treat:
Prepare & Freeze:
Gently melt the cream cheese with a small amount of cream and whisk in the sugar until it dissolves.
Transfer this mixture to your Ninja Creami pint container.
Whisk in the remaining ingredients, secure the lid, and place the container in the freezer for at least 3 hours to ensure the base is thoroughly frozen.
Churn to Perfection:
Attach the frozen container to the Ninja Creami machine.
Select either “ice cream” or “lite ice cream” setting. Let the machine work its magic.
If the texture appears crumbly on top or isn’t as smooth as desired, simply re-spin it until you achieve a creamy consistency.
Serve & Enjoy:
Once churned, scoop your ice cream into bowls and enjoy immediately.
For extra flair, add your favorite mix-ins after the initial churn to ensure even distribution throughout the dessert.
Expert Tips for Consistency
Avoid Overfilling: Always fill your container at least 1/2 inch below the “max” line. Overfilling can make the machine struggle to churn evenly.
Mode Selection: Stick to the “ice cream” or “lite ice cream” modes for optimal creaminess. Other settings might result in a texture that’s more akin to a smoothie bowl or milkshake.
Timing Is Key: Freezing for a minimum of 3 hours generally provides a creamy consistency, even though some guidelines suggest 24 hours. Experiment with your freezer to see what works best.
Re-Churn as Needed: If the dessert isn’t perfectly smooth, don’t hesitate to churn a few more times until you’re satisfied with the texture.
Flavor Variations for Ninja Creami Recipes Healthy
Once you’ve mastered the base, consider experimenting with these creative and healthy flavor ideas:
Mixed Berry Sorbet: Combine 1 cup each of fresh raspberries, blueberries, and strawberries.
Cookies and Cream: Add a few sandwich or Oreo cookies for texture, along with an extra tablespoon of cream cheese.
Chocolate High-Protein Ice Cream: Use 1¾ cups of premade chocolate protein shake mixed with 2 tablespoons of chocolate pudding mix.
Banana Cream Pie: Incorporate one overripe banana and some crushed graham crackers.
Cinnamon Roll Protein: Blend 1¾ cups of premade cinnamon roll protein shake (or protein powder whisked with milk) with 2 tablespoons of vanilla pudding mix and ½ teaspoon cinnamon.
Mango or Pineapple Sorbet: Use canned or packaged fruit chunks (15 ounces) in their natural juices.
Frozen Yogurt: Swap in 16 ounces of your favorite flavored or vanilla yogurt.
Mint Chocolate Chip: Include 1 teaspoon of peppermint extract, few drops of green food coloring, and ¼ cup of chocolate chips.
Vegan Ice Cream: Replace the milk with coconut milk and use dairy-free cream for a delicious plant-based version.
These ideas ensure that you’re not only creating a delicious dessert but also keeping the options aligned with ninja creami recipes healthy goals.
Nutritional Considerations
While each variation’s nutritional profile may differ, a few general pointers include:
Dairy Alternatives: Using almond, oat, or coconut milk can lower the fat content and calories.
Sugar Substitutes: Opting for allulose or stevia reduces sugar intake without sacrificing sweetness.
Protein Boosts: Incorporating protein shakes or protein powders can enhance the nutritional value, making the dessert a more balanced treat.
For more detailed nutritional information, consider consulting nutritional databases or the official guidelines provided by your Ninja Creami machine manufacturer.
Storage and Re-Freezing Tips
If you can’t finish your pint in one sitting, don’t worry! Here are some quick storage tips:
Short-Term Storage: Enjoy your ice cream fresh for the best texture.
Re-Freezing: If needed, you can re-freeze your dessert. Treat it like a freshly frozen base and re-spin in the Ninja Creami machine to restore creaminess.
Conclusion
Creating ninja creami recipes healthy treats at home is easier than ever. With this versatile vanilla ice cream base and a host of flavor variations, you can enjoy a delicious dessert that aligns with your health goals. Experiment with different ingredients, share your favorite tweaks, and relish the joy of crafting a frozen treat that’s both nutritious and indulgent.
Cooking healthy meals can often feel time-consuming, but with an Instant Pot Chicken Recipes Healthy, it becomes effortless. Whether looking for quick weeknight dinners or meal prep solutions, these nutritious chicken recipes deliver flavour, protein, and convenience in every bite.
Benefits of Cooking Chicken in Instant Pot
Time-Saving – Meals are ready in a fraction of the time compared to traditional cooking methods.
Retains Nutrients – The pressure cooking process preserves vitamins and minerals better than boiling or frying.
Tender and Juicy Results – The sealed environment prevents moisture loss, ensuring soft, flavorful chicken.
It is a light and zesty dish packed with antioxidants and lean protein.
Ingredients:
2 boneless, skinless chicken breasts
1 cup low-sodium chicken broth
3 cloves garlic, minced
1 lemon, juiced
1 tsp olive oil
1 tsp dried oregano
Salt and pepper to taste
Instructions:
Turn on Instant Pot to sauté mode and heat the olive oil.
Add garlic and sauté for 1 minute until fragrant.
Place chicken breasts in pot and sear for 2 minutes on each side.
Pour the chicken broth and lemon juice, then add oregano, salt, and pepper.
Close the lid, set to high pressure, and cook for 8 minutes.
Permit natural pressure release for 5 minutes, then quickly release the rest.
Serve with steamed vegetables or quinoa.
2. Instant Pot Chicken and Quinoa Soup
A nourishing, protein-rich soup that supports immunity and digestion.
Ingredients:
1 lb boneless, skinless chicken thighs
1 cup quinoa, rinsed
4 cups low-sodium chicken broth
2 carrots, diced
2 celery stalks, chopped
1 onion, finely diced
2 cloves garlic, minced
1 tsp turmeric
1/2 tsp black pepper
1/2 tsp salt
1 tbsp olive oil
Instructions:
Turn on sauté mode, add olive oil, and sauté onions, carrots, and celery for 3 minutes.
Stir in garlic, turmeric, and black pepper.
Add chicken, quinoa, and chicken broth. Stir well.
Close the lid and cook on high pressure for 12 minutes.
Let the pressure release naturally for 10 minutes before opening.
Shred the chicken & mix it back into the soup. Serve warm.
3. Spicy Honey Garlic Chicken
A perfect balance of sweet & spicy, great for meal prepping.
Ingredients:
4 boneless, skinless chicken thighs
3 tbsp honey
2 tbsp soy sauce (low sodium)
1 tbsp apple cider vinegar
3 cloves garlic, minced
1 tsp red pepper flakes
1/2 cup water
Instructions:
Mix honey, soy sauce, vinegar, garlic, and red pepper flakes in a bowl.
Place chicken in Instant Pot and pour the mixture over it.
Add 1/2 cup of water.
Close the lid and cook on high pressure for 10 minutes.
Quickly release the pressure and serve over brown rice or cauliflower rice.
Tips for Instant Pot Chicken Recipes Healthy
Choose Lean Cuts: Skinless chicken breasts or thighs offer high protein with less fat.
Limit Sodium: Use low-sodium broths and seasonings instead of salt-heavy alternatives.
Enhance with Herbs: Fresh herbs like parsley, basil, and cilantro add nutrients without extra calories.
Pair with Whole Grains: Quinoa, brown rice, and farro complement chicken well and provide fibre.
These Instant Pot chicken recipes make healthy eating simple, fast, and delicious. Try them today and enjoy flavorful meals without compromising nutrition.
Many face the challenge of maintaining a healthy diet without compromising on taste, but the Trim Healthy Mama (THM) approach offers a balanced solution. By focusing on whole foods, strategic fuel separation, and natural ingredients, THM recipes cater to diverse dietary needs while supporting weight management and overall well-being. Whether you seek energizing breakfasts, satisfying lunches, or indulgent yet healthy desserts, Trim Healthy Mama Recipes will keep you nourished and satisfied.
The Core Principles of Trim Healthy Mama
THM is built around the idea of separating different macronutrients—S (Satisfying), E (Energizing), FP (Fuel Pull), and XO (Crossover)—to optimize digestion, metabolism, and energy levels. Here’s a quick breakdown:
S (Satisfying): Healthy fats with minimal carbs (e.g., butter, coconut oil, cheese, meats, and non-starchy vegetables).
E (Energizing): Lean proteins paired with healthy carbs (e.g., oats, brown rice, quinoa, and fruits).
FP (Fuel Pull): Low-fat and low-carb meals focusing on lean proteins and non-starchy veggies.
XO (Crossover): A mix of S and E fuels for maintenance and muscle building.
Trim Healthy Mama Breakfast Recipes
1. Protein-Packed Blueberry Pancakes (E)
Start the day with a nourishing, fibre-rich meal that keeps you energized.
Ingredients:
1/3 cup oat flour
1 egg white
1/4 cup unsweetened almond milk
1/2 tsp baking powder
1/4 tsp cinnamon
1/2 cup blueberries
1-2 tsp gentle sweetener (THM-approved)
Instructions:
Mix all ingredients except blueberries in bowl.
Heat a non-stick skillet and cook pancakes on medium heat.
Add blueberries while cooking.
Serve with dollop of Greek yoghurt or sugar-free syrup.
2. Avocado and Egg Breakfast Bowl (S)
A creamy, protein-rich breakfast perfect for busy mornings.
Ingredients:
1/2 avocado, mashed
2 boiled eggs, chopped
1 tbsp olive oil
1/2 tsp sea salt
1/4 tsp black pepper
1 tbsp shredded cheese (optional)
Instructions:
Mash avocado and mix with chopped eggs.
Drizzle with olive oil & season with salt & pepper.
Top with cheese if desired.
Trim Healthy Mama Lunch Recipes
3. Chicken and Quinoa Power Bowl (E)
A hearty, protein-packed meal ideal for sustained energy.
Ingredients:
1/2 cup cooked quinoa
1 grilled chicken breast, sliced
1/2 cup steamed broccoli
1 tbsp lemon juice
1/2 tsp garlic powder
Salt and pepper to taste.
Instructions:
Layer quinoa, chicken, and broccoli in a bowl.
Drizzle with lemon juice and sprinkle with garlic powder.
Toss and enjoy!
4. Zucchini Noodle Alfredo (S)
A creamy, low-carb take on a comfort food favourite.
Ingredients:
2 medium zucchinis, spiralized
1/2 cup heavy cream
1/4 cup grated Parmesan cheese
1 tbsp butter
1/2 tsp garlic powder
Salt and pepper to taste.
Instructions:
Sauté zucchini noodles in butter for 2 minutes.
Add heavy cream, Parmesan, and seasonings.
Stir until creamy and serve hot.
Trim Healthy Mama Dessert Recipes
5. Chocolate Avocado Mousse (S)
It is a rich and satisfying treat with healthy fats. Ingredients:
1 ripe avocado
2 tbsp unsweetened cocoa powder
2 tbsp gentle sweetener
1/2 tsp vanilla extract
2 tbsp unsweetened almond milk
Instructions:
Blend all ingredients until smooth.
Chill for 30 minutes before serving.
Top with whipped cream or berries.
6. Lemon Coconut Bites (FP)
It is a light, refreshing snack for any time of day.
Ingredients:
1/2 cup unsweetened shredded coconut
2 tbsp coconut flour
1 tbsp gentle sweetener
1/2 tsp lemon zest
1/4 cup unsweetened almond milk
Instructions:
Mix all ingredients in bowl until dough forms.
Roll into bite-sized balls.
Refrigerate for 1 hour before serving.
Final Thoughts
Incorporating Trim Healthy Mama recipes into your daily routine can transform your health while keeping meals delicious and satisfying. The THM approach ensures you never feel deprived, whether you prefer low-carb, high-protein, or balanced meals. By choosing wholesome ingredients and strategically combining macronutrients, you can enjoy flavorful dishes that effortlessly support your wellness goals.
Swordfish, known for its robust, steak-like consistency and delicately sweet undertone, is revered among discerning seafood connoisseurs. Its versatility and rich nutrient profile render it ideal for both casual weeknight meals and refined dinner affairs. This detailed guide unveils a lemon-garlic swordfish recipe that not only satisfies the palate but also aligns with nutritional and culinary excellence.
Why Choose Swordfish?
Choosing swordfish is more than a gustatory decision—it’s a strategic move towards healthier, more elevated eating. Here’s what sets this fish apart:
Rich in Lean Protein: Each portion of swordfish provides a bountiful amount of high-quality protein essential for muscle repair, metabolic function, and satiety.
Omega-3 Fatty Acids: Swordfish contains a commendable amount of omega-3s, which are known to support cardiovascular integrity, reduce inflammation, and enhance cognitive performance.
Culinary Flexibility: Its meaty texture withstands high-heat cooking methods without falling apart, making it ideal for grilling, roasting, or pan-searing.
Swordfish isn’t merely an option—it’s an upgrade.
Grilled Garlic Herb Swordfish Recipe
This refined preparation balances brightness with herbaceous depth, resulting in a restaurant-worthy dish served with simplicity.
Ingredients
2 swordfish steaks (6–8 oz each)
2 tbsp extra virgin olive oil
2 cloves garlic, finely minced
1 tbsp freshly squeezed lemon juice
1 tsp chopped fresh rosemary
1 tsp chopped fresh thyme
½ tsp sea salt
½ tsp cracked black pepper
½ tsp smoked paprika
Lemon wedges (for garnish)
Instructions
1. Prepare the Marinade
Whisk together olive oil, garlic, lemon juice, rosemary, thyme, salt, pepper, & paprika in a small glass bowl. The blend should be aromatic, slightly acidic, and herbaceous—designed to permeate the swordfish’s dense flesh with vibrancy and depth.
2. Marinate the Swordfish
Pat the swordfish steaks dry using a paper towel. Coat them thoroughly with the marinade and allow them to rest for 20–30 minutes at room temperature. This critical step allows the flavours to infiltrate the fish, ensuring a nuanced and satisfying bite.
3. Grill to Perfection
Preheat grill to medium-high heat, approximately 400°F. Carefully lay the marinated swordfish steaks onto the grates. Grill for 4–5 minutes per side or until internal temperature reaches 130°F and the surface shows caramelized grill marks. The centre should appear opaque but moist.
4. Serve and Enjoy
Remove from heat, let the steaks rest briefly, and present them with fresh lemon wedges. The lemon’s acidity will heighten the overall flavour profile.
Pro Tips for Cooking Swordfish
✔ Avoid Overcooking
Swordfish is best when it retains a moist interior. Once the centre turns opaque, please remove it from heat to preserve tenderness.
✔ Use High Heat
A searing-hot grill ensures an appetizing crust and seals in natural juices.
✔ Complement with Balanced Sides
Roasted fingerling potatoes, charred asparagus, or a citrusy arugula salad pair harmoniously with the richness of swordfish.
✔ Experiment with Marinades
Substitute herbs and acid bases: For diversified flavour experiences, try a miso-ginger glaze, citrus-soy reduction, or a Mediterranean mix of oregano, capers, and lemon zest.
Nutritional and Culinary Value of Swordfish
Nutrient
Per 6oz Serving
Benefit
Calories
~200 kcal
Energy with lean composition
Protein
~34g
Muscle maintenance and repair
Omega-3s
~0.5g
Brain and heart function
Selenium
90 mcg (129% DV)
Antioxidant support
Vitamin D
566 IU (71% DV)
Bone health and immune modulation
Conclusion
With its refined texture and health-forward profile, Swordfish is an exceptional seafood selection for the modern kitchen. This lemon-garlic swordfish recipe delivers on flavour and offers a foundation for culinary creativity. Mastering how to cook swordfish transforms an ordinary dinner into a gourmet statement. With just handful of fresh ingredients and attention to detail, the best way to cook swordfish is within reach—grilled, infused with herbs, and perfectly seared. Embrace the elegance of this remarkable fish and let it anchor your next dining experience.
Salmon is widely regarded for its rich taste, flaky texture, and powerful nutritional profile. But one question often lingers in kitchens and restaurants: Can you eat salmon skin? The short and confident answer is yes. Salmon skin is not only edible but also highly nutritious—if sourced and prepared correctly. This article will guide you through benefits, precautions, and best cooking practices, helping you decide whether to keep the skin on your next fillet.
Is It Safe to Eat Salmon Skin?
Can you eat salmon skin safely? Yes—but with some caveats. The skin of salmon contains more concentrated levels of omega-3 fatty acids, essential vitamins, & minerals than the flesh itself. However, the safety of the salmon depends heavily on the quality and origin of the salmon.
Wild-caught salmon (especially Alaskan, Sockeye, Coho, and Chinook) generally has cleaner, lower-toxin skin and is considered the safest to consume.
Farmed salmon, especially from poorly regulated sources, may contain higher environmental contaminants like PCBs and dioxins that accumulate in the fatty skin layer.
So, yes, you can eat salmon skin, but to minimise health risks, choose wild-caught and responsibly sourced options.
Nutritional Benefits of Eating Salmon Skin
When you ask if you can eat salmon skin for its nutritional value, the answer becomes even more compelling. The skin is a powerhouse of nutrients that support many vital bodily functions.
🔹 Omega-3 Fatty Acids
Salmon skin is densely packed with EPA and DHA, two long-chain omega-3 fatty acids linked to:
Improved cardiovascular health
Reduced inflammation
Enhanced brain function
Joint support
These fatty acids are fat-soluble, and the skin retains a significant portion—often more than the flesh.
🔹 Collagen and Protein
Salmon skin is rich natural source of collagen, a protein vital for:
Skin elasticity
Hair and nail strength
Joint and tendon health
It also contributes high-quality protein that aids in muscle repair and satiety, making it an excellent choice for fitness-focused diets.
🔹 Essential Micronutrients
Nutrients found in salmon skin include:
Vitamin D – strengthens bones and supports immune function
B Vitamins – help convert food into energy and maintain cognitive health
Selenium – acts as a potent antioxidant that protects against cellular damage
Potential Risks of Eating Salmon Skin
Although you can eat salmon skin, there are potential concerns you should be aware of:
Toxins and Heavy Metals: Contaminants like polychlorinated biphenyls (PCBs) and dioxins may be more concentrated in the skin due to their fat content. These risks are higher in farmed salmon.
Allergies and Sensitivities: People with fish allergies may also react to compounds in the skin. If you’re unsure, try a small portion first.
Cooking Hygiene: Consuming raw or undercooked salmon skin that isn’t sushi-grade could expose you to parasites or bacteria. Always ensure thorough cooking unless certified safe.
How to Cook Salmon Skin for Maximum Flavor and Texture
Can you eat salmon skin and enjoy it? Absolutely—when it’s cooked the right way. Here are four popular methods to get that golden, crispy skin that adds crunch and flavour to your meal:
1. Pan-Searing (Crispy Skin Perfection)
Heat a pan over medium-high heat with olive oil or ghee.
Place the salmon skin-side down and press gently with a spatula.
Cook for 4–5 minutes until golden & crisp; flip and cook for two more minutes.
2. Grilling (Smoky and Flavorful)
Preheat your grill & oil the grates to prevent sticking.
Place the fish skin-side down and grill for 6–8 minutes.
Let the skin crisp up before flipping.
3. Baking (Health-Conscious Choice)
Preheat the oven to 400°F (200°C).
Season the salmon and place it on a lined baking sheet, skin-side down.
Bake for 12–15 minutes until the skin is dry and crisp.
4. Air-frying (Crispy with Less Oil)
Set your air fryer to 375°F (190°C).
Place the salmon skin-side up and cook for 8–10 minutes for crunchy results.
Expert Tips for Enjoying Salmon Skin
Describe the skin before cooking for a cleaner bite.
Use high-heat oils like avocado or ghee to prevent sticking and enhance crispness.
For a gourmet snack, try making salmon skin chips—cut off the skin, season it, and bake or air-fry until crisp.
Final Thoughts
So, can you eat salmon skin without worry? Yes—and doing so provides an abundance of health benefits along with culinary enjoyment. Whether you’re looking to boost your omega-3 intake, improve skin health through collagen, or enhance the flavour and texture of your dish, salmon skin is a worthy addition to your plate. Just be mindful of where your fish comes from, how it’s cooked, and your dietary needs.
 Strengthening Exercises for SI Joint Stability
 Lifestyle and Therapeutic Considerations
 Benefits of Cable Back Exercises:
 Muscles Targeted by Cable Back Exercises
 2. Dehydration from Caffeine
 Final Thoughts
 2. Strength Training and Muscle Building
 6. Lifestyle Enhancements That Matter
 Step-by-Step Instructions
 Nutritional Considerations
 2. Instant Pot Chicken and Quinoa Soup
 2. Avocado and Egg Breakfast Bowl (S)
 Instructions:
 Nutritional Benefits of Eating Salmon Skin
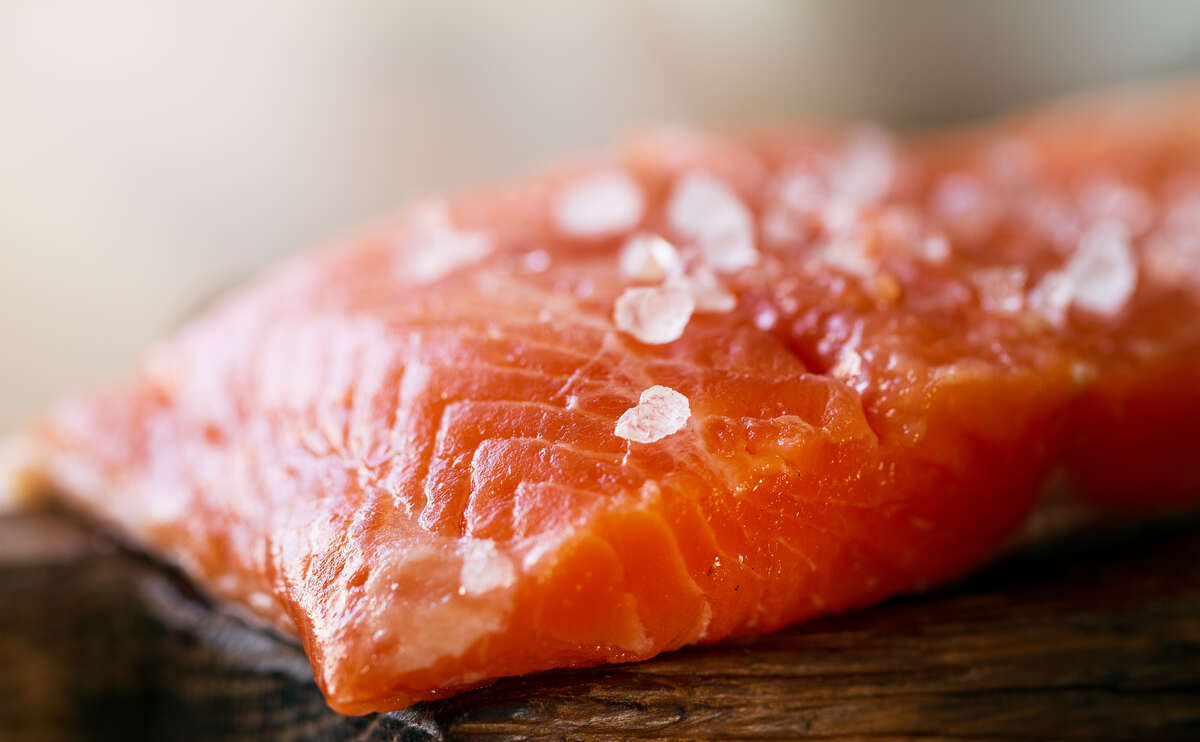 How to Cook Salmon Skin for Maximum Flavor and Texture