Many face the challenge of maintaining a healthy diet without compromising on taste, but the Trim Healthy Mama (THM) approach offers a balanced solution. By focusing on whole foods, strategic fuel separation, and natural ingredients, THM recipes cater to diverse dietary needs while supporting weight management and overall well-being. Whether you seek energizing breakfasts, satisfying lunches, or indulgent yet healthy desserts, Trim Healthy Mama Recipes will keep you nourished and satisfied.
The Core Principles of Trim Healthy Mama
THM is built around the idea of separating different macronutrients—S (Satisfying), E (Energizing), FP (Fuel Pull), and XO (Crossover)—to optimize digestion, metabolism, and energy levels. Here’s a quick breakdown:
S (Satisfying): Healthy fats with minimal carbs (e.g., butter, coconut oil, cheese, meats, and non-starchy vegetables).
E (Energizing): Lean proteins paired with healthy carbs (e.g., oats, brown rice, quinoa, and fruits).
FP (Fuel Pull): Low-fat and low-carb meals focusing on lean proteins and non-starchy veggies.
XO (Crossover): A mix of S and E fuels for maintenance and muscle building.
Trim Healthy Mama Breakfast Recipes
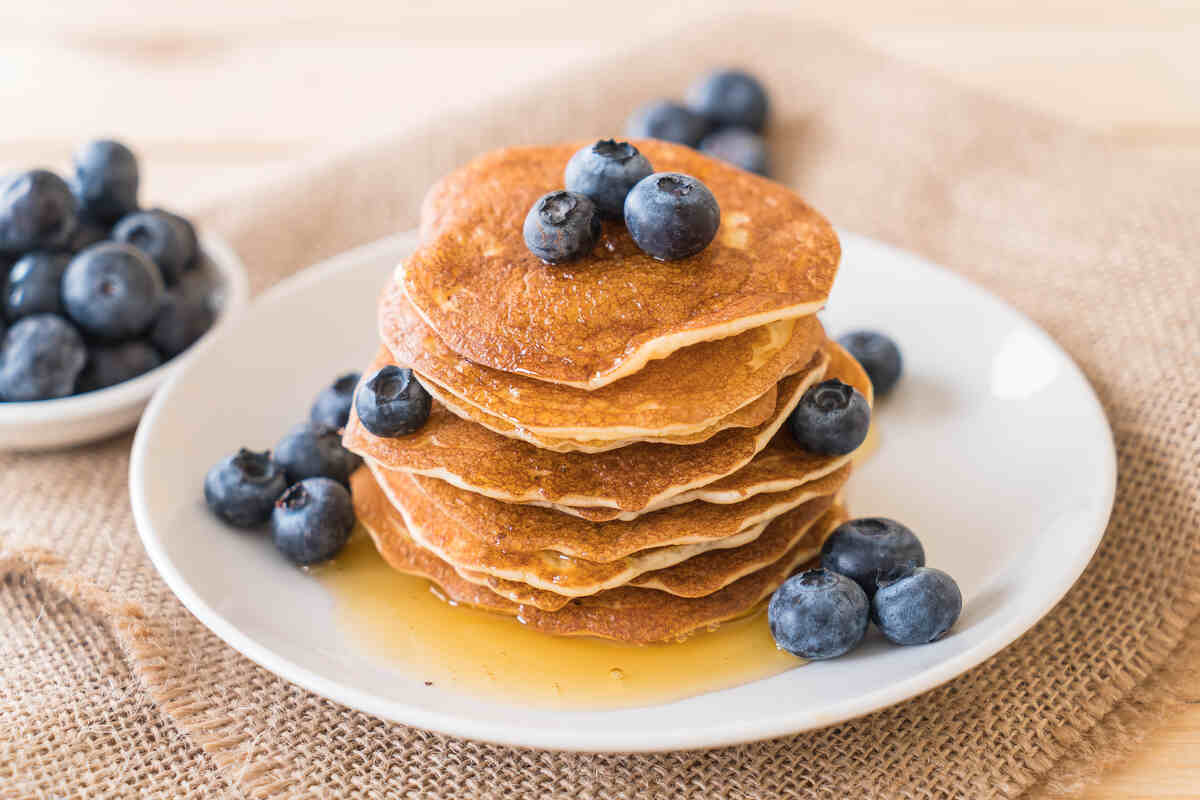
1. Protein-Packed Blueberry Pancakes (E)
Start the day with a nourishing, fibre-rich meal that keeps you energized.
Ingredients:
1/3 cup oat flour
1 egg white
1/4 cup unsweetened almond milk
1/2 tsp baking powder
1/4 tsp cinnamon
1/2 cup blueberries
1-2 tsp gentle sweetener (THM-approved)
Instructions:
Mix all ingredients except blueberries in bowl.
Heat a non-stick skillet and cook pancakes on medium heat.
Add blueberries while cooking.
Serve with dollop of Greek yoghurt or sugar-free syrup.
2. Avocado and Egg Breakfast Bowl (S)
A creamy, protein-rich breakfast perfect for busy mornings.
Ingredients:
1/2 avocado, mashed
2 boiled eggs, chopped
1 tbsp olive oil
1/2 tsp sea salt
1/4 tsp black pepper
1 tbsp shredded cheese (optional)
Instructions:
Mash avocado and mix with chopped eggs.
Drizzle with olive oil & season with salt & pepper.
Top with cheese if desired.
Trim Healthy Mama Lunch Recipes
3. Chicken and Quinoa Power Bowl (E)
A hearty, protein-packed meal ideal for sustained energy.
Ingredients:
1/2 cup cooked quinoa
1 grilled chicken breast, sliced
1/2 cup steamed broccoli
1 tbsp lemon juice
1/2 tsp garlic powder
Salt and pepper to taste.
Instructions:
Layer quinoa, chicken, and broccoli in a bowl.
Drizzle with lemon juice and sprinkle with garlic powder.
Toss and enjoy!
4. Zucchini Noodle Alfredo (S)
A creamy, low-carb take on a comfort food favourite.
Ingredients:
2 medium zucchinis, spiralized
1/2 cup heavy cream
1/4 cup grated Parmesan cheese
1 tbsp butter
1/2 tsp garlic powder
Salt and pepper to taste.
Instructions:
Sauté zucchini noodles in butter for 2 minutes.
Add heavy cream, Parmesan, and seasonings.
Stir until creamy and serve hot.
Trim Healthy Mama Dessert Recipes
5. Chocolate Avocado Mousse (S)
It is a rich and satisfying treat with healthy fats. Ingredients:
1 ripe avocado
2 tbsp unsweetened cocoa powder
2 tbsp gentle sweetener
1/2 tsp vanilla extract
2 tbsp unsweetened almond milk
Instructions:
Blend all ingredients until smooth.
Chill for 30 minutes before serving.
Top with whipped cream or berries.
6. Lemon Coconut Bites (FP)
It is a light, refreshing snack for any time of day.
Ingredients:
1/2 cup unsweetened shredded coconut
2 tbsp coconut flour
1 tbsp gentle sweetener
1/2 tsp lemon zest
1/4 cup unsweetened almond milk
Instructions:
Mix all ingredients in bowl until dough forms.
Roll into bite-sized balls.
Refrigerate for 1 hour before serving.
Final Thoughts
Incorporating Trim Healthy Mama recipes into your daily routine can transform your health while keeping meals delicious and satisfying. The THM approach ensures you never feel deprived, whether you prefer low-carb, high-protein, or balanced meals. By choosing wholesome ingredients and strategically combining macronutrients, you can enjoy flavorful dishes that effortlessly support your wellness goals.
Swordfish, known for its robust, steak-like consistency and delicately sweet undertone, is revered among discerning seafood connoisseurs. Its versatility and rich nutrient profile render it ideal for both casual weeknight meals and refined dinner affairs. This detailed guide unveils a lemon-garlic swordfish recipe that not only satisfies the palate but also aligns with nutritional and culinary excellence.
Why Choose Swordfish?
Choosing swordfish is more than a gustatory decision—it’s a strategic move towards healthier, more elevated eating. Here’s what sets this fish apart:
Rich in Lean Protein: Each portion of swordfish provides a bountiful amount of high-quality protein essential for muscle repair, metabolic function, and satiety.
Omega-3 Fatty Acids: Swordfish contains a commendable amount of omega-3s, which are known to support cardiovascular integrity, reduce inflammation, and enhance cognitive performance.
Culinary Flexibility: Its meaty texture withstands high-heat cooking methods without falling apart, making it ideal for grilling, roasting, or pan-searing.
Swordfish isn’t merely an option—it’s an upgrade.
Grilled Garlic Herb Swordfish Recipe
This refined preparation balances brightness with herbaceous depth, resulting in a restaurant-worthy dish served with simplicity.
Ingredients
2 swordfish steaks (6–8 oz each)
2 tbsp extra virgin olive oil
2 cloves garlic, finely minced
1 tbsp freshly squeezed lemon juice
1 tsp chopped fresh rosemary
1 tsp chopped fresh thyme
½ tsp sea salt
½ tsp cracked black pepper
½ tsp smoked paprika
Lemon wedges (for garnish)
Instructions
1. Prepare the Marinade
Whisk together olive oil, garlic, lemon juice, rosemary, thyme, salt, pepper, & paprika in a small glass bowl. The blend should be aromatic, slightly acidic, and herbaceous—designed to permeate the swordfish’s dense flesh with vibrancy and depth.
2. Marinate the Swordfish
Pat the swordfish steaks dry using a paper towel. Coat them thoroughly with the marinade and allow them to rest for 20–30 minutes at room temperature. This critical step allows the flavours to infiltrate the fish, ensuring a nuanced and satisfying bite.
3. Grill to Perfection
Preheat grill to medium-high heat, approximately 400°F. Carefully lay the marinated swordfish steaks onto the grates. Grill for 4–5 minutes per side or until internal temperature reaches 130°F and the surface shows caramelized grill marks. The centre should appear opaque but moist.
4. Serve and Enjoy
Remove from heat, let the steaks rest briefly, and present them with fresh lemon wedges. The lemon’s acidity will heighten the overall flavour profile.
Pro Tips for Cooking Swordfish
✔ Avoid Overcooking
Swordfish is best when it retains a moist interior. Once the centre turns opaque, please remove it from heat to preserve tenderness.
✔ Use High Heat
A searing-hot grill ensures an appetizing crust and seals in natural juices.
✔ Complement with Balanced Sides
Roasted fingerling potatoes, charred asparagus, or a citrusy arugula salad pair harmoniously with the richness of swordfish.
✔ Experiment with Marinades
Substitute herbs and acid bases: For diversified flavour experiences, try a miso-ginger glaze, citrus-soy reduction, or a Mediterranean mix of oregano, capers, and lemon zest.
Nutritional and Culinary Value of Swordfish
Nutrient
Per 6oz Serving
Benefit
Calories
~200 kcal
Energy with lean composition
Protein
~34g
Muscle maintenance and repair
Omega-3s
~0.5g
Brain and heart function
Selenium
90 mcg (129% DV)
Antioxidant support
Vitamin D
566 IU (71% DV)
Bone health and immune modulation
Conclusion
With its refined texture and health-forward profile, Swordfish is an exceptional seafood selection for the modern kitchen. This lemon-garlic swordfish recipe delivers on flavour and offers a foundation for culinary creativity. Mastering how to cook swordfish transforms an ordinary dinner into a gourmet statement. With just handful of fresh ingredients and attention to detail, the best way to cook swordfish is within reach—grilled, infused with herbs, and perfectly seared. Embrace the elegance of this remarkable fish and let it anchor your next dining experience.
Salmon is widely regarded for its rich taste, flaky texture, and powerful nutritional profile. But one question often lingers in kitchens and restaurants: Can you eat salmon skin? The short and confident answer is yes. Salmon skin is not only edible but also highly nutritious—if sourced and prepared correctly. This article will guide you through benefits, precautions, and best cooking practices, helping you decide whether to keep the skin on your next fillet.
Is It Safe to Eat Salmon Skin?
Can you eat salmon skin safely? Yes—but with some caveats. The skin of salmon contains more concentrated levels of omega-3 fatty acids, essential vitamins, & minerals than the flesh itself. However, the safety of the salmon depends heavily on the quality and origin of the salmon.
Wild-caught salmon (especially Alaskan, Sockeye, Coho, and Chinook) generally has cleaner, lower-toxin skin and is considered the safest to consume.
Farmed salmon, especially from poorly regulated sources, may contain higher environmental contaminants like PCBs and dioxins that accumulate in the fatty skin layer.
So, yes, you can eat salmon skin, but to minimise health risks, choose wild-caught and responsibly sourced options.
Nutritional Benefits of Eating Salmon Skin
When you ask if you can eat salmon skin for its nutritional value, the answer becomes even more compelling. The skin is a powerhouse of nutrients that support many vital bodily functions.
🔹 Omega-3 Fatty Acids
Salmon skin is densely packed with EPA and DHA, two long-chain omega-3 fatty acids linked to:
Improved cardiovascular health
Reduced inflammation
Enhanced brain function
Joint support
These fatty acids are fat-soluble, and the skin retains a significant portion—often more than the flesh.
🔹 Collagen and Protein
Salmon skin is rich natural source of collagen, a protein vital for:
Skin elasticity
Hair and nail strength
Joint and tendon health
It also contributes high-quality protein that aids in muscle repair and satiety, making it an excellent choice for fitness-focused diets.
🔹 Essential Micronutrients
Nutrients found in salmon skin include:
Vitamin D – strengthens bones and supports immune function
B Vitamins – help convert food into energy and maintain cognitive health
Selenium – acts as a potent antioxidant that protects against cellular damage
Potential Risks of Eating Salmon Skin
Although you can eat salmon skin, there are potential concerns you should be aware of:
Toxins and Heavy Metals: Contaminants like polychlorinated biphenyls (PCBs) and dioxins may be more concentrated in the skin due to their fat content. These risks are higher in farmed salmon.
Allergies and Sensitivities: People with fish allergies may also react to compounds in the skin. If you’re unsure, try a small portion first.
Cooking Hygiene: Consuming raw or undercooked salmon skin that isn’t sushi-grade could expose you to parasites or bacteria. Always ensure thorough cooking unless certified safe.
How to Cook Salmon Skin for Maximum Flavor and Texture
Can you eat salmon skin and enjoy it? Absolutely—when it’s cooked the right way. Here are four popular methods to get that golden, crispy skin that adds crunch and flavour to your meal:
1. Pan-Searing (Crispy Skin Perfection)
Heat a pan over medium-high heat with olive oil or ghee.
Place the salmon skin-side down and press gently with a spatula.
Cook for 4–5 minutes until golden & crisp; flip and cook for two more minutes.
2. Grilling (Smoky and Flavorful)
Preheat your grill & oil the grates to prevent sticking.
Place the fish skin-side down and grill for 6–8 minutes.
Let the skin crisp up before flipping.
3. Baking (Health-Conscious Choice)
Preheat the oven to 400°F (200°C).
Season the salmon and place it on a lined baking sheet, skin-side down.
Bake for 12–15 minutes until the skin is dry and crisp.
4. Air-frying (Crispy with Less Oil)
Set your air fryer to 375°F (190°C).
Place the salmon skin-side up and cook for 8–10 minutes for crunchy results.
Expert Tips for Enjoying Salmon Skin
Describe the skin before cooking for a cleaner bite.
Use high-heat oils like avocado or ghee to prevent sticking and enhance crispness.
For a gourmet snack, try making salmon skin chips—cut off the skin, season it, and bake or air-fry until crisp.
Final Thoughts
So, can you eat salmon skin without worry? Yes—and doing so provides an abundance of health benefits along with culinary enjoyment. Whether you’re looking to boost your omega-3 intake, improve skin health through collagen, or enhance the flavour and texture of your dish, salmon skin is a worthy addition to your plate. Just be mindful of where your fish comes from, how it’s cooked, and your dietary needs.
If you’re looking for a bold, energetic, and crowd-pleasing cocktail to spice up your next party or game night, the Vegas Bomb recipe is your go-to! This drink has earned a spot among the most iconic party beverages with a sweet, smooth flavour and an exciting drop-shot style.
This guide will show you how to make a Vegas Bomb at home, including ingredients, step-by-step instructions, variations, and tips for responsible enjoyment.
What Is a Vegas Bomb?
The Vegas Bomb is a bomb-shot cocktail named after Las Vegas, a city famous for excitement, nightlife, and indulgence. It combines Crown Royal whiskeypeach schnappsMalibu rum and an energy drink creating a flavorful and fizzy concoction that’s as fun to drink as it is to make.
The drink is usually made by combining the spirits in a shot glass and dropping them into a larger glass partially filled with an energy drink like Red Bull. When the shot hits the energy drink, it fizzes, creating a bomb effect, just like its name.
Vegas Bomb Recipe: Classic Version
Ingredients
½ oz Crown Royal Canadian Whisky
½ oz Peach Schnapps
½ oz Malibu Rum
1 oz chilled Energy Drink (like Red Bull)
Optional: You can also add a splash of cranberry juice for a fruitier taste.
Instructions
Prepare the Shot
Mixn Royal, peach schnapps, and Malibu rum.
Fill in a standard shot glasses Pint Glass
Fill a pint or highball glass with 1 oz of your favourite energy drink.
Drop and Drink
Drop the shot glass into the pint glass and down it for the fizzy experience.
Vegas Bomb Variations
Looking to switch things up? Try these tasty twists on the original Vegas Bomb recipe:
1. Cranberry Vegas Bomb
Add a splash of cranberry juice to the energy drink for a tangy finish.
2. Cherry Bomb
Swap peach schnapps with cherry liqueur for a sweeter, fruitier version.
Use a caffeine-free soda like Sprite instead of Red Bull for a gentler option.
Vegas Bomb Recipe Tips
Chill your ingredients beforehand to avoid diluting the flavour with ice.
Use high-quality glassware to prevent breakage when dropping the shot glass.
Make it a pitcher: Multiply ingredients and mix in a large container for group settings (skip the drop shot style).
Drink Responsibly: Because this drink contains alcohol and caffeine, enjoy it in moderation and avoid combining it with strenuous activity.
Final Thoughts:
The Vegas Bomb isn’t just a drink—it’s an experience. Whether celebrating with friends or looking for something fun to serve at your next event, this shot combines taste, energy, and showmanship in one glass.
Frequently Asked Questions (FAQs)
Is the Vegas Bomb potent?
Yes. It combines three types of alcohol and an energy drink. While delicious and smooth, it can be deceivingly potent—especially when consumed quickly.
What does a Vegas Bomb taste like?
It’s sweet and slightly nutty from the Crown Royal, fruity from the peach schnapps, and tropical, thanks to Malibu rum. The energy drink adds fizz and a sugary finish.
Can I make a non-alcoholic Vegas Bomb?
Absolutely! For a mocktail version, try mixing peach juice, coconut water, and an energy drink or sparkling soda.
When life moves fast, meal prep is your secret weapon. Whether juggling work, school, or family, planning meals helps you stay energized, support gut health, and manage your weight—without the overwhelm. This guide explores quick, nutritious meal prep ideas for every part of the day, including make-ahead breakfasts, high-protein lunches, and simple dinners.
We’re also spotlighting an international treat: the Swiss Gipfeli Recipe a crescent-shaped pastry that makes a perfect breakfast companion or on-the-go snack. With the right balance and planning, clean eating on a budget is achievable for anyone—even beginners.
Feature Recipe: Traditional Swiss Gipfeli Recipe
Gipfeli (pronounced GIP-feh-lee) are flaky, buttery pastries often compared to croissants but are denser and slightly savoury. While not your average “low-calorie” meal, homemade Gipfeli made with quality ingredients can be part of a balanced diet when paired mindfully.
Ingredients:
3 ¾ cups (500 g) all-purpose flour
1 tsp salt
2 ¼ tsp instant yeast
1 cup (240 ml) lukewarm milk
1 egg
3 tbsp unsalted butter (softened)
½ cup (100 g) cold butter (for laminating)
1 egg yolk + 1 tbsp milk (egg wash)
Instructions:
Make the Dough: Combine flour, salt, and yeast. Add milk, egg, and softened butter. Knead until smooth. Let rise for 1 hour.
Laminate: Roll out dough, place slices of cold butter, fold, and chill. Repeat twice for flakiness.
Shape & Proof: Roll into a rectangle, cut triangles, and roll into crescents. Let rise for 30–40 mins.
Bake: Brush with egg wash and bake at 375°F (190°C) for 20 minutes or until golden.
Nutritional Breakdown (Per Gipfeli):
Calories: ~230
Protein: 5g
Fat: 12g
Carbs: 26g
Fiber: 1g
Time-Saving Tip: Prepare the dough the night before and refrigerate. Bake fresh in the morning!
Make-Ahead Breakfasts That Power Your Morning
1. Overnight Oats with Chia Seeds & Berries
Prep Time: 5 min
Store for 3–4 days
Benefits: Gut health, energy boost, fiber-rich
Ingredients:
½ cup rolled oats
1 tbsp chia seeds
1 cup almond milk
½ banana, sliced
Handful of berries
2. Egg Muffins with Spinach & Bell Peppers
Prep Time: 10 min | Bake: 20 min
Store for: 5 days
Benefits: High protein, low carb
Ingredients:
6 eggs
½ cup spinach (chopped)
½ red bell pepper (diced)
Salt & pepper to taste
Tip: Bake in silicone muffin trays for easy cleanup.
High-Protein Lunches for On-the-Go Energy
1. Grilled Chicken Grain Bowls
Prep Time: 20 min
Store: 4 days
Benefits: Lean protein, complex carbs, satisfying
Ingredients:
Grilled chicken breast
Quinoa or brown rice
Roasted broccoli
Tahini lemon dressing
2. Chickpea Salad Wraps
Prep Time: 10 min
Store: 3 days
Benefits: Plant-based, gut-friendly, rich in fibre
Ingredients:
1 can chickpeas (mashed)
Greek yogurt
Diced cucumber, red onion, and parsley
Whole wheat wrap
Easy, Clean Dinners You Can Whip Up Fast
1. One-Pan Baked Salmon with Veggies
Prep + Cook: 25 min
Benefits: Omega-3s, low in carbs, rich in nutrients
Staying hydrated supports digestion, skin health, and energy levels. Here are two easy, prep-friendly options:
1. Green Detox Smoothie
Ingredients: Spinach, cucumber, green apple, lemon, coconut water
Benefits: Detox support, hydration, vitamins
2. Citrus Ginger Infused Water
Ingredients: Sliced lemon, orange, ginger, mint
Benefits: Boosts immunity, reduces bloating
Tip: Use a large glass bottle to prep 2–3 servings simultaneously.
Final Thoughts
Meal prepping isn’t about perfection—it’s about planning for progress. Combining wise choices like Swiss Gipfeli Recipe for comforthigh-protein meals for energy and hydrating smoothies even the busiest schedules can make room for wellness. Whether new to this or refining your routine, these easy, healthy recipes offer a delicious way to master clean eating on a budget
Whether you are starting your fitness journey or a seasoned lifter looking to enhance your chest workout, dumbbells are one of the most versatile tools for building upper body strength. Incorporating dumbbells into your routine not only increases the range of motion but also effectively targets various parts of your chest. This guide will explore the best Chest Exercises with Dumbbells, helping you develop a balanced chest workout.
Why Choose Dumbbells for Chest Training?
Dumbbells allow for more freedom of movement than barbells. By using dumbbells, each side of your body works independently, helping to correct muscle imbalances. Additionally, dumbbells enable a more significant stretch and contraction at the movement’s top, leading to improved muscle activation.
Below, we’ll break down some of the most effective dumbbell exercises for building your chest, from beginner moves to advanced techniques.
Top Dumbbell Chest Exercises
1. Dumbbell Bench Press
Dumbbell Bench Press is staple in any chest workout. This exercise targets the entire pectoral muscle group while engaging your shoulders and triceps. By using dumbbells, you can ensure both sides of your body are working independently, preventing muscle imbalances.
Form Tips:
Lie flat on bench with your feet firmly planted on ground.
Hold dumbbells at chest level with palms facing forward.
Lower the dumbbells to a 90-degree bend in your elbows, keeping your core engaged to protect your lower back.
Press the dumbbells back up until your arms are fully extended.
Benefits: Builds overall chest strength and size.
2. Dumbbell Flyes
Dumbbell Flyes are excellent isolation exercise for targeting pectorals. This movement stretches the chest muscle at the bottom of the motion, leading to better muscle definition.
Form Tips:
Begin by lying flat on bench, holding a dumbbell in each hand with slight bend in your elbows.
Lower dumbbells to the sides of your body in an arc, maintaining the slight elbow bend.
Squeeze your chest to bring dumbbells back together at the top.
Benefits: Excellent for chest isolation and muscle definition.
3. Incline Dumbbell Press
The Incline Dumbbell Press is your go-to move for targeting the upper part of the chest. It helps build the clavicular head of the pectorals, providing a well-rounded chest development.
Form Tips:
Set the bench at 30-45 degree angle.
Hold dumbbells above your chest, with your palms facing forward.
Lower weights slowly until your elbows are at about a 90-degree angle.
Press the dumbbells upward while keeping your shoulder blades pinched together.
Benefits: Focuses on the upper chest, helping to create a more defined and rounded look.
4. Dumbbell Pullover
A unique exercise that targets both the chest and back muscles, the Dumbbell Pullover helps expand your rib cage and enhance your chest development.
Form Tips:
Lie across bench with only your upper back and shoulders supported.
Hold a dumbbell with both hands and extend it over your chest.
Slowly lower dumbbell back over your head in a controlled motion, feeling a stretch in your chest.
Bring the dumbbell back to the starting position, engaging your chest muscles.
Benefits: Stretches the chest muscles and activates the lats.
5. Squeeze Press
This exercise isolates the inner chest, helping to build the muscle fibres responsible for chest thickness.
Form Tips:
Lie flat on a bench & hold two dumbbells with palms facing each other.
Squeeze the dumbbells as hard as you can while pressing them upward.
Lower the weights back to chest level, maintaining the squeeze throughout the movement.
Benefits: Targets the inner chest, promoting thickness and muscle engagement.
6. Dumbbell Push-up
Incorporating push-ups into your dumbbell workout adds a bodyweight element that enhances chest and core strength. Performing push-ups with hands-on dumbbells allows for a more excellent range of motion and profound muscle activation.
Form Tips:
Place a pair of dumbbells on the floor and get into a push-up position.
Lower your chest to the floor, ensuring your elbows stay at about a 45-degree angle to your body.
Push back up to starting position, keeping your body in straight line from head to heels.
Benefits: Combines the advantages of push-ups with increased range of motion and chest activation.
Additional Effective Dumbbell Chest Exercises
Decline Dumbbell Bench Press: Targets the lower part of the chest for a complete upper body workout.
One-Arm Dumbbell Bench Press: Adds an element of stability, forcing your core to engage more for balance.
Alternating Dumbbell Bench Press: Focuses on unilateral chest strength, allowing you to correct imbalances.
Dumbbell Floor Press: A safer alternative to the bench press, particularly for beginners or those with shoulder issues.
How to Structure Your Dumbbell Chest Exercises
Consider structuring your workout with compound and isolation exercises for optimal chest development. Here’s a sample chest workout:
Warm-up: 5-10 minutes of light cardio or dynamic stretching.
Main Workout: Perform 3-4 sets of 8-12 reps for each of the following:
Dumbbell Bench Press (Compound Movement)
Incline Dumbbell Press (Upper Chest Focus)
Dumbbell Flyes (Isolation)
Dumbbell Pullover (Chest & Back Focus)
Dumbbell Push-ups (Bodyweight + Dumbbell)
Cool Down: Stretch your chest and arms to increase flexibility and prevent soreness.
Rest Between Sets: 60-90 seconds for muscle growth or longer for strength-focused sets.
Final Thoughts
Incorporating these chest exercises into your routine will help you develop a muscular, defined chest. Whether you’re a beginner or an advanced lifter, dumbbells provide the flexibility to challenge your Chest Exercises in various ways. Start with basic exercises & gradually incorporate more advanced moves as you gain strength and confidence.
The adductor muscles in the inner thigh play a crucial role in hip stability, mobility, and overall lower body strength. Whether you’re an athlete looking to enhance agility or someone aiming for balanced leg development, incorporating adductor exercises into your routine is essential. This guide will explore the best adductor exercises, their benefits, and how to incorporate them effectively.
Why Strengthen the Adductors?
Strong adductor muscles contribute to:
✅ Enhanced Athletic Performance – Crucial for lateral soccer, basketball, and tennis movements.
✅ Injury Prevention – Weak adductors are linked to groin strains and knee instability.
✅ Improved Hip Mobility – Essential for deep squats, lunges, and dynamic movements.
✅ Better Balance and Stability – Supports proper posture and movement mechanics.
Best Adductor Exercises for Strength and Mobility
1. Bodyweight Adductor Exercises
🔹 Side Lunge: Step laterally, keeping one leg straight while bending the other knee. This exercise engages adductors while improving mobility.
🔹 Cossack Squat – A deep lateral squat that increases flexibility and strengthens the inner thighs.
🔹 Frog Stretch – A deep stretch targeting the adductors and groin, ideal for improving mobility.
🔹 Butterfly Stretch – Sit with the soles of your feet together and gently push your knees down.
2. Resistance-Based Adductor Exercises
🔹 Cable Hip Adduction – Attach an ankle strap and bring your leg toward your midline for isolated adductor engagement using a cable machine.
🔹 Sumo Deadlift – A more expansive stance deadlift variation that places more emphasis on inner thighs.
🔹 Dumbbell Sumo Squat – A deep squat with a wide stance that strengthens adductors and glutes.
🔹 Seated Leg Press (Wide Stance) – Position feet wider than shoulder-width apart to emphasize the adductors.
3. Dynamic and Stability Exercises
🔹 Copenhagen Plank – One of the best exercises for inner thighs, requiring you to support your weight on one leg while in a side plank.
🔹 Lateral Bound – Jump side to side, focusing on power and adductor activation.
🚫 Ignoring Progressive Overload – Increase resistance gradually to keep making progress.
Final Thoughts
Adductor exercises are essential for leg strength, mobility, and injury prevention. You can build muscular and functional inner thighs by incorporating a mix of Bodyweight, resistance-based, and dynamic movements. Whether you’re an athlete or a fitness enthusiast, these exercises will enhance hip stability, balance, and overall performance.
Looking for the best chicken wings recipe that’s easy to make, incredibly flavorful, and perfect for any occasion? Chicken wings are the ultimate crowd-pleaser whether you’re hosting a game night, planning a family dinner, or meal-prepping high-protein lunches.
In this post, you’ll discover a foolproof method for making crispy, juicy chicken wings using simple ingredients—no deep fryer required. We’ll also share tips for air-fried and oven-baked options, flavor variations, and serving ideas.
The Best Chicken Wings Recipe (Crispy + Juicy!)
Ingredients
2 lbs chicken wings (split at joints, tips removed)
Dry thoroughly for crispier skin. Moisture is the enemy of crunch.
Don’t overcrowd the tray or air fryer basket. Give wings room to crisp.
Want extra heat? Add cayenne or hot sauce.
No wire rack? Flip wings often to avoid sogginess.
Make ahead: Cook wings and reheat in the oven at 375°F for 10 minutes.
Freezer-Friendly Instructions
Want to make your chicken wings recipe ahead of time?
Cook wings fully.
Let them cool and freeze in airtight bags.
Reheat from frozen in the oven at 375°F for 20–25 minutes until crisp and hot.
Final Thoughts
This easy chicken wings recipe is your go-to solution for delicious, crispy wings without the fuss of deep frying. Whether baked or air-fried, they’re flavorful and can be customized to suit any taste—buffalo, garlic parmesan, BBQ, or sweet and spicy.
Make them part of your weekly meal prep, a highlight for your next party platter, or a satisfying dinner with a side salad and a hydrating smoothie.
Frequently Asked Questions (FAQs)
Can I use frozen wings?
Thaw completely and dry them well before seasoning and cooking.
Are baked or air-fried wings healthier?
Both use little to no oil, making them much healthier than deep-fried versions.
How do I store leftover wings?
Store in an airtight container in the fridge for up to 3 days. Reheat in the oven or air fryer.
Fire hydrant exercises, also known as quadruped hip abductions, are a deceptively simple yet profoundly effective movement that enhance gluteal strength, improve hip mobility, and build lower body stability. As a no-equipment, bodyweight exercise, fire hydrants are accessible to all, from beginners to seasoned athletes. Their primary target—the gluteus maximus—is pivotal for postural support, athletic functionality, and injury prevention.
How To Do Fire Hydrant Exercises
The fire hydrant exercise is grounded in biomechanical simplicity but demands precision for optimal effect.
Step-By-Step Guide
1. Starting Position:
Position yourself on all fours (quadruped position).
Align hands directly beneath shoulders and knees beneath hips.
Maintain a neutral spine. Engage the core by slightly tucking the pelvis.
Eyes should face the floor to keep the cervical spine in alignment.
2. Lifting the Leg:
Bend one knee at 90 degrees.
Abduct (lift) the leg outward to the side to approximately a 45-degree angle.
Keep hips square; do not tilt or rotate the pelvis.
3. Returning to Start:
Lower the leg back with control.
Avoid sudden drops—this is where the muscle engagement is refined.
Recommended Reps and Sets:
3 sets of 15 repetitions per leg are ideal for neuromuscular activation and strength development.
Key Form Tips
Engage the core: Prevents lumbar hyperextension and isolates the hip movement.
Do not rotate the torso: Rotation dilutes glute activation.
Foot orientation: Keep your foot slightly pointed down for correct glute engagement.
Benefits Of Fire Hydrant Exercises
Fire hydrant exercises deliver a multitude of performance and therapeutic advantages:
1. Glute Activation and Strength
The fire hydrant isolates the gluteus maximus, enhancing functional strength and muscular hypertrophy. Regular practice supports posture, athleticism, and aesthetic toning.
2. Improved Hip Mobility
The movement targets the hip abductors, including the gluteus medius and minimus, and amplifies lateral hip mobility. This is crucial for squatting, sprinting, and stair climbing.
3. Injury Prevention
Weak glutes are a common source of kinetic chain dysfunction. Strengthening this region:
Reduces knee valgus risk
Stabilizes pelvic alignment
Minimizes lumbar strain
4. Core Stability Enhancement
The static core engagement necessary during each rep enhances spinal integrity and builds deep abdominal strength, preventing back pain and promoting better balance.
Fire Hydrant Variations For Increased Challenge
To avoid muscular adaptation and plateaus, consider advancing your routine with these progressive fire hydrant modifications:
1. Fire Hydrant With Resistance Band
Loop a resistance band just above your knees.
Maintain constant tension during each rep.
This increases the mechanical load on the abductors and glutes.
Activates gluteus medius and reinforces pelvic stability.
3. Side Leg Raise
Stand tall, then lift one leg laterally.
Keep the motion slow and controlled.
Enhances abductor strength and balance training.
Final Thoughts
The fire hydrant exercise remains one of the most potent, equipment-free strategies for building a stable, strong lower body. It transcends traditional gym routines by enhancing glute activation, hip mobility, and core stabilization in a single movement. Its adaptability—from resistance bands to advanced pulses—ensures continued progression and muscular development.
Staying active is important for preserving good health, improving cardiovascular endurance, building muscle strength, and enhancing flexibility. Whether you prefer bodyweight exercises, weightlifting, or outdoor activities, incorporating a variety of movements into your routine ensures balanced fitness.
Below, we explore 20 Different Types of Exercises categorized into cardiovascular endurance, strength training, and flexibility workouts. Each exercise targets specific muscle groups & contributes to overall fitness.
20 Different Types of Exercises
Cardiovascular Endurance Workouts
Cardio exercises improve heart health, stamina, and lung capacity while burning calories. These workouts are great for weight loss and boosting endurance.
1. Jumping Rope
A classic and effective aerobic exercise, jumping rope strengthens the heart, improves coordination, and enhances agility. This high-intensity workout also aids in weight loss and increases bone density.
2. Cycling
One of the best low-impact cardiovascular exercises, cycling strengthens the legs, improves joint mobility, and enhances endurance. Whether outdoors or on a stationary bike, it’s an excellent calorie-burning workout.
3. Brisk Walking
Unlike casual strolling, brisk walking (around 3-4.5 mph) raises the heart rate, burns fat, and strengthens the lower body. It’s a tremendous beginner-friendly alternative to running.
4. Stair Climbing
Taking the stairs makes it easy to engage multiple muscle groups while improving cardiovascular health. It enhances leg strength, glute activation, and endurance while reducing the risk of heart disease.
5. Aerobics
High-energy aerobics workouts—like Zumba or step aerobics—improve cardiovascular fitness, flexibility, and balance while making exercise fun and engaging.
6. Dancing
Whether salsa, hip-hop, or ballet, dancing improves coordination, burns calories, and enhances flexibility. It’s also a stress-relieving and enjoyable way to stay active.
7. Swimming
Swimming is a full-body, low-impact cardio exercise that increases lung capacity, builds endurance, and strengthens muscles. It’s ideal for individuals with joint pain or arthritis.
8. Mountain Climbers
This high-intensity bodyweight exercise mimics the movement of climbing and is excellent for cardio conditioning, core strength, and fat burning.
9. Burpees
A staple in circuit training, burpees combine strength and endurance by incorporating squats, push-ups, and jumps into one explosive movement.
10. Rowing
Using a rowing machine or engaging in water rowing provides a full-body workout, building endurance while strengthening the core, arms, and legs.
Strength Training Exercises
Building muscle is essential for boosting metabolism, enhancing bone density, and preventing injuries. Strength exercises can be done using bodyweight movements or lifting weights.
11. Chair Squat
Chair squats are a beginner-friendly squat variation that targets the glutes, hamstrings, and quadriceps while improving balance and mobility.
12. Push-ups
Push-ups are among the best upper-body exercises, working the chest, shoulders, triceps, and core. Beginners can modify with knee push-ups.
13. Bridge Exercise
The bridge exercise strengthens your glutes, hamstrings, and lower back. It also improves posture and core stability.
14. Jumping Lunges
Adding a jump to traditional lunges increases intensity, improving lower-body power, balance, and agility.
15. Squat Jumps
This explosive plyometric exercise builds lower-body strength, enhances speed, and boosts cardiovascular endurance.
16. Lifting Weights
Weightlifting helps build muscle mass, increases metabolism, and strengthens bones. Beginners can start with dumbbells or resistance bands.
17. Bird Dog Exercise
This core and stability exercise enhances coordination, strengthens the lower back, and improves posture.
18. Dead Bug Exercise
A popular core-strengthening movement, the dead bug exercise improves stability and strengthens the abdominal muscles and lower back.
Improving flexibility prevents injuries and enhances overall movement. Balance exercises also help with coordination and stability.
20. Yoga
Yoga combines breath control, strength, and stretching to enhance flexibility and reduce stress. Poses like the plank to downward dog improve core strength and mobility.
How to Incorporate These Exercises into Your Routine
For best results, combine different types of exercises throughout the week:
Cardio workouts (e.g., cycling, swimming, jumping rope) 3-5 times per week
Strength training (e.g., push-ups, squats, lifting weights) 2-3 times per week
Flexibility & balance exercises (e.g., yoga, Pilates) at least 2 times per week
Final Thoughts
Regular exercise improves physical and mental well-being, reduces the risk of chronic diseases, & enhances overall fitness. Whether you prefer circuit training, weightlifting, or outdoor activities, the key is staying consistent and choosing exercises that you enjoy.
 2. Avocado and Egg Breakfast Bowl (S)
 Instructions:
 Nutritional Benefits of Eating Salmon Skin
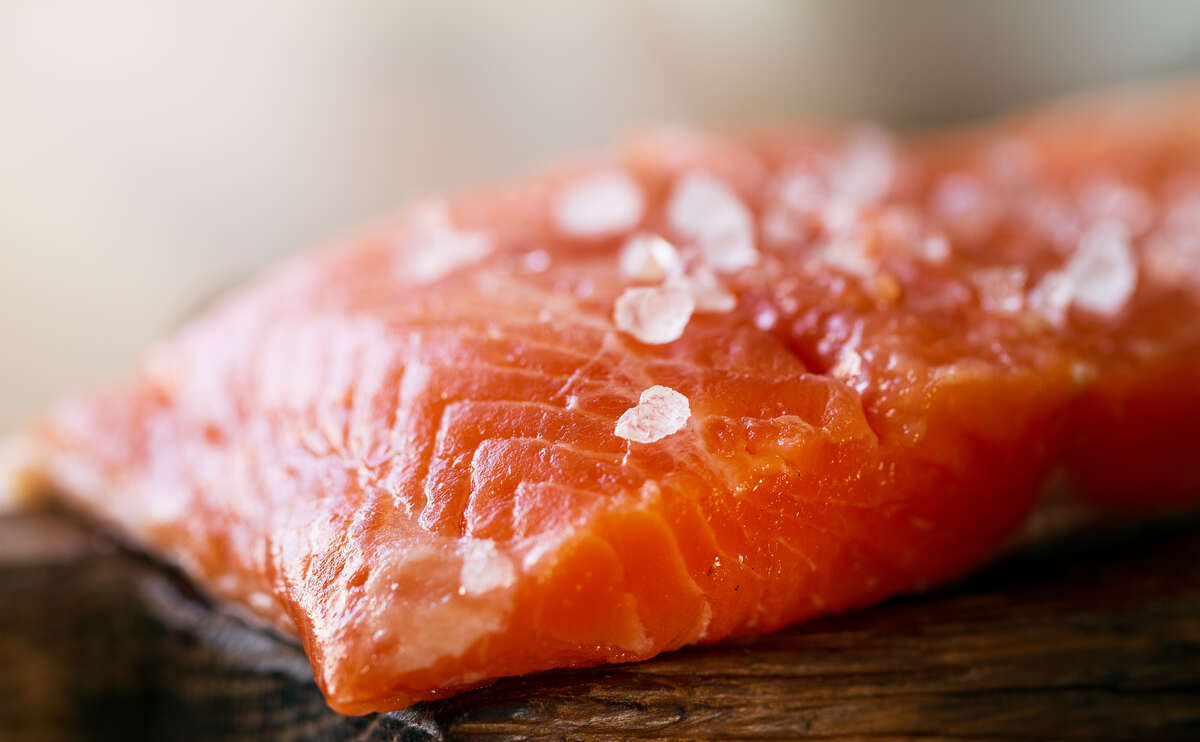 How to Cook Salmon Skin for Maximum Flavor and Texture
 Vegas Bomb Recipe: Classic Version
 Final Thoughts:
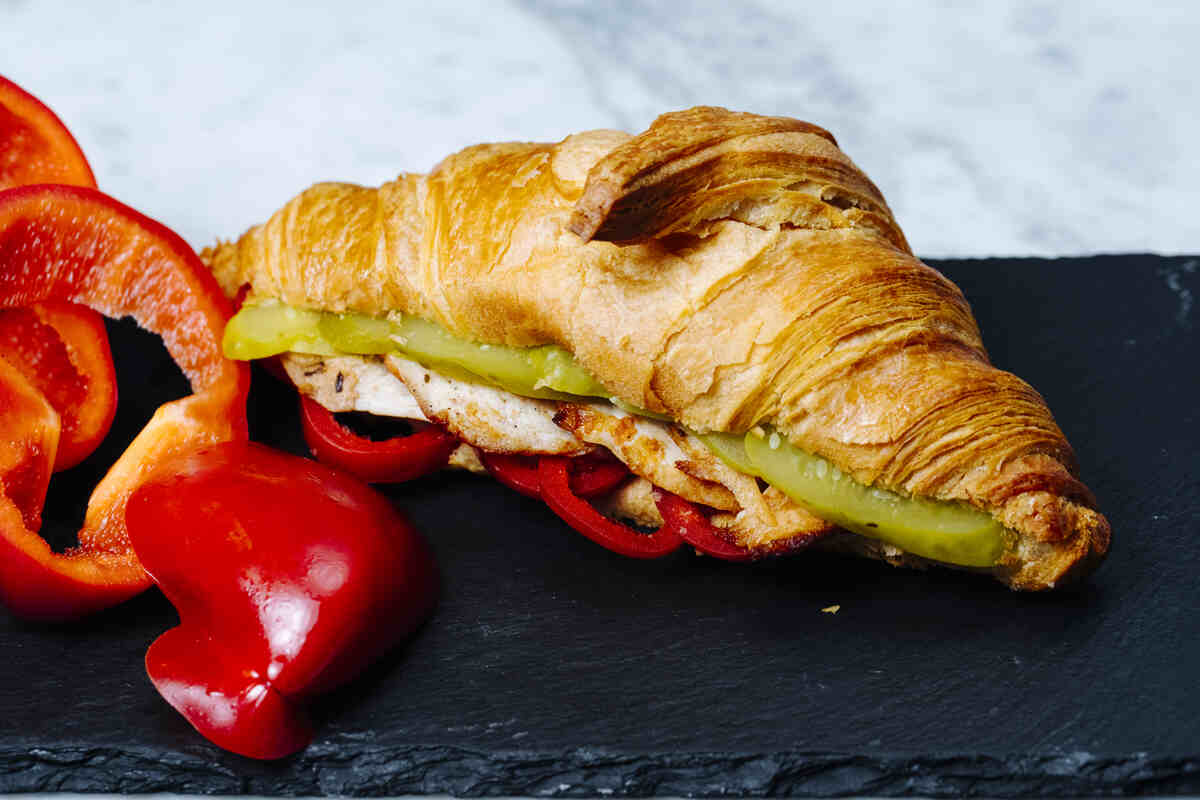 Make-Ahead Breakfasts That Power Your Morning
 1. Green Detox Smoothie
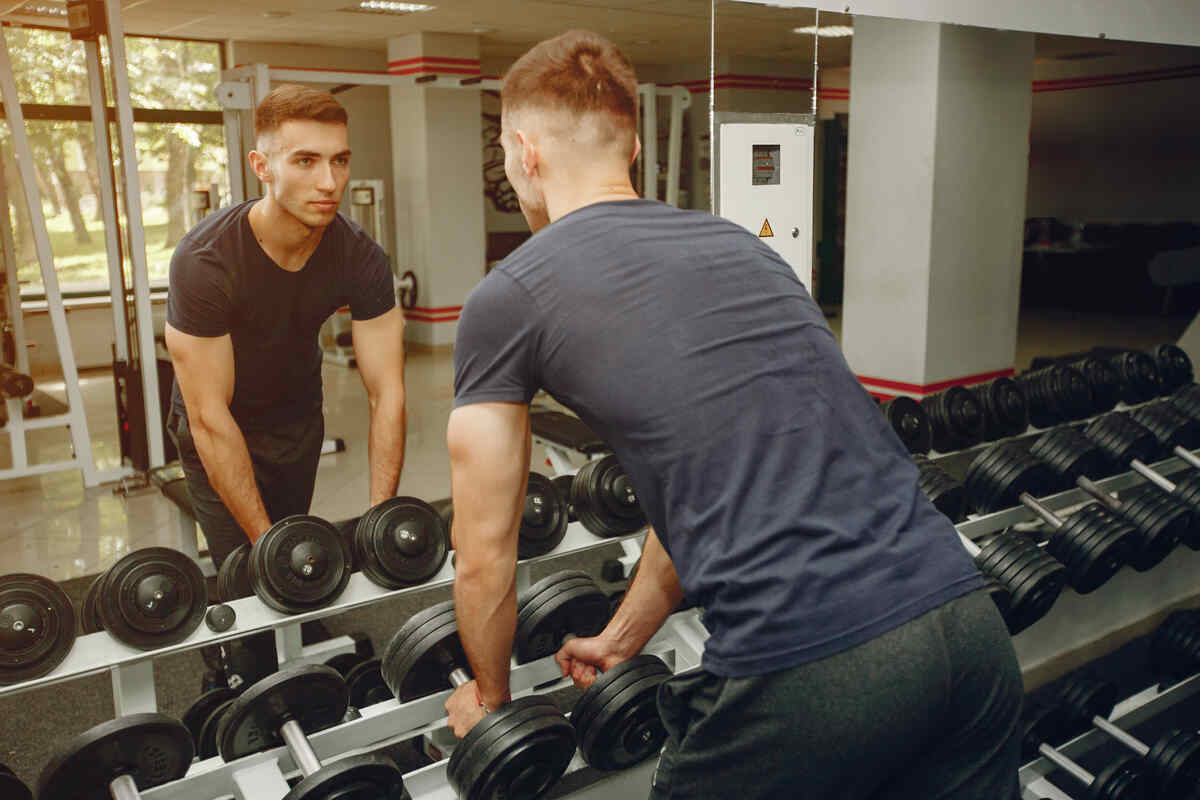 Top Dumbbell Chest Exercises
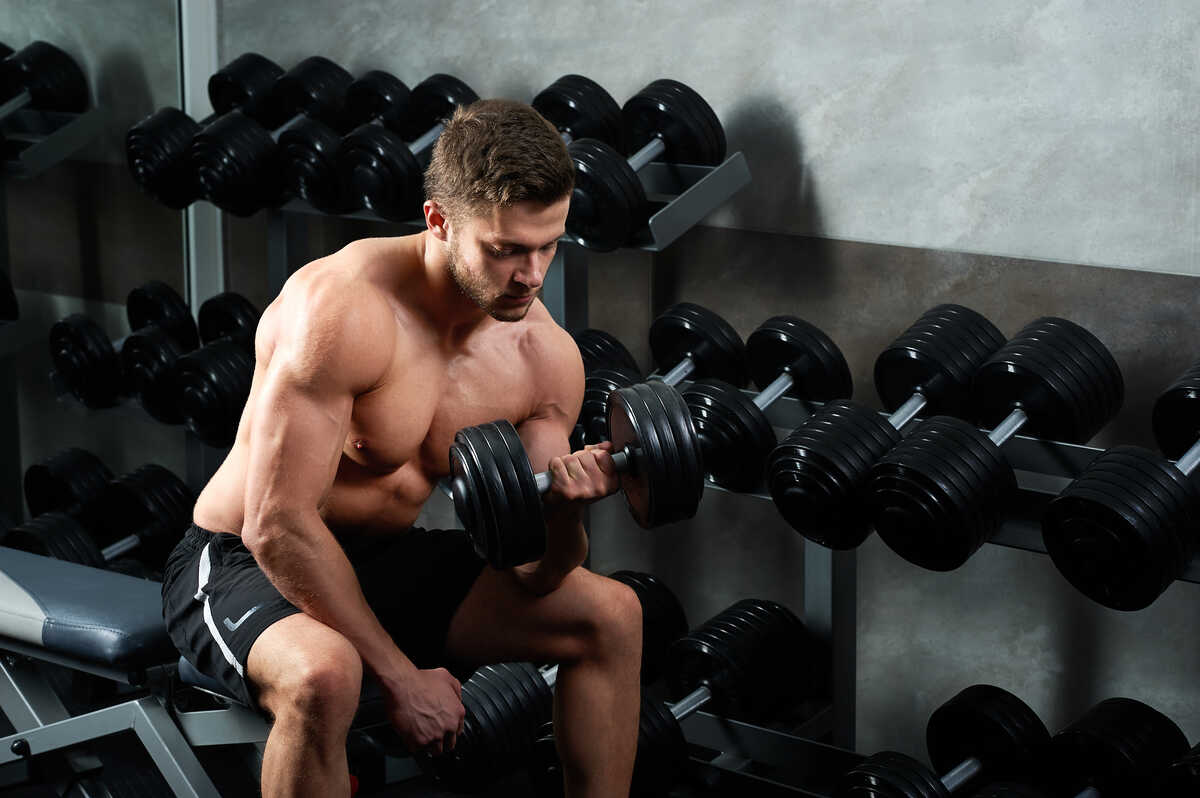 How to Structure Your Dumbbell Chest Exercises
 Best Adductor Exercises for Strength and Mobility
 Instructions
 Freezer-Friendly Instructions
 Step-By-Step Guide
 1. Bent Knee Hip Extensions
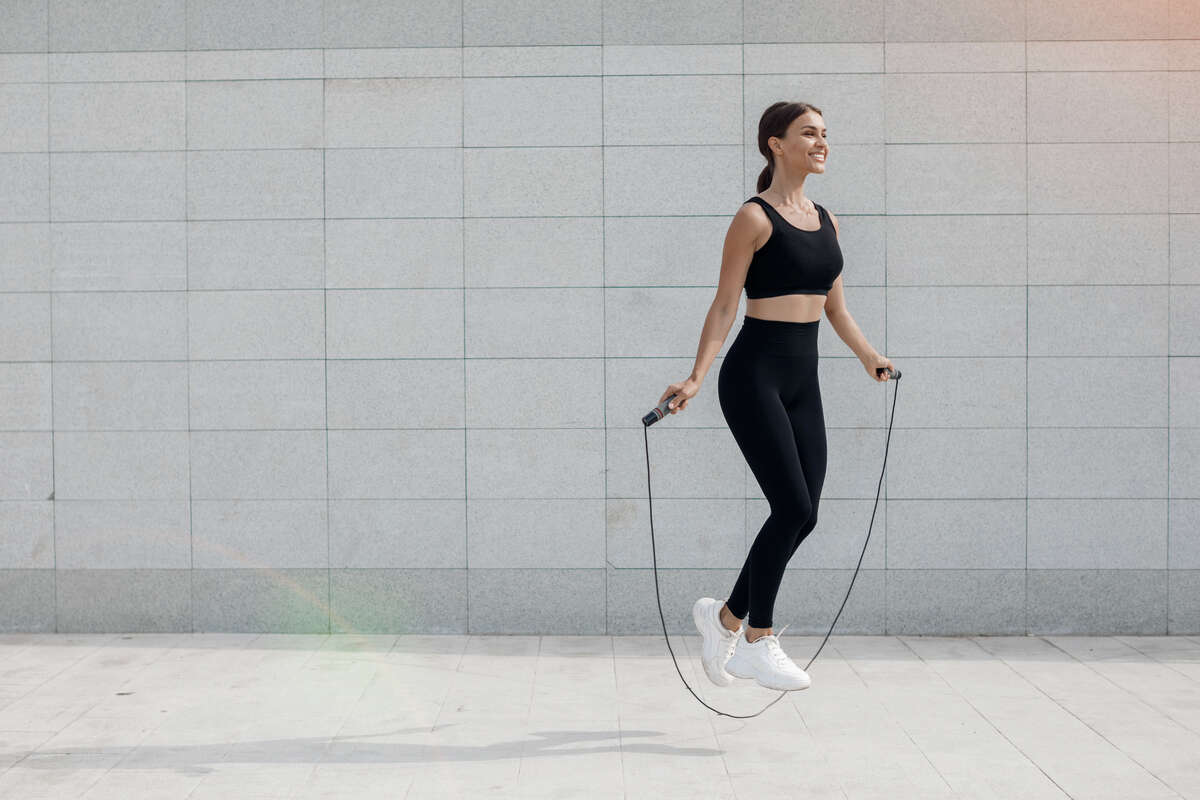 2. Cycling
 3. Brisk Walking
 4. Stair Climbing
 5. Aerobics
 6. Dancing
 7. Swimming
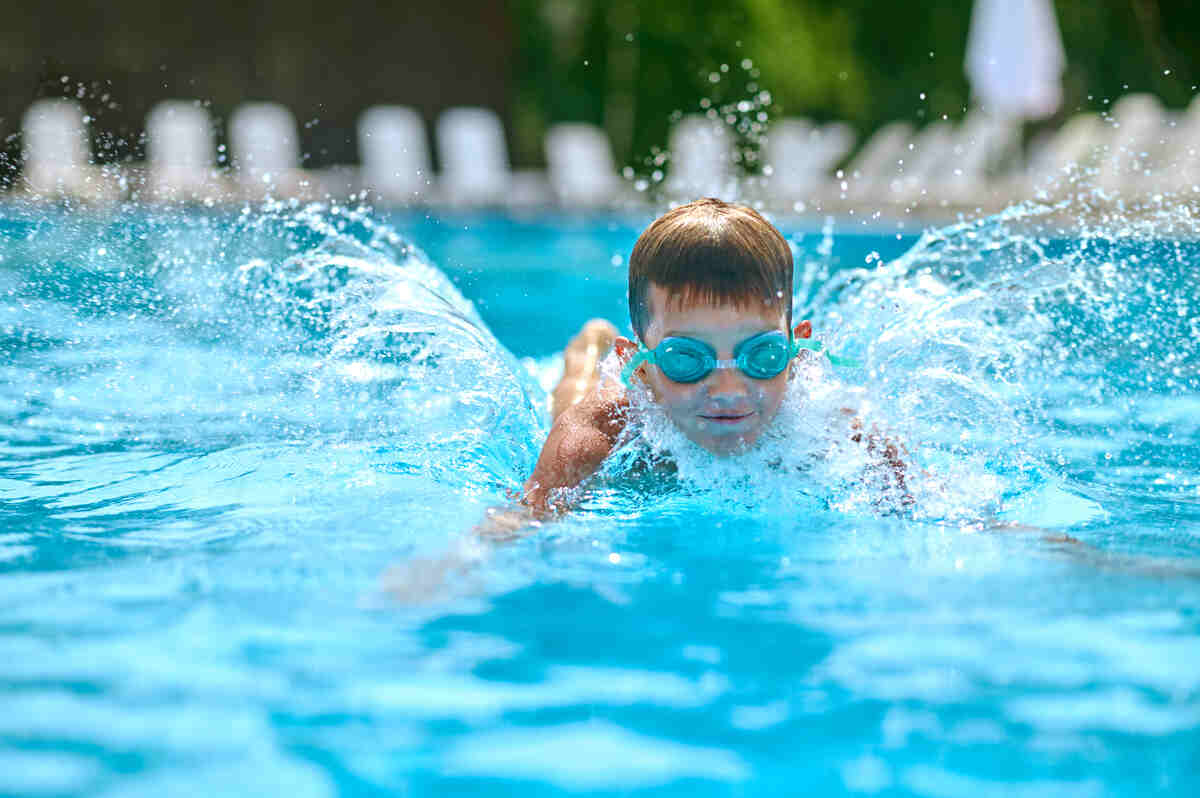 8. Mountain Climbers
 9. Burpees
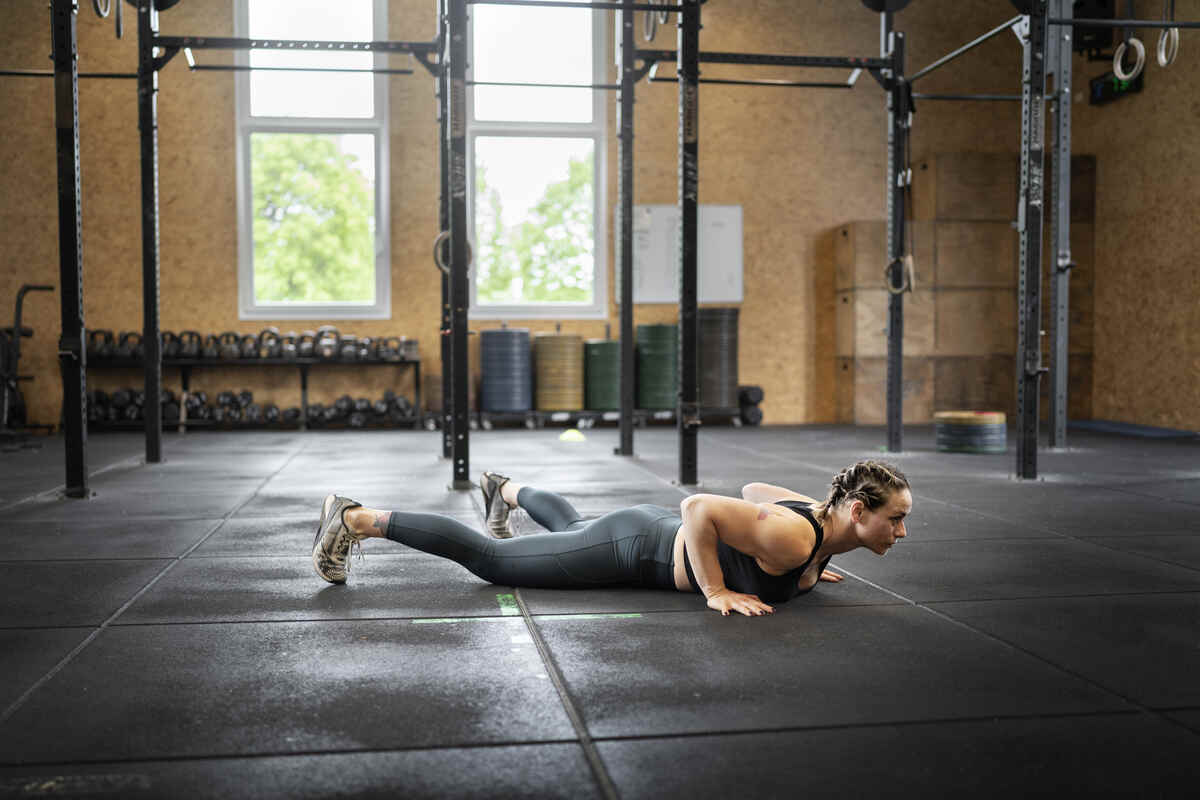 10. Rowing
 Strength Training Exercises
 12. Push-ups
 13. Bridge Exercise
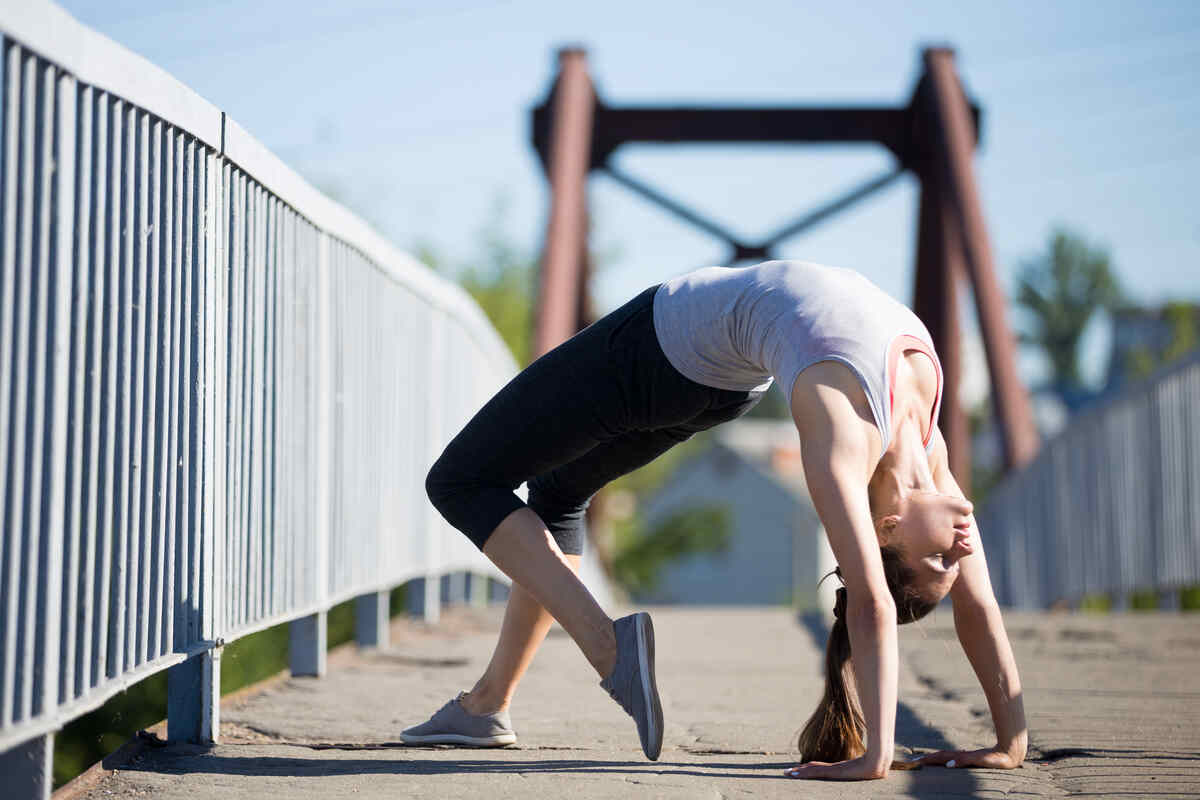 14. Jumping Lunges
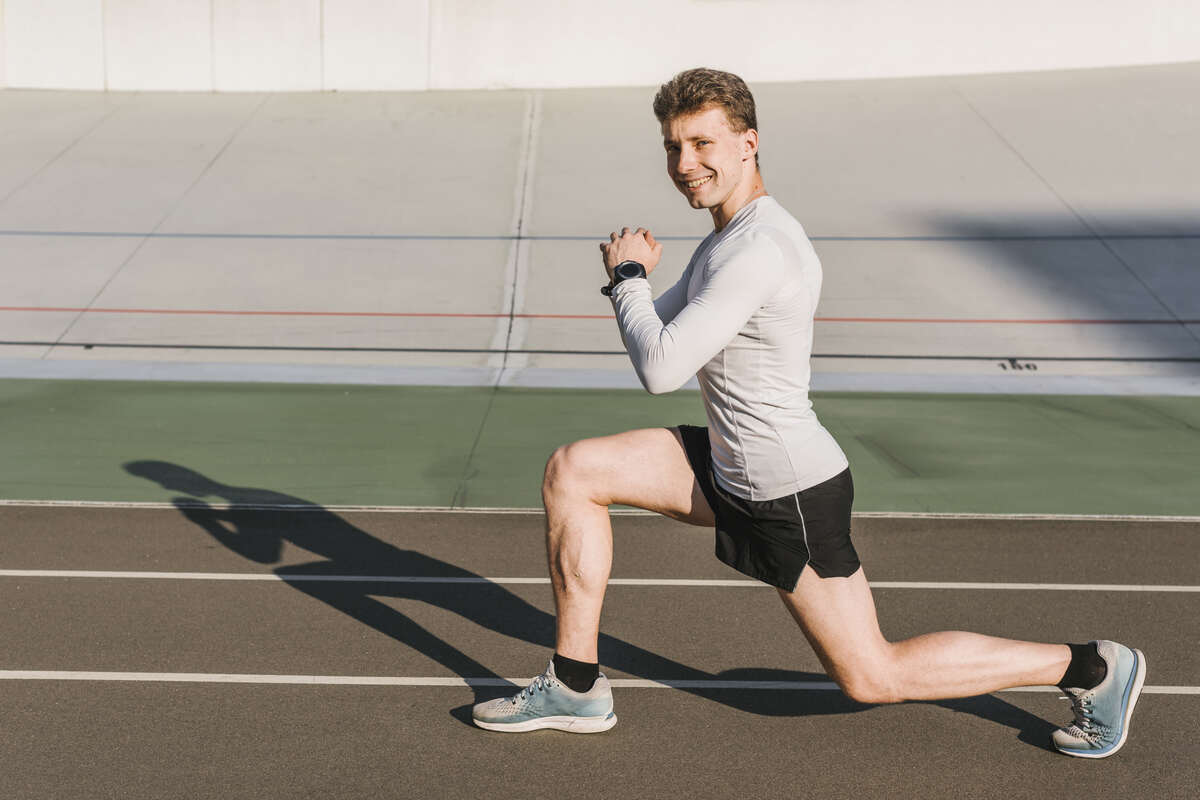 15. Squat Jumps
 16. Lifting Weights
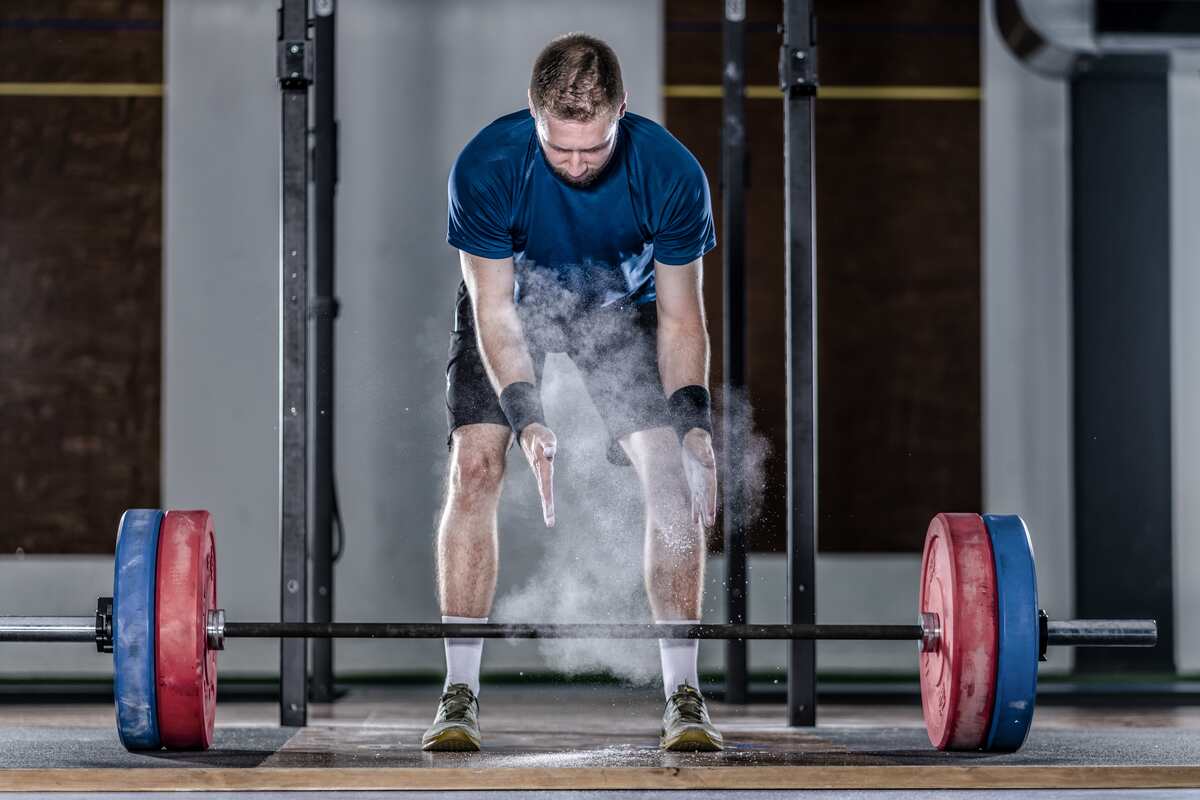 17. Bird Dog Exercise
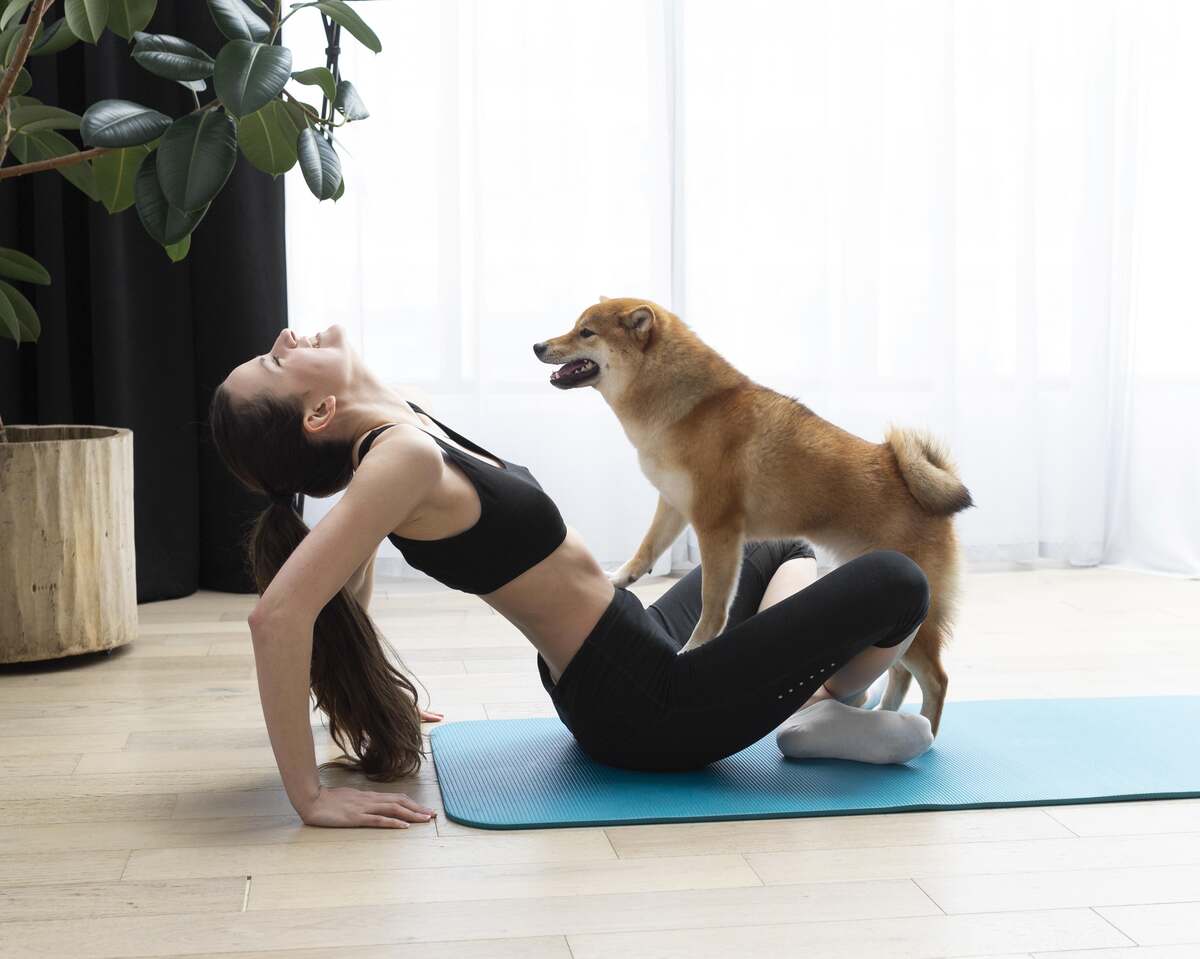 18. Dead Bug Exercise
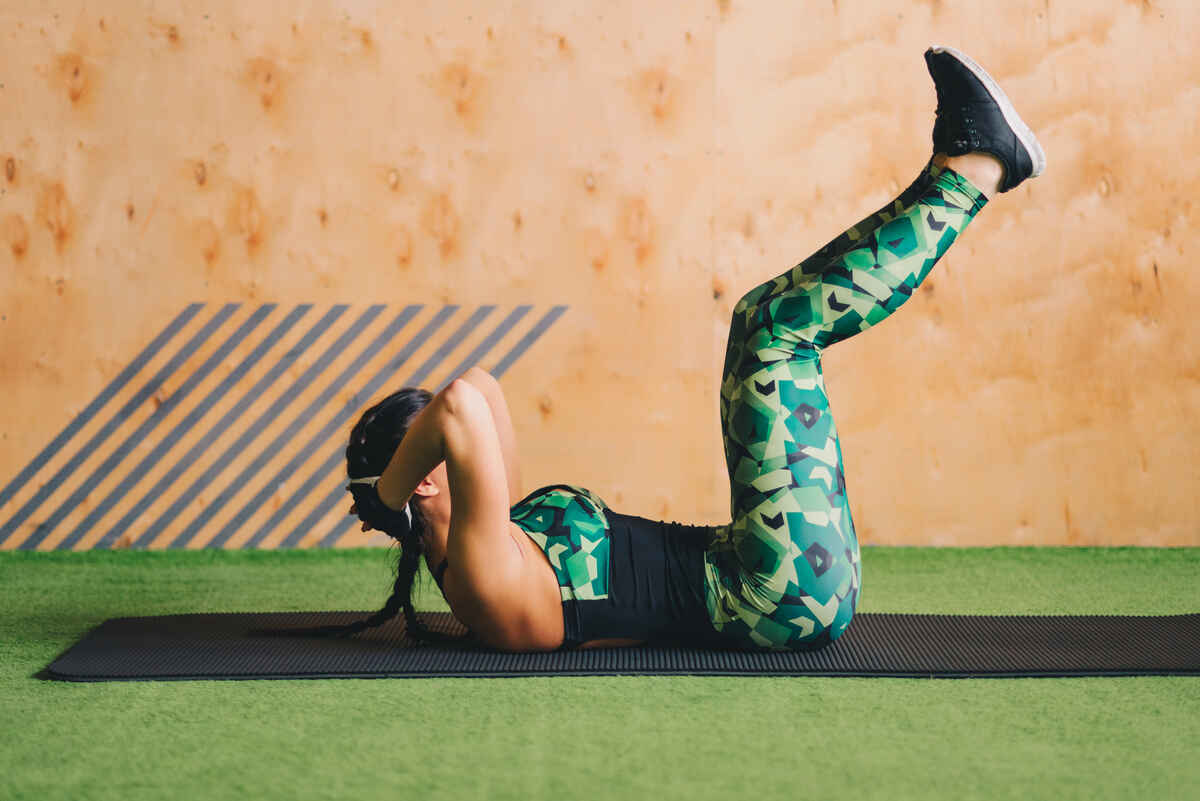 19. The Contralateral Limb Raises
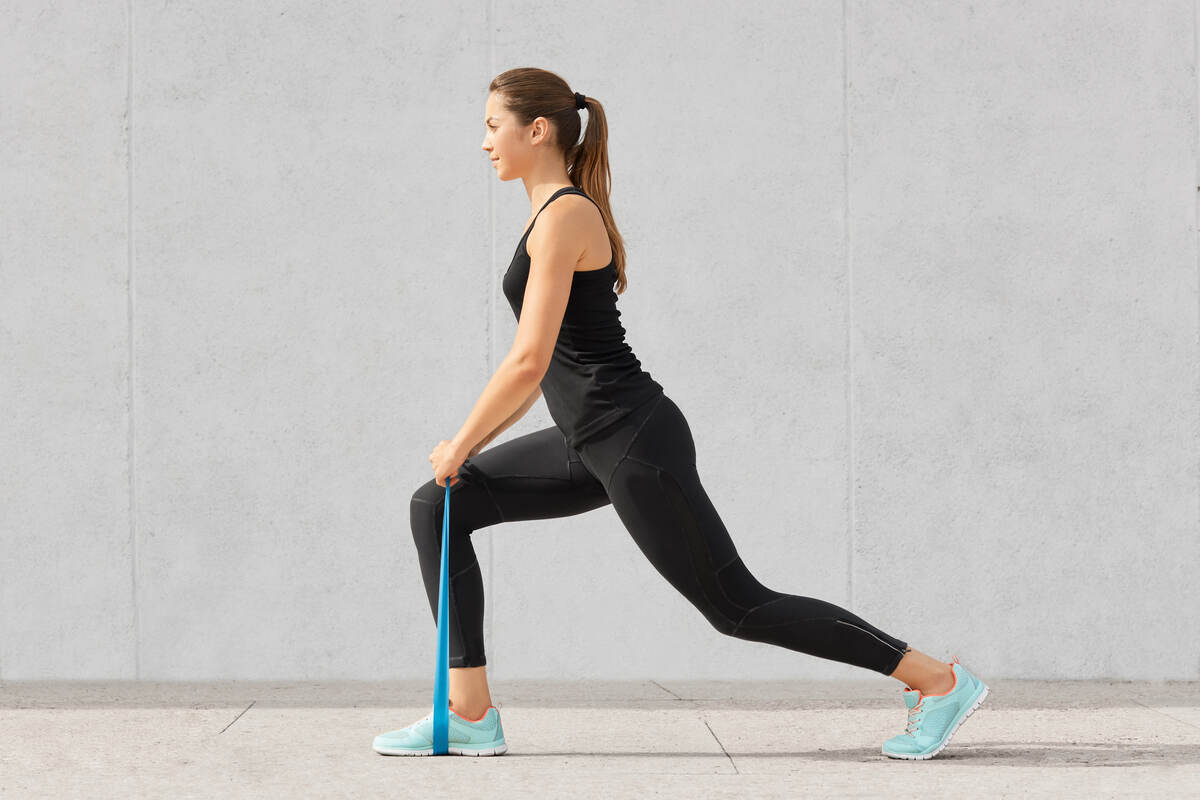 Flexibility and Balance Workouts
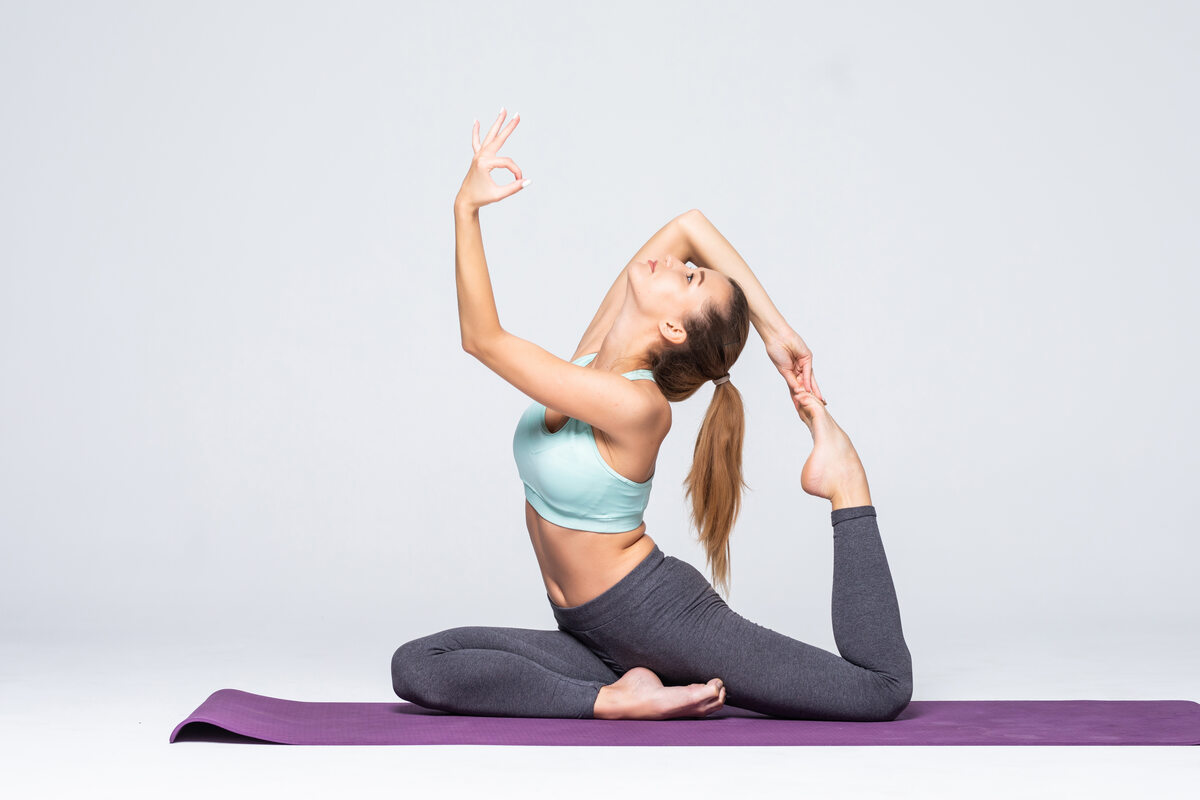 How to Incorporate These Exercises into Your Routine