Few dishes in Indian cuisine can match the sheer joy of digging into a hot plate of chole bhature. This classic Punjabi comfort food brings together spicy chickpea curry (chole) and soft, fluffy fried bread (bhature). Whether you enjoy it for breakfast, brunch, or a weekend indulgence, Chole Bhature Recipe is a dish that instantly makes any day brighter. In fact, many restaurants across India report that it is one of their most-ordered items, proving its timeless popularity.
What Makes Chole Bhature So Special?
Chole bhature is more than just food; it’s an experience. The chole is packed with aromatic spices, slow-cooked chickpeas, and a tangy tomato-onion gravy that balances heat and flavor. Bhature, on the other hand, are deep-fried breads made with flour and yogurt, puffing up into golden clouds of deliciousness. Together, they create a hearty meal that’s both filling and deeply satisfying.
For many families, this dish is often served on festive mornings, weekend brunches, or special occasions. Its popularity has also spread globally, with Indian restaurants in the US, UK, and Canada often listing it among their bestsellers. If you love Indian comfort food, you might also enjoy trying Dal Khichdi Recipe for a lighter yet nourishing option.
Ingredients for Chole Bhature
To make this dish at home, you need two sets of ingredients—one for the chole and one for the bhature.
Ingredients for Chole (Chickpea Curry)
2 cups white chickpeas (soaked overnight)
2 large onions (finely chopped)
3 tomatoes (pureed)
2 green chilies (slit)
1 tablespoon ginger-garlic paste
2 teaspoons coriander powder
1 teaspoon cumin powder
1 teaspoon garam masala
1 teaspoon red chili powder
1 teaspoon turmeric powder
2 teaspoons chole masala (optional but recommended)
3 tablespoons oil
Salt to taste
Fresh coriander leaves for garnish
Ingredients for Bhature (Fried Bread)
2 cups all-purpose flour (maida)
2 tablespoons semolina (rava/sooji)
3 tablespoons yogurt (curd)
1 teaspoon sugar
½ teaspoon baking powder
1 pinch baking soda
2 tablespoons oil
Water as required
Oil for deep frying
Step-by-Step Chole Bhature Recipe
Cooking this dish might look elaborate, but breaking it down into simple steps makes it easy to follow.
Step 1: Prepare the Chickpeas
Soak chickpeas overnight in enough water. This helps them cook faster and makes them easier to digest.
Drain and rinse before pressure cooking with salt and water until soft but not mushy.
Step 2: Cook the Chole
Heat oil in a large pan, add onions, and sauté until golden brown.
Add ginger-garlic paste and green chilies, cooking until the raw smell disappears.
Mix in the tomato puree and cook until the oil separates from the masala.
Add coriander powder, cumin powder, turmeric, chili powder, and chole masala. Stir well.
Add boiled chickpeas and simmer for 15–20 minutes. If needed, add a little water for the desired consistency.
Finish with garam masala and garnish with fresh coriander.
Step 3: Make the Bhature Dough
In a large bowl, combine flour, semolina, sugar, baking powder, baking soda, and salt.
Add yogurt and oil, mixing into a soft dough. Add water as needed.
Cover and let it rest for 2–3 hours. This resting time helps the dough rise slightly.
Step 4: Fry the Bhature
Divide the dough into equal portions and roll out round discs.
Heat oil in a deep pan and fry each disc until golden and puffed.
Place on a paper towel to remove excess oil.
Tips to Perfect Chole Bhature
Always soak chickpeas overnight for a creamy texture.
Use ripe red tomatoes for the curry to balance the spices.
Resting the dough is crucial for soft, fluffy bhature.
Serve immediately after frying for the best taste.
While chole bhature is considered indulgent, it also offers some nutritional benefits. Chickpeas are high in protein, fiber, and essential minerals like iron and magnesium. The spices used in the curry, such as turmeric and cumin, provide anti-inflammatory properties. However, since bhature are deep-fried, moderation is key. Pairing the dish with a side of salad or fresh pickle can make the meal more balanced. If you’re looking for high-protein yet lighter options, try out our High Protein Crock Pot Recipes.
Serving Ideas and Variations
Traditionally, chole bhature is served with sliced onions, pickled carrots, and a wedge of lemon. Many households also enjoy it with a glass of chilled lassi or buttermilk to balance the richness.
If you want to experiment, you can try:
Adding boiled potatoes to the chole for a thicker texture.
Using whole wheat flour instead of refined flour for healthier bhature.
Serving with rice for a lighter weekday meal option.
You can also explore fusion dishes like Can Chicken Recipes for a global twist on traditional meals, or even natural wellness alternatives such as Mounjaro-Inspired Recipes to support a healthy lifestyle.
Why This Dish Stands Out in Indian Cuisine
Chole bhature is one of those dishes that cut across regions and generations. A survey by Zomato in 2022 revealed that it ranked among the top 10 most ordered breakfast dishes in North India. Beyond its flavor, it represents the comfort of home-cooked meals and the vibrancy of Indian street food culture. Every bite carries warmth, spice, and the essence of togetherness. For more recipes and wellness ideas, visit SavenShine, where food meets health and tradition.
Frequently Asked Questions
Can I make bhature without yeast?
Yes, the traditional recipe uses yogurt and baking soda instead of yeast. Resting the dough ensures the same puffiness.
How long can I store cooked chole?
You can refrigerate chole for up to three days in an airtight container. Reheat with a bit of water before serving.
Is chole bhature healthy?
The chickpeas in chole are highly nutritious, but bhature are deep-fried, making the dish calorie-dense. Enjoy it occasionally as part of a balanced diet.
Can I make bhature without maida?
Yes, you can substitute all-purpose flour with whole wheat flour, though the texture will be slightly denser.
What is the difference between chole bhature and chana puri?
Chole bhature uses larger, puffed bread made from leavened dough, while chana puri is paired with smaller, unleavened puris.
Food is far more than fuel—it is information for our bodies, a determinant of health, energy, clarity, and disease resistance. In recent years, researchers and nutritionists have emphasized how daily dietary choices influence not only physical health but also mental clarity, gut function, and long-term wellness. Among the most underrated ingredients in American kitchens today is canned chicken—a versatile, protein-rich pantry staple that supports well-rounded, health-focused meals. In this blog, we explore the role of canchicken recipes in shaping a healthy lifestyle and why these easy meals can be a brilliant addition to any wellness-focused diet.
The Science of Food and Health: More Than Calories
Food quality impacts every system in the body. According to the Harvard T.H. Chan School of Public Health, nutrient-dense diets rich in lean proteins, healthy fats, whole grains, and vegetables are linked to lower risks of cardiovascular disease, diabetes, obesity, and cognitive decline. On the other hand, highly processed meals filled with refined sugars, hydrogenated oils, and preservatives can disrupt digestion, raise inflammation, and negatively affect brain health.
Canned chicken, when used in balanced recipes, can be part of a nutrient-conscious eating plan. It’s low in fat, high in protein, and offers essential nutrients like niacin, selenium, and vitamin B6—nutrients critical for brain function, metabolism, and immune defense.
Why Canned Chicken Deserves a Place in Your Kitchen
You might associate canned chicken with convenience, but it’s more than just a backup dinner option. Here’s why chicken recipes are valuable for people prioritizing food quality:
Lean Protein Power: A single serving of canned chicken delivers up to 20 grams of protein, helping support muscle repair, energy levels, and satiety.
Long Shelf Life: Unlike fresh meat, canned chicken stays safe for months, reducing food waste and encouraging more innovative meal planning.
Affordable & Accessible: In the U.S., canned chicken is often less expensive than fresh cuts, making healthy eating more attainable for families.
Minimal Prep Required: For busy professionals, students, or parents, chicken recipes offer a no-fuss way to create healthy meals without sacrificing nutrition.
Food and Mental Clarity: What You Eat Affects How You Think
Emerging research in nutritional psychiatry shows a clear link between what we eat and our mental well-being. Diets high in omega-3s, B vitamins, and lean protein (like that found in Can chicken recipes) have been linked to improved mood, better focus, and reduced anxiety. Conversely, diets high in refined sugars and saturated fats may increase the risk of depression and brain fog.
For Americans juggling demanding schedules, quick meals that support mental clarity are vital. Can Chicken recipes—such as chicken and quinoa bowls, Mediterranean wraps, or avocado chicken salads—are rich in protein and often paired with fiber and healthy fats, all of which nourish the brain.
Good digestion goes beyond avoiding discomfort—it determines how well your body absorbs and utilizes nutrients. Meals that combine lean proteins like canned chicken with fibrous vegetables and probiotics (like yogurt or fermented foods) improve gut function and keep your digestive tract balanced.
Here’s a healthy and gut-friendly example using can chicken recipes:
How it Helps: Protein supports tissue repair, yogurt boosts gut flora, and the water-rich lettuce helps hydration and fiber intake.
When eaten regularly as part of a high-fiber, low-processed diet, recipes like this reduce the likelihood of bloating, indigestion, and constipation—common issues in the modern Western diet.
Can Chicken Recipes and Chronic Disease Prevention
Long-term disease prevention begins with consistent dietary habits. According to the CDC, nearly 60% of adults in the United States live with at least one chronic disease, many of which are linked to lifestyle and food choices. Choosing lean protein sources like chicken (even canned) over red or processed meats reduces the risk of cardiovascular disease and certain cancers.
When used in meals with legumes, whole grains, and leafy greens, chicken recipes can create a synergistic effect, balancing blood sugar levels, reducing inflammation, and promoting healthy cholesterol levels. This makes them an ideal fit for diabetic-friendly or heart-healthy meal plans.
Practical & Delicious Can Chicken Recipes to Try
Here are three chicken recipes designed for U.S. households that prioritize health, flavor, and simplicity.
Suitable For: A light yet satisfying lunch loaded with heart-healthy fats, vitamins A and K, and digestive support.
Meal Planning Made Easy with Chicken
For Americans focused on clean eating, work-life balance, and reducing their reliance on ultra-processed foods, canned chicken can be a lifesaver. The key is pairing it with real, whole foods: vegetables, legumes, whole grains, and healthy oils.
Whether you’re looking to improve your mental performance, enhance digestion, lose weight, or reduce the risk of disease, building meals around chicken recipes offers a foundation that’s both practical and aligned with evidence-based nutrition.
Final Thoughts
The road to better health doesn’t always require expensive superfoods or restrictive diets. Sometimes, it starts with a well-stocked pantry and the willingness to try something new. Processed foods dominate grocery aisles, small, intentional choices like preparing can chicken recipes can set the tone for a healthier life, physically and mentally.
Frequently Asked Questions (FAQs)
1. Can chicken recipes be healthy?
Yes, can chicken recipes can be healthy when paired with nutrient-dense ingredients like vegetables, whole grains, and healthy fats. They provide lean protein, essential vitamins, and minerals.
2. Does canned chicken have the same nutrition as fresh chicken?
While fresh chicken may have slightly more natural moisture, canned chicken retains most of its protein and essential nutrients. Look for low-sodium and preservative-free options for maximum health benefits.
3. How can I make canned chicken taste fresh?
Drain and rinse the canned chicken, then mix it with fresh herbs, lemon juice, or spices. Pair it with vegetables or whole grains for balanced meals.
You’re not alone if your busy schedule leaves little time for cooking. Whether juggling work, family, or fitness goals, meal prepping with easy, nourishing ingredients can make all the difference. And when it comes to simplifying your routine, high protein crock pot recipes are a game-changer.
These recipes are perfect for boosting energy, supporting gut health, and maintaining a healthy weight. In this guide, you’ll discover delicious crock pot meals, make-ahead breakfasts, and hydrating smoothies designed for busy lives.
Why High-Protein Crock Pot Recipes Are Ideal for Meal Prep
Meal prepping is about working smarter, not harder—and that’s where the crock pot shines. With just a few ingredients and a slow cooker, you can create flavorful meals that cook while you work, sleep, or run errands.
Why go with high-protein crockpot recipes?
They promote satiety and help curb cravings.
Protein supports muscle repair, metabolism, and energy levels.
Crock pots allow for hands-free, batch-style cooking.
They’re perfect for clean eating on a budget.
By preparing meals in bulk, you’ll save time, money, and decision fatigue.
Make-Ahead Breakfasts to Fuel Your Morning
1. Crock Pot Protein Oatmeal
This make-ahead oatmeal is creamy, satisfying, and packed with protein.
Combine oats, almond milk, and cinnamon in the crock pot. Cook on low for 6–8 hours. Stir in protein powder after cooking. Top with berries and yoghurt before serving.
Why It Works:
This perfect high-protein breakfast supports gut health and provides sustained energy through fibre-rich oats and probiotics from yoghurt.
High Protein Crock Pot Recipes for Lunch & Dinner
Whether you’re prepping lunches for the week or looking for an easy dinner, these high protein crock pot recipes are perfect.
2. Slow Cooker Salsa Chicken
Ingredients:
1.5 lbs boneless, skinless chicken breasts
1 cup low-sodium salsa
1 tsp cumin
Salt & pepper to taste
Instructions:
Place chicken, salsa, and seasonings in the crock pot. Cook on low for 6 hours. Shred and serve in lettuce wraps, rice bowls, or tacos.
Benefits:
Each serving delivers over 30g of protein with minimal prep and ingredients.
3. Crock Pot White Bean & Turkey Chilli
Ingredients:
1 lb lean ground turkey
1 can of white beans, rinsed
1 onion, chopped
1 can of diced tomatoes
2 tsp chilli powder
½ cup chicken broth
Instructions:
Brown the turkey and add all ingredients to the crock pot. Cook on low for 6–7 hours.
Why You’ll Love It:
Loaded with fibre and lean protein, this chilli supports digestion and keeps you feeling full.
4. Slow Cooker Beef & Broccoli
Ingredients:
1 lb flank steak, thinly sliced
2 cups broccoli florets
1/3 cup coconut aminos or low-sodium soy sauce
2 tbsp honey
2 garlic cloves, minced
Instructions:
Add everything (except broccoli) to the crock pot and cook on low for 6 hours. Add broccoli 30 minutes before serving.
Nutrition Tip:
This is one of those high protein crockpot recipes that’s both comforting and nourishing—ideal for weeknight dinners or post-workout recovery.
Time-Saving Tips for Busy Meal Preppers
Pre-chop vegetables and store them in airtight containers.
Use freezer-friendly bags to assemble crockpot meal kits ahead of time.
Store cooked meals in portion-sized glass containers for grab-and-go lunches.
Label each container with the meal name and date for easy rotation.
Hydrating Smoothies & Drinks to Pair With Your Meals
Meal prep isn’t just about food—hydration matters, too. These drinks complement your meals and support digestion.
1. Gut-Loving Green Smoothie
Ingredients:
1 cup spinach
½ frozen banana
½ avocado
1 scoop vanilla protein powder
1 tbsp chia seeds
1 cup almond milk
Tip:
Chia and avocado help digestion and satiety, while protein keeps energy levels high.
2. Cucumber Citrus Detox Water
Infuse filtered water with cucumber slices, lemon wedges, and fresh mint. This is a refreshing, zero-calorie way to stay hydrated throughout the day.
Final Thoughts
Meal prep can feel overwhelming, but it doesn’t have to be. With the help of high protein crock pot recipes, you can create delicious, balanced meals that nourish your body, save time, and support your goals. Whether you’re a busy professional, parent, or student, these recipes and hydration ideas offer everything you need for a healthier lifestyle.
Get started today—and let your slow cooker do the heavy lifting.
Frequently Asked Questions (FAQs)
Can I freeze high-protein crockpot recipes?
Yes. Most crock pot meals freeze beautifully. Cool completely before storing in freezer-safe containers.
How many meals can I prep at once?
Depending on the size of your crock pot, you can make 6–8 servings of most meals. For variety, prepare two different recipes in a week.
How much protein should each meal have?
Aim for 20–35 grams of protein per meal to support energy and satiety.
Dal Khichdi is the heart of Indian comfort food—a warm, humble bowl made from rice and lentils, lightly seasoned, and nourishing. Whether you’re recovering from a cold, needing a quick one-pot meal, or simply craving something light and soulful, this dish has your back.
In this blog, you’ll learn how to make a perfect Dal Khichdi Recipe, explore its variations, discover pro cooking tips, and get answers to the most common voice-search questions about it.
What Is Dal Khichdi?
Dal Khichdi is a traditional Indian dish made by cooking split yellow lentils (moong dal) with rice seasoned with turmeric, salt, and ghee. It’s mild, easy to digest, and deeply rooted in Indian kitchens for centuries.
This simple, sattvic (pure) meal is often prepared for babies, seniors, or anyone needing a wholesome, gut-friendly dish. But beyond its health benefits, dal khichdi is a comfort classic you’ll want on repeat.
Why Make Dal Khichdi?
One-pot and beginner-friendly
Packed with plant protein and fibre
Easy on the stomach
Ready in under 30 minutes
Customizable with vegetables and spices
Ingredients You’ll Need
For the base:
½ cup split yellow moong dal
½ cup rice (any short- or medium-grain variety)
4 cups water
¼ tsp turmeric powder
Salt to taste
For the tempering (tadka):
2 tbsp ghee
1 tsp cumin seeds
1 tsp grated ginger
1–2 green chillies (slit)
1 pinch asafoetida (hing)
1 bay leaf (optional)
Optional add-ins:
1 chopped onion
1 chopped tomato
Diced carrots, beans, or green peas
Chopped fresh coriander leaves for garnish
How to Make Dal Khichdi (Step-by-Step)
Step 1: Prep the Dal and Rice
Rinse moong dal and rice thoroughly until water runs clear.
Soak together for 15–20 minutes. Drain before cooking.
Step 2: Pressure Cook or Simmer
Add soaked dal and rice with 4 cups of water, turmeric, and salt in a pressure cooker or heavy pot.
Pressure cook for 3–4 whistles or simmer uncovered for 25–30 minutes until soft and mushy.
Step 3: Make the Tadka
Heat ghee in a small pan.
Add cumin seeds, bay leaf, asafoetida, ginger, and green chillies.
Sauté for 30 seconds.
(Optional) Add onion and cook until translucent.
(Optional) Add tomato and cook until soft.
Step 4: Mix & Serve
Pour the tempering over the cooked dal-rice mixture.
Stir well. Add more hot water if you prefer thinner consistency.
Garnish with fresh coriander & a spoonful of ghee before serving.
Pro Cooking Tips
Use moong dal for a lighter, Ayurvedic-friendly version.
Add seasonal vegetables for extra fibre and nutrients.
Use ghee generously—it enhances taste and aids digestion.
If serving to babies or seniors, mash the khichdi slightly.
What to Serve With Dal Khichdi
Serve hot with:
A bowl of curd or raita
Roasted papad
A side of pickle
A wedge of lemon
Popular Variations of Dal Khichdi
Variation
Ingredients
Flavor Profile
Masala Khichdi
Onion, tomato, spices
Bold and savory
Vegetable Khichdi
Carrots, beans, peas
Nutritious and filling
Palak Khichdi
Spinach puree
Iron-rich and earthy
Gujarati Khichdi
Ghee, ginger, cumin
Mild and sattvic
Nutrition (Per Serving)
Calories: 210 kcal
Protein: 9g
Carbohydrates: 32g
Fat: 6g
Fiber: 4g
Dal khichdi is low-fat, high-protein, and naturally gluten-free.
Final Thoughts
Dal khichdi is not just a dish—it’s a memory, a remedy, and a warm hug in a bowl. Whether you’re looking for a detox meal, an Ayurvedic option, or a nourishing dinner, this recipe delivers every time.
Make it your way—keep it classic, or dress it up with vegetables and spices. Either way, it’s a winner.
Try this dal khichdi recipe today and savour the soul of Indian home cooking.
Mango shakes are a refreshing and delicious way to enjoy the tropical sweetness of mangoes while getting a healthy dose of nutrients. Whether you’re sipping it post-workout or as a summer treat, understanding the Mango Shake Nutrition Facts can help you make better dietary choices.
Here’s a detailed nutritional breakdown based on a recipe using low-fat milk, mango juice, and one banana:
Nutrient
Amount per 3/4 Cup
Calories
106 kcal
Total Fat
2 g
Saturated Fat
1 g
Cholesterol
5 mg
Sodium
63 mg
Total Carbohydrates
20 g
Dietary Fiber
2 g
Sugar (natural & added)
~17–18 g
Protein
5 g
Potassium
361 mg
Note: The nutritional content can vary based on ingredients such as the type of milk (full-fat vs. almond), the use of sweeteners, and the portion size.
Health Benefits of Mango Shake
Mango shakes are more than just tasty—they offer several health benefits when consumed in moderation:
1. Rich in Vitamins & Antioxidants
Mangoes are packed with Vitamin C, Vitamin A, & beta-carotene, which support immunity and skin health.
2. Good Source of Energy
The natural sugars and carbohydrates in mangoes and bananas provide quick energy, ideal for post-workout recovery or a morning boost.
3. Promotes Digestive Health
Mangoes contain enzymes like amylase and dietary fibre, aiding digestion and gut function.
4. Potassium Boost
With 361 mg of potassium per serving, mango shakes support heart health and fluid balance.
Mango Shake: Is It Healthy?
It depends on your goals:
For weight gain: Add nuts, full-fat milk, or oats for a calorie-dense shake.
For people with diabetes: Opt for low-GI fruits and avoid added sugars.
Pro Tip: Healthier Mango Shake Recipe
Try this healthy version:
1/2 cup chopped ripe mango
1/2 frozen banana
3/4 cup unsweetened almond milk
A pinch of cinnamon
Ice cubes
Blend and enjoy—no added sugar, low in fat, and rich in flavour!
Final Thoughts
Mango shakes can be a nutritious part of your diet when made with mindful ingredients. Watch the portion size, skip unnecessary sweeteners, and enjoy natural goodness of mangoes in a cool, creamy blend.
Murgh Musallam, a celebrated gem of Mughlai cuisine, is a royal dish known for its complex flavours, opulent presentation, and deep cultural roots. This culinary masterpiece, meaning “whole chicken,” has graced the banquet tables of emperors and nobles. Today, it continues to captivate with its aromatic spices, nut-laced richness, and luscious gravy. This detailed Murgh Musallam recipe carefully walks you through each step, unveiling traditional techniques and time-honoured ingredients.
A Glimpse into the Origins of Murgh Musallam Recipe
Steeped in history, Murgh Musallam Recipe origins are in the royal kitchens of the Mughal Empire. The dish is believed to have been a favourite of Emperor Muhammad bin Tughlaq and was later refined during the height of Mughal rule. What sets it apart is its preparation of a whole chicken, marinated with layers of spices and slow-cooked to perfection, often stuffed and richly garnished.
Ingredients You Will Need
Ensure all components are ready before embarking on the preparation. The soul of this dish lies in the freshly ground spices and patient marination.
For the Marinade:
1 whole chicken (skinless, about 1.2–1.5 kg), cleaned and pat dried
¼ cup fresh cream (optional but enriches the gravy)
2 tbsp chopped fresh coriander leaves
A few strands of saffron soaked in 2 tbsp warm milk (optional, for finishing)
Step-by-Step Preparation
Step 1: Preparing the Marinade
Start by mixing the curd with turmeric, salt, half of the red chilli powder, garam masala, and the fresh ground paste of onion, ginger, and garlic. Coat the chicken thoroughly, ensuring the marinade seeps into the cuts on the bird’s surface. Allow it to rest for at least 30 minutes. For deeper infusion, marinate overnight under refrigeration.
Step 2: Toasting the Whole Spices
In dry pan over medium heat, gently roast cloves, peppercorns, cinnamon, cardamoms, almonds, cumin, coriander, and poppy seeds. Stir continuously for even toasting. Once fragrant, remove from heat & allow to cool slightly. Grind them into a fine paste using minimal water. This forms the core masala of the dish—robust, earthy, and intensely aromatic.
Step 3: Searing the Chicken
Heat 2 tablespoons of mustard oil or ghee in a large, deep pan. Lightly sear the marinated whole chicken on all sides until it develops a golden hue. Remove and set aside. This initial browning locks in moisture and adds depth to the flavour.
Step 4: Building the Gravy Base
In the same pan, add remaining oil. Sauté the finely sliced onions until caramelized—a process that can take up to 15 minutes on low flame. This slow caramelization is critical for the signature richness of Murgh Musallam Recipe. Stir in the prepared spice paste and cook for 7–8 minutes until oil separates and the rawness dissipates.
Now, add the tomato purée and the remaining red chilli powder. Cook until the mixture thickens & takes on a deep, luscious colour. Fold in the cream for added silkiness (optional).
Step 5: Simmering to Perfection
Place the seared whole chicken into the pan, spooning the masala. Add about ½ to ¾ cup water to adjust consistency. Cover and simmer over a low flame for 35–40 minutes, occasionally basting the chicken with the sauce. The meat should be tender, easily pierced with a fork, but not falling apart.
In the final five minutes, add saffron-infused milk and fresh coriander. Simmer uncovered for a richer colour and aroma.
Step 6: Resting and Garnishing
Once cooked, allow the Murgh Musallam Recipe to rest for 10 minutes before serving. This resting period allows flavours to settle and the gravy to thicken further. Garnish with silver leaf (varq), additional saffron strands, and a drizzle of ghee for that regal touch.
Serving Suggestions
Murgh Musallam Recipe is traditionally served with fragrant basmati rice or sheer mal (sweet saffron flatbread). However, it pairs equally well with naan or tandoori roti. To balance the richness, accompany it with a simple cucumber raita and onion salad.
Final Thoughts
This Murgh Musallam Recipe is more than a method—it’s a journey into a regal era where food was not merely sustenance but art. The layering of spices, the ceremonial preparation of a whole bird, and the final flourish of saffron and cream all signal a dish crafted with reverence. Murgh Musallam Recipe celebrates tradition, patience, and flavour for a festive table or a culinary challenge.
Frequently Asked Questions (FAQs)
What does “Murgh Musallam” mean?
“Murgh Musallam” is a Persian-origin term meaning “whole chicken.” In the culinary context, it refers to a regal dish in which an entire chicken is marinated, often stuffed, and cooked in a rich, aromatic gravy. It is traditionally served during festive or royal occasions.
Can I use boneless chicken for Murgh Musallam?
While it’s technically possible, using boneless chicken deviates from the essence of this dish. Murgh Musallam is traditionally prepared with a whole bird, which helps retain moisture and delivers the intended presentation and texture. For a flavor profile similar to boneless pieces, consider “Chicken Musallam” instead.
How long should the chicken be marinated?
A minimum of 30 minutes is essential for the spices to infuse, but marinating overnight (6–8 hours) in the refrigerator is highly recommended for optimal flavour. This allows the curd and spices acid to thoroughly tenderize and flavour the meat.
Is Murgh Musallam very spicy?
Murgh Musallam has a rich, bold flavour but is not necessarily overly spicy. The heat level can be adjusted by reducing the quantity of red chilli powder or using mild chilli varieties. Curd, cream, and nuts also naturally mellow the heat.
Can Murgh Musallam be made in an oven?
Yes. After marinating and optionally searing the chicken, place it in a covered oven-safe dish or Dutch oven & bake at 180°C (350°F) for about 45–55 minutes. Baste occasionally and uncover in the last 10 minutes for a slightly roasted finish.
In recent years, many individuals have turned toward natural Mounjaro recipes as an alternative approach to managing weight and supporting healthy glucose levels. Inspired by the mechanism of GLP-1 receptor agonists like Mounjaro, these homemade formulations aim to mimic their effects using organic, plant-based ingredients.
While pharmaceutical options have their place in medical treatment, there’s a growing demand for nature-based recipes that promote similar metabolic benefits without synthetic compounds or side effects.
What Is a Natural Mounjaro Recipe?
A natural Mounjaro recipe typically includes ingredients that stimulate the body’s natural production of GLP-1, a hormone responsible for regulating appetite, slowing digestion, and maintaining insulin balance. Using specific herbs, spices, and nutrient-rich foods can create a blend that helps manage cravings, supports fat metabolism, and improves energy levels.
Ingredients Commonly Found in Natural Mounjaro Recipes
These carefully selected ingredients offer powerful, synergistic benefits:
Fenugreek Seeds are known to slow down carbohydrate absorption and improve insulin sensitivity.
Cinnamon – Balances blood sugar and enhances metabolic function.
Apple Cider Vinegar – Aids in satiety and supports digestive health.
Lemon Juice – Detoxifying and rich in vitamin C, which aids metabolic processes.
Chia Seeds are high in fibre & protein & help with appetite control.
Ginger – Promotes thermogenesis and healthy digestion.
Turmeric – Contains curcumin, which has anti-inflammatory & insulin-sensitizing properties.
How to Make a Natural Mounjaro Recipe at Home
Here’s a potent, easy-to-make natural Mounjaro recipe that can be consumed daily:
Homemade GLP-1 Activating Drink
Ingredients:
1 tablespoon apple cider vinegar
½ teaspoon cinnamon powder
1 teaspoon chia seeds (pre-soaked for 10 minutes)
1 teaspoon grated ginger
Juice of half a lemon
A pinch of turmeric
1 cup of warm water
Instructions:
Combine all ingredients in a glass.
Stir well and let it sit for 5 minutes.
Consume on an empty stomach in the morning.
This Mounjaro weight loss drink may naturally encourage your body’s GLP-1 response, helping you feel fuller and longer and reducing excessive hunger cravings throughout the day.
Benefits of a Natural Mounjaro Recipe
Incorporating a natural Mounjaro recipe into your daily regimen can offer multiple health advantages:
Promotes weight loss by reducing appetite & cravings
Encourages stable blood sugar levels
Supports hormonal balance
Boosts energy and digestion
Provides a safe, non-synthetic alternative to commercial medications
Additional GLP-1 Supporting Foods to Add to Your Diet
For enhanced results, consider incorporating the following GLP-1 weight-loss foods into your meals:
Leafy greens like kale and spinach
Avocados and nuts for healthy fats
Legumes such as lentils and chickpeas
Blueberries and apples (low glycemic fruits)
Fermented foods like kimchi and yoghurt
These Mounjaro natural ingredients work harmoniously to support your metabolism and overall well-being.
Final Thoughts
A natural Mounjaro recipe offers a promising route for those seeking holistic weight management and metabolic health solutions. While not a replacement for medical treatment in severe cases, it is a thoughtful, effective tool for individuals committed to healthier living through natural means.
The Mai Tai is one of the most beloved tropical cocktails, offering a delightful combination of rum, fruit juices, and exotic flavours. Originating in the early 20th century, this cocktail has become a staple in tiki bars and summer parties. Its name, “Mai Tai,” translates to “good” or “out of this world” in Tahitian, and the drink lives up to its name with a burst of rich flavours that transport you to an island paradise. Here’s how to craft the perfect Mai Tai recipe at home.
Ingredients for the Perfect Mai Tai
You need a few simple ingredients that harmonise to make the perfect Mai Tai. Here’s what you’ll need:
2 oz (60 ml) of light rum
1 oz (30 ml) of dark rum (preferably aged for a deeper flavour)
1/2 oz (15 ml) of orange curaçao
1/2 oz (15 ml) of fresh lime juice
1/4 oz (7.5 ml) of orgeat syrup (almond-based syrup for a hint of sweetness)
1/4 oz (7.5 ml) of simple syrup (optional, depending on your sweetness preference)
Crushed ice
Garnishes: A mint sprig and a lime wedge
Step-by-Step Instructions
Prepare Your Glass: Fill a highball or rock glass with crushed ice to chill it.
Combine the Ingredients: In a cocktail shaker, combine light rum, dark rum, orange curaçao, fresh lime juice, orgeat syrup, and simple syrup (if you’re using it). Add ice to shaker & shake vigorously for 10-15 seconds to mix ingredients thoroughly and chill the mixture.
Strain and Serve: Strain mixture into the glass over the crushed ice, ensuring it stays cold and refreshing.
Garnish: For that perfect touch, garnish your Mai Tai with sprig of fresh mint and a lime wedge. Add a cherry or a slice of pineapple for extra flair if desired.
Enjoy: Take a sip and enjoy the sweet, tangy, and refreshing flavours of the Mai Tai. It’s the perfect cocktail to transport you to a tropical getaway without leaving home.
Variations of the Mai Tai
While the classic Mai Tai recipe is beloved by many, there are a few variations to cater to different preferences:
Frozen Mai Tai: Blend ingredients with ice for a refreshing, slushy version of the classic cocktail.
Fruity Mai Tai: For those who prefer a fruitier cocktail, add a splash of pineapple juice or grenadine for sweetness and colour.
Mai Tai with a Twist: Experiment with flavoured rum, such as coconut or mango rum, for a unique twist on the traditional recipe.
The History Behind the Mai Tai
The Mai Tai’s origins are often debated, with Trader Vic’s and Don the Beachcomber claiming to have invented it. While the details are fuzzy, what remains clear is that this cocktail has become a symbol of tiki culture. Trader Vic’s version, which uses a mix of light and dark rum, has remained the most popular, offering a balanced taste of sweet and slightly tart.
Tips for the Best Mai Tai
Fresh Ingredients: Always use freshly squeezed lime juice for best flavour. Pre-bottled lime juice tends to have a more artificial taste that can affect the quality of the cocktail.
Use High-Quality Rum: Since rum is the show’s star, choose a good-quality rum for the best taste. A blend of both light and dark rum creates a balanced profile.
Don’t Overdo the Syrups: The orgeat syrup is key to achieving that signature nutty flavour. Be cautious with the amount of simple syrup you add, as it can easily overpower the other flavours.
Mai Tai in Popular Culture
The Mai Tai has appeared in pop culture, often representing carefree beach vacations, tropical islands, and fun-filled parties. Whether watching a summer blockbuster or sitting on the porch with friends, the Mai Tai is the perfect cocktail to enjoy while unwinding.
Conclusion
The Mai Tai recipe is as versatile as it is delicious, offering a refreshing balance of rum, fruit, and sweetness. By following this simple recipe, you can recreate this iconic cocktail at home and enjoy the vibrant flavors of a tropical paradise. Whether you’re making it for a party or to enjoy a relaxing evening, the Mai Tai is always a great choice.
The carnivore diet has gained popularity as a high-protein, zero-carb eating plan emphasizing animal-based foods while eliminating all plant-based ingredients. Many people use this diet for weight loss, muscle gain, improved digestion, and reduced inflammation. However, sticking to it can be challenging without various satisfying meals.
If you’re searching for carnivore diet recipes that are easy to prepare, nutrient-dense, and flavorful, this guide has you covered. From juicy steaks to nourishing bone broth, you’ll find everything you need to succeed in this meat-based lifestyle.
Why Choose the Carnivore Diet?
Before diving into the best carnivore diet recipes, let’s explore the key benefits:
Weight Loss – Without carbohydrates, your body burns fat for fuel.
Muscle Growth – The diet provides ample protein for muscle repair and strength.
Reduced Inflammation – Many people report relief from joint pain, autoimmune disorders, and bloating.
Blood Sugar Stability – Insulin spikes and crashes are avoided since carbs are eliminated.
Gut Health Improvement – A meat-based diet may reduce digestive issues caused by fiber and plant toxins.
Now that we understand the benefits, let’s get to the recipes!
Best Carnivore Diet Recipes
Each carnivore diet recipe is packed with essential nutrients, easy to prepare, and incredibly delicious.
1. Ribeye Steak with Bone Marrow Butter
A perfectly seared ribeye steak, enhanced with rich and creamy bone marrow butter, is a carnivore staple.
Ingredients:
1 ribeye steak (grass-fed, if possible)
2 tbsp bone marrow (melted)
Sea salt to taste
Instructions:
Preheat a cast-iron skillet over high heat.
Season the steak with salt.
Sear for 3-4 minutes per side for a crispy crust.
Rest for 5 minutes, then top with melted bone marrow butter.
Why It Works:
High in protein and healthy fats
Provides essential amino acids for muscle recovery
Rich in collagen for joint & skin health
2. Beef Liver Pâté
The liver is one of the most nutrient-dense foods, packed with iron, vitamins A and B vitamins. This creamy pâté is a perfect way to enjoy it.
Ingredients:
½ lb beef liver
3 tbsp butter
Sea salt to taste
Instructions:
Sauté the liver in butter until browned.
Blend until smooth and creamy.
Refrigerate and serve chilled.
Why It Works:
Provides high levels of vitamins and minerals
Supports liver function and energy production
Rich in bioavailable iron, crucial for red blood cells
3. Carnivore Egg & Cheese Omelet
Eggs and cheese provide a satisfying and nutrient-rich meal that is easy to digest.
Ingredients:
3 eggs
½ cup shredded cheese (cheddar or Parmesan)
2 tbsp butter
Instructions:
Whisk eggs and cook in butter over low heat.
Add cheese and fold the omelet.
Serve hot and enjoy.
Why It Works:
High in healthy fats for sustained energy
Rich in choline, essential for brain function
Provides calcium and protein for strong bones
4. Crispy Pork Belly
A perfect combination of crispy skin & juicy meat, this pork belly recipe is a must-try.
Ingredients:
1 lb pork belly
Sea salt to taste
Instructions:
Score pork belly skin with sharp knife.
Bake at 375°F for 45 minutes, or until it is crispy.
Let rest before slicing.
Why It Works:
High in satiating fats
Provides collagen for skin and joint health
A great alternative to beef-based meals
5. Bone Broth for Gut Health
Bone broth is essential to the carnivore diet, providing collagen, amino acids, and minerals that promote gut healing.
Choose fatty cuts of meat to ensure adequate energy intake.
Stay hydrated with bone broth and mineral-rich water.
Incorporate organ meats for maximum nutrient density.
Avoid processed meats that contain additives, sugars, or preservatives.
Experiment with different cooking methods like grilling, slow cooking, and searing to keep meals exciting.
Final Thoughts
The carnivore diet may seem restrictive at first, but with the right recipes, it can become a sustainable and enjoyable way of eating. Whether you prefer steak, eggs, or nourishing bone broth, these recipes will help you stay on track while enjoying every bite.
Mangoes are adored for their sweet, juicy flesh and vibrant flavour—but what about their skin? The question “Can you eat mango skin?” is one nutritionists and curious fruit lovers have explored. While many discard the peel without a second thought, mango skin is, in fact, edible and packed with potential health benefits.
However, consuming it isn’t always as straightforward as biting into the fruit. Let’s dive into the nutritional science, potential concerns, and innovative ways to enjoy mango skin safely.
Is Mango Skin Safe to Eat?
Yes, you can eat mango skin, and it’s entirely safe for most people. Like apple or pear peels, mango skin is natural source of dietary fibre, vitamins, and protective plant compounds. Despite this, it is often avoided due to its tough texture and slightly bitter or resinous taste.
Nutritional Benefits of Mango Skin
Mango skin holds many health-boosting compounds, often lost when peeled and discarded. Here’s what it contains:
Nutrient / Compound
Benefit
Dietary Fiber
Aids digestion, promotes gut health, and supports regularity
Vitamin C
Enhances immunity and supports collagen production
Beta-Carotene
Converts to Vitamin A, improves vision, and boosts skin health
Mangiferin
A powerful antioxidant with anti-inflammatory and anticancer potential
Polyphenols & Flavonoids
Reduce oxidative stress and protect cells from damage
So next time you wonder, “Can you eat mango skin?” remember it’s a treasure trove of antioxidants and immune-enhancing nutrients.
Possible Drawbacks of Eating Mango Skin
Despite its impressive nutritional profile, mango skin isn’t universally embraced. There are a few important considerations:
1. Taste and Texture
Mango skin can be leathery, fibrous, and slightly bitter, especially in certain varieties like Tommy Atkins. This texture can make it unpleasant to chew directly.
2. Allergic Reactions
Mango skin contains urushiol, a compound also found in poison ivy. People with sensitivities may experience:
Itching around the lips
Skin rash or inflammation
Tingling or burning sensation
Anyone allergic to cashews, poison oak, or ivy should be cautious before consuming mango skin.
3. Pesticide Residue
Non-organic mangoes may have pesticide traces on their surface. While washing reduces this risk, it’s still worth noting—especially if the skin will be eaten raw.
How to Eat Mango Skin Safely
If you’re interested in adding mango peel to your diet, here are safe and enjoyable ways to do so:
✔️ Wash Thoroughly
Scrub the mango under running water to remove dirt, bacteria, and pesticide residues. Soak it in baking soda solution for 10–15 minutes for extra protection.
✔️ Choose Thin-Skinned Varieties
Some mango types like Ataulfo, Honey, or Alphonso have smoother, less fibrous skin, making them easier to eat whole.
✔️ Blend Into Smoothies
Toss mango skin and flesh into a high-powered blender. Other fruits like bananas or pineapple mask the bitterness while retaining all the nutrients.
✔️ Cook or Bake With It
Cooking mango skin in chutneys, jams, or stir-fries softens its texture and reduces bitterness. It can also be dried, powdered, and added to spice mixes or teas.
✔️ Go Organic
Choosing organic mangoes minimizes your exposure to harmful chemical residues, which is especially important if you plan to eat the peel.
Who Should Avoid Mango Skin?
While most healthy adults can safely enjoy mango peel in moderation, the following groups should exercise caution:
Individuals with urushiol sensitivity
Children under 5 years, due to choking risk from tough peel
People with oral allergies to mango sap
Anyone undergoing immunosuppressive therapy, unless approved by a physician
If any adverse reactions occur after trying mango skin, discontinue use & consult a healthcare provider.
Final Thoughts
So, can you eat mango skin? Yes—mango skin is edible, nutritious, and offers powerful health benefits, thanks to its rich supply of fibre, antioxidants, and bioactive compounds. However, it’s not for everyone. Some may dislike the taste and texture or experience mild allergic reactions. To reap the benefits safely, choose organic mangoes, wash them well, and consider blending or cooking the skin into your meals.
Frequently Asked Questions (FAQs)
Can you eat mango skin raw?
Mango skin can be eaten raw, but it’s important to wash it thoroughly to remove pesticide residues and dirt. Due to its bitter taste and tough texture, many people prefer blending it into smoothies or cooking it.
Is mango skin good for you?
Absolutely. Mango skin is rich in fibre, vitamin C, beta-carotene, and powerful antioxidants like mangiferin and polyphenols. These nutrients support digestion, immunity, and skin health and help reduce inflammation.
Can eating mango skin cause allergies?
In some cases, yes. Mango skin contains urushiol, the same compound found in poison ivy, which can trigger itching, rashes, or allergic reactions in sensitive individuals. If you’re allergic to poison ivy or cashews, it’s best to avoid it.
 Ingredients for Chole Bhature
 Nutritional Value of Chole Bhature
 Food and Mental Clarity: What You Eat Affects How You Think
 Final Thoughts
 High Protein Crock Pot Recipes for Lunch & Dinner
 3. Crock Pot White Bean & Turkey Chilli
 4. Slow Cooker Beef & Broccoli
 Time-Saving Tips for Busy Meal Preppers
 2. Cucumber Citrus Detox Water
 Final Thoughts
 Why Make Dal Khichdi?
 Step 1: Prep the Dal and Rice
 Mango Shake Nutrition Facts (Per 3/4 Cup Serving)
 1. Rich in Vitamins & Antioxidants
 Ingredients You Will Need
 Final Thoughts
 Ingredients Commonly Found in Natural Mounjaro Recipes
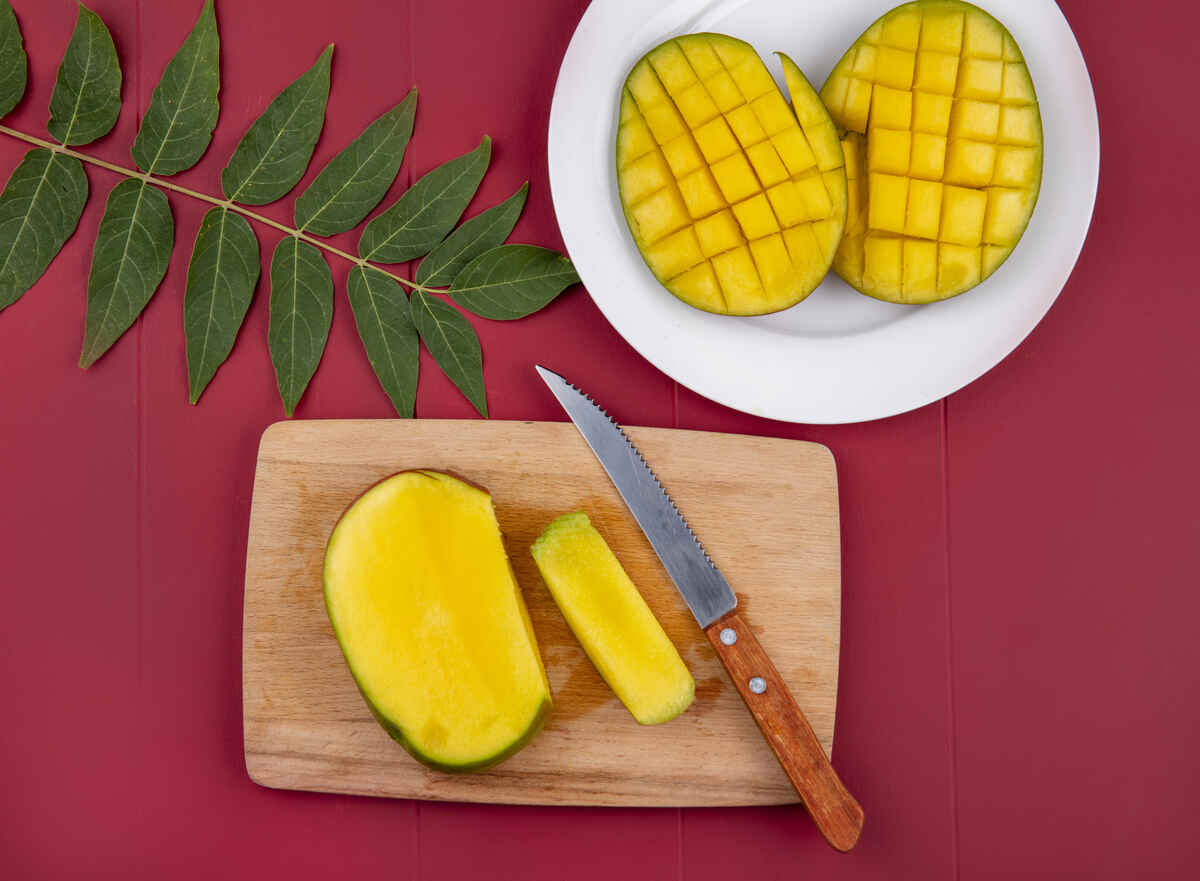 Nutritional Benefits of Mango Skin
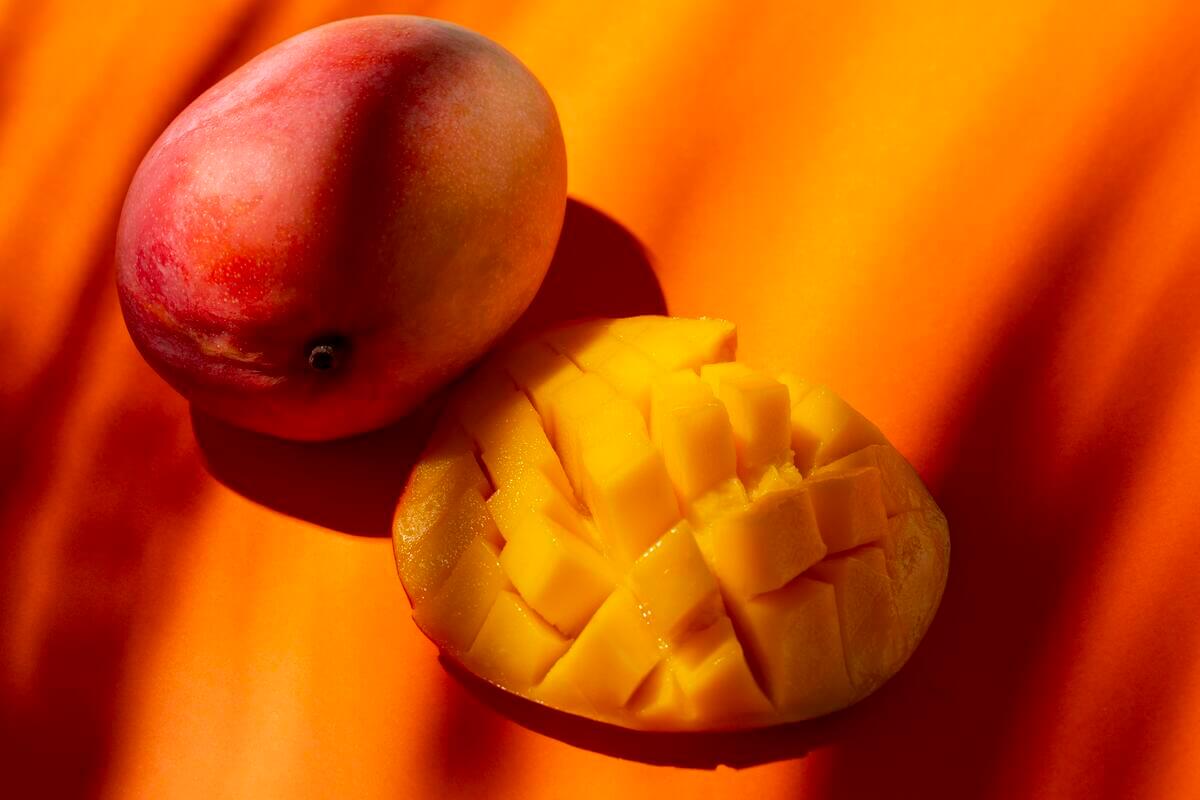 Final Thoughts