Swordfish, known for its robust, steak-like consistency and delicately sweet undertone, is revered among discerning seafood connoisseurs. Its versatility and rich nutrient profile render it ideal for both casual weeknight meals and refined dinner affairs. This detailed guide unveils a lemon-garlic swordfish recipe that not only satisfies the palate but also aligns with nutritional and culinary excellence.
Why Choose Swordfish?
Choosing swordfish is more than a gustatory decision—it’s a strategic move towards healthier, more elevated eating. Here’s what sets this fish apart:
Rich in Lean Protein: Each portion of swordfish provides a bountiful amount of high-quality protein essential for muscle repair, metabolic function, and satiety.
Omega-3 Fatty Acids: Swordfish contains a commendable amount of omega-3s, which are known to support cardiovascular integrity, reduce inflammation, and enhance cognitive performance.
Culinary Flexibility: Its meaty texture withstands high-heat cooking methods without falling apart, making it ideal for grilling, roasting, or pan-searing.
Swordfish isn’t merely an option—it’s an upgrade.
Grilled Garlic Herb Swordfish Recipe
This refined preparation balances brightness with herbaceous depth, resulting in a restaurant-worthy dish served with simplicity.
Ingredients
2 swordfish steaks (6–8 oz each)
2 tbsp extra virgin olive oil
2 cloves garlic, finely minced
1 tbsp freshly squeezed lemon juice
1 tsp chopped fresh rosemary
1 tsp chopped fresh thyme
½ tsp sea salt
½ tsp cracked black pepper
½ tsp smoked paprika
Lemon wedges (for garnish)
Instructions
1. Prepare the Marinade
Whisk together olive oil, garlic, lemon juice, rosemary, thyme, salt, pepper, & paprika in a small glass bowl. The blend should be aromatic, slightly acidic, and herbaceous—designed to permeate the swordfish’s dense flesh with vibrancy and depth.
2. Marinate the Swordfish
Pat the swordfish steaks dry using a paper towel. Coat them thoroughly with the marinade and allow them to rest for 20–30 minutes at room temperature. This critical step allows the flavours to infiltrate the fish, ensuring a nuanced and satisfying bite.
3. Grill to Perfection
Preheat grill to medium-high heat, approximately 400°F. Carefully lay the marinated swordfish steaks onto the grates. Grill for 4–5 minutes per side or until internal temperature reaches 130°F and the surface shows caramelized grill marks. The centre should appear opaque but moist.
4. Serve and Enjoy
Remove from heat, let the steaks rest briefly, and present them with fresh lemon wedges. The lemon’s acidity will heighten the overall flavour profile.
Pro Tips for Cooking Swordfish
✔ Avoid Overcooking
Swordfish is best when it retains a moist interior. Once the centre turns opaque, please remove it from heat to preserve tenderness.
✔ Use High Heat
A searing-hot grill ensures an appetizing crust and seals in natural juices.
✔ Complement with Balanced Sides
Roasted fingerling potatoes, charred asparagus, or a citrusy arugula salad pair harmoniously with the richness of swordfish.
✔ Experiment with Marinades
Substitute herbs and acid bases: For diversified flavour experiences, try a miso-ginger glaze, citrus-soy reduction, or a Mediterranean mix of oregano, capers, and lemon zest.
Nutritional and Culinary Value of Swordfish
Nutrient
Per 6oz Serving
Benefit
Calories
~200 kcal
Energy with lean composition
Protein
~34g
Muscle maintenance and repair
Omega-3s
~0.5g
Brain and heart function
Selenium
90 mcg (129% DV)
Antioxidant support
Vitamin D
566 IU (71% DV)
Bone health and immune modulation
Conclusion
With its refined texture and health-forward profile, Swordfish is an exceptional seafood selection for the modern kitchen. This lemon-garlic swordfish recipe delivers on flavour and offers a foundation for culinary creativity. Mastering how to cook swordfish transforms an ordinary dinner into a gourmet statement. With just handful of fresh ingredients and attention to detail, the best way to cook swordfish is within reach—grilled, infused with herbs, and perfectly seared. Embrace the elegance of this remarkable fish and let it anchor your next dining experience.
Salmon is widely regarded for its rich taste, flaky texture, and powerful nutritional profile. But one question often lingers in kitchens and restaurants: Can you eat salmon skin? The short and confident answer is yes. Salmon skin is not only edible but also highly nutritious—if sourced and prepared correctly. This article will guide you through benefits, precautions, and best cooking practices, helping you decide whether to keep the skin on your next fillet.
Is It Safe to Eat Salmon Skin?
Can you eat salmon skin safely? Yes—but with some caveats. The skin of salmon contains more concentrated levels of omega-3 fatty acids, essential vitamins, & minerals than the flesh itself. However, the safety of the salmon depends heavily on the quality and origin of the salmon.
Wild-caught salmon (especially Alaskan, Sockeye, Coho, and Chinook) generally has cleaner, lower-toxin skin and is considered the safest to consume.
Farmed salmon, especially from poorly regulated sources, may contain higher environmental contaminants like PCBs and dioxins that accumulate in the fatty skin layer.
So, yes, you can eat salmon skin, but to minimise health risks, choose wild-caught and responsibly sourced options.
Nutritional Benefits of Eating Salmon Skin
When you ask if you can eat salmon skin for its nutritional value, the answer becomes even more compelling. The skin is a powerhouse of nutrients that support many vital bodily functions.
🔹 Omega-3 Fatty Acids
Salmon skin is densely packed with EPA and DHA, two long-chain omega-3 fatty acids linked to:
Improved cardiovascular health
Reduced inflammation
Enhanced brain function
Joint support
These fatty acids are fat-soluble, and the skin retains a significant portion—often more than the flesh.
🔹 Collagen and Protein
Salmon skin is rich natural source of collagen, a protein vital for:
Skin elasticity
Hair and nail strength
Joint and tendon health
It also contributes high-quality protein that aids in muscle repair and satiety, making it an excellent choice for fitness-focused diets.
🔹 Essential Micronutrients
Nutrients found in salmon skin include:
Vitamin D – strengthens bones and supports immune function
B Vitamins – help convert food into energy and maintain cognitive health
Selenium – acts as a potent antioxidant that protects against cellular damage
Potential Risks of Eating Salmon Skin
Although you can eat salmon skin, there are potential concerns you should be aware of:
Toxins and Heavy Metals: Contaminants like polychlorinated biphenyls (PCBs) and dioxins may be more concentrated in the skin due to their fat content. These risks are higher in farmed salmon.
Allergies and Sensitivities: People with fish allergies may also react to compounds in the skin. If you’re unsure, try a small portion first.
Cooking Hygiene: Consuming raw or undercooked salmon skin that isn’t sushi-grade could expose you to parasites or bacteria. Always ensure thorough cooking unless certified safe.
How to Cook Salmon Skin for Maximum Flavor and Texture
Can you eat salmon skin and enjoy it? Absolutely—when it’s cooked the right way. Here are four popular methods to get that golden, crispy skin that adds crunch and flavour to your meal:
1. Pan-Searing (Crispy Skin Perfection)
Heat a pan over medium-high heat with olive oil or ghee.
Place the salmon skin-side down and press gently with a spatula.
Cook for 4–5 minutes until golden & crisp; flip and cook for two more minutes.
2. Grilling (Smoky and Flavorful)
Preheat your grill & oil the grates to prevent sticking.
Place the fish skin-side down and grill for 6–8 minutes.
Let the skin crisp up before flipping.
3. Baking (Health-Conscious Choice)
Preheat the oven to 400°F (200°C).
Season the salmon and place it on a lined baking sheet, skin-side down.
Bake for 12–15 minutes until the skin is dry and crisp.
4. Air-frying (Crispy with Less Oil)
Set your air fryer to 375°F (190°C).
Place the salmon skin-side up and cook for 8–10 minutes for crunchy results.
Expert Tips for Enjoying Salmon Skin
Describe the skin before cooking for a cleaner bite.
Use high-heat oils like avocado or ghee to prevent sticking and enhance crispness.
For a gourmet snack, try making salmon skin chips—cut off the skin, season it, and bake or air-fry until crisp.
Final Thoughts
So, can you eat salmon skin without worry? Yes—and doing so provides an abundance of health benefits along with culinary enjoyment. Whether you’re looking to boost your omega-3 intake, improve skin health through collagen, or enhance the flavour and texture of your dish, salmon skin is a worthy addition to your plate. Just be mindful of where your fish comes from, how it’s cooked, and your dietary needs.
Caldo de pollo, a beloved Mexican chicken soup, stands out for its hearty ingredients and comforting flavor. Unlike other Latin American chicken soups, this dish uses whole chicken pieces, creating a rich and satisfying meal. Whether craving something warm on a chilly day or seeking a nutritious dish, this Caldo de Pollo Recipe delivers on all fronts.
What Is Caldo de Pollo?
Caldo de pollo, translating to “chicken broth,” is a staple in Mexican households. Packed with large chunks of vegetables and tender chicken, it’s a versatile dish tailored to personal preferences. Traditionally, it includes simple yet flavorful ingredients like carrots, potatoes, zucchini, and cilantro, simmered to perfection.
Ingredients for Caldo de Pollo Recipe
This caldo de pollo recipe features wholesome ingredients, ensuring flavor and nourishment. Here’s what you’ll need:
5 pounds of chicken leg quarters: Provides rich flavor and tender meat.
2 gallons of water: Forms the base of the broth.
Seasonings: 2 tablespoons minced garlic, two tablespoons salt, one tablespoon garlic powder, and one chicken bouillon cube.
Vegetables: 4 large carrots, four large potatoes, four zucchini, 1 chayote, and one large white onion, all cut into hearty chunks.
Fresh cilantro: Adds burst of freshness to the dish.
How to Make Caldo de Pollo
Follow these simple steps to create warm & delicious bowl of caldo de pollo:
Prepare the Chicken:
Place chicken leg quarters in a large stockpot. Add water, minced garlic, salt, and garlic powder.
Simmer the Broth:
Cover the pot &bring the mixture to boil. Reduce heat & simmer for 2 hours until chicken is tender & begins to fall off the bone.
Add Vegetables:
Stir in the bouillon cube until dissolved, then add the carrots, potatoes, zucchini, chayote, and onion. Simmer over medium-low heat for 1 hour or until vegetables are soft.
Finish with Cilantro:
Stir in freshly chopped cilantro and let it simmer for another 5 minutes.
Serve Hot:
Ladle the caldo de pollo into bowls, ensuring each serving has generous amount of chicken and vegetables.
Tips and Variations
Customization: Add corn on the cob, cabbage, or celery for extra texture and flavor.
Serving Suggestions: Pair with warm tortillas, a side of Spanish rice, or a squeeze of lime for a complete meal.
Storage: Store leftovers in an container in refrigerator for up to one week. Reheat on the stove or microwave before serving.
Why You’ll Love This Caldo de Pollo Recipe
This caldo de pollo recipe isn’t just a meal—it’s an experience. The tender chicken, vibrant vegetables, and aromatic broth create a hearty and nutritious dish. It’s perfect for family gatherings, a soothing remedy during cold seasons, or simply when you want a taste of Mexican tradition.
The Dubai chocolate bar recipe has taken the internet—and dessert lovers—by storm. Born in the luxurious kitchens of Fix Dessert Chocolatier in Dubai, this indulgent bar is a masterpiece of textures and flavours: a velvety chocolate shell, crunchy kataifi pastry, and a luscious pistachio cream filling. While the original bars are sold at premium prices ranging from $30 to $60 each, you can now recreate this viral sensation at home with simple ingredients and no fancy equipment.
Why Is the Dubai Chocolate Bar Recipe So Popular?
The Dubai chocolate bar recipe owes its fame to its Instagram-worthy presentation and the sensory overload it delivers in every bite. It’s the perfect balance of creamy, crunchy, sweet, and nutty layered inside a glossy chocolate mould. It’s a feast for the palate and the eyes—perfect for special occasions, gifting, or satisfying personal cravings.
Here’s a complete guide to making your own in your kitchen.
Ingredients You’ll Need
To recreate the Dubai chocolate bar recipe, gather the following:
Ingredient
Quantity
Notes
Dark chocolate chips
1 cup
Use 70% or higher for deep flavor
Coconut oil or butter
2 tbsp
Helps melt chocolate and toast kataifi
Kataifi pastry
1 cup (chopped)
Shredded phyllo dough (found in Middle Eastern stores)
Pistachio butter
½ cup
Homemade or store-bought
Tahini (optional)
1 tbsp
Adds nutty depth
White chocolate chips
¼ cup (optional)
For decoration and drizzling
Sea salt
Pinch
Enhances flavor contrast
Step-By-Step Instructions
1. Prepare the Chocolate Mold
Melt white chocolate (if using) in 20-second microwave intervals, stirring in between.
Drizzle designs into silicone molds for a decorative touch. Allow to set.
Melt dark chocolate with one tablespoon of coconut oil until silky.
Spoon 2 tablespoons of chocolate into each mold. Coat the base and sides evenly.
Refrigerate moulds for 10–15 minutes until set.
2. Toast the Kataifi
Chop kataifi pastry into small bits.
Heat one tablespoon of coconut oil in a skillet over medium heat.
Toast kataifi, stirring frequently, until golden and crisp.
Remove from heat and let cool.
3. Make the Pistachio Filling
In a bowl, combine toasted kataifi, pistachio butter, and tahini.
Mix well to form a thick, spreadable paste.
4. Assemble the Bars
Fill each chocolate-lined mold with pistachio mixture, pressing gently to compact.
Cover with remaining melted chocolate, smoothing the surface.
Chill in the fridge for 30 minutes or freezer for 10 minutes until fully set.
Pop out of moulds and enjoy your homemade Dubai chocolate bar recipe masterpiece.
Tips for Perfect Results
Choose quality chocolate: The better the chocolate, the more luxurious your bars will taste.
Don’t skip the toasting: Properly toasted kataifi adds the signature crunch.
Use deep moulds To ensure a good chocolate-to-filling ratio.
Balance the flavours: A pinch of sea salt beautifully brings out the nutty and sweet components.
Get creative: Add a layer of crushed pistachios, rose petals, or edible gold leaf for luxury flair.
Nutritional Insight
While indulgent, these bars can be tailored to your preferences. Swap dark chocolate for sugar-free versions, or use natural pistachio butter without added sugars. Each bar is packed with good fats and offers a unique fusion of Middle Eastern ingredients.
Final Thoughts
There’s a reason the Dubai chocolate bar recipe has gone viral—it truly delivers an elevated dessert experience. Instead of splurging on a luxury shipment, you can enjoy the same decadent treat at home for a fraction of the price. Whether you’re entertaining guests, creating content for social media, or simply treating yourself, this recipe is guaranteed to impress.
If you want a quick, flavorful, and versatile appetizer, try this taco dip recipe.With its creamy base, zesty seasoning, and colorful toppings, this dish is the life of any party. Whether you’re hosting a backyard barbecue, game night, or a casual family gathering, this Taco Dip Recipe will keep everyone coming back for seconds (or even thirds!).
Why This Taco Dip Recipe is a Must-Try
This recipe combines the rich creaminess of sour cream and cream cheese with the bold, savory kick of taco seasoning. Topped with vibrant vegetables and gooey cheese, it’s delicious and visually stunning. What makes it even better? It takes just minutes to prepare!
Another reason this dish stands out is its versatility. You can customize it to your liking—skip the olives, double the tomatoes, or even add a layer of guacamole for extra flavor. It’s a recipe that can cater to everyone’s taste preferences.
Ingredients You’ll Need
Here’s what you need to whip up this easy and delicious taco dip recipe:
16 ounces sour cream (non-fat or regular)
8 ounces cream cheese, softened
1.25 ounces taco seasoning mix (store-bought or homemade)
1 cup shredded Cheddar cheese
¼ head iceberg lettuce, rinsed, dried, and shredded
3 medium Roma tomatoes, chopped
1 medium green bell pepper, diced
1 (2.25 ounces) can of black olives, drained
How to Make the Perfect Taco Dip Recipe
Follow these simple steps to create an appetizer that is sure to please a crowd:
Prepare the Base: In medium bowl, mix sour cream, softened cream cheese, & taco seasoning until smooth and well combined. This creamy mixture forms the flavorful foundation of the dish.
Assemble the Dip: Spread the mixture evenly in a 9- or 10-inch round serving or pie dish.
Add the Toppings: Layer the shredded lettuce on the base, followed by a generous sprinkling of Cheddar cheese.
Finish with Vegetables: Add the chopped tomatoes, diced bell pepper, and black olives for a colorful and flavorful finish.
Serve and Enjoy: Pair the dip with tortilla chips, pita chips, or fresh vegetable sticks like carrots and celery for a refreshing crunch.
Tips for the Best Taco Dip
Make It Ahead: Prepare the cream cheese mixture a day in advance and store it in the refrigerator. Add the toppings right before serving to keep everything fresh and crisp.
Customize Your Toppings: Don’t like black olives? Swap them for green onions, jalapeños, or even diced avocado.
Prevent Soggy Tomatoes: Remove the seeds and pulp from the tomatoes before chopping to avoid excess moisture in your dip.
Layer Strategically: If adding extra toppings like salsa or guacamole, layer them between the creamy base and the shredded lettuce for a neat presentation.
What to Serve With Taco Dip
This taco dip pairs beautifully with the following:
Tortilla Chips: A classic choice for scooping up all the layers.
Pita Chips: For a slightly different texture and flavor.
Veggie Sticks: Carrots, celery, or cucumber slices for a lighter, gluten-free option.
Why You’ll Love This Recipe
Not only is this taco dip recipe easy to make, but it’s also packed with flavor and adaptable to various dietary needs. It’s vegetarian-friendly, and you can adjust gluten-free or low-fat preferences.
This dish is the ultimate party pleaser. The creamy base, combined with crunchy vegetables and bold seasoning, creates a balanced and addictive flavor profile that will have everyone asking for recipe.
Final Thoughts
This easy taco dip recipe is a guaranteed hit for any occasion. With its creamy base, vibrant toppings, and endless customization options, it’s a dish you’ll want to make again and again. Perfect for sharing, this appetizer will quickly become a staple at your gatherings.
When it comes to comfort food, hearty baked beans recipe tops the list. Whether you’re craving a traditional British-style dish or a homemade twist on canned beans, this guide will provide everything you need to create flavorful, wholesome baked beans in your kitchen. Say goodbye to artificial flavors & hello to decadent, savory goodness made from scratch.
Why Choose a Homemade Baked Beans Recipe?
While canned baked beans are convenient, they often contain preservatives and lack the depth of flavor that homemade recipes can provide. A homemade baked beans recipe gives you complete control over the ingredients, making it healthier, tastier, and customizable to suit your preferences.
Ingredients You’ll Need
To prepare this classic baked beans recipe, gather the following ingredients:
Navy beans (or haricot beans): The star of the dish, providing a creamy texture.
Onion and garlic: For a robust, savory base.
Tomato paste: Adds depth and enhances the sauce’s flavor.
Brown sugar: Balances the tanginess with a touch of sweetness.
Molasses or honey: Traditional sweeteners for an authentic taste.
Dijon mustard: Adds a mild kick and rounds out the flavors.
Worcestershire sauce: For a subtle umami touch.
Chicken or vegetable stock: The liquid base for the beans.
Cornflour (optional): Helps thicken the sauce for a glossy finish.
Step-by-Step Baked Beans Recipe
Step 1: Prepare the Beans
If using dried beans, soak them overnight in water and cook until tender (approximately 1–2 hours). For convenience, canned beans can be rinsed and used directly.
Step 2: Sauté Aromatics
Heat some oil and sauté chopped onions and garlic until fragrant in a large pot or Dutch oven.
Step 3: Build the Sauce
Add tomato paste, brown sugar, molasses, Dijon mustard, and Worcestershire sauce to the pot. Stir well to combine, creating a thick and flavorful base.
Step 4: Add Beans and Stock
Pour in the beans and stock, ensuring the beans are fully submerged. Simmer on low heat for 30–40 minutes, permitting flavors to meld together.
Step 5: Thicken the Sauce
If the sauce is too thin, dissolve cornflour in water and stir it into the pot. Cook for an additional 5 minutes until the sauce thickens.
Step 6: Serve and Enjoy
Serve the baked beans warm with crusty bread, baked potatoes, or grilled meats.
Tips for Perfect Baked Beans
Use the right beans: Navy or haricot beans work best due to their creamy texture.
Don’t rush the simmering process: Slow cooking allows the flavors to develop fully.
Customize sweetness: Adjust the amount of brown sugar and molasses to suit your taste.
Serving Suggestions
This versatile baked beans recipe can be enjoyed in numerous ways:
Spread on toast for a classic British-style breakfast.
As a side dish with grilled chicken or sausages.
Stuffed into baked sweet potatoes for a hearty vegetarian meal.
Served at barbecues as a crowd-pleasing addition.
Nutritional Benefits of Homemade Baked Beans
Homemade baked beans are rich in protein, fiber, and essential vitamins. By controlling the ingredients, you can reduce added sugars and sodium compared to store-bought options, making it a healthy choice for the whole family.
Apple cider vinegar is one of the pantry staples that has stood the test of time & is praised for its potential health benefits and culinary versatility. While many people are familiar with its use in health tonics or as a natural remedy, there’s so much more this humble ingredient can do. Whether you’re looking for a tangy vinaigrette, a flavorful marinade, or a way to elevate your vegetable dishes, there’s an apple cider vinegar recipe for every occasion. Let’s dive into how to incorporate Apple Cider Vinegar Recipe into your cooking.
1. Simple Apple Cider Vinegar Salad Dressing
A classic apple cider vinegar recipe is a basic salad dressing. This quick and easy recipe has just a few ingredients and is an excellent way to bring out the flavors of fresh greens & vegetables.
Ingredients:
1 part Bragg Apple Cider Vinegar (with the mother)
1 part olive oil
Salt and pepper to taste
Instructions:
Whisk together apple cider vinegar & olive oil in a small bowl.
Season with salt & pepper, adjusting to taste.
Drizzle over your favorite salad or greens.
This tangy, slightly sweet vinaigrette pairs perfectly with simple salads, but you can also use it to dress cole slaw, pasta salads, or even warm potato salad.
2. Apple Cider Vinegar Marinade for Meat
Apple cider vinegar is a fantastic marinade ingredient because it tenderizes meat while adding a unique depth of flavor. You can use it to marinate chicken, or beef.
Ingredients:
3 tbsp Bragg Apple Cider Vinegar
2 tbsp olive oil
1 tbsp honey
1 tsp cayenne pepper
Salt and pepper to taste
Instructions:
Whisk together all ingredients in a bowl.
Pour over your choice of meat, ensuring it’s well coated.
Allow it to marinate for at least 30 minutes before grilling, roasting, or pan-searing.
This apple cider vinegar marinade adds a spicy, tangy kick to meats and is especially great for grilling or barbecuing.
3. Quick Pickled Vegetables
Quick pickles are one of easiest ways to enjoy the flavor and benefits of apple cider vinegar. In minutes, you can pickle various vegetables, such as cucumbers, carrots, onions, or radishes.
Ingredients:
1 cup Bragg Apple Cider Vinegar
1 cup water
1 tbsp sugar
1 tsp salt
Sliced vegetables (cucumbers, carrots, onions)
Instructions:
Combine apple cider vinegar, water, sugar, salt in a pot & bring to a simmer.
Pour the hot brine over the sliced vegetables in a jar.
Let the mixture sit for about 10 minutes before draining the vinegar.
These quick pickles can be stored in fridge and enjoyed as a crunchy side dish, topping, or snack.
4. Apple Cider Vinegar for Roasted Vegetables
Apple cider vinegar is also an excellent addition when roasting vegetables. Adding a splash of ACV to your oil mixture enhances the flavors and helps to caramelize the veggies beautifully in the oven.
Ingredients:
1 tbsp Bragg Apple Cider Vinegar
2 tbsp olive oil
Your favorite vegetables (carrots, Brussels sprouts, potatoes)
Salt and pepper to taste
Instructions:
Preheat oven to 400°F (200°C).
In bowl, combine olive oil, apple cider vinegar, salt, and pepper.
Toss your vegetables in the mixture until well-coated.
Roast for 30 minutes, stirring halfway through, vegetables are tender & slightly crispy.
Adding apple cider vinegar adds a tangy richness to the vegetables, making them irresistible.
5. Apple Cider Vinegar for Detox Water
While apple cider vinegar is known for its health benefits, it also makes a refreshing addition to a detox water recipe. This is an excellent option if you’re looking for a simple way to incorporate ACV into your daily routine.
Ingredients:
1-2 tbsp Bragg Apple Cider Vinegar
1 cup water
1 tsp honey (optional)
Lemon slices (optional)
Instructions:
Mix the apple cider vinegar with water.
Stir in honey if desired for sweetness.
Add few slices of lemon for extra flavor.
Drinking this ACV water in the morning or throughout the day is a popular way to support digestion and metabolism, making it a perfect addition to your wellness routine.
6. Apple Cider Vinegar Detox Smoothie
If you’re looking for an apple cider vinegar recipe that blends health benefits with flavor, try adding it to a smoothie—the vinegar’s acidity pairs surprisingly well with fruits like apples and berries.
Ingredients:
1 tbsp Bragg Apple Cider Vinegar
1 cup water or almond milk
1 banana
1/2 cup mixed berries (blueberries, strawberries)
1 tsp honey (optional)
Instructions:
Add ingredients to blender & blend until smooth.
Adjust sweetness by adding honey if necessary.
This refreshing smoothie can kickstart your day and boost your digestion, making it an excellent healthy option.
Conclusion
Apple cider vinegar is more than just trendy health tonic—it’s a versatile ingredient that can enhance a variety of dishes in your kitchen. From salad dressings to marinades and even detox drinks, there are countless apple cider vinegar recipes to try. By incorporating it into your cooking routine, you’ll boost flavor and potentially reap the health benefits of this powerhouse ingredient. So why not explore how apple cider vinegar can elevate your meals and wellness today?
 Nutritional Benefits of Eating Salmon Skin
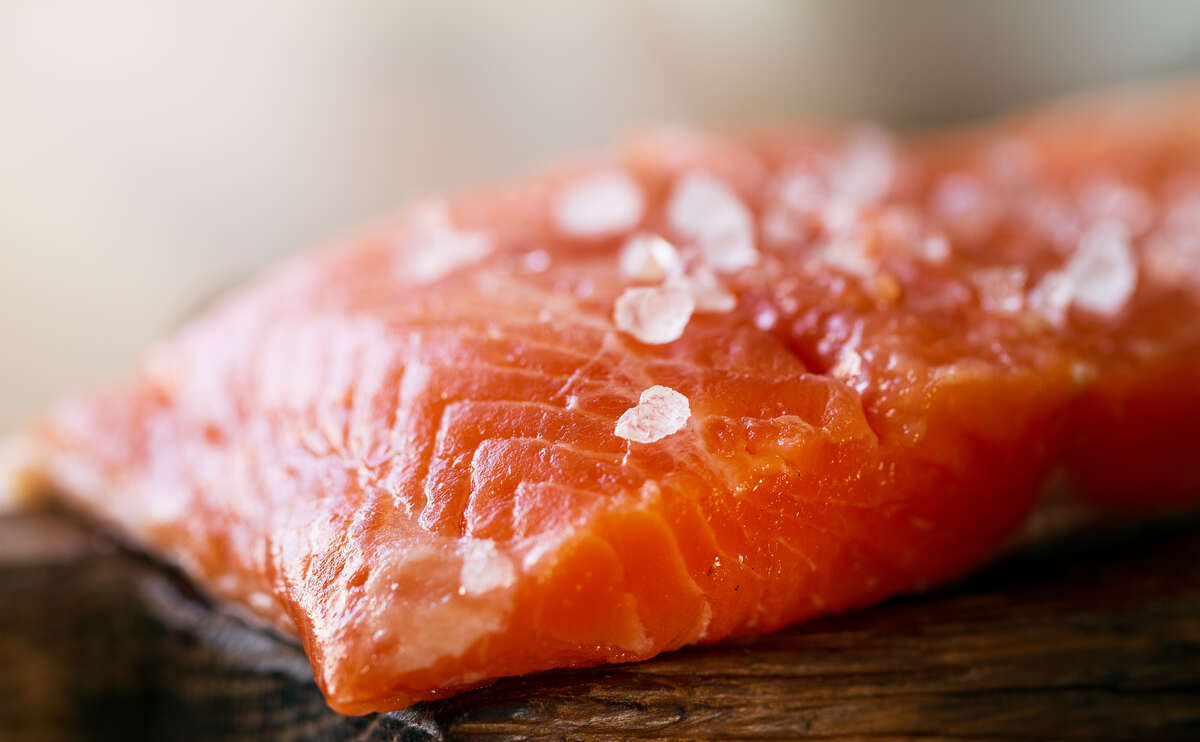 How to Cook Salmon Skin for Maximum Flavor and Texture
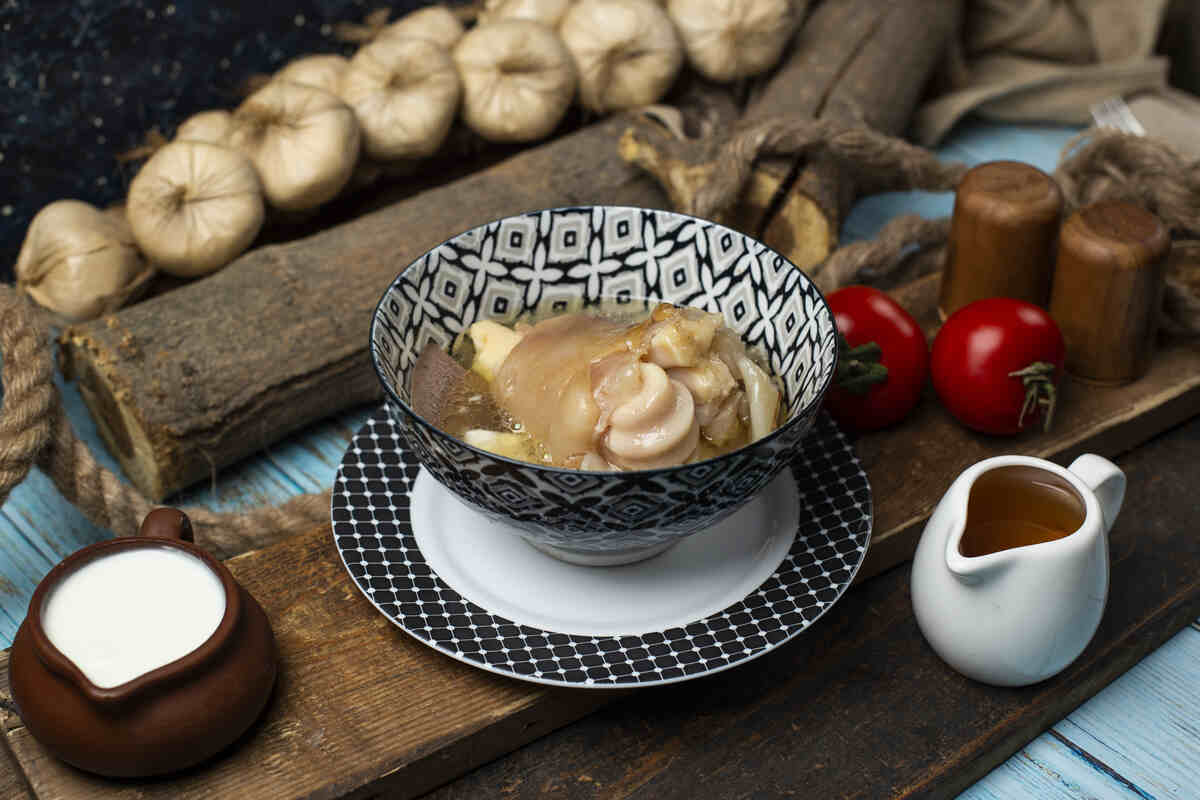 Ingredients for Caldo de Pollo Recipe
 Simmer the Broth:
 Here’s a complete guide to making your own in your kitchen.
 Nutritional Insight
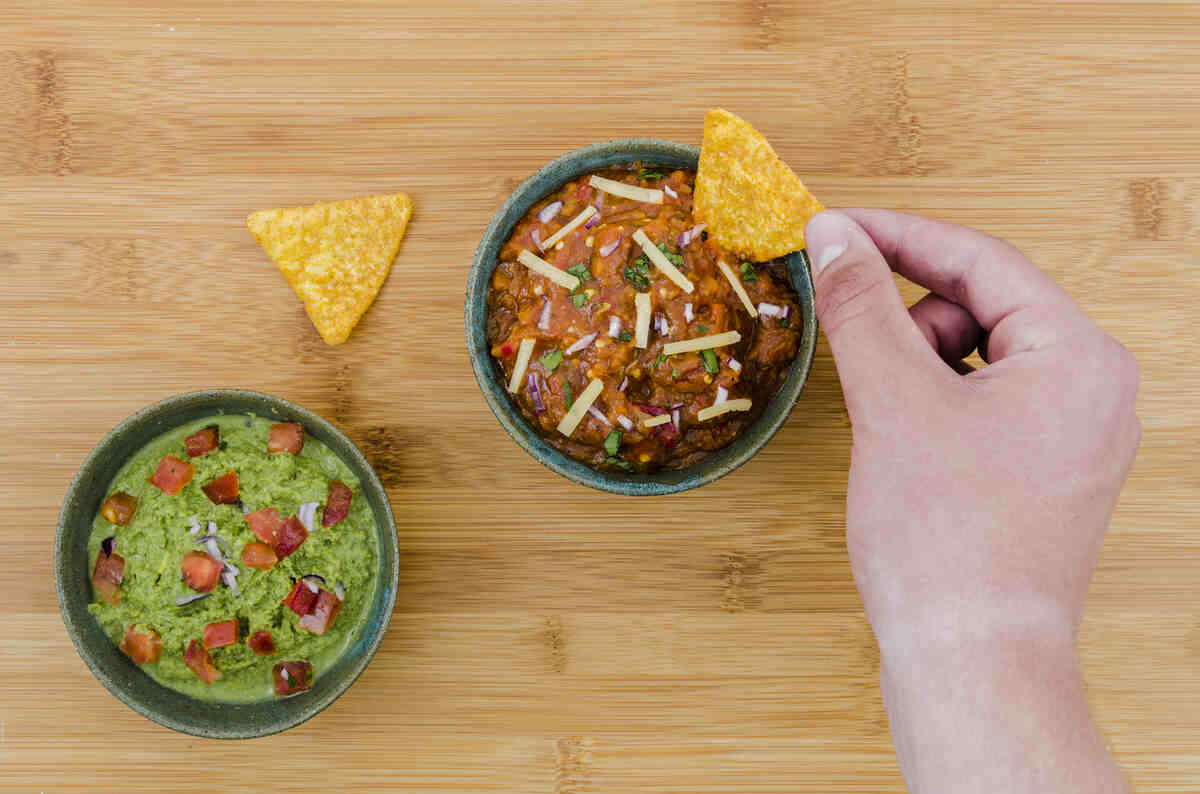 Ingredients You’ll Need
 Final Thoughts
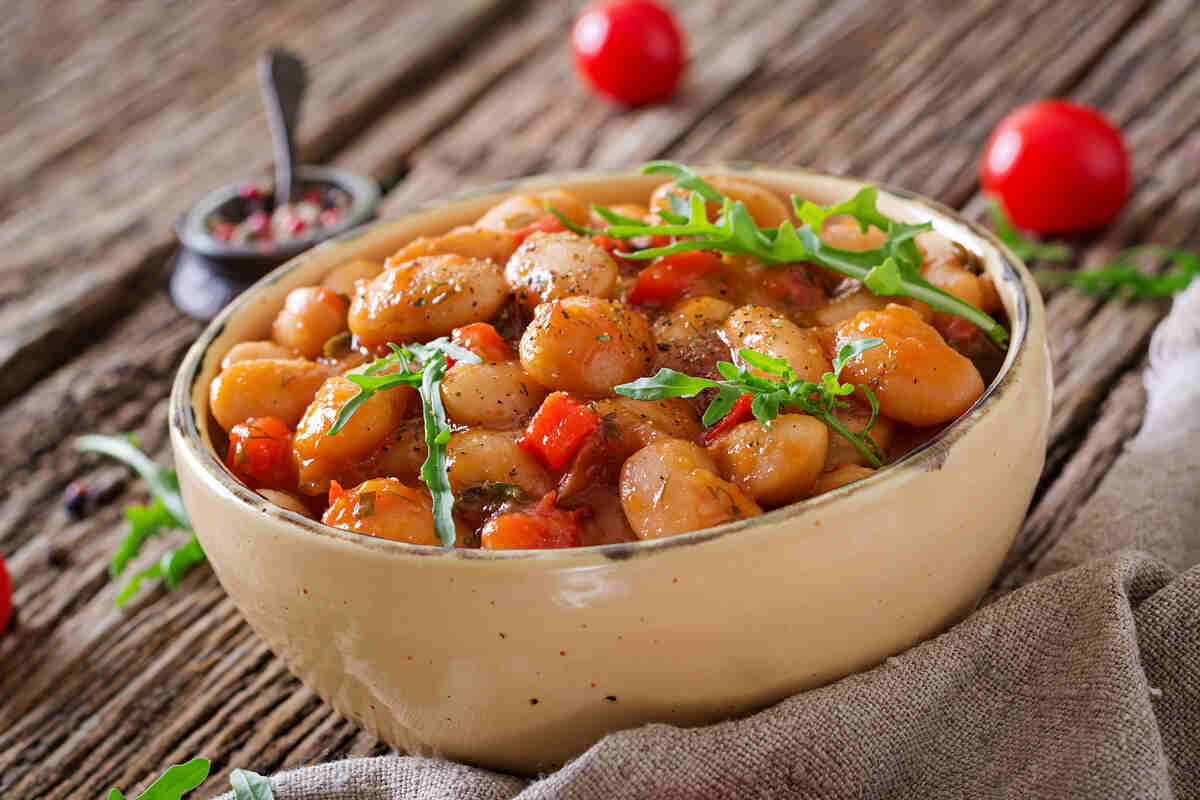 Ingredients You’ll Need
 Nutritional Benefits of Homemade Baked Beans
 Ingredients:
 Ingredients: